| Dragon Quest III (All) | |
|---|---|
| Weapon | Modifier(s) |
| Cypress stick | Attack +2 |
| Oaken club | Attack +7 |
| Copper sword | Attack +12 |
| Divine dagger | Attack +14 |
| Chain sickle | Attack +16 |
| Staff of Rain | Attack +16 |
| Staff of antimagic | Attack +20 |
| Iron lance | Attack +26 |
| Morning star | Attack +30 |
| Snooze stick | Attack +30 |
| Staff of strife | Attack +33 |
| Staff of resurrection | Attack +33 |
| Holy lance | Attack +35 |
| Staff of sentencing | Attack +37 |
| Rune staff | Attack +40 |
| Sage's staff | Attack +50 |
| Somatic staff | Attack +65 |
| Zombiesbane | Attack +67 |
Priest: Difference between revisions
Jump to navigation
Jump to search
A cleric in the service of all that is holy, and who is able to heal allies and cast protective spells.
--Description in Dragon Quest VII
No edit summary |
No edit summary |
||
| (40 intermediate revisions by 15 users not shown) | |||
| Line 1: | Line 1: | ||
[[File:Priest3male.png|right|border|250px]][[File:Priest3female.png|right|border|180px]] | [[File:Priest3male.png|right|border|250px]][[File:Priest3female.png|right|border|180px]] | ||
<center>''A cleric in the service of all that is holy, and who is able to heal allies and cast protective spells.'' | <center>''A cleric in the service of all that is holy, and who is able to heal allies and cast protective spells.'' | ||
--Description in | --Description in {{Dragon Quest VII}}</center> | ||
The '''Priest''' (僧侶, ''Souryo'') is a class in the | The '''Priest''' (僧侶, ''Souryo'') is a class in the {{DQSeries}}. Design wise, the original depiction drew inspiration from the Catholic church, while modern versions pull from Buddhist monks beginning with the ninth game. | ||
==Characteristics== | ==Characteristics== | ||
Priests specialize in healing and fortifying spells rather than offensive magic, and are some of the only characters who can learn to revive party members | Priests specialize in healing and fortifying spells rather than offensive magic, and are some of the only characters who can learn to revive party members with the [[Zing]] and [[Kazing]] spells. Priests typically cannot equip heavy armor, but they have better options than a [[Mage]] and can also wield a wider variety of weapons. Priests do have initially more strength, agility and resilience than Magi, but on the whole, their physical combat potential is average at best. | ||
Priests were the original users of the Wind-element [[Woosh]] spells in the classic era of the series, but beginning with ''IX'' these spells have been passed on to the {{Luminary V}} and [[Minstrel]] vocations. Priests have consistently had access to the instant-death [[Whack]] spells since their appearance in ''III'', however. | |||
''NES | ==Appearances== | ||
==={{DQ3}}=== | |||
====Stats==== | |||
''{{NES}} Version'' | |||
{| style="width:65%; height:100px; text-align:center" border="1" | {| style="width:65%; height:100px; text-align:center" border="1" | ||
|-<---!Headings are up first.!---> style="font-weight:bold; background:# | |-<---!Headings are up first.!---> style="font-weight:bold; background:#439CD0" | ||
| Attribute || Starting Stats || Maximum Stats | | Attribute || Starting Stats || Maximum Stats | ||
|- style="font-weight:normal" | |- style="font-weight:normal" | ||
| Level || 1 || 99 | | Level || 1 || 99 | ||
|- | |- | ||
| HP || 9 || 335 | | {{HP}} || 9 || 335 | ||
|- | |- | ||
| MP || 8 || 432 | | {{MP}} || 8 || 432 | ||
|- | |- | ||
| Strength || 4 || 150 | | {{Strength}} || 4 || 150 | ||
|- | |- | ||
| Agility || 5 || 130 | | {{Agility}} || 5 || 130 | ||
|- | |- | ||
| Resilience || 3 || 171 | | {{Resilience}} || 3 || 171 | ||
|- | |- | ||
| Wisdom || 8 || 205 | | {{Wisdom}} || 8 || 205 | ||
|- | |- | ||
|Luck || 3 || 183 | | {{Luck}} || 3 || 183 | ||
|} | |} | ||
===Equipment=== | ====Spells==== | ||
{{VersionTabs|Weapons|{{CharacterEquipmentList|header|title=Dragon Quest III|subtitle=All|equipmentType=Weapon}} | {| style="width:65%; height:100px; text-align:center" border="1" | ||
{{CharacterEquipmentList|entry|item=[[Cypress | |-<---!Headings are up first.!---> style="font-weight:bold; background:#439CD0" | ||
{{CharacterEquipmentList|entry|item=[[Oaken | | Level Learned || Original<br>Japanese || {{NES}}/{{GBC}}<br>Localization || Modern<br>Localization || {{MP}} || Description | ||
{{CharacterEquipmentList|entry|item=[[Copper | |- style="font-weight:normal" | ||
{{CharacterEquipmentList|entry|item=[[Divine | | - ||ホイミ<br>Hoimi||Heal || [[Heal]] || 3 || Restores 30~39 HP to one ally | ||
{{CharacterEquipmentList|entry|item=[[Chain | |- | ||
| 2 ||ニフラム<br>Nifuramu|| Expel|| [[Poof]] || 2 || Attempts to banish one group<br>Banished monster yield no exp or gold | |||
|- | |||
| 5 ||ピオリム<br>Piorimu||Speedup || [[Acceleratle]] || 3 || Doubles party's agility | |||
|- | |||
| 7 ||マヌーサ<br>Manusa||Surround || [[Dazzle]] || 4 || Reduces one group's physical accuracy to 3/8ths | |||
|- | |||
| 8 ||ルカニ<br>Rukani||Sap || [[Sap]] || 3 || Reduces one foe's defence by 50% | |||
|- | |||
| 9 ||ラリホー<br>Rariho||Sleep || [[Snooze]] || 3 || Attempts to knock out one group | |||
|- | |||
| 11 ||キアリー<br>Kiari||Antidote || [[Squelch]] || 2 || Cures poison | |||
|- | |||
| 12 ||バギ<br>Bagi||Infernos || [[Woosh]] || 4 || Deals 8~23 Wind damage to one group | |||
|- | |||
| 13 ||マホトーン<br>Mahoton||Stopspell || [[Fizzle]] || 3 || Seals one group's spells | |||
|- | |||
| 14 ||ベホイミ<br>Behoimi||Healmore || [[Midheal]] || || Restores 75~94 HP to one ally | |||
|- | |||
| 15 ||キアリク<br>Kiariku||Numboff || [[Tingle]] || 6 || Cures one ally of paralysis | |||
|- | |||
| 17 ||ザメハ<br>Zameha||Awake || [[Cock-a-doodle-doo]] || 3 || Awakens a sleeping ally | |||
|- | |||
| 18 ||ルカナン<br>Rukanan||Defense || [[Kasap]] || 4 || Reduces all foes' defence by 50% | |||
|- | |||
| 20 ||バシルーラ<br>Bashirura|| Limbo|| [[Blasto]] || 7 || Attempts to banish one monster<br>Banished monster yield no exp or gold | |||
|- | |||
| 22 ||ザキ<br>Zaki||Beat || [[Whack]] || 7 || Attempts to instantly kill one monster | |||
|- | |||
| 24 ||ザオラル<br>Zaoraru|| Vivify|| [[Zing]] || 10 ||Attempts to revive one ally at half health | |||
|- | |||
| 26 ||バギマ<br>Bagima||Infermore || [[Swoosh]] || 6 || Deals 25~54 Wind damage to one group | |||
|- | |||
| 28 ||ザラキ<br>Zaraki||Defeat || [[Thwack]] || 7 || Attempts to instantly kill one group | |||
|- | |||
| 30 ||ベホマ<br>Behoma||Healall || [[Fullheal]] || 7 || Fully recover HP | |||
|- | |||
| 32 ||フバーハ<br>Fubaha||Barrier || [[Insulatle]] || 6 ||Cuts [[breath]] damage by 50% | |||
|- | |||
| 34 ||ベホマ<br>Behoma||Healus || [[Multiheal]] || 18 ||Heals all allies by 75~94 in battle<br>Heals 44~55 out of battle | |||
|- | |||
| 36 ||バギクロス<br>Bagikurosu||Infermost || [[Kaswoosh]] || 9 || Deals 60~119 Wind damage to one group | |||
|- | |||
| 38 ||ザオリク<br>Zaoriku||Revive || [[Kazing]] || 20 || Revives one ally to max HP | |||
|- | |||
| 41 ||メガンテ<br>Megante||Sacrifice || [[Kamikazee]] || 1 || Self-destructs to kill all monsters<br>Pierces [[Bounce]] | |||
|- | |||
|} | |||
====Equipment==== | |||
{{VersionTabs|Weapons|{{CharacterEquipmentList|header|title={{Dragon Quest III}}|subtitle=All|equipmentType=Weapon}} | |||
{{CharacterEquipmentList|entry|item=[[Cypress stick]]|statModifier=Attack +2}} | |||
{{CharacterEquipmentList|entry|item=[[Oaken club]]|statModifier=Attack +7}} | |||
{{CharacterEquipmentList|entry|item=[[Copper sword]]|statModifier=Attack +12}} | |||
{{CharacterEquipmentList|entry|item=[[Divine dagger]]|statModifier=Attack +14}} | |||
{{CharacterEquipmentList|entry|item=[[Chain sickle]]|statModifier=Attack +16}} | |||
{{CharacterEquipmentList|entry|item=[[Staff of Rain]]|statModifier=Attack +16}} | {{CharacterEquipmentList|entry|item=[[Staff of Rain]]|statModifier=Attack +16}} | ||
{{CharacterEquipmentList|entry|item=[[Staff of | {{CharacterEquipmentList|entry|item=[[Staff of antimagic]]|statModifier=Attack +20}} | ||
{{CharacterEquipmentList|entry|item=[[Iron | {{CharacterEquipmentList|entry|item=[[Iron lance]]|statModifier=Attack +26}} | ||
{{CharacterEquipmentList|entry|item=[[Morning | {{CharacterEquipmentList|entry|item=[[Morning star]]|statModifier=Attack +30}} | ||
{{CharacterEquipmentList|entry|item=[[Snooze | {{CharacterEquipmentList|entry|item=[[Snooze stick]]|statModifier=Attack +30}} | ||
{{CharacterEquipmentList|entry|item=[[Staff of | {{CharacterEquipmentList|entry|item=[[Staff of strife]]|statModifier=Attack +33}} | ||
{{CharacterEquipmentList|entry|item=[[Staff of | {{CharacterEquipmentList|entry|item=[[Staff of resurrection]]|statModifier=Attack +33}} | ||
{{CharacterEquipmentList|entry|item=[[Holy | {{CharacterEquipmentList|entry|item=[[Holy lance]]|statModifier=Attack +35}} | ||
{{CharacterEquipmentList|entry|item=[[Staff of | {{CharacterEquipmentList|entry|item=[[Staff of sentencing]]|statModifier=Attack +37}} | ||
{{CharacterEquipmentList|entry|item=[[Rune | {{CharacterEquipmentList|entry|item=[[Rune staff]]|statModifier=Attack +40}} | ||
{{CharacterEquipmentList|entry|item=[[Sage's | {{CharacterEquipmentList|entry|item=[[Sage's staff]]|statModifier=Attack +50}} | ||
{{CharacterEquipmentList|entry|item=[[Somatic | {{CharacterEquipmentList|entry|item=[[Somatic staff]]|statModifier=Attack +65}} | ||
{{CharacterEquipmentList|entry|item=[[Zombiesbane]]|statModifier=Attack +67}} | {{CharacterEquipmentList|entry|item=[[Zombiesbane]]|statModifier=Attack +67}} | ||
{{CharacterEquipmentList|note|text=}} | |||
{{CharacterEquipmentList|footer}}|Helmets| | |||
{{CharacterEquipmentList|header|title={{Dragon Quest III}}|subtitle=All|equipmentType=Helmet}} | |||
{{CharacterEquipmentList|entry|item=[[Leather hat]]|statModifier=Defense +2}} | |||
{{CharacterEquipmentList|entry|item=[[Hardwood headwear]]|statModifier=Defense +6}} | |||
{{CharacterEquipmentList|entry|item=[[King's crown]]|statModifier=Defense +6}} | |||
{{CharacterEquipmentList|entry|item=[[Mad cap]]|statModifier=Defense +8}} | |||
{{CharacterEquipmentList|entry|item=[[Fur hood]]♥|statModifier=Defense +10}} | |||
{{CharacterEquipmentList|entry|item=[[Iron helmet]]|statModifier=Defense +16}} | |||
{{CharacterEquipmentList|entry|item=[[Silver tiara]]♥|statModifier=Defense +20}} | |||
{{CharacterEquipmentList|entry|item=[[Iron mask]]|statModifier=Defense +25}} | |||
{{CharacterEquipmentList|entry|item=[[Mythril helm]]|statModifier=Defense +38}} | |||
{{CharacterEquipmentList|entry|item=[[Mask of Implacability]]|statModifier=Defense +255}} | |||
{{CharacterEquipmentList|note|text=}} | |||
{{CharacterEquipmentList|footer}}|Armor| | |||
{{CharacterEquipmentList|header|title={{Dragon Quest III}}|subtitle=All|equipmentType=Armor}} | |||
{{CharacterEquipmentList|entry|item=[[Scandalous swimsuit]]♥|statModifier=Defense+1}} | |||
{{CharacterEquipmentList|entry|item=[[Plain clothes]]|statModifier=Defense+4}} | |||
{{CharacterEquipmentList|entry|item=[[Wayfarer's clothes]]|statModifier=Defense+8}} | |||
{{CharacterEquipmentList|entry|item=[[Boxer shorts]]|statModifier=Defense+10}} | |||
{{CharacterEquipmentList|entry|item=[[Leather armour]]|statModifier=Defense+12}} | |||
{{CharacterEquipmentList|entry|item=[[Leather dress]]♥|statModifier=Defense+15}} | |||
{{CharacterEquipmentList|entry|item=[[Shell armour]]|statModifier=Defense+16}} | |||
{{CharacterEquipmentList|entry|item=[[Chain mail]]|statModifier=Defense+20}} | |||
{{CharacterEquipmentList|entry|item=[[Silk robe]]♥|statModifier=Defense+20}} | |||
{{CharacterEquipmentList|entry|item=[[Cloak of evasion]]|statModifier=Defense+23}} | |||
{{CharacterEquipmentList|entry|item=[[Leather kilt]]|statModifier=Defense+24}} | |||
{{CharacterEquipmentList|entry|item=[[Iron armour]]|statModifier=Defense+25}} | |||
{{CharacterEquipmentList|entry|item=[[Magical skirt]]♥|statModifier=Defense+25}} | |||
{{CharacterEquipmentList|entry|item=[[Magical robes]]|statModifier=Defense+30}} | |||
{{CharacterEquipmentList|entry|item=[[Glombolero]]|statModifier=Defense+30}} | |||
{{CharacterEquipmentList|entry|item=[[Angel's robe]]|statModifier=Defense+35}} | |||
{{CharacterEquipmentList|entry|item=[[Cat suit]]|statModifier=Defense+35}} | |||
{{CharacterEquipmentList|entry|item=[[Magic armour]]|statModifier=Defense+40}} | |||
{{CharacterEquipmentList|entry|item=[[Magic bikini]]♥|statModifier=Defense+65}} | |||
{{CharacterEquipmentList|entry|item=[[Dragon robe]]|statModifier=Defense+80}} | |||
{{CharacterEquipmentList|entry|item=[[Blessed bikini]]♥|statModifier=Defense+88}} | |||
{{CharacterEquipmentList|entry|item=[[Shimmering dress]]♥|statModifier=Defense+90}} | |||
{{CharacterEquipmentList|note|text=}} | |||
{{CharacterEquipmentList|footer}}|Shields| | |||
{{CharacterEquipmentList|header|title={{Dragon Quest III}}|subtitle=All|equipmentType=Shields}} | |||
{{CharacterEquipmentList|entry|item=[[Pot lid]]|statModifier=Defense+2}} | |||
{{CharacterEquipmentList|entry|item=[[Leather shield]]|statModifier=Defense+4}} | |||
{{CharacterEquipmentList|entry|item=[[Bronze shield]]|statModifier=Defense+7}} | |||
{{CharacterEquipmentList|entry|item=[[Scale shield]]|statModifier=Defense+12}} | |||
{{CharacterEquipmentList|entry|item=[[Magic shield]]|statModifier=Defense+25}} | |||
{{CharacterEquipmentList|entry|item=[[Silver shield]]|statModifier=Defense+40}} | |||
{{CharacterEquipmentList|note|text=}} | |||
{{CharacterEquipmentList|footer}}|Accessories| | |||
{{CharacterEquipmentList|header|title={{Dragon Quest III}}|subtitle=All|equipmentType=Accessories}} | |||
{{CharacterEquipmentList|entry|item=[[Strength ring]]|statModifier=Strength+7}} | |||
{{CharacterEquipmentList|entry|item=[[Tough guy tattoo]]|statModifier=Strength+8}} | |||
{{CharacterEquipmentList|entry|item=[[Mighty armlet]]|statModifier=Strength+15}} | |||
{{CharacterEquipmentList|entry|item=[[Doh-hican]]|statModifier=Defence+3}} | |||
{{CharacterEquipmentList|entry|item=[[Garter]]♥|statModifier=Defence+3}} | |||
{{CharacterEquipmentList|entry|item=[[Gold rosary]]|statModifier=Defence+4}} | |||
{{CharacterEquipmentList|entry|item=[[Leg warmers]]♥|statModifier=Defence+5}} | |||
{{CharacterEquipmentList|entry|item=[[Ten ton toupee]]|statModifier=Defence+15}} | |||
{{CharacterEquipmentList|entry|item=[[Cower ring]]|statModifier=Agility+7}} | |||
{{CharacterEquipmentList|entry|item=[[Skull ring]]|statModifier=Agility+10}} | |||
{{CharacterEquipmentList|entry|item=[[Agility ring]]|statModifier=Agility+`5}} | |||
{{CharacterEquipmentList|entry|item=[[Mercury's bandana]]|statModifier=Agility+30}} | |||
{{CharacterEquipmentList|entry|item=[[Meteorite bracer]]|statModifier=Agilityx2}} | |||
{{CharacterEquipmentList|entry|item=[[Restless heart]]|statModifier=Resilience+10}} | |||
{{CharacterEquipmentList|entry|item=[[Gold chain]]|statModifier=Resilience+10}} | |||
{{CharacterEquipmentList|entry|item=[[Weightlifter's belt]]|statModifier=Resilience+15}} | |||
{{CharacterEquipmentList|entry|item=[[Recovery ring]]|statModifier=Resilience+25}} | |||
{{CharacterEquipmentList|entry|item=[[Care ring]]|statModifier=Wisdom+15}} | |||
{{CharacterEquipmentList|entry|item=[[Scholar's specs]]|statModifier=Wisdom+15}} | |||
{{CharacterEquipmentList|entry|item=[[Goddess ring]]♥|statModifier=Wisdom+33}} | |||
{{CharacterEquipmentList|entry|item=[[Bunny tail]]♥|statModifier=Luck+8}} | |||
{{CharacterEquipmentList|entry|item=[[Golden tiara]]♥|statModifier=Luck+13}} | |||
{{CharacterEquipmentList|entry|item=[[Hen's tooth]]|statModifier=Luck+20}} | |||
{{CharacterEquipmentList|entry|item=[[Sacred amulet]]|statModifier=Luck+30}} | |||
{{CharacterEquipmentList|entry|item=[[Elevating shoes]]|statModifier=Luck+50}} | |||
{{CharacterEquipmentList|entry|item=[[Dummy]]|statModifier=}} | |||
{{CharacterEquipmentList|entry|item=[[Slime earrings]]|statModifier=}} | |||
{{CharacterEquipmentList|entry|item=[[Ruby Wristband]]|statModifier=}} | |||
{{CharacterEquipmentList|footer}}}} | |||
*♥ denotes female only equipment. | |||
==={{DQ3HD}}=== | |||
The Priests have had their crosses changed into tridents for all versions of the game. Unlike the other cases of censorship in the game, this instance is not due to the Japanese CERO ratings board but is in fact a hold over from the 2005 localization of {{DQ8}}. When the ''Dragon Quest'' series was relaunched internationally it was decided to remove all religious imagery from the games abroad and in Japan, as seen in the changing of crosses to tridents in the [[Nintendo DS]] versions of the [[Zenithia Trilogy]]. | |||
====Stats==== | |||
Calculated using the [[everyman]] personality. | |||
{| style="width:65%; height:100px; text-align:center" border="1" | |||
|-<---!Headings are up first.!---> style="font-weight:bold; background:#439CD0" | |||
!colspan="3"| Female !! colspan="2"| Male | |||
|- | |||
! Stats !! Level 1 !! Level 99 !! Level 1 !! Level 99 | |||
|- | |||
|Strength ||7 ||226 ||7 ||226 | |||
|- | |||
|Resilience ||10 ||226 ||11 ||227 | |||
|- | |||
|Agility ||7 ||220 ||7 ||220 | |||
|- | |||
|Stamina ||9 ||256 ||9 ||256 | |||
|- | |||
|Wisdom ||12 ||312 ||11 ||311 | |||
|- | |||
|Luck ||5 ||238 ||5 ||238 | |||
|- | |||
|-<---!Headings are up first.!---> style="font-weight:bold; background:#439CD0" | |||
!colspan="5"| [[Critical Hit|Critical hit mod]] | |||
|- | |||
!colspan="2"| Mod !! colspan="3"| Level | |||
|- | |||
|colspan="2"| 2 ||colspan="3"| One through ninety-nine | |||
|- | |||
|} | |||
====Spells==== | |||
{| style="width:65%; height:100px; text-align:center" border="1" | |||
|-<---!Headings are up first.!---> style="font-weight:bold; background:#439CD0" | |||
| Level Learned || Original Japanese || English || {{MP}} || Description | |||
|- style="font-weight:normal" | |||
| 1 ||ホイミ<br>Hoimi|| [[Heal]] || 3 || Heals one ally by 30~40 HP | |||
|- | |||
| 2||ニフラム<br>Nifuramu|| [[Poof]] || 2 || Attempts to banish one mgroup<br>Banished monster yield no exp or gold | |||
|- | |||
| 3||マヌーサ<br>Manusa|| [[Dazzle]] || 4 || Reduces one group's physical accuracy to 3/8ths | |||
|- | |||
| 4||バギ<br>Bagi|| [[Woosh]] || 4 || Deals a minimum of 11~26 Wind damage to one group | |||
|- | |||
| 6||ルカニ<br>Rukani|| [[Sap]] || 3 || Reduces one foe's defence by 50% | |||
|- | |||
| 7 ||キアリー<br>Kiari|| [[Squelch]] || 3 || Cures one ally's poison | |||
|- | |||
| 8||ラリホー<br>Rariho|| [[Snooze]] || 3 || Attempts to knock out one group | |||
|- | |||
| 9||ピオリム<br>Piorimu|| [[Acceleratle]] || 3 || Raises party's agility | |||
|- | |||
| 10||ザメハ<br>Zameha|| [[Cock-a-doodle-doo]] || 3 || Cures one ally's slumber | |||
|- | |||
| 10||ザオラル<br>Zao|| [[Zin]] ||5 || Attempts to revive one ally at 1 HP | |||
|- | |||
| 12 ||マホトーン<br>Mahoton|| [[Fizzle]] || 5 || Seals one group's spells | |||
|- | |||
| 12 ||ベホイミ<br>Behoimi|| [[Midheal]] || 5 || Heals one ally by 75~95 HP | |||
|- | |||
| 14 ||キアリク<br>Kiariku|| [[Tingle]] || 6 ||Cures one ally's paralysis | |||
|- | |||
| 16 ||キアリク<br>Kiariku|| [[Magic Barrier]] || 6 || Cuts spell damage by 50% | |||
|- | |||
| 16 ||ルカナン<br>Rukanan|| [[Kasap]] || 5 || Reduces one group's defence by 25% | |||
|- | |||
| 18 ||バギマ<br>Bagima|| [[Swoosh]] || 6 || Deals a minimum of 32~55 Wind damage to one group | |||
|- | |||
| 18 ||バシルーラ<br>Bashirura|| [[Blasto]] || 7 || Attempts to banish one monster<br>Banished monster yield no exp or gold | |||
|- | |||
| 20 ||ザキ<br>Zaki|| [[Whack]] || 7 ||Attempts to instantly kill one foe | |||
|- | |||
| 22 ||ベホイム<br>Behoimu|| [[Moreheal]] || 7 || Heals one ally by 164~184 HP | |||
|- | |||
| 22 ||ザオラル<br>Zaoraru|| [[Zing]] || 10 || Attempts to revive one ally at 50% HP | |||
|- | |||
|26 ||ザラキ<br>Zaraki|| [[Thwack]] || 10 || Attempts to instantly kill one group | |||
|- | |||
| 27 ||フバーハ<br>Fubaha|| [[Insulatle]] || 8 || Cuts breath damage by 50% | |||
|- | |||
| 31 ||バギクロス<br>Bagikurosu|| [[Kaswoosh]] || 10 || Deals a minimum of 90~120 Wind damage to one group | |||
|- | |||
|32 ||ベホマ<br>Behoma|| [[Fullheal]] || 9 || Fully restores one ally's HP | |||
|- | |||
| 33 ||ベホマ<br>Behoma|| [[Multiheal]] || 18 || Heals the party by 75 〜94 HP | |||
|- | |||
| 33 ||メガンテ<br>Megante|| [[Kamikazee]] || 1 || Self-destructs to kill all monsters | |||
|- | |||
| 37 ||ザオリク<br>Zaoriku|| [[Kazing]] || 20 || Revives one ally to max HP | |||
|- | |||
|} | |||
====Equipment==== | |||
{{VersionTabs|Weapons|{{CharacterEquipmentList|header|title=Dragon Quest III HD-2D Remake|subtitle=|equipmentType=Weapon}} | |||
{{CharacterEquipmentList|entry|item=[[Cypress stick]]|statModifier=Attack +2}} | |||
{{CharacterEquipmentList|entry|item=[[Oaken club]]|statModifier=Attack +5}} | |||
{{CharacterEquipmentList|entry|item=[[Copper sword]]|statModifier=Attack +10}} | |||
{{CharacterEquipmentList|entry|item=[[Divine dagger]]|statModifier=Attack +12}} | |||
{{CharacterEquipmentList|entry|item=[[Chain sickle]]|statModifier=Attack +16}} | |||
{{CharacterEquipmentList|entry|item=[[Staff of Rain]]|statModifier=Attack +16}} | |||
{{CharacterEquipmentList|entry|item=[[Iron lance]]|statModifier=Attack +24}} | |||
{{CharacterEquipmentList|entry|item=[[Snooze stick]]|statModifier=Attack +29}} | |||
{{CharacterEquipmentList|entry|item=[[Staff of antimagic]]|statModifier=Attack +31}} | |||
{{CharacterEquipmentList|entry|item=[[Holy lance]]|statModifier=Attack +34}} | |||
{{CharacterEquipmentList|entry|item=[[Morning star]]|statModifier=Attack +38}} | |||
{{CharacterEquipmentList|entry|item=[[Rune staff]]|statModifier=Attack +39}} | |||
{{CharacterEquipmentList|entry|item=[[Staff of resurrection]]|statModifier=Attack +40}} | |||
{{CharacterEquipmentList|entry|item=[[Staff of sentencing]]|statModifier=Attack +42}} | |||
{{CharacterEquipmentList|entry|item=[[Staff of strife]]|statModifier=Attack +48}} | |||
{{CharacterEquipmentList|entry|item=[[Zombiesbane]]|statModifier=Attack +68}} | |||
{{CharacterEquipmentList|entry|item=[[Sage's staff]]|statModifier=Attack +84}} | |||
{{CharacterEquipmentList|entry|item=[[Somatic staff]]|statModifier=Attack +96}} | |||
{{CharacterEquipmentList|entry|item=[[Demon spear]]|statModifier=Attack +96}} | |||
{{CharacterEquipmentList|entry|item=[[Godbird sceptre]]|statModifier=Attack +123}} | |||
{{CharacterEquipmentList|entry|item=[[Rubiss's sword]]|statModifier=Attack +206}} | |||
{{CharacterEquipmentList|note|text=}} | {{CharacterEquipmentList|note|text=}} | ||
{{CharacterEquipmentList|footer}}|Helmets| | {{CharacterEquipmentList|footer}}|Helmets| | ||
{{CharacterEquipmentList|header|title=Dragon Quest III|subtitle=All|equipmentType=Helmet}} | {{CharacterEquipmentList|header|title=Dragon Quest III|subtitle=All|equipmentType=Helmet}} | ||
{{CharacterEquipmentList|entry|item=[[Leather | {{CharacterEquipmentList|entry|item=[[Leather hat]]|statModifier=Defense +3}} | ||
{{CharacterEquipmentList|entry|item=[[Hardwood | {{CharacterEquipmentList|entry|item=[[Feathered cap]]|statModifier=Defense +8}} | ||
{{CharacterEquipmentList|entry|item=[[King's | {{CharacterEquipmentList|entry|item=[[Hardwood headwear]]|statModifier=Defense +11}} | ||
{{CharacterEquipmentList|entry|item=[[Mad | {{CharacterEquipmentList|entry|item=[[King's crown]]|statModifier=Defense +13}} | ||
{{CharacterEquipmentList|entry|item=[[ | {{CharacterEquipmentList|entry|item=[[Fur hood]]♥|statModifier=Defense +15}} | ||
{{CharacterEquipmentList|entry|item=[[Iron | {{CharacterEquipmentList|entry|item=[[Mad cap]]|statModifier=Defense +18}} | ||
{{CharacterEquipmentList|entry|item=[[Silver | {{CharacterEquipmentList|entry|item=[[Scholar's cap]]|statModifier=Defense +20<br>Wisdom +20}} | ||
{{CharacterEquipmentList|entry|item=[[ | {{CharacterEquipmentList|entry|item=[[Pointy hat]]|statModifier=Defense +21}} | ||
{{CharacterEquipmentList|entry|item=[[ | {{CharacterEquipmentList|entry|item=[[Iron helmet]]|statModifier=Defense +22}} | ||
{{CharacterEquipmentList|entry|item=[[Duplic hat]]|statModifier=Defense +25}} | |||
{{CharacterEquipmentList|entry|item=[[Hermes' hat]]|statModifier=Defense +28}} | |||
{{CharacterEquipmentList|entry|item=[[Silver tiara]]♥|statModifier=Defense +30}} | |||
{{CharacterEquipmentList|entry|item=[[Mythril helm]]|statModifier=Defense +53}} | |||
{{CharacterEquipmentList|entry|item=[[Thinking cap]]|statModifier=Defense +60<br>Wisdom +40}} | |||
{{CharacterEquipmentList|entry|item=[[Star circlet]]|statModifier=Defense +71}} | |||
{{CharacterEquipmentList|entry|item=[[Mask of Implacability]]|statModifier=Defense +255}} | {{CharacterEquipmentList|entry|item=[[Mask of Implacability]]|statModifier=Defense +255}} | ||
{{CharacterEquipmentList|note|text=}} | {{CharacterEquipmentList|note|text=}} | ||
{{CharacterEquipmentList|footer}}|Armor| | {{CharacterEquipmentList|footer}}|Armor| | ||
{{CharacterEquipmentList|header|title=Dragon Quest III|subtitle=All|equipmentType=Armor}} | {{CharacterEquipmentList|header|title=Dragon Quest III|subtitle=All|equipmentType=Armor}} | ||
{{CharacterEquipmentList|entry|item=[[Scandalous | {{CharacterEquipmentList|entry|item=[[Scandalous swimsuit]]♥|statModifier=Defense+1}} | ||
{{CharacterEquipmentList|entry|item=[[Plain | {{CharacterEquipmentList|entry|item=[[Plain clothes]]|statModifier=Defense+5}} | ||
{{CharacterEquipmentList|entry|item=[[Wayfarer's | {{CharacterEquipmentList|entry|item=[[Wayfarer's clothes]]|statModifier=Defense+9}} | ||
{{CharacterEquipmentList|entry|item=[[Boxer | {{CharacterEquipmentList|entry|item=[[Boxer shorts]]|statModifier=Defense+10}} | ||
{{CharacterEquipmentList|entry|item=[[Leather | {{CharacterEquipmentList|entry|item=[[Leather armour]]|statModifier=Defense+12}} | ||
{{CharacterEquipmentList|entry|item=[[Leather | {{CharacterEquipmentList|entry|item=[[Leather dress]]♥|statModifier=Defense+16}} | ||
{{CharacterEquipmentList|entry|item=[[Shell | {{CharacterEquipmentList|entry|item=[[Shell armour]]|statModifier=Defense+17}} | ||
{{CharacterEquipmentList|entry|item=[[Chain | {{CharacterEquipmentList|entry|item=[[Leather cape]]|statModifier=Defense+19}} | ||
{{CharacterEquipmentList|entry|item=[[Silk | {{CharacterEquipmentList|entry|item=[[Chain mail]]|statModifier=Defense+21}} | ||
{{CharacterEquipmentList|entry|item=[[Cloak of | {{CharacterEquipmentList|entry|item=[[Silk robe]]♥|statModifier=Defense+22}} | ||
{{CharacterEquipmentList|entry|item=[[ | {{CharacterEquipmentList|entry|item=[[Cloak of evasion]]|statModifier=Defense+28}} | ||
{{CharacterEquipmentList|entry|item=[[ | {{CharacterEquipmentList|entry|item=[[Magical robes]]|statModifier=Defense+48}} | ||
{{CharacterEquipmentList|entry|item=[[ | {{CharacterEquipmentList|entry|item=[[Glombolero]]|statModifier=Defense+50}} | ||
{{CharacterEquipmentList|entry|item=[[ | {{CharacterEquipmentList|entry|item=[[Magic armour]]|statModifier=Defense+50}} | ||
{{CharacterEquipmentList|entry|item=[[ | {{CharacterEquipmentList|entry|item=[[Cat suit]]|statModifier=Defense+55}} | ||
{{CharacterEquipmentList|entry|item=[[ | {{CharacterEquipmentList|entry|item=[[Angel's robe]]|statModifier=Defense+63}} | ||
{{CharacterEquipmentList|entry|item=[[ | {{CharacterEquipmentList|entry|item=[[Magic bikini]]♥|statModifier=Defense+79}} | ||
{{CharacterEquipmentList|entry|item=[[ | {{CharacterEquipmentList|entry|item=[[Dragon mail]]|statModifier=Defense+80}} | ||
{{CharacterEquipmentList|entry|item=[[ | {{CharacterEquipmentList|entry|item=[[Dragon dojo duds]]|statModifier=Defense+87}} | ||
{{CharacterEquipmentList|entry|item=[[Dragon | {{CharacterEquipmentList|entry|item=[[Spiked armour]]|statModifier=Defense+88}} | ||
{{CharacterEquipmentList|entry|item=[[Blessed | {{CharacterEquipmentList|entry|item=[[Dragon robe]]|statModifier=Defense+94}} | ||
{{CharacterEquipmentList|entry|item=[[Shimmering | {{CharacterEquipmentList|entry|item=[[Blessed bikini]]♥|statModifier=Defense+101}} | ||
{{CharacterEquipmentList|entry|item=[[Shimmering dress]]♥|statModifier=Defense+105}} | |||
{{CharacterEquipmentList|entry|item=[[Yggdrasil dress coat]]|statModifier=Defense+112}} | |||
{{CharacterEquipmentList|entry|item=[[Exotoga]]|statModifier=Defense+132}} | |||
{{CharacterEquipmentList|note|text=}} | {{CharacterEquipmentList|note|text=}} | ||
{{CharacterEquipmentList|footer}}|Shields| | {{CharacterEquipmentList|footer}}|Shields| | ||
{{CharacterEquipmentList|header|title=Dragon Quest III|subtitle=All|equipmentType=Shields}} | {{CharacterEquipmentList|header|title=Dragon Quest III|subtitle=All|equipmentType=Shields}} | ||
{{CharacterEquipmentList|entry|item=[[Pot | {{CharacterEquipmentList|entry|item=[[Pot lid]]|statModifier=Defense+3}} | ||
{{CharacterEquipmentList|entry|item=[[Leather | {{CharacterEquipmentList|entry|item=[[Leather shield]]|statModifier=Defense+4}} | ||
{{CharacterEquipmentList|entry|item=[[Bronze | {{CharacterEquipmentList|entry|item=[[Scale shield]]|statModifier=Defense+11}} | ||
{{CharacterEquipmentList|entry|item=[[ | {{CharacterEquipmentList|entry|item=[[Bronze shield]]|statModifier=Defense+15}} | ||
{{CharacterEquipmentList|entry|item=[[Magic | {{CharacterEquipmentList|entry|item=[[Silver platter]]|statModifier=Defense+22}} | ||
{{CharacterEquipmentList|entry|item=[[Silver | {{CharacterEquipmentList|entry|item=[[Light shield]]|statModifier=Defense+32}} | ||
{{CharacterEquipmentList|entry|item=[[Magic shield]]|statModifier=Defense+40}} | |||
{{CharacterEquipmentList|entry|item=[[Silver shield]]|statModifier=Defense+63}} | |||
{{CharacterEquipmentList|entry|item=[[Mirror shield]]|statModifier=Defense+81}} | |||
{{CharacterEquipmentList|entry|item=[[Goddess shield]]|statModifier=Defense+84}} | |||
{{CharacterEquipmentList|note|text=}} | {{CharacterEquipmentList|note|text=}} | ||
{{CharacterEquipmentList|footer}}|Accessories| | {{CharacterEquipmentList|footer}}|Accessories| | ||
{{CharacterEquipmentList|header|title=Dragon Quest III|subtitle=All|equipmentType=Accessories}} | {{CharacterEquipmentList|header|title=Dragon Quest III|subtitle=All|equipmentType=Accessories}} | ||
{{CharacterEquipmentList|entry|item=[[Strength | {{CharacterEquipmentList|entry|item=[[Strength ring]]|statModifier=Attack+9}} | ||
{{CharacterEquipmentList|entry|item=[[Tough | {{CharacterEquipmentList|entry|item=[[Tough guy tattoo]]|statModifier=Attack+11}} | ||
{{CharacterEquipmentList|entry|item=[[Mighty | {{CharacterEquipmentList|entry|item=[[Weightlifter's belt]]|statModifier=Attack+13}} | ||
{{CharacterEquipmentList|entry|item=[[ | {{CharacterEquipmentList|entry|item=[[Mighty armlet]]|statModifier=Attack+16}} | ||
{{CharacterEquipmentList|entry|item=[[Recovery ring]]|statModifier=Defence +2}} | |||
{{CharacterEquipmentList|entry|item=[[Garter]]♥|statModifier=Defence+3}} | {{CharacterEquipmentList|entry|item=[[Garter]]♥|statModifier=Defence+3}} | ||
{{CharacterEquipmentList|entry|item=[[Gold | {{CharacterEquipmentList|entry|item=[[Restless heart]]|statModifier=Defence+3}} | ||
{{CharacterEquipmentList|entry|item=[[Leg | {{CharacterEquipmentList|entry|item=[[Care rivière]]|statModifier=Defence+4}} | ||
{{CharacterEquipmentList|entry|item=[[Ten | {{CharacterEquipmentList|entry|item=[[Gold rosary]]|statModifier=Defence+4}} | ||
{{CharacterEquipmentList|entry|item=[[Cower | {{CharacterEquipmentList|entry|item=[[Necklace of immunity]]|statModifier=Defence+4}} | ||
{{CharacterEquipmentList|entry|item=[[Skull | {{CharacterEquipmentList|entry|item=[[Dragon scale]]|statModifier=Defence+5}} | ||
{{CharacterEquipmentList|entry|item=[[Agility | {{CharacterEquipmentList|entry|item=[[Silver rosary]]|statModifier=Defence+5}} | ||
{{CharacterEquipmentList|entry|item=[[Mercury's | {{CharacterEquipmentList|entry|item=[[Slime earrings]]|statModifier=Defence+5}} | ||
{{CharacterEquipmentList|entry|item=[[Meteorite | {{CharacterEquipmentList|entry|item=[[Leg warmers]]♥|statModifier=Defence+6}} | ||
{{CharacterEquipmentList|entry|item=[[Restless | {{CharacterEquipmentList|entry|item=[[Ruby wristband]]|statModifier=Defence +8}} | ||
{{CharacterEquipmentList|entry|item=[[ | {{CharacterEquipmentList|entry|item=[[Doh-hican]]|statModifier=Defence+11}} | ||
{{CharacterEquipmentList|entry|item=[[ | {{CharacterEquipmentList|entry|item=[[Spirit bracer]]|statModifier=Defence+17}} | ||
{{CharacterEquipmentList|entry|item=[[ | {{CharacterEquipmentList|entry|item=[[Ten ton toupee]]|statModifier=Defence+18}} | ||
{{CharacterEquipmentList|entry|item=[[Care | {{CharacterEquipmentList|entry|item=[[Cower ring]]|statModifier=Agility+12}} | ||
{{CharacterEquipmentList|entry|item=[[Scholar's | {{CharacterEquipmentList|entry|item=[[Skull ring]]|statModifier=Agility+16}} | ||
{{CharacterEquipmentList|entry|item=[[Goddess | {{CharacterEquipmentList|entry|item=[[Agility ring]]|statModifier=Agility+`22}} | ||
{{CharacterEquipmentList|entry|item=[[Bunny | {{CharacterEquipmentList|entry|item=[[Mercury's bandana]]|statModifier=Agility+36}} | ||
{{CharacterEquipmentList|entry|item=[[Golden | {{CharacterEquipmentList|entry|item=[[Meteorite bracer]]|statModifier=Agilityx2}} | ||
{{CharacterEquipmentList|entry|item=[[Hen's | {{CharacterEquipmentList|entry|item=[[Restless heart]]|statModifier=Resilience+10}} | ||
{{CharacterEquipmentList|entry|item=[[Sacred | {{CharacterEquipmentList|entry|item=[[Aerofoil earrings]]|statModifier=Wisdom+8}} | ||
{{CharacterEquipmentList|entry|item=[[Elevating | {{CharacterEquipmentList|entry|item=[[Anti-freeze earrings]]|statModifier=Wisdom+8}} | ||
{{CharacterEquipmentList|entry|item=[[Asbestos earrings]]|statModifier=Wisdom+8}} | |||
{{CharacterEquipmentList|entry|item=[[Care ring]]|statModifier=Wisdom+15}} | |||
{{CharacterEquipmentList|entry|item=[[Scholar's specs]]|statModifier=Wisdom+15}} | |||
{{CharacterEquipmentList|entry|item=[[Goddess ring]]|statModifier=Wisdom+33}} | |||
{{CharacterEquipmentList|entry|item=[[Full moon ring]]|statModifier=Luck+7}} | |||
{{CharacterEquipmentList|entry|item=[[Ring of clarity]]|statModifier=Luck+7}} | |||
{{CharacterEquipmentList|entry|item=[[Rousing ring]]|statModifier=Luck+7}} | |||
{{CharacterEquipmentList|entry|item=[[Bunny tail]]♥|statModifier=Luck+8}} | |||
{{CharacterEquipmentList|entry|item=[[Gold chain]]|statModifier=Luck+10}} | |||
{{CharacterEquipmentList|entry|item=[[Golden tiara]]♥|statModifier=Luck+13}} | |||
{{CharacterEquipmentList|entry|item=[[Hen's tooth]]|statModifier=Luck+20}} | |||
{{CharacterEquipmentList|entry|item=[[Sacred amulet]]|statModifier=Luck+30}} | |||
{{CharacterEquipmentList|entry|item=[[Elevating shoes]]|statModifier=Luck+50}} | |||
{{CharacterEquipmentList|entry|item=[[Dummy]]|statModifier=}} | {{CharacterEquipmentList|entry|item=[[Dummy]]|statModifier=}} | ||
{{CharacterEquipmentList|footer}}}} | {{CharacterEquipmentList|footer}}}} | ||
*♥ denotes female only equipment. | *♥ denotes female-only equipment. | ||
=== | ==={{DQ6}}=== | ||
{{ | Priest is one of the basic vocations available. It is one of the prerequisites for the [[Sage]], along with [[Mage]], and for the [[Paladin]] vocation along with [[Martial Artist]]. | ||
= | ====Stat Changes==== | ||
===Stat Changes=== | |||
{|width="50%" cellspacing="0" cellpadding="2" border="1" style="text-align:center" | {|width="50%" cellspacing="0" cellpadding="2" border="1" style="text-align:center" | ||
|width="25%" valign="top" style="background:#4682B4"|'''<font color="#ffffff">Statistics</font>''' | |width="25%" valign="top" style="background:#4682B4"|'''<font color="#ffffff">Statistics</font>''' | ||
| Line 171: | Line 423: | ||
|160 | |160 | ||
|- | |- | ||
|Strength | |{{Strength}} | ||
| -20% | | -20% | ||
|- | |- | ||
|Agility | |{{Agility}} | ||
| -10% | | -10% | ||
|- | |- | ||
|Resilience | |{{Resilience}} | ||
| -30% | | -30% | ||
|- | |- | ||
|Wisdom | |{{Wisdom}} | ||
| +10% | | +10% | ||
|- | |- | ||
|Max HP | |Max {{HP}} | ||
| -20% | | -20% | ||
|} | |} | ||
===Abilities=== | ====Abilities==== | ||
{|width="90%" cellspacing="0" cellpadding="2" border="1" style="text-align:center" | {|width="90%" cellspacing="0" cellpadding="2" border="1" style="text-align:center" | ||
|width="5%" valign="top" style="background:#4682B4"|'''<font color="#ffffff">Level</font>''' | |width="5%" valign="top" style="background:#4682B4"|'''<font color="#ffffff">Level</font>''' | ||
| Line 202: | Line 454: | ||
|rowspan=2|1 | |rowspan=2|1 | ||
|One ally | |One ally | ||
|Restores at least 30 HP to a single ally. | |Restores at least 30 {{HP}} to a single ally. | ||
|2 | |2 | ||
|- | |- | ||
|[[Poof]] | |[[Poof]] | ||
|One group | |One group | ||
|Makes | |Makes monsters vanish in a flash of light. | ||
|1 | |1 | ||
|- | |- | ||
| Line 220: | Line 472: | ||
|[[Squelch]] | |[[Squelch]] | ||
|One ally | |One ally | ||
|Cures a single ally of the effects of | |Cures a single ally of the effects of {{Poison}}. | ||
|2 | |2 | ||
|- | |- | ||
| Line 228: | Line 480: | ||
|rowspan=2|37 | |rowspan=2|37 | ||
|One ally | |One ally | ||
|Raises the | |Raises the {{Defence}} of a single [[party]] member. | ||
|2 | |2 | ||
|- | |- | ||
| Line 241: | Line 493: | ||
|rowspan=2|50 | |rowspan=2|50 | ||
|One ally | |One ally | ||
|Restores at least 75 HP to a single ally. | |Restores at least 75 {{HP}} to a single ally. | ||
|5 | |5 | ||
|- | |- | ||
|[[Tingle]] | |[[Tingle]] | ||
|Self | |Self | ||
|Cures all party members of the effects of | |Cures all party members of the effects of {{Sleep}} and [[Paralysis]]. | ||
|2 | |2 | ||
|- | |- | ||
| Line 254: | Line 506: | ||
|rowspan=2|80 | |rowspan=2|80 | ||
|One enemy | |One enemy | ||
|A | |A {{Cursed}} incantation that sends an enemy to the hereafter. | ||
|4 | |4 | ||
|- | |- | ||
|[[Kabuff]] | |[[Kabuff]] | ||
|Party | |[[Party]] | ||
|Raises the | |Raises the {{Defence}} of all [[party]] members. | ||
|3 | |3 | ||
|- | |- | ||
| Line 280: | Line 532: | ||
|[[Fullheal]] | |[[Fullheal]] | ||
|One ally | |One ally | ||
|Restores all HP to a single ally. | |Restores all {{HP}} to a single ally. | ||
|7 | |7 | ||
|- | |- | ||
| Line 288: | Line 540: | ||
|160 | |160 | ||
|One ally | |One ally | ||
|Occasionally resurrects a fallen ally with half HP restored. | |Occasionally resurrects a fallen ally with half {{HP}} restored. | ||
|10 | |10 | ||
|} | |} | ||
== | ==={{DQ7}}=== | ||
Priest is one of the basic vocations available at {{Alltrades Abbey 7}}. It is a necessary prerequisite for both [[Sage]] and [[Paladin]] {{Vocation}}s. | |||
Priest is one of the basic vocations available at | |||
===Stat Changes=== | ====Stat Changes==== | ||
{|width="50%" cellspacing="0" cellpadding="2" border="1" style="text-align:center" | {|width="50%" cellspacing="0" cellpadding="2" border="1" style="text-align:center" | ||
|width="25%" valign="top" style="background:#4682B4"|'''<font color="#ffffff">Statistics</font>''' | |width="25%" valign="top" style="background:#4682B4"|'''<font color="#ffffff">Statistics</font>''' | ||
| Line 301: | Line 553: | ||
|- | |- | ||
|Battles to Master | |Battles to Master | ||
|180 (PS1) / 97 (3DS) | |180 (PS1) / 97 ({{3DS}}) | ||
|- | |- | ||
|Strength | |{{Strength}} | ||
| -20% | | -20% | ||
|- | |- | ||
|Agility | |{{Agility}} | ||
| -10% | | -10% | ||
|- | |- | ||
|Resilience | |{{Resilience}} | ||
| -30% | | -30% | ||
|- | |- | ||
|Wisdom | |{{Wisdom}} | ||
| +10% | | +10% | ||
|- | |- | ||
|Style | |{{Style}} | ||
| Null | | Null | ||
|- | |- | ||
|Max HP | |Max {{HP}} | ||
| -20% | | -20% | ||
|- | |- | ||
|Max MP | |Max {{MP}} | ||
|Null | |Null | ||
|} | |} | ||
===PS1 Abilities=== | ===={{PS1}} Abilities==== | ||
{|width="78%" cellspacing="0" cellpadding="2" border="1" style="text-align:center" | {|width="78%" cellspacing="0" cellpadding="2" border="1" style="text-align:center" | ||
|width="5%" valign="top" style="background:#4682B4"|'''<font color="#ffffff">Level</font>''' | |width="5%" valign="top" style="background:#4682B4"|'''<font color="#ffffff">Level</font>''' | ||
| Line 340: | Line 592: | ||
|1 | |1 | ||
|One Group | |One Group | ||
|Banishes one group of enemies from battle. (Party does not gain | |Banishes one group of enemies from battle. (Party does not gain [[Experience Points]]) | ||
|1 | |1 | ||
|- | |- | ||
| Line 348: | Line 600: | ||
|1 | |1 | ||
|One Ally | |One Ally | ||
|Heals about | |Heals about 30 {{HP}} to one ally. | ||
|2 | |2 | ||
|- | |- | ||
| Line 356: | Line 608: | ||
|19 | |19 | ||
|One Group | |One Group | ||
|Causes around | |Causes around 15 {{HP}} in wind damage to one group of enemies. | ||
|2 | |2 | ||
|- | |- | ||
| Line 364: | Line 616: | ||
|37 | |37 | ||
|One Ally | |One Ally | ||
|Raises the | |Raises the {{Defence}} of one ally. | ||
|2 | |2 | ||
|- | |- | ||
| Line 380: | Line 632: | ||
|80 | |80 | ||
|One Ally | |One Ally | ||
|Heals around | |Heals around 80 {{HP}} to one ally. | ||
|4 | |4 | ||
|- | |- | ||
| Line 388: | Line 640: | ||
|100 | |100 | ||
|One Group | |One Group | ||
|Causes roughly | |Causes roughly 30 {{HP}} in wind damage to one group of enemies. | ||
|4 | |4 | ||
|- | |- | ||
| Line 396: | Line 648: | ||
|130 | |130 | ||
|One Ally | |One Ally | ||
|Restores an ally to full HP | |Restores an ally to full {{HP}}. | ||
|6 | |6 | ||
|- | |- | ||
| Line 404: | Line 656: | ||
|180 | |180 | ||
|One Ally | |One Ally | ||
|Has the chance of restoring one fallen ally with half their Max HP | |Has the chance of restoring one fallen ally with half their Max {{HP}}. | ||
|8 | |8 | ||
|} | |} | ||
===3DS Abilities=== | ===={{3DS}} Abilities==== | ||
{|width="85%" cellspacing="0" cellpadding="2" border="1" style="text-align:center" | {|width="85%" cellspacing="0" cellpadding="2" border="1" style="text-align:center" | ||
|width="5%" valign="top" style="background:#4682B4"|'''<font color="#ffffff">Level</font>''' | |width="5%" valign="top" style="background:#4682B4"|'''<font color="#ffffff">Level</font>''' | ||
| Line 423: | Line 675: | ||
|rowspan=2|1 | |rowspan=2|1 | ||
|One ally | |One ally | ||
|Restores at least 30 HP to a single ally. | |Restores at least 30 {{HP}} to a single ally. | ||
|2 | |2 | ||
|- | |- | ||
| Line 436: | Line 688: | ||
|5 | |5 | ||
|One Group | |One Group | ||
|Causes around | |Causes around 15 {{HP}} in wind damage to one group of enemies. | ||
|2 | |2 | ||
|- | |- | ||
| Line 442: | Line 694: | ||
|Cleric | |Cleric | ||
|[[Buff]] | |[[Buff]] | ||
|7 | |7 (12) | ||
|One Ally | |One Ally | ||
|Raises the | |Raises the {{Defence}} of one ally. | ||
|2 | |2 | ||
|- | |- | ||
| Line 450: | Line 702: | ||
|Monk | |Monk | ||
|[[Fizzle]] | |[[Fizzle]] | ||
|10 | |10 (22) | ||
|One Group | |One Group | ||
|Has a chance of preventing one group of enemies from casting spells | |Has a chance of preventing one group of enemies from casting spells. | ||
|3 | |3 | ||
|- | |- | ||
| Line 458: | Line 710: | ||
|Pastor | |Pastor | ||
|[[Midheal]] | |[[Midheal]] | ||
|15 | |15 (37) | ||
|One Ally | |One Ally | ||
|Restores at least 75 HP to one ally | |Restores at least 75 {{HP}} to one ally. | ||
|4 | |4 | ||
|- | |- | ||
| Line 466: | Line 718: | ||
|Bishop | |Bishop | ||
|[[Swoosh]] | |[[Swoosh]] | ||
|15 | |15 (52) | ||
|One Group | |One Group | ||
|Causes roughly | |Causes roughly 30 {{HP}} in wind damage to one group of enemies. | ||
|4 | |4 | ||
|- | |- | ||
| Line 474: | Line 726: | ||
|Archbishop | |Archbishop | ||
|[[Fullheal]] | |[[Fullheal]] | ||
|15 | |15 (67) | ||
|One Ally | |One Ally | ||
|Restores an ally to full HP | |Restores an ally to full {{HP}}. | ||
|6 | |6 | ||
|- | |- | ||
| Line 482: | Line 734: | ||
|Pontiff | |Pontiff | ||
|[[Zing]] | |[[Zing]] | ||
|30 | |30 (97) | ||
|One Ally | |One Ally | ||
|Has the chance of restoring one fallen ally with half their Max HP | |Has the chance of restoring one fallen ally with half their Max {{HP}}. | ||
|8 | |8 | ||
|} | |} | ||
===Hybrid Abilities=== | ====Hybrid Abilities==== | ||
{|width="90%" cellspacing="0" cellpadding="2" border="1" style="text-align:center" | {|width="90%" cellspacing="0" cellpadding="2" border="1" style="text-align:center" | ||
|width="20%" valign="top" style="background:#4682B4"|'''<font color="#ffffff">Hybrid</font>''' | |width="20%" valign="top" style="background:#4682B4"|'''<font color="#ffffff">Hybrid</font>''' | ||
| Line 499: | Line 751: | ||
|[[Soothing Song|Heal Song]] | |[[Soothing Song|Heal Song]] | ||
|All Allies | |All Allies | ||
|Restores | |Restores 20 {{HP}} to All Allies. | ||
|0 | |0 | ||
|- | |- | ||
| Line 505: | Line 757: | ||
|[[Death Dance]] | |[[Death Dance]] | ||
|All Enemies | |All Enemies | ||
|Has a chance of killing all enemies | |Has a chance of killing all enemies. | ||
|0 | |0 | ||
|- | |- | ||
| Line 511: | Line 763: | ||
|[[Holy Aura]] | |[[Holy Aura]] | ||
|All Allies | |All Allies | ||
|Allies cannot be attacked but cannot attack | |Allies cannot be attacked but cannot attack. | ||
|0 | |0 | ||
|- | |- | ||
| Line 517: | Line 769: | ||
|[[Kabuff|Increase]] | |[[Kabuff|Increase]] | ||
|All Allies | |All Allies | ||
|Increases the | |Increases the {{Defence}} of all allies. | ||
|3 | |3 | ||
|} | |} | ||
===Usefulness=== | ====Usefulness==== | ||
One of the first classes that any player should choose for any party member is the Priest. All of the spells that the Priest learns are useful throughout the game. The only downside to this class is that the class takes a long time to master. | One of the first classes that any player should choose for any party member is the Priest. All of the spells that the Priest learns are useful throughout the game. The only downside to this class is that the class takes a long time to master. | ||
== | ==={{DQ7R}}=== | ||
{{Stub}} | |||
===Stats=== | ==={{DQ9}}=== | ||
The Priest vocation is available at the start of the game and has the unique skillset "Faith". Priests can also use skill points to learn {{Spear}}s, {{Wand}}s, {{Staves}}, and [[Shield]] skills. Their [[Coup-de-Grace]] is "[[Choir of Angels]]", which heals all [[party]] members and removes negative status effects. | |||
Priests easily surpass the durability and curative capabilities of [[Sage]]s, but are not as {{MP}} efficient with their casting and lack the vital [[Kazing]] spell. | |||
====Stats==== | |||
{| style="width:65%; height:100px; text-align:center" border="1" | {| style="width:65%; height:100px; text-align:center" border="1" | ||
|-<---!Headings are up first.!---> style="font-weight:bold; background:# | |-<---!Headings are up first.!---> style="font-weight:bold; background:#439CD0" | ||
| Attribute || Starting Stats || Maximum Stats | | Attribute || Starting Stats || Maximum Stats | ||
|- style="font-weight:normal" | |- style="font-weight:normal" | ||
| Level || 1 || 99 | | Level || 1 || 99 | ||
|- | |- | ||
| HP || 19 || 420 | | {{HP}} || 19 || 420 | ||
|- | |- | ||
| MP || 14 || 315 | | {{MP}} || 14 || 315 | ||
|- | |- | ||
| Strength || 9 || 201 | | {{Strength}} || 9 || 201 | ||
|- | |- | ||
| Agility || 14 || 312 | | {{Agility}} || 14 || 312 | ||
|- | |- | ||
| Resilience || 9 || 204 | | {{Resilience}} || 9 || 204 | ||
|- | |- | ||
| Magical Might || 0 || 0 | | {{Magical Might}} || 0 || 0 | ||
|- | |- | ||
| Magical Mending || 18 || 400 | | {{Magical Mending}} || 18 || 400 | ||
|- | |- | ||
| Deftness || 9 || 206 | | {{Deftness}} || 9 || 206 | ||
|- | |- | ||
| Charm || 7 || 146 | | {{Charm}} || 7 || 146 | ||
|} | |} | ||
===Faith=== | ====Faith==== | ||
{| cellspacing="0" cellpadding="2" border="1" | {| cellspacing="0" cellpadding="2" border="1" | ||
!style="background:#4682B4; color: white;"|Accolades | !style="background:#4682B4; color: white;"|Accolades | ||
| Line 564: | Line 818: | ||
|Believer||8||[[Divination]]||Tells its caster the experience needed to climb a level. | |Believer||8||[[Divination]]||Tells its caster the experience needed to climb a level. | ||
|- | |- | ||
|Acolyte/Postulant||16||Natural Magical Mending +20||Permanently adds 20 to | |Acolyte/Postulant||16||Natural Magical Mending +20||Permanently adds 20 to {{Magical Mending}}. | ||
|- | |- | ||
|Mendicant/Votary||28||[[Benediction]]||Lifts a curse from a single ally. | |Mendicant/Votary||28||[[Benediction]]||Lifts a [[Curses|curse]] from a single ally. | ||
|- | |- | ||
|Parish Priest/Nun of the Parish||40||Natural Max MP +10||Permanently adds 10 to Max MP | |Parish Priest/Nun of the Parish||40||Natural Max {{MP}} +10||Permanently adds 10 to Max {{MP}}. | ||
|- | |- | ||
|Presbyter/Missionary||48||[[Rotstopper]]||Protects the party from | |Presbyter/Missionary||48||[[Rotstopper]]||Protects the [[party]] from {{Undead}} enemies' attacks. | ||
|- | |- | ||
|Abbot/Abbess||56||Natural Magical Mending +60||Permanently adds 60 to | |Abbot/Abbess||56||Natural Magical Mending +60||Permanently adds 60 to {{Magical Mending}}. | ||
|- | |- | ||
|Bishop/Prioress||70||[[Alma Mater]]||Offers up a prayer to prevent instant death attacks. | |Bishop/Prioress||70||[[Alma Mater]]||Offers up a prayer to prevent instant death attacks. | ||
|- | |- | ||
|Archbishop/Mother Superior||80||Natural Max MP +20||Permanently adds 20 to Max MP | |Archbishop/Mother Superior||80||Natural Max {{MP}} +20||Permanently adds 20 to Max {{MP}}. | ||
|- | |- | ||
|Cardinal/Beatificant||90||[[Care Prayer]]||Offers up a prayer to increase | |Cardinal/Beatificant||90||[[Care Prayer]]||Offers up a prayer to increase {{Magical Mending}}. | ||
|- | |- | ||
|Saint||100||Natural Magical Mending +100||Permanently adds 100 to | |Saint||100||Natural {{Magical Mending}} +100||Permanently adds 100 to {{Magical Mending}}. | ||
|} | |} | ||
===Spells=== | ====Spells==== | ||
{| cellspacing="0" cellpadding="2" border="1" | {| cellspacing="0" cellpadding="2" border="1" | ||
!style="background:#4682B4; color: white;"|Name | !style="background:#4682B4; color: white;"|Name | ||
| Line 590: | Line 844: | ||
!style="background:#4682B4; color: white;"|Description | !style="background:#4682B4; color: white;"|Description | ||
|- | |- | ||
|[[Heal]]||1||2||Restores at least 30 HP to a single ally. | |[[Heal]]||1||2||Restores at least 30 {{HP}} to a single ally. | ||
|- | |- | ||
|[[Squelch]]||3||2||Cures a single ally of the effects of | |[[Squelch]]||3||2||Cures a single ally of the effects of {{Poison}}. | ||
|- | |- | ||
|[[Snooze]]||6||3||Puts a group of enemies to | |[[Snooze]]||6||3||Puts a group of enemies to {{Sleep}}. | ||
|- | |- | ||
|[[Buff]]||8||3||Raises the | |[[Buff]]||8||3||Raises the {{Defence}} of a single [[party]] member. | ||
|- | |- | ||
|[[Cock-A-Doodle-Doo]]||11||2||Awakens any | |[[Cock-A-Doodle-Doo]]||11||2||Awakens any {{Sleep}}ing [[party]] members. | ||
|- | |- | ||
|[[Insulate]]||14||4||Protects a party member from [[breath]]-based attacks. | |[[Insulate]]||14||4||Protects a [[party]] member from [[breath attack|breath]]-based attacks. | ||
|- | |- | ||
|[[Midheal]]||16||4||Restores at least 75 HP to a single ally. | |[[Midheal]]||16||4||Restores at least 75 {{HP}} to a single ally. | ||
|- | |- | ||
|[[Zing]]||18||8||Resurrects a fallen ally, but sometimes fails. | |[[Zing]]||18||8||Resurrects a fallen ally, but sometimes fails. | ||
|- | |- | ||
|[[Whack]]||20||5||A | |[[Whack]]||20||5||A {{Cursed}} incantation that sends an enemy to the hereafter. | ||
|- | |- | ||
|[[Tingle]]||22||2||Cures all | |[[Tingle]]||22||2||Cures all [[Party]] members of the effects of [[Paralysis]]. | ||
|- | |- | ||
|[[Moreheal]]||31||8||Restores at least 165 HP to a single ally. | |[[Moreheal]]||31||8||Restores at least 165 {{HP}} to a single ally. | ||
|- | |- | ||
|[[Thwack]]||34||10||A curse that sends a group of enemies to the hereafter. | |[[Thwack]]||34||10||A curse that sends a group of enemies to the hereafter. | ||
|- | |- | ||
|[[Multiheal]]||38||16||Restores at least 100 HP to all party members. | |[[Multiheal]]||38||16||Restores at least 100 {{HP}} to all [[party]] members. | ||
|- | |- | ||
|[[Insulatle]]||43||8||Protects the whole party from breath-based attacks. | |[[Insulatle]]||43||8||Protects the whole party from [[Breath attack|breath]]-based attacks. | ||
|- | |- | ||
|[[Fullheal]]||47||24||Restores all HP to a single ally. | |[[Fullheal]]||47||24||Restores all {{HP}} to a single ally. | ||
|- | |- | ||
|[[Kathwack]]||55||20||A curse that sends all enemies to the hereafter. | |[[Kathwack]]||55||20||A curse that sends all enemies to the hereafter. | ||
|- | |- | ||
|[[Omniheal]]||65||128||Restores all HP to all party members. | |[[Omniheal]]||65||128||Restores all {{HP}} to all [[party]] members. | ||
|} | |} | ||
===Revocation Award=== | ====Revocation Award==== | ||
*[[Lifesaving Medal]] | *[[Revocation Medals|Lifesaving Medal]] | ||
== | |||
==={{DQ10}}=== | |||
{{Section-Stub}} | |||
==={{DQTreasures}}=== | |||
The Priests have been depicted as [[List of treasures in Dragon Quest Treasures|statues]] with base values of 120,00, and one mouthful of a description. | |||
==={{DQWalk}}=== | |||
The Priest {{Vocation}} is available to players at the beginning of the game, and gives access to {{Boomerang}}s, {{Staves}}, and {{Wand}}s. | |||
{{Clear}} | |||
==Notable Priests== | ==Notable Priests== | ||
*[[Kiryl]] | *Selectable class in {{Dragon Quest III}}. | ||
*[[Kiryl]] is an apprentice training under the resident priest in castle [[Zamoksva]] | |||
* | *{{Hero 5}} of {{Dragon Quest V}} has abilities from the Priest set, and resembles a wandering monk. | ||
*[[ | *[[Nevan]] is a pious prodigy of [[Ghent]], gaining world renown despite his young age. | ||
*[[Angelo]] | *[[Sir Mervyn]] learns several abilities from the {{Vocation}}, and is styled after a real life Templar. | ||
*[[Sellma]] | *[[Angelo]] is an ex-clergyman who is disgusted with the seediness of the [[church]]. | ||
*[[ | *[[Sellma]]'s default {{Vocation}} is a priest when she joins the [[party]] in {{IX}}. | ||
*{{Serena 11}} is a Keeper from [[Arboria]] destined to protect the {{Luminary}}. | |||
*[[Goobriel]], an opportunist [[Healslime]] priest from who uses his healing magic to turn a profit. | |||
==Trivia== | ==Trivia== | ||
*The male priest from | *The male priest from {{Dragon Quest III}} makes a cameo appearance as an {{NPC}} in {{Dragon Quest VII}}. | ||
*The female priest from | *The female priest from {{Dragon Quest III}} makes a cameo appearance as an {{NPC}} in {{Dragon Quest XI}}. | ||
*Most of the crosses worn by Priests throughout the series has been altered to a trident starting with {{Dragon Quest VIII}} in order to avoid any resemblance to real world religious iconography. With the vocations presentation shift to the oriental monk design, the cross and trident have been retired for an invented symbol that resembles the peace sign. | |||
==Gallery== | ==Gallery== | ||
<center><gallery> | <center><gallery> | ||
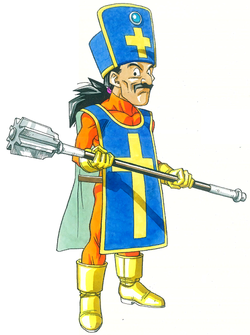
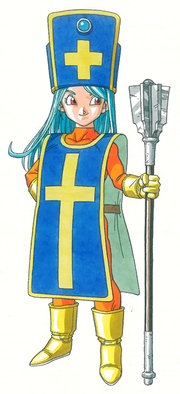
File:Priest_concept_art_DQ_III.jpg|Priest concept art, circa 1987 | |||
DQIII Priest Female Famicom.png|Female Priest, {{Famicom}} artwork. | |||
DQIII Priest Male Famicom.png|Male Priest, {{Famicom}} artwork. | |||
DQIIIPriestClass.png|Male and female Priest, {{Famicom}} artwork. | |||
DQ3 priests.png|Male and female Priest, {{Super Famicom}} artwork. | |||
Yumiko_Murakami_Priests_III_GBC.png|{{GBC}} artwork by [[Yumiko Murakami]] | |||
Yumiko_Murakami_Priest_female_III_GBC.png | |||
Yumiko_Murakami_Priest_male_III_GBC.png | |||
Priest female III HD2D.png|Female Priest, HD-2D artwork by [[Yoshiya Fujisaki]] | |||
Priest male III HD2D.png|Male Priest, HD-2D artwork by [[Yoshiya Fujisaki]] | |||
Priest female IIIHD2D.png|Female Priest, HD-2D sprite | |||
Priest male IIIHD2D.png|Male Priest, HD-2D sprite | |||
Priest female style 1 III HD2D.png | |||
Priest female style 2 III HD2D.png | |||
Priest female style 3 III HD2D.png | |||
Priest female style 4 III HD2D.png | |||
Priest male style 1 III HD2D.png | |||
Priest male style 2 III HD2D.png | |||
Priest male style 3 III HD2D.png | |||
Priest male style 4 III HD2D.png | |||
Party camping III HD2D illustration.jpg|Camping with the party | |||
DQ Carnival 2025 banner.jpg|Priests as depicted on the main artwork for the [https://archive.is/zypQJ| 2025 Dragon Quest Carnival] | |||
DQIII Male Priest Figure.jpg|''Dragon Quest Character Figure Collection Roto no Monshou'' series. | |||
DQIII Female Priest Figure.jpg|''Dragon Quest Character Figure Collection Roto no Monshou'' series. | |||
File:Priest_DQVI_official_guide_book_profile.jpg|[[Nevan]] becoming a man of the cloth in the official guide for ''VI'' | |||
File:Priest v-jump VI.jpg|As well as in the V-Jump guide | |||
DQVII_Priest_male.png|The {{Hero 7}} as a Priest in the 3DS version of ''VII'' | |||
DQVII_Priest_female.png|[[Maribel]] as a Priestess | |||
DQIX Priest Male.png|Stock Priest in ''IX'' | |||
DQIX Priest Female.png|Stock Priestess in ''IX'' | |||
File:X priest.png|Stock art of the vocation in ''X'', note the similarity to [[Kiryl]] | |||
Curate_Rollo.png|Curate Rollo from ''[[Slime MoriMori Dragon Quest: Shougeki no Shippo Dan|Slime MoriMori Dragon Quest]]'' | |||
DQ Heroines.png|Admonishing the [[Martial Artist]] and Tsarevna [[Alena]] | |||
DQ Stars Android Female Priest 1.jpg|Appearance in {{Stars}} | |||
DQ Stars Android Female Priest 2.jpg| | |||
DQ Stars Android Female Priest 3.jpg| | |||
DQ Stars Android Female Priest 4.jpg| | |||
DQT Goobriel.png|Goobriel from {{Tact}}. | |||
priestess statue treasures icon.jpg|The Sister's statue in ''Treasures''... | |||
priest statue treasures icon.jpg|...and the Pastor's | |||
Walk priests.jpg|A character changing from a warrior to a priest in ''Walk'' | |||
</gallery></center> | </gallery></center> | ||
| Line 659: | Line 958: | ||
{{DQIXClasses}} | {{DQIXClasses}} | ||
{{DQXClasses}} | {{DQXClasses}} | ||
[[Category: | |||
[[Category:Dragon Quest III | [[Category:Dragon Quest III vocations]] | ||
[[Category:Dragon Quest VI | [[Category:Dragon Quest III HD-2D Remake vocations]] | ||
[[Category:Dragon Quest VII | [[Category:Dragon Quest VI vocations]] | ||
[[Category:Dragon Quest IX | [[Category:Dragon Quest VII vocations]] | ||
[[Category:Dragon Quest X | [[Category:Dragon Quest VII Reimagined vocations]] | ||
[[Category:Dragon Quest IX vocations]] | |||
[[Category:Dragon Quest X vocations]] | |||
[[Category:Dragon Quest of the Stars vocations]] | |||
[[Category:Dragon Quest Walk vocations]] | |||
[[fr:Prêtre]] | |||
Latest revision as of 18:48, 6 October 2025


The Priest (僧侶, Souryo) is a class in the Dragon Quest series. Design wise, the original depiction drew inspiration from the Catholic church, while modern versions pull from Buddhist monks beginning with the ninth game.
Characteristics[edit]
Priests specialize in healing and fortifying spells rather than offensive magic, and are some of the only characters who can learn to revive party members with the Zing and Kazing spells. Priests typically cannot equip heavy armor, but they have better options than a Mage and can also wield a wider variety of weapons. Priests do have initially more strength, agility and resilience than Magi, but on the whole, their physical combat potential is average at best.
Priests were the original users of the Wind-element Woosh spells in the classic era of the series, but beginning with IX these spells have been passed on to the Luminary and Minstrel vocations. Priests have consistently had access to the instant-death Whack spells since their appearance in III, however.
Appearances[edit]
Dragon Quest III: The Seeds of Salvation[edit]
Stats[edit]
NES Version
| Attribute | Starting Stats | Maximum Stats |
| Level | 1 | 99 |
| HP | 9 | 335 |
| MP | 8 | 432 |
| Strength | 4 | 150 |
| Agility | 5 | 130 |
| Resilience | 3 | 171 |
| Wisdom | 8 | 205 |
| Luck | 3 | 183 |
Spells[edit]
| Level Learned | Original Japanese |
NES/GBC Localization |
Modern Localization |
MP | Description |
| - | ホイミ Hoimi |
Heal | Heal | 3 | Restores 30~39 HP to one ally |
| 2 | ニフラム Nifuramu |
Expel | Poof | 2 | Attempts to banish one group Banished monster yield no exp or gold |
| 5 | ピオリム Piorimu |
Speedup | Acceleratle | 3 | Doubles party's agility |
| 7 | マヌーサ Manusa |
Surround | Dazzle | 4 | Reduces one group's physical accuracy to 3/8ths |
| 8 | ルカニ Rukani |
Sap | Sap | 3 | Reduces one foe's defence by 50% |
| 9 | ラリホー Rariho |
Sleep | Snooze | 3 | Attempts to knock out one group |
| 11 | キアリー Kiari |
Antidote | Squelch | 2 | Cures poison |
| 12 | バギ Bagi |
Infernos | Woosh | 4 | Deals 8~23 Wind damage to one group |
| 13 | マホトーン Mahoton |
Stopspell | Fizzle | 3 | Seals one group's spells |
| 14 | ベホイミ Behoimi |
Healmore | Midheal | Restores 75~94 HP to one ally | |
| 15 | キアリク Kiariku |
Numboff | Tingle | 6 | Cures one ally of paralysis |
| 17 | ザメハ Zameha |
Awake | Cock-a-doodle-doo | 3 | Awakens a sleeping ally |
| 18 | ルカナン Rukanan |
Defense | Kasap | 4 | Reduces all foes' defence by 50% |
| 20 | バシルーラ Bashirura |
Limbo | Blasto | 7 | Attempts to banish one monster Banished monster yield no exp or gold |
| 22 | ザキ Zaki |
Beat | Whack | 7 | Attempts to instantly kill one monster |
| 24 | ザオラル Zaoraru |
Vivify | Zing | 10 | Attempts to revive one ally at half health |
| 26 | バギマ Bagima |
Infermore | Swoosh | 6 | Deals 25~54 Wind damage to one group |
| 28 | ザラキ Zaraki |
Defeat | Thwack | 7 | Attempts to instantly kill one group |
| 30 | ベホマ Behoma |
Healall | Fullheal | 7 | Fully recover HP |
| 32 | フバーハ Fubaha |
Barrier | Insulatle | 6 | Cuts breath damage by 50% |
| 34 | ベホマ Behoma |
Healus | Multiheal | 18 | Heals all allies by 75~94 in battle Heals 44~55 out of battle |
| 36 | バギクロス Bagikurosu |
Infermost | Kaswoosh | 9 | Deals 60~119 Wind damage to one group |
| 38 | ザオリク Zaoriku |
Revive | Kazing | 20 | Revives one ally to max HP |
| 41 | メガンテ Megante |
Sacrifice | Kamikazee | 1 | Self-destructs to kill all monsters Pierces Bounce |
Equipment[edit]
| Dragon Quest III (All) | |
|---|---|
| Helmet | Modifier(s) |
| Leather hat | Defense +2 |
| Hardwood headwear | Defense +6 |
| King's crown | Defense +6 |
| Mad cap | Defense +8 |
| Fur hood♥ | Defense +10 |
| Iron helmet | Defense +16 |
| Silver tiara♥ | Defense +20 |
| Iron mask | Defense +25 |
| Mythril helm | Defense +38 |
| Mask of Implacability | Defense +255 |
| Dragon Quest III (All) | |
|---|---|
| Armor | Modifier(s) |
| Scandalous swimsuit♥ | Defense+1 |
| Plain clothes | Defense+4 |
| Wayfarer's clothes | Defense+8 |
| Boxer shorts | Defense+10 |
| Leather armour | Defense+12 |
| Leather dress♥ | Defense+15 |
| Shell armour | Defense+16 |
| Chain mail | Defense+20 |
| Silk robe♥ | Defense+20 |
| Cloak of evasion | Defense+23 |
| Leather kilt | Defense+24 |
| Iron armour | Defense+25 |
| Magical skirt♥ | Defense+25 |
| Magical robes | Defense+30 |
| Glombolero | Defense+30 |
| Angel's robe | Defense+35 |
| Cat suit | Defense+35 |
| Magic armour | Defense+40 |
| Magic bikini♥ | Defense+65 |
| Dragon robe | Defense+80 |
| Blessed bikini♥ | Defense+88 |
| Shimmering dress♥ | Defense+90 |
| Dragon Quest III (All) | |
|---|---|
| Shields | Modifier(s) |
| Pot lid | Defense+2 |
| Leather shield | Defense+4 |
| Bronze shield | Defense+7 |
| Scale shield | Defense+12 |
| Magic shield | Defense+25 |
| Silver shield | Defense+40 |
| Dragon Quest III (All) | |
|---|---|
| Accessories | Modifier(s) |
| Strength ring | Strength+7 |
| Tough guy tattoo | Strength+8 |
| Mighty armlet | Strength+15 |
| Doh-hican | Defence+3 |
| Garter♥ | Defence+3 |
| Gold rosary | Defence+4 |
| Leg warmers♥ | Defence+5 |
| Ten ton toupee | Defence+15 |
| Cower ring | Agility+7 |
| Skull ring | Agility+10 |
| Agility ring | Agility+`5 |
| Mercury's bandana | Agility+30 |
| Meteorite bracer | Agilityx2 |
| Restless heart | Resilience+10 |
| Gold chain | Resilience+10 |
| Weightlifter's belt | Resilience+15 |
| Recovery ring | Resilience+25 |
| Care ring | Wisdom+15 |
| Scholar's specs | Wisdom+15 |
| Goddess ring♥ | Wisdom+33 |
| Bunny tail♥ | Luck+8 |
| Golden tiara♥ | Luck+13 |
| Hen's tooth | Luck+20 |
| Sacred amulet | Luck+30 |
| Elevating shoes | Luck+50 |
| Dummy | |
| Slime earrings | |
| Ruby Wristband | |
- ♥ denotes female only equipment.
Dragon Quest III HD-2D Remake[edit]
The Priests have had their crosses changed into tridents for all versions of the game. Unlike the other cases of censorship in the game, this instance is not due to the Japanese CERO ratings board but is in fact a hold over from the 2005 localization of Dragon Quest VIII: Journey of the Cursed King. When the Dragon Quest series was relaunched internationally it was decided to remove all religious imagery from the games abroad and in Japan, as seen in the changing of crosses to tridents in the Nintendo DS versions of the Zenithia Trilogy.
Stats[edit]
Calculated using the everyman personality.
| Female | Male | |||
|---|---|---|---|---|
| Stats | Level 1 | Level 99 | Level 1 | Level 99 |
| Strength | 7 | 226 | 7 | 226 |
| Resilience | 10 | 226 | 11 | 227 |
| Agility | 7 | 220 | 7 | 220 |
| Stamina | 9 | 256 | 9 | 256 |
| Wisdom | 12 | 312 | 11 | 311 |
| Luck | 5 | 238 | 5 | 238 |
| Critical hit mod | ||||
| Mod | Level | |||
| 2 | One through ninety-nine | |||
Spells[edit]
| Level Learned | Original Japanese | English | MP | Description |
| 1 | ホイミ Hoimi |
Heal | 3 | Heals one ally by 30~40 HP |
| 2 | ニフラム Nifuramu |
Poof | 2 | Attempts to banish one mgroup Banished monster yield no exp or gold |
| 3 | マヌーサ Manusa |
Dazzle | 4 | Reduces one group's physical accuracy to 3/8ths |
| 4 | バギ Bagi |
Woosh | 4 | Deals a minimum of 11~26 Wind damage to one group |
| 6 | ルカニ Rukani |
Sap | 3 | Reduces one foe's defence by 50% |
| 7 | キアリー Kiari |
Squelch | 3 | Cures one ally's poison |
| 8 | ラリホー Rariho |
Snooze | 3 | Attempts to knock out one group |
| 9 | ピオリム Piorimu |
Acceleratle | 3 | Raises party's agility |
| 10 | ザメハ Zameha |
Cock-a-doodle-doo | 3 | Cures one ally's slumber |
| 10 | ザオラル Zao |
Zin | 5 | Attempts to revive one ally at 1 HP |
| 12 | マホトーン Mahoton |
Fizzle | 5 | Seals one group's spells |
| 12 | ベホイミ Behoimi |
Midheal | 5 | Heals one ally by 75~95 HP |
| 14 | キアリク Kiariku |
Tingle | 6 | Cures one ally's paralysis |
| 16 | キアリク Kiariku |
Magic Barrier | 6 | Cuts spell damage by 50% |
| 16 | ルカナン Rukanan |
Kasap | 5 | Reduces one group's defence by 25% |
| 18 | バギマ Bagima |
Swoosh | 6 | Deals a minimum of 32~55 Wind damage to one group |
| 18 | バシルーラ Bashirura |
Blasto | 7 | Attempts to banish one monster Banished monster yield no exp or gold |
| 20 | ザキ Zaki |
Whack | 7 | Attempts to instantly kill one foe |
| 22 | ベホイム Behoimu |
Moreheal | 7 | Heals one ally by 164~184 HP |
| 22 | ザオラル Zaoraru |
Zing | 10 | Attempts to revive one ally at 50% HP |
| 26 | ザラキ Zaraki |
Thwack | 10 | Attempts to instantly kill one group |
| 27 | フバーハ Fubaha |
Insulatle | 8 | Cuts breath damage by 50% |
| 31 | バギクロス Bagikurosu |
Kaswoosh | 10 | Deals a minimum of 90~120 Wind damage to one group |
| 32 | ベホマ Behoma |
Fullheal | 9 | Fully restores one ally's HP |
| 33 | ベホマ Behoma |
Multiheal | 18 | Heals the party by 75 〜94 HP |
| 33 | メガンテ Megante |
Kamikazee | 1 | Self-destructs to kill all monsters |
| 37 | ザオリク Zaoriku |
Kazing | 20 | Revives one ally to max HP |
Equipment[edit]
| Dragon Quest III HD-2D Remake | |
|---|---|
| Weapon | Modifier(s) |
| Cypress stick | Attack +2 |
| Oaken club | Attack +5 |
| Copper sword | Attack +10 |
| Divine dagger | Attack +12 |
| Chain sickle | Attack +16 |
| Staff of Rain | Attack +16 |
| Iron lance | Attack +24 |
| Snooze stick | Attack +29 |
| Staff of antimagic | Attack +31 |
| Holy lance | Attack +34 |
| Morning star | Attack +38 |
| Rune staff | Attack +39 |
| Staff of resurrection | Attack +40 |
| Staff of sentencing | Attack +42 |
| Staff of strife | Attack +48 |
| Zombiesbane | Attack +68 |
| Sage's staff | Attack +84 |
| Somatic staff | Attack +96 |
| Demon spear | Attack +96 |
| Godbird sceptre | Attack +123 |
| Rubiss's sword | Attack +206 |
| Dragon Quest III (All) | |
|---|---|
| Helmet | Modifier(s) |
| Leather hat | Defense +3 |
| Feathered cap | Defense +8 |
| Hardwood headwear | Defense +11 |
| King's crown | Defense +13 |
| Fur hood♥ | Defense +15 |
| Mad cap | Defense +18 |
| Scholar's cap | Defense +20 Wisdom +20 |
| Pointy hat | Defense +21 |
| Iron helmet | Defense +22 |
| Duplic hat | Defense +25 |
| Hermes' hat | Defense +28 |
| Silver tiara♥ | Defense +30 |
| Mythril helm | Defense +53 |
| Thinking cap | Defense +60 Wisdom +40 |
| Star circlet | Defense +71 |
| Mask of Implacability | Defense +255 |
| Dragon Quest III (All) | |
|---|---|
| Armor | Modifier(s) |
| Scandalous swimsuit♥ | Defense+1 |
| Plain clothes | Defense+5 |
| Wayfarer's clothes | Defense+9 |
| Boxer shorts | Defense+10 |
| Leather armour | Defense+12 |
| Leather dress♥ | Defense+16 |
| Shell armour | Defense+17 |
| Leather cape | Defense+19 |
| Chain mail | Defense+21 |
| Silk robe♥ | Defense+22 |
| Cloak of evasion | Defense+28 |
| Magical robes | Defense+48 |
| Glombolero | Defense+50 |
| Magic armour | Defense+50 |
| Cat suit | Defense+55 |
| Angel's robe | Defense+63 |
| Magic bikini♥ | Defense+79 |
| Dragon mail | Defense+80 |
| Dragon dojo duds | Defense+87 |
| Spiked armour | Defense+88 |
| Dragon robe | Defense+94 |
| Blessed bikini♥ | Defense+101 |
| Shimmering dress♥ | Defense+105 |
| Yggdrasil dress coat | Defense+112 |
| Exotoga | Defense+132 |
| Dragon Quest III (All) | |
|---|---|
| Shields | Modifier(s) |
| Pot lid | Defense+3 |
| Leather shield | Defense+4 |
| Scale shield | Defense+11 |
| Bronze shield | Defense+15 |
| Silver platter | Defense+22 |
| Light shield | Defense+32 |
| Magic shield | Defense+40 |
| Silver shield | Defense+63 |
| Mirror shield | Defense+81 |
| Goddess shield | Defense+84 |
| Dragon Quest III (All) | |
|---|---|
| Accessories | Modifier(s) |
| Strength ring | Attack+9 |
| Tough guy tattoo | Attack+11 |
| Weightlifter's belt | Attack+13 |
| Mighty armlet | Attack+16 |
| Recovery ring | Defence +2 |
| Garter♥ | Defence+3 |
| Restless heart | Defence+3 |
| Care rivière | Defence+4 |
| Gold rosary | Defence+4 |
| Necklace of immunity | Defence+4 |
| Dragon scale | Defence+5 |
| Silver rosary | Defence+5 |
| Slime earrings | Defence+5 |
| Leg warmers♥ | Defence+6 |
| Ruby wristband | Defence +8 |
| Doh-hican | Defence+11 |
| Spirit bracer | Defence+17 |
| Ten ton toupee | Defence+18 |
| Cower ring | Agility+12 |
| Skull ring | Agility+16 |
| Agility ring | Agility+`22 |
| Mercury's bandana | Agility+36 |
| Meteorite bracer | Agilityx2 |
| Restless heart | Resilience+10 |
| Aerofoil earrings | Wisdom+8 |
| Anti-freeze earrings | Wisdom+8 |
| Asbestos earrings | Wisdom+8 |
| Care ring | Wisdom+15 |
| Scholar's specs | Wisdom+15 |
| Goddess ring | Wisdom+33 |
| Full moon ring | Luck+7 |
| Ring of clarity | Luck+7 |
| Rousing ring | Luck+7 |
| Bunny tail♥ | Luck+8 |
| Gold chain | Luck+10 |
| Golden tiara♥ | Luck+13 |
| Hen's tooth | Luck+20 |
| Sacred amulet | Luck+30 |
| Elevating shoes | Luck+50 |
| Dummy | |
- ♥ denotes female-only equipment.
Dragon Quest VI: Realms of Revelation[edit]
Priest is one of the basic vocations available. It is one of the prerequisites for the Sage, along with Mage, and for the Paladin vocation along with Martial Artist.
Stat Changes[edit]
| Statistics | Change |
| Battles to Master | 160 |
| Strength | -20% |
| Agility | -10% |
| Resilience | -30% |
| Wisdom | +10% |
| Max HP | -20% |
Abilities[edit]
| Level | Title | Learns | Battles Needed | Target | Info | MP |
| 1 | Neophyte | Heal | 1 | One ally | Restores at least 30 HP to a single ally. | 2 |
| Poof | One group | Makes monsters vanish in a flash of light. | 1 | |||
| 2 | Pilgrim | Woosh | 19 | One group | Slices through a group of enemies with a small whirlwind. | 2 |
| Squelch | One ally | Cures a single ally of the effects of Poison. | 2 | |||
| 3 | Cleric | Buff | 37 | One ally | Raises the Defence of a single party member. | 2 |
| Fizzle | One group | Prevents enemy from using magic. | 3 | |||
| 4 | Monk | Midheal | 50 | One ally | Restores at least 75 HP to a single ally. | 5 |
| Tingle | Self | Cures all party members of the effects of Sleep and Paralysis. | 2 | |||
| 5 | Pastor | Whack | 80 | One enemy | A Cursed incantation that sends an enemy to the hereafter. | 4 |
| Kabuff | Party | Raises the Defence of all party members. | 3 | |||
| 6 | Bishop | Swoosh | 100 | One group | Slices through a group of enemies with a powerful whirlwind. | 4 |
| 7 | Archbishop | Thwack | 130 | One group | Tries to instantly kill a group of enemies | 7 |
| Fullheal | One ally | Restores all HP to a single ally. | 7 | |||
| 8 | Pontiff | Zing | 160 | One ally | Occasionally resurrects a fallen ally with half HP restored. | 10 |
Dragon Quest VII: Fragments of the Forgotten Past[edit]
Priest is one of the basic vocations available at Alltrades Abbey. It is a necessary prerequisite for both Sage and Paladin Vocations.
Stat Changes[edit]
| Statistics | Change |
| Battles to Master | 180 (PS1) / 97 (3DS) |
| Strength | -20% |
| Agility | -10% |
| Resilience | -30% |
| Wisdom | +10% |
| Style | Null |
| Max HP | -20% |
| Max MP | Null |
PS1 Abilities[edit]
| Level | Title | Learns | Battles Needed | Target | Info | MP |
| 1 | Beginner | Poof | 1 | One Group | Banishes one group of enemies from battle. (Party does not gain Experience Points) | 1 |
| 1 | Beginner | Heal | 1 | One Ally | Heals about 30 HP to one ally. | 2 |
| 2 | Novice | Woosh | 19 | One Group | Causes around 15 HP in wind damage to one group of enemies. | 2 |
| 3 | Acolyte | Buff | 37 | One Ally | Raises the Defence of one ally. | 2 |
| 4 | Prelate | Fizzle | 50 | One Group | Has a chance of preventing one group of enemies from casting spells | 3 |
| 5 | Clergyman | Midheal | 80 | One Ally | Heals around 80 HP to one ally. | 4 |
| 6 | Priest | Swoosh | 100 | One Group | Causes roughly 30 HP in wind damage to one group of enemies. | 4 |
| 7 | Bishop | Fullheal | 130 | One Ally | Restores an ally to full HP. | 6 |
| 8 | HiPriest | Zing | 180 | One Ally | Has the chance of restoring one fallen ally with half their Max HP. | 8 |
3DS Abilities[edit]
| Level | Title | Learns | Battles Needed | Target | Info | MP |
| 1 | Neophyte | Heal | 1 | One ally | Restores at least 30 HP to a single ally. | 2 |
| Poof | One group | Banishes one group of enemies from battle. | 1 | |||
| 2 | Pilgrim | Woosh | 5 | One Group | Causes around 15 HP in wind damage to one group of enemies. | 2 |
| 3 | Cleric | Buff | 7 (12) | One Ally | Raises the Defence of one ally. | 2 |
| 4 | Monk | Fizzle | 10 (22) | One Group | Has a chance of preventing one group of enemies from casting spells. | 3 |
| 5 | Pastor | Midheal | 15 (37) | One Ally | Restores at least 75 HP to one ally. | 4 |
| 6 | Bishop | Swoosh | 15 (52) | One Group | Causes roughly 30 HP in wind damage to one group of enemies. | 4 |
| 7 | Archbishop | Fullheal | 15 (67) | One Ally | Restores an ally to full HP. | 6 |
| 8 | Pontiff | Zing | 30 (97) | One Ally | Has the chance of restoring one fallen ally with half their Max HP. | 8 |
Hybrid Abilities[edit]
| Hybrid | Learns | Target | Info | MP |
| Troubadour | Heal Song | All Allies | Restores 20 HP to All Allies. | 0 |
| Dancer | Death Dance | All Enemies | Has a chance of killing all enemies. | 0 |
| Sailor | Holy Aura | All Allies | Allies cannot be attacked but cannot attack. | 0 |
| Shepherd | Increase | All Allies | Increases the Defence of all allies. | 3 |
Usefulness[edit]
One of the first classes that any player should choose for any party member is the Priest. All of the spells that the Priest learns are useful throughout the game. The only downside to this class is that the class takes a long time to master.
Dragon Quest VII Reimagined[edit]
|
|
This article is a stub. You can help by expanding it. |
Dragon Quest IX: Sentinels of the Starry Skies[edit]
The Priest vocation is available at the start of the game and has the unique skillset "Faith". Priests can also use skill points to learn Spears, Wands, Staves, and Shield skills. Their Coup-de-Grace is "Choir of Angels", which heals all party members and removes negative status effects. Priests easily surpass the durability and curative capabilities of Sages, but are not as MP efficient with their casting and lack the vital Kazing spell.
Stats[edit]
| Attribute | Starting Stats | Maximum Stats |
| Level | 1 | 99 |
| HP | 19 | 420 |
| MP | 14 | 315 |
| Strength | 9 | 201 |
| Agility | 14 | 312 |
| Resilience | 9 | 204 |
| Magical Might | 0 | 0 |
| Magical Mending | 18 | 400 |
| Deftness | 9 | 206 |
| Charm | 7 | 146 |
Faith[edit]
| Accolades | Required points | Name | Effects |
|---|---|---|---|
| Believer | 8 | Divination | Tells its caster the experience needed to climb a level. |
| Acolyte/Postulant | 16 | Natural Magical Mending +20 | Permanently adds 20 to Magical Mending. |
| Mendicant/Votary | 28 | Benediction | Lifts a curse from a single ally. |
| Parish Priest/Nun of the Parish | 40 | Natural Max MP +10 | Permanently adds 10 to Max MP. |
| Presbyter/Missionary | 48 | Rotstopper | Protects the party from Undead enemies' attacks. |
| Abbot/Abbess | 56 | Natural Magical Mending +60 | Permanently adds 60 to Magical Mending. |
| Bishop/Prioress | 70 | Alma Mater | Offers up a prayer to prevent instant death attacks. |
| Archbishop/Mother Superior | 80 | Natural Max MP +20 | Permanently adds 20 to Max MP. |
| Cardinal/Beatificant | 90 | Care Prayer | Offers up a prayer to increase Magical Mending. |
| Saint | 100 | Natural Magical Mending +100 | Permanently adds 100 to Magical Mending. |
Spells[edit]
| Name | Level | MP | Description |
|---|---|---|---|
| Heal | 1 | 2 | Restores at least 30 HP to a single ally. |
| Squelch | 3 | 2 | Cures a single ally of the effects of Poison. |
| Snooze | 6 | 3 | Puts a group of enemies to Sleep. |
| Buff | 8 | 3 | Raises the Defence of a single party member. |
| Cock-A-Doodle-Doo | 11 | 2 | Awakens any Sleeping party members. |
| Insulate | 14 | 4 | Protects a party member from breath-based attacks. |
| Midheal | 16 | 4 | Restores at least 75 HP to a single ally. |
| Zing | 18 | 8 | Resurrects a fallen ally, but sometimes fails. |
| Whack | 20 | 5 | A Cursed incantation that sends an enemy to the hereafter. |
| Tingle | 22 | 2 | Cures all Party members of the effects of Paralysis. |
| Moreheal | 31 | 8 | Restores at least 165 HP to a single ally. |
| Thwack | 34 | 10 | A curse that sends a group of enemies to the hereafter. |
| Multiheal | 38 | 16 | Restores at least 100 HP to all party members. |
| Insulatle | 43 | 8 | Protects the whole party from breath-based attacks. |
| Fullheal | 47 | 24 | Restores all HP to a single ally. |
| Kathwack | 55 | 20 | A curse that sends all enemies to the hereafter. |
| Omniheal | 65 | 128 | Restores all HP to all party members. |
Revocation Award[edit]
Dragon Quest X[edit]
|
|
This section is a stub. You can help by expanding it. |
Dragon Quest Treasures[edit]
The Priests have been depicted as statues with base values of 120,00, and one mouthful of a description.
Dragon Quest Walk[edit]
The Priest Vocation is available to players at the beginning of the game, and gives access to Boomerangs, Staves, and Wands.
Notable Priests[edit]
- Selectable class in Dragon Quest III.
- Kiryl is an apprentice training under the resident priest in castle Zamoksva
- Hero of Dragon Quest V has abilities from the Priest set, and resembles a wandering monk.
- Nevan is a pious prodigy of Ghent, gaining world renown despite his young age.
- Sir Mervyn learns several abilities from the Vocation, and is styled after a real life Templar.
- Angelo is an ex-clergyman who is disgusted with the seediness of the church.
- Sellma's default Vocation is a priest when she joins the party in IX.
- Serena is a Keeper from Arboria destined to protect the Luminary.
- Goobriel, an opportunist Healslime priest from who uses his healing magic to turn a profit.
Trivia[edit]
- The male priest from Dragon Quest III makes a cameo appearance as an NPC in Dragon Quest VII.
- The female priest from Dragon Quest III makes a cameo appearance as an NPC in Dragon Quest XI.
- Most of the crosses worn by Priests throughout the series has been altered to a trident starting with Dragon Quest VIII in order to avoid any resemblance to real world religious iconography. With the vocations presentation shift to the oriental monk design, the cross and trident have been retired for an invented symbol that resembles the peace sign.
Gallery[edit]
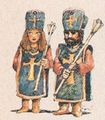
Priest concept art, circa 1987
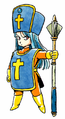
Female Priest, Famicom artwork.

Male Priest, Famicom artwork.
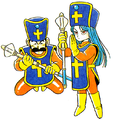
Male and female Priest, Famicom artwork.
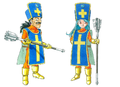
Male and female Priest, Super Famicom artwork.
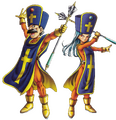
GBC artwork by Yumiko Murakami


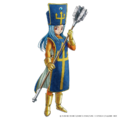
Female Priest, HD-2D artwork by Yoshiya Fujisaki
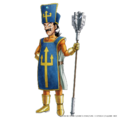
Male Priest, HD-2D artwork by Yoshiya Fujisaki
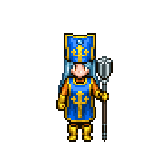
Female Priest, HD-2D sprite

Male Priest, HD-2D sprite


Camping with the party
Priests as depicted on the main artwork for the 2025 Dragon Quest Carnival
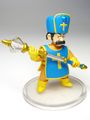
Dragon Quest Character Figure Collection Roto no Monshou series.
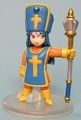
Dragon Quest Character Figure Collection Roto no Monshou series.

Nevan becoming a man of the cloth in the official guide for VI

As well as in the V-Jump guide

The Hero as a Priest in the 3DS version of VII

Maribel as a Priestess

Stock Priest in IX

Stock Priestess in IX
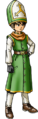
Stock art of the vocation in X, note the similarity to Kiryl

Curate Rollo from Slime MoriMori Dragon Quest
Admonishing the Martial Artist and Tsarevna Alena
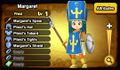
Appearance in Stars
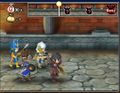
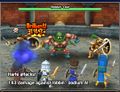
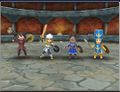

Goobriel from Tact.
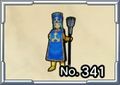
The Sister's statue in Treasures...
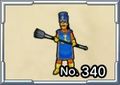
...and the Pastor's
A character changing from a warrior to a priest in Walk


Categories:
- Pages using Tabber parser tag
- Stubs
- Articles with section stubs
- Dragon Quest III vocations
- Dragon Quest III HD-2D Remake vocations
- Dragon Quest VI vocations
- Dragon Quest VII vocations
- Dragon Quest VII Reimagined vocations
- Dragon Quest IX vocations
- Dragon Quest X vocations
- Dragon Quest of the Stars vocations
- Dragon Quest Walk vocations