
| Dragon Quest III (All) | |
|---|---|
| Weapon | Modifier(s) |
| Cypress Stick | Attack +2 |
| Falcon Blade | Attack +5 |
| Oaken Club | Attack +7 |
| Copper Sword | Attack +12 |
| Divine Dagger | Attack +14 |
| Chain Sickle | Attack +16 |
| Thorn Whip | Attack +18 |
| Boomerang | Attack +19 |
| Edged Boomerang | Attack +24 |
| Iron Lance | Attack +26 |
| Steel Broadsword | Attack +33 |
| Iron Axe | Attack +38 |
| Spiked Steel Whip | Attack +40 |
| Flametang Boomerang | Attack +42 |
| Siren Sword♥ | Attack +50 |
| Mountaincleaver | Attack +51 |
| Dragontail Whip | Attack +54 |
| Orochi's Sword | Attack +65 |
| Zombiesbane | Attack +67 |
| Dragonsbane | Attack +79 |
| Thunderbolt Blade | Attack +82 |
| Blizzard Blade | Attack +90 |
| Stormlord's Sword | Attack +95 |
| Bastard Sword | Attack +105 |
| Gringham Whip | Attack +105 |
| Sword of Ruin | Attack +107 |
| Double-Edged Sword | Attack +115 |
| Sword of Kings | Attack +120 |
| Destructiball | Attack +135 |
Hero (Dragon Quest III): Difference between revisions
From Dragon Quest Wiki
mNo edit summary |
(Cleaned up page to match wiki style and removed broken references section.) |
||
| Line 4: | Line 4: | ||
|Image=[[Image:Hero3male.png|300px]] | |Image=[[Image:Hero3male.png|300px]] | ||
[[Image:Hero3female.png|250px]] | [[Image:Hero3female.png|250px]] | ||
|Sprite=[[Image:Dq3hero-sprite-NES.gif| | |Sprite=[[Image:Dq3hero-sprite-NES.gif|28px]][[File:Dragon Quest III hero male sprite SFC.gif|28px]][[File:Dragon Quest III hero female sprite SFC.gif|28px]] | ||
|home = [[Aliahan]] | |home = [[Aliahan]] | ||
|beginstats = | |beginstats = | ||
| Line 12: | Line 12: | ||
|Race=Human | |Race=Human | ||
|Age=16 | |Age=16 | ||
|Family=[[Ortega]] (father)<br> | |Family=[[Ortega]] (father)<br>[[Hero's Mother (Dragon Quest III)|Mother]]<br>[[Hero (Dragon Quest)]] (descendant)<br>[[Prince of Midenhall]] (descendant)<br>[[Prince of Cannock]] (descendant)<br>[[Princess of Cannock]] (descendant)<br>[[Princess of Moonbrooke]] (descendant) | ||
|Voice Actor = [http://www.imdb.com/name/nm0585640/ Hikaru Midorikawa] ([[Dragon Quest III CD Theater|CD Theater]])<br>Nobuyuki Hiyama ([[Super Smash Bros. Ultimate]]) | |Voice Actor = [http://www.imdb.com/name/nm0585640/ Hikaru Midorikawa] ([[Dragon Quest III CD Theater|CD Theater]])<br>Nobuyuki Hiyama ([[Super Smash Bros. Ultimate]]) | ||
}} | }} | ||
| Line 19: | Line 19: | ||
In ''[[Super Smash Bros. Ultimate]]'', the Hero of ''Dragon Quest III'' has been given the default name '''Arusu''' in order to differentiate him from the other three Heroes appearing in the game. | In ''[[Super Smash Bros. Ultimate]]'', the Hero of ''Dragon Quest III'' has been given the default name '''Arusu''' in order to differentiate him from the other three Heroes appearing in the game. | ||
==Appearance== | |||
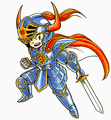
Although the hero can be either male or female, their appearances are practically identical. They are of average height and build, and they have incredibly spiky, dark brown hair. The heroine is slightly shorter than her male counterpart, her hair sticks up less, and she wears a pair of green earrings. Around their forehead is a silver circlet inlaid with a green gem. They wear a long blue tunic over a yellow long-sleeved shirt and pants, a pair of knee-length leather boots, leather gloves, and a long purple cloak around their necks. They wear a brown leather belt around their waist, and a scabbard strapped to their back. | |||
The hero wields a simple sword and a grey heater shield with an insignia of a dragon's head and two crossed swords on the front. The hero's outfit is slightly different in the Famicom illustrations, having a gold circlet with a blue gem around their forehead, and a dark blue cloak around their neck. They are seen carrying a cutlass and a round version of Erdrick's shield. There were also no illustrations of the female Erdrick until the Super Famicom remake: in certain illustrations, the female Erdrick's outfit is more feminized, making her blue tunic a strapless miniskirt. | |||
== | ==Appearances== | ||
==={{DQ3}}=== | |||
The Hero was raised by their by their [[Hero's Mother (Dragon Quest III)|mother]] and grandfather in their home in [[Aliahan]]. Their father, the renowned warrior [[Ortega]], was tasked by the king of Aliahan to assassinate the world-threatening archfiend [[Baramos]] on the very day of their birth. Some time later, word of Ortega's supposed death at the [[Great Pit of Giaga]] reaches the kingdom and the Hero's mother proposes that her child can follow in Ortega's footsteps to free the world from Baramos' growing menace. The child is then trained to become a great warrior like their father and, on their sixteenth birthday, they officially depart to save the world. The king gives a word of warning to take companions with them on their quest lest they meet the same fate as their father, and instructs them to visit [[Patty's Party Planning Place]] before leaving the safty of Aliahan. | |||
The | The King of Aliahan has discreetly sent word of the Hero's journey to the monarchs of every major nation--this is why the Kings and Queen warmly receive them even though the citizenry knows nothing of their mission. The Hero encounters several towns and kingdoms throughout their journey and accomplishes many feats of heroism, such mending the wounds between the [[Faeries]] and the people of [[Norvik]] and freeing the nation of [[Jipang]] from the deceit of a sinister [[Orochi|serpent]]. Six legendary [[Six Orbs|orbs]] are gathered by the Hero along their trek, which they use to hatch the legendary Everbird [[Ramia]]. The phoenix is the direct servant of the Goddess, and her camaraderie with the Hero is irrefutable proof of their destiny as the savior of the world. Additionally, the Hero encounters the dying [[Queen of Dragons]] in her remote mountain [[Castle of the Dragon Queen|castle]]. Before she succumbs to her age, she gives the Hero the [[Sphere of Light]] and reassures them that their destiny is on of great courage and hardship for the benefit of the entire world. | ||
After defeating Baramos, the Hero returns victorious to Aliahan only to be confronted by a new nemesis, [[Zoma]]. Taking up a new quest to defeat the true evil, the Hero travels through the [[Necrogond Shrine]] to the world below and arrives in [[Alefgard]], which is sealed in perpetual darkness darkness under the devil's heel. Here, the Hero fights back against the eternal night by freeing the entrapped Goddess [[Rubiss]] and besieging Zoma's castle. Against all odds, the Hero encounters their father fighting in the depths of the castle--Ortega had fallen into the world below during his fight at the crater of the Giaga volcano and resumed his mission by seeking to kill the evil plaguing both worlds at its source. | |||
Tragically, Ortega is mortally wounded in a battle with the [[King Hydra]] before he can even reach Zoma, and is so severely burned by the dragon that he can no longer see. Sensing someone is present, Ortega embraces his death with despair and bemoans his inability to bring peace to his world and that he was never able to see his child grow up. Ortega then quietly dies in the Hero's arms. | |||
Reaching the lowest level of the castle, the Hero kills the king hydra before fighting through the [[Bones of Baramos|animated corpse of Baramos]] and the fiend's very [[Soul of Baramos|soul]] on their way to Zoma's throne. The devil mocks the would-be savior and the battle begins, with Zoma's impenetrable shroud of darkness being burned away by the sphere of light and leaving him vulnerable. After a vicious clash the Hero emerges victorious, and Zoma begins to fade away--warning that hen though he may perish, there will always be [[Dragonlord|an evil]] to take [[Hargon|his place]]. | |||
== | The castle begins to collapse due to the force of the battle, and the Hero emerges from the [[Nail Mark]] north of Tantegel. The light of the sun has begun to shine in Alefgard for the first time in untold years, and the people receive the Hero as nothing short of a messiah sent by the Goddess. The king bestows upon them the title of Erdrick, the most sacred honor that the land has, and the stratum gap between the world above and Alefgard closes before the Hero can return. Unable to rejoin friends and family above, the Hero settles down in their new home and begins a family that will continue their legacy of standing resolute in the face of desolating evil. | ||
====Stats==== | |||
''NES Version'' | ''NES Version'' | ||
{| style="width:65%; height:100px; text-align:center" border="1" | {| style="width:65%; height:100px; text-align:center" border="1" | ||
| Line 62: | Line 62: | ||
|} | |} | ||
In | In the Super Famicom remake of the game and all subsequent ports, the hHero's attribute growth is determined by their [[List of personality types in Dragon Quest III|Personality]]. At the start of the game, the Hero is asked a series of questions by a mysterious voice in the sky, culminating in a short scene in order to see just what type of person the Hero is. There are 32 different personalities that can be assigned at the beginning, but it is possible to change it with the help of various books or accessories that can be found. | ||
The Hero is not a genuine jack-of-all-trades character despite a decent spell list, with their stats focusing more on physical strength and durability more than spell casting--this results in an MP shortage once expensive spells such as Kazap and Omniheal are learned. This can be corrected with the application of an MP-boosting personality and by consuming [[Seed of Magic|seed of magic]] and [[Seed of Wisdom|seeds of wisdom]] when found. | |||
The Hero is not able to change classes like other characters in the game, with the abbot of [[Alltrades Abbey (Dragon Quest III)|Alltrades]] reprimanding them for attempting to slack in their duties. In the original NES version of the game, the Hero must always be in the party until completing the game. In the remakes, this restriction is removed after defeating Zoma. | |||
====Spells==== | |||
The Hero is capable of learning a balanced mix of magic from both the [[Priest]] and [[Mage]]'s pools, as well as some that are unique to them, such as Kaclang and Zap. | |||
==Equipment== | {| style="width:65%; height:100px; text-align:center" border="1" | ||
|-<---!Headings are up first.!---> style="font-weight:bold; background:#439CD0" | |||
| Level Learned || Original Japanese || GBC Localization || Modern Localization || MP || Description | |||
|- style="font-weight:normal" | |||
| 2 || メラ ''Mera'' || Blaze || [[Frizz]] || 2 || A simple fire spell; affects one enemy. | |||
|- | |||
| 4 || ホイミ ''Hoimi'' || Heal || [[Heal]] || 3 || A simple healing spell. | |||
|- | |||
| 6 || ニフラム ''Nifuramu'' || Expel || [[Poof]] || 2 || Blows away weak enemies. | |||
|- | |||
| 8 || ルーラ ''Ruura'' || Return || [[Zoom]] || 8 || Instantaneous travel to a previously visited location. | |||
|- | |||
| 10 || ギラ ''Gira'' || Firebal || [[Sizz]] || 4 || A weak fire spell that affects a group of enemies. | |||
|- | |||
| 12 || アストロン ''Asutoron'' || Ironize || [[Kaclang]] || 6 || Makes the hero immune to all enemy attacks for a short period of time. | |||
|- | |||
| 14 || リレミト ''Riremito'' || Outside || [[Evac]] || 8 || Exit a cave/dungeon with this spell. | |||
|- | |||
| 17 || ラリホー ''Rarihoo'' || Sleep || [[Snooze]] || 3 || May put a group of enemies to sleep. | |||
|- | |||
| 19 || マホトーン ''Mahotoon'' || StopSpell || [[Fizzle]] || 3 || Try to block the enemies' spell. | |||
|- | |||
| 19 || トヘロス ''Toherosu'' || Repel || [[Holy Protection]] || 4 || Causes weak enemies to leave you alone. | |||
|- | |||
| 24 || ベギラマ ''Begirama'' || Firebane || [[Sizzle]] || 6 || This fire spell affects a group of enemies. | |||
|- | |||
| 26 || ライデイン ''Raidein'' || Zap || [[Zap]] || 8 || Affects one enemy; the first lightning type spell. | |||
|- | |||
| 29 || ベホイミ ''Behoimi'' || Healmore || [[Midheal]] || 5 || A stronger form of Heal. | |||
|- | |||
| 31 || イオラ ''Iora'' || Boom || [[Boom]] || 9 || Damages all targets with a powerful explosion. | |||
|- | |||
| 33 || ベホマ ''Behoma'' || Healall ||[[Fullheal]] || 7 || Restores an ally to full health. | |||
|- | |||
| 35 || ザオラル ''Zaoraru'' || Vivify || [[Zing]] || 10 || 50% chance to revive a deceased party member. | |||
|- | |||
| 38 || ベホマズン ''Behomazun'' || Healusall || [[Omniheal]] || 62 || Restores the party to full health. | |||
|- | |||
| 41 || ギガデイン ''Gigadein'' || Thordain || [[Kazap]] || 30 || Causes around 200 points of electrical damage to all enemies. | |||
|} | |||
====Equipment==== | |||
The hero has access to a very wide range of both weapons, ranging from swords, spears, axes, as well as whips and boomerangs in the remakes. They are capable of being outfitted with the heaviest armour, shields, and helmets available. Erdrick is also the only character capable of using the legendary equipment, which will prove useful when fighting against [[Zoma]]. In the remake versions, the hero begins his journey equipped with a [[copper sword]] and [[wayfarer's clothes]]. | The hero has access to a very wide range of both weapons, ranging from swords, spears, axes, as well as whips and boomerangs in the remakes. They are capable of being outfitted with the heaviest armour, shields, and helmets available. Erdrick is also the only character capable of using the legendary equipment, which will prove useful when fighting against [[Zoma]]. In the remake versions, the hero begins his journey equipped with a [[copper sword]] and [[wayfarer's clothes]]. | ||
{{VersionTabs|Weapons|{{CharacterEquipmentList|header|title=Dragon Quest III|subtitle=All|equipmentType=Weapon}} | {{VersionTabs|Weapons|{{CharacterEquipmentList|header|title=Dragon Quest III|subtitle=All|equipmentType=Weapon}} | ||
| Line 188: | Line 237: | ||
*♥ denotes female only equipment. | *♥ denotes female only equipment. | ||
== | ===''[[Dragon Quest IX]]''=== | ||
In the [[ | In this game, it is possible to replicate the hero's outfit by receiving pieces from defeating either Baramos or Zoma, who appear as [[Legacy Boss]]es in the game. An accolade is conferred to the player after wearing all of the pieces of this outfit. | ||
*[[Aliahan clothes]] | |||
*[[Aliahan headpiece]] | |||
*[[Aliahan trousers]] | |||
*[[Aliahan boots]] | |||
*[[Aliahan gloves]] | |||
===''[[Dragon Quest XI]]''=== | |||
In this game’s true ending after [[Serenica]] is shown to reunite with [[Erdwin]], the beginning of ''Dragon Quest III'' is shown, with III's Hero appearing at the end to be awoken by their mother before setting off for Aliahan castle. Their mother was shown reading a red book that detailed the adventure of the [[Luminary (Dragon Quest XI)|Luminary]] before walking upstairs to awaken their child--whether this book is a historical account or a work of fiction is unknown. | |||
===''[[Super Smash Bros. Ultimate]]''=== | |||
III's hero appears as a costume for the [[Hero (Super Smash Bros.)|Hero]], along with the Heroes of [[Hero (Dragon Quest XI)|XI]], [[Hero (Dragon Quest IV)|IV]], and [[Hero (Dragon Quest VIII)|VIII]]. While playing as the Hero in Classic Mode, he appears as the opponent of Stage 6, set on the third version of the Castle Seige stage. | |||
== | ==Lineage== | ||
The Hero's | The Hero's bloodline is that of powerful men and women who save the world from the grips of darkness. While every person descended from them carries their spirit, the most notable are the protagonists of the first and second games. These are the [[Hero (Dragon Quest)|Scion of Erdrick]], the [[Prince of Midenhall]], the [[Prince of Cannock]], and the [[Princess of Moonbrooke]]. Their own adventures would shape the course of history for the betterment of the world, and insures that the name of Erdrick never leaves the heart of Alefgard. | ||
== | ==Items Iconography== | ||
As the Hero's legacy has grown in the distant time between the third and first game, several items and pieces of equipment that once belonged to the Hero have Erdrick in their names. See the ''[[Erdrick Equipment]]'' article for more details on the sword and armor set, along with the emblem. | |||
Beyond the gear the Hero took into battle, they also left behind a tablet with a message written left for their descendant in ''Dragon Quest''. It gives instructions on what items are needed to create the [[Rainbow Drop]], which is the location of [[Charlock Castle]]. The tablet is found in a a small cave that would be named [[Erdrick's Cave]] after their passing. | |||
<center><gallery> | <center><gallery> | ||
| Line 263: | Line 276: | ||
==Trivia== | ==Trivia== | ||
| Line 292: | Line 289: | ||
File:DQIIIHeroArt.png | File:DQIIIHeroArt.png | ||
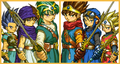
File:Erdrick and Monsters.png| | File:Erdrick and Monsters.png| | ||
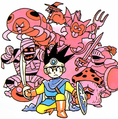
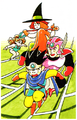
File:DQIII_Characters.png| | File:DQIII_Characters.png|Taking flight with Ramia | ||
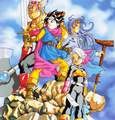
File:DQIII Party Super Famicom art.png|Super Famicom art | File:DQIII Party Super Famicom art.png|Super Famicom art | ||
File:DQIII Mutsumi Inomata.png|Art by Mutsumi Inomata | File:DQIII Mutsumi Inomata.png|Art by Mutsumi Inomata | ||
| Line 305: | Line 302: | ||
File:Treasures n Trapdoors.png|Playing [[Treasures n' Trapdoors]] | File:Treasures n Trapdoors.png|Playing [[Treasures n' Trapdoors]] | ||
File:DQ Monster Storybook DQIII group.png|''Dragon Quest Monster Storybook'' | File:DQ Monster Storybook DQIII group.png|''Dragon Quest Monster Storybook'' | ||
File:DQIII Erdrick and Slime.png | File:DQIII Erdrick and Slime.png|2011 V-jump illustration supporting the relief efforts for the Tohoku earthquake | ||
File:dq3hero-dqv.jpg|As seen in the ''Monster Battle Road'' series | File:dq3hero-dqv.jpg|As seen in the ''Monster Battle Road'' series | ||
File:DQMBR Heroes.png|''Dragon Quest: Monster Battle Road'' (third from right) | File:DQMBR Heroes.png|''Dragon Quest: Monster Battle Road'' (third from right) | ||
| Line 319: | Line 316: | ||
{{#ev:youtube|5mK4YwR63yo|300}}''[[Dragon Quest: Monster Battle Road Victory]]'' finishing move | {{#ev:youtube|5mK4YwR63yo|300}}''[[Dragon Quest: Monster Battle Road Victory]]'' finishing move | ||
{{Hero}} | {{Hero}} | ||
| Line 335: | Line 322: | ||
[[Category:Dragon Quest III characters]] | [[Category:Dragon Quest III characters]] | ||
[[Category:Dragon Quest | [[Category:Dragon Quest XI characters]] | ||
[[Category:Super Smash Bros. Ultimate characters]] | |||
Revision as of 21:37, 3 January 2020
| "Hero" | |
| Dragon Quest III | |

| |
| Sprite(s) | |
| Japanese name | 勇者 |
| Romaji | Yuusha |
| Race | Human |
| Age | 16 |
| Family | Ortega (father) Mother Hero (Dragon Quest) (descendant) Prince of Midenhall (descendant) Prince of Cannock (descendant) Princess of Cannock (descendant) Princess of Moonbrooke (descendant) |
| Voice actor | Hikaru Midorikawa (CD Theater) Nobuyuki Hiyama (Super Smash Bros. Ultimate) |
The Hero of Dragon Quest III is a fabled, legendary hero from the days of lore and the ancient history of Alefgard. Though only appearing in one game, the legacy of the hero would live on in the "Erdrick Trilogy", so named for the title bestowed upon them and carried forth by their descendants.
In Super Smash Bros. Ultimate, the Hero of Dragon Quest III has been given the default name Arusu in order to differentiate him from the other three Heroes appearing in the game.
Appearance
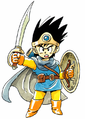
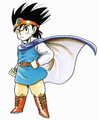
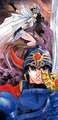
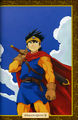
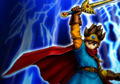
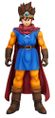
Although the hero can be either male or female, their appearances are practically identical. They are of average height and build, and they have incredibly spiky, dark brown hair. The heroine is slightly shorter than her male counterpart, her hair sticks up less, and she wears a pair of green earrings. Around their forehead is a silver circlet inlaid with a green gem. They wear a long blue tunic over a yellow long-sleeved shirt and pants, a pair of knee-length leather boots, leather gloves, and a long purple cloak around their necks. They wear a brown leather belt around their waist, and a scabbard strapped to their back.
The hero wields a simple sword and a grey heater shield with an insignia of a dragon's head and two crossed swords on the front. The hero's outfit is slightly different in the Famicom illustrations, having a gold circlet with a blue gem around their forehead, and a dark blue cloak around their neck. They are seen carrying a cutlass and a round version of Erdrick's shield. There were also no illustrations of the female Erdrick until the Super Famicom remake: in certain illustrations, the female Erdrick's outfit is more feminized, making her blue tunic a strapless miniskirt.
Appearances
Dragon Quest III: The Seeds of Salvation
The Hero was raised by their by their mother and grandfather in their home in Aliahan. Their father, the renowned warrior Ortega, was tasked by the king of Aliahan to assassinate the world-threatening archfiend Baramos on the very day of their birth. Some time later, word of Ortega's supposed death at the Great Pit of Giaga reaches the kingdom and the Hero's mother proposes that her child can follow in Ortega's footsteps to free the world from Baramos' growing menace. The child is then trained to become a great warrior like their father and, on their sixteenth birthday, they officially depart to save the world. The king gives a word of warning to take companions with them on their quest lest they meet the same fate as their father, and instructs them to visit Patty's Party Planning Place before leaving the safty of Aliahan.
The King of Aliahan has discreetly sent word of the Hero's journey to the monarchs of every major nation--this is why the Kings and Queen warmly receive them even though the citizenry knows nothing of their mission. The Hero encounters several towns and kingdoms throughout their journey and accomplishes many feats of heroism, such mending the wounds between the Faeries and the people of Norvik and freeing the nation of Jipang from the deceit of a sinister serpent. Six legendary orbs are gathered by the Hero along their trek, which they use to hatch the legendary Everbird Ramia. The phoenix is the direct servant of the Goddess, and her camaraderie with the Hero is irrefutable proof of their destiny as the savior of the world. Additionally, the Hero encounters the dying Queen of Dragons in her remote mountain castle. Before she succumbs to her age, she gives the Hero the Sphere of Light and reassures them that their destiny is on of great courage and hardship for the benefit of the entire world.
After defeating Baramos, the Hero returns victorious to Aliahan only to be confronted by a new nemesis, Zoma. Taking up a new quest to defeat the true evil, the Hero travels through the Necrogond Shrine to the world below and arrives in Alefgard, which is sealed in perpetual darkness darkness under the devil's heel. Here, the Hero fights back against the eternal night by freeing the entrapped Goddess Rubiss and besieging Zoma's castle. Against all odds, the Hero encounters their father fighting in the depths of the castle--Ortega had fallen into the world below during his fight at the crater of the Giaga volcano and resumed his mission by seeking to kill the evil plaguing both worlds at its source.
Tragically, Ortega is mortally wounded in a battle with the King Hydra before he can even reach Zoma, and is so severely burned by the dragon that he can no longer see. Sensing someone is present, Ortega embraces his death with despair and bemoans his inability to bring peace to his world and that he was never able to see his child grow up. Ortega then quietly dies in the Hero's arms.
Reaching the lowest level of the castle, the Hero kills the king hydra before fighting through the animated corpse of Baramos and the fiend's very soul on their way to Zoma's throne. The devil mocks the would-be savior and the battle begins, with Zoma's impenetrable shroud of darkness being burned away by the sphere of light and leaving him vulnerable. After a vicious clash the Hero emerges victorious, and Zoma begins to fade away--warning that hen though he may perish, there will always be an evil to take his place.
The castle begins to collapse due to the force of the battle, and the Hero emerges from the Nail Mark north of Tantegel. The light of the sun has begun to shine in Alefgard for the first time in untold years, and the people receive the Hero as nothing short of a messiah sent by the Goddess. The king bestows upon them the title of Erdrick, the most sacred honor that the land has, and the stratum gap between the world above and Alefgard closes before the Hero can return. Unable to rejoin friends and family above, the Hero settles down in their new home and begins a family that will continue their legacy of standing resolute in the face of desolating evil.
Stats
NES Version
| Attribute | Starting Stats | Maximum Stats |
| Level | 1 | 99 |
| HP | 15 | 446 |
| MP | 6 | 218 |
| Strength | 8 | 181 |
| Agility | 6 | 156 |
| Resilience | 7 | 244 |
| Wisdom | 6 | 126 |
| Luck | 5 | 157 |
| Initial gear | Cypress stick, Plain clothes | |
In the Super Famicom remake of the game and all subsequent ports, the hHero's attribute growth is determined by their Personality. At the start of the game, the Hero is asked a series of questions by a mysterious voice in the sky, culminating in a short scene in order to see just what type of person the Hero is. There are 32 different personalities that can be assigned at the beginning, but it is possible to change it with the help of various books or accessories that can be found.
The Hero is not a genuine jack-of-all-trades character despite a decent spell list, with their stats focusing more on physical strength and durability more than spell casting--this results in an MP shortage once expensive spells such as Kazap and Omniheal are learned. This can be corrected with the application of an MP-boosting personality and by consuming seed of magic and seeds of wisdom when found.
The Hero is not able to change classes like other characters in the game, with the abbot of Alltrades reprimanding them for attempting to slack in their duties. In the original NES version of the game, the Hero must always be in the party until completing the game. In the remakes, this restriction is removed after defeating Zoma.
Spells
The Hero is capable of learning a balanced mix of magic from both the Priest and Mage's pools, as well as some that are unique to them, such as Kaclang and Zap.
| Level Learned | Original Japanese | GBC Localization | Modern Localization | MP | Description |
| 2 | メラ Mera | Blaze | Frizz | 2 | A simple fire spell; affects one enemy. |
| 4 | ホイミ Hoimi | Heal | Heal | 3 | A simple healing spell. |
| 6 | ニフラム Nifuramu | Expel | Poof | 2 | Blows away weak enemies. |
| 8 | ルーラ Ruura | Return | Zoom | 8 | Instantaneous travel to a previously visited location. |
| 10 | ギラ Gira | Firebal | Sizz | 4 | A weak fire spell that affects a group of enemies. |
| 12 | アストロン Asutoron | Ironize | Kaclang | 6 | Makes the hero immune to all enemy attacks for a short period of time. |
| 14 | リレミト Riremito | Outside | Evac | 8 | Exit a cave/dungeon with this spell. |
| 17 | ラリホー Rarihoo | Sleep | Snooze | 3 | May put a group of enemies to sleep. |
| 19 | マホトーン Mahotoon | StopSpell | Fizzle | 3 | Try to block the enemies' spell. |
| 19 | トヘロス Toherosu | Repel | Holy Protection | 4 | Causes weak enemies to leave you alone. |
| 24 | ベギラマ Begirama | Firebane | Sizzle | 6 | This fire spell affects a group of enemies. |
| 26 | ライデイン Raidein | Zap | Zap | 8 | Affects one enemy; the first lightning type spell. |
| 29 | ベホイミ Behoimi | Healmore | Midheal | 5 | A stronger form of Heal. |
| 31 | イオラ Iora | Boom | Boom | 9 | Damages all targets with a powerful explosion. |
| 33 | ベホマ Behoma | Healall | Fullheal | 7 | Restores an ally to full health. |
| 35 | ザオラル Zaoraru | Vivify | Zing | 10 | 50% chance to revive a deceased party member. |
| 38 | ベホマズン Behomazun | Healusall | Omniheal | 62 | Restores the party to full health. |
| 41 | ギガデイン Gigadein | Thordain | Kazap | 30 | Causes around 200 points of electrical damage to all enemies. |
Equipment
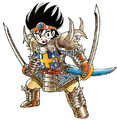
The hero has access to a very wide range of both weapons, ranging from swords, spears, axes, as well as whips and boomerangs in the remakes. They are capable of being outfitted with the heaviest armour, shields, and helmets available. Erdrick is also the only character capable of using the legendary equipment, which will prove useful when fighting against Zoma. In the remake versions, the hero begins his journey equipped with a copper sword and wayfarer's clothes.
| Dragon Quest III (All) | |
|---|---|
| Helmet | Modifier(s) |
| Leather Hat | Defense +2 |
| Hardwood Headwear | Defense +6 |
| King's Crown | Defense +6 |
| Fur Hood♥ | Defense +10 |
| Iron Helmet | Defense +16 |
| Silver Tiara♥ | Defense +20 |
| Iron Mask | Defense +25 |
| Ortega's Helm | Defense +30 |
| Hapless Helm | Defense +35 |
| Mythril Helm | Defense +38 |
| Great Helm | Defense +45 |
| Mask of Implacability | Defense +255 |
| Dragon Quest III (All) | |
|---|---|
| Armor | Modifier(s) |
| Scandalous Swimsuit♥ | Defense+1 |
| Plain Clothes | Defense+4 |
| Wayfarer's Clothes | Defense+8 |
| Leather Armour | Defense+12 |
| Leather Dress♥ | Defense+15 |
| Shell Armour | Defense+16 |
| Chain Mail | Defense+20 |
| Silk Robe♥ | Defense+20 |
| Cloak of Evasion | Defense+23 |
| Leather Kilt | Defense+24 |
| Iron Armour | Defense+25 |
| Magical Skirt♥ | Defense+25 |
| Glombolero | Defense+30 |
| Full Plate Armour | Defense+32 |
| Cat Suit | Defense+35 |
| Magic Armour | Defense+40 |
| Dragon Mail | Defense+45 |
| Earthenwear | Defense+50 |
| Spiked Armour | Defense+55 |
| Magic Bikini♥ | Defense+65 |
| Hate Mail | Defense+65 |
| Auroral Armour | Defense+82 |
| Blessed Bikini♥ | Defense+88 |
| Shimmering Dress♥ | Defense+90 |
| Dragon Quest III (All) | |
|---|---|
| Shields | Modifier(s) |
| Pot Lid | Defense+2 |
| Leather Shield | Defense+4 |
| Bronze Shield | Defense+7 |
| Scale Shield | Defense+12 |
| Iron Shield | Defense+20 |
| Magic Shield | Defense+25 |
| Dragon Shield | Defense+32 |
| Tempest Shield | Defense+35 |
| Silver Shield | Defense+40 |
| Shield of Shame | Defense+42 |
| Power Shield | Defense+50 |
| Ogre Shield | Defense+60 |
| Hero's Shield | Defense+65 |
| Dragon Quest III (All) | |
|---|---|
| Accessories | Modifier(s) |
| Strength Ring | Strength+7 |
| Tough Guy Tattoo | Strength+8 |
| Mighty Armlet | Strength+15 |
| Doh-Hican | Defence+3 |
| Garter♥ | Defence+3 |
| Gold Rosary | Defence+4 |
| Leg Warmers♥ | Defence+5 |
| Ten Ton Toupee | Defence+15 |
| Cower Ring | Agility+7 |
| Skull Ring | Agility+10 |
| Agility Ring | Agility+`5 |
| Mercury's Bandana | Agility+30 |
| Meteorite Bracer | Agilityx2 |
| Restless Heart | Resilience+10 |
| Gold Chain | Resilience+10 |
| Weightlifter's Belt | Resilience+15 |
| Recovery Ring | Resilience+25 |
| Care Ring | Wisdom+15 |
| Scholar's Specs | Wisdom+15 |
| Goddess Ring♥ | Wisdom+33 |
| Bunny Tail♥ | Luck+8 |
| Golden Tiara♥ | Luck+13 |
| Hen's Tooth | Luck+20 |
| Sacred Amulet | Luck+30 |
| Elevating Shoes | Luck+50 |
| Dummy | |
| Slime Earrings | |
| Ruby Wristband | |
- ♥ denotes female only equipment.
Dragon Quest IX
In this game, it is possible to replicate the hero's outfit by receiving pieces from defeating either Baramos or Zoma, who appear as Legacy Bosses in the game. An accolade is conferred to the player after wearing all of the pieces of this outfit.
Dragon Quest XI
In this game’s true ending after Serenica is shown to reunite with Erdwin, the beginning of Dragon Quest III is shown, with III's Hero appearing at the end to be awoken by their mother before setting off for Aliahan castle. Their mother was shown reading a red book that detailed the adventure of the Luminary before walking upstairs to awaken their child--whether this book is a historical account or a work of fiction is unknown.
Super Smash Bros. Ultimate
III's hero appears as a costume for the Hero, along with the Heroes of XI, IV, and VIII. While playing as the Hero in Classic Mode, he appears as the opponent of Stage 6, set on the third version of the Castle Seige stage.
Lineage
The Hero's bloodline is that of powerful men and women who save the world from the grips of darkness. While every person descended from them carries their spirit, the most notable are the protagonists of the first and second games. These are the Scion of Erdrick, the Prince of Midenhall, the Prince of Cannock, and the Princess of Moonbrooke. Their own adventures would shape the course of history for the betterment of the world, and insures that the name of Erdrick never leaves the heart of Alefgard.
Items Iconography
As the Hero's legacy has grown in the distant time between the third and first game, several items and pieces of equipment that once belonged to the Hero have Erdrick in their names. See the Erdrick Equipment article for more details on the sword and armor set, along with the emblem.
Beyond the gear the Hero took into battle, they also left behind a tablet with a message written left for their descendant in Dragon Quest. It gives instructions on what items are needed to create the Rainbow Drop, which is the location of Charlock Castle. The tablet is found in a a small cave that would be named Erdrick's Cave after their passing.
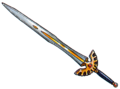
Erdrick's Sword
Erdrick's Armour
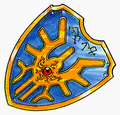
Erdrick's Shield
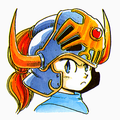
Erdrick's Helmet
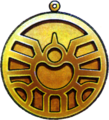
Erdrick's Emblem
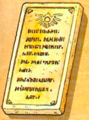
Erdrick's Tablet


Trivia
- The manga series Gintama has a parody of Dragon Quest which stars Leukocyte King, a character based on III's hero.
- As this is the first game in the mainline, numbered Dragon Quest series to allow players to determine the Hero's gender, the female version of Dragon Quest IIIs Hero is the first female main protagonist in that series.
- The Hero shares his voice actor in the audio drama with Android 16 from Akira Toriyama's Dragon Ball series. He also shares his voice with Marth from the Fire Emblem and Super Smash Bros. series.
- In Super Smash Bros. Ultimate, he shares his voice with Barry Kahn from Dragon Ball Super as well as Link from The Legend of Zelda: Ocarina of Time. Smash Bros. series creator Masahiro Sakurai also noted that his performance may be recognized as Guy Shishioh from The King of Braves GaoGaiGar.
Gallery
Famicom art
Taking flight with Ramia
Super Famicom art

Art by Mutsumi Inomata
Art by Mutsumi Inomata

Wearing a leather hat

Wearing iron armour
Wearing spiked armour
Exploring Fifer's Spire

Locked door
Playing Treasures n' Trapdoors
Dragon Quest Monster Storybook
2011 V-jump illustration supporting the relief efforts for the Tohoku earthquake

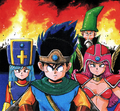
As seen in the Monster Battle Road series
Dragon Quest: Monster Battle Road (third from right)
Dragon Quest: Monster Battle Road Victory
Dragon Quest Sofubi Character merchandise series

Bring Arts action figure series
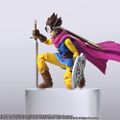
Super Famicom iconic pose
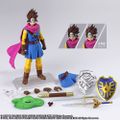
Bring Arts figure extras

Super Smash Bros. Ultimate


Videos
Dragon Quest: Monster Battle Road Victory finishing move