Kaboom: Difference between revisions
No edit summary |
|||
| Line 11: | Line 11: | ||
==Appearances== | ==Appearances== | ||
==={{DQ2}}=== | ==={{DQ2}}=== | ||
Kaboom is learned by the [[Princess of Moonbrooke]] at level 19. The spell costs a mere 8 MP, but deals only 55~68 in the original version and 68~92 in the remakes and ports. On the enemy side, Kaboom can be cast by [[ | Kaboom is learned by the [[Princess of Moonbrooke]] at level 19. The spell costs a mere 8 MP, but deals only 55~68 in the original version and 68~92 in the remakes and ports. On the enemy side, Kaboom can be cast by [[archdemon]]s, [[wrecktor]]s, [[Pazuzu]], [[Belial]], and [[Hargon]]. | ||
==={{DQ3}}=== | ==={{DQ3}}=== | ||
Kaboom is learned by [[Mage]]s and [[Sage]]s at level 38, and deals between 140~160 points of damage. It costs 18 MP to cast. | Kaboom is learned by [[Mage]]s and [[Sage]]s at level 38, and deals between 140~160 points of damage. It costs 18 MP to cast. | ||
The enemies [[ | The enemies [[imp]], [[hocus-poker]], [[abracadabrer]], [[EvilCloud]], [[Baramos]], [[Soul of Baramos]], [[Baramonster]], [[Xenlon]], and [[Gran Dragon]] can use this spell against the party, although Imps don't have enough MP to cast it. | ||
==={{DQ4}}=== | ==={{DQ4}}=== | ||
| Line 53: | Line 53: | ||
Kaboom can only be obtained by mastering the [[Sage]] vocation. The force of the explosion has been focused slightly, dealing 130~150 damage for 15 MP. | Kaboom can only be obtained by mastering the [[Sage]] vocation. The force of the explosion has been focused slightly, dealing 130~150 damage for 15 MP. | ||
It is used by the enemies [[ | It is used by the enemies [[pudgedevil]], [[demon overlord]], and [[Mortamor]] in his first and third forms. | ||
==={{DQ7}}=== | ==={{DQ7}}=== | ||
Kaboom has the same aspects as in the previous game and is learned through the same method. | Kaboom has the same aspects as in the previous game and is learned through the same method. | ||
It can be cast by the enemies [[ | It can be cast by the enemies [[wiz pip]], [[nutty professor]] (though these two always fail to cast it), [[infernal kernel]], [[black bishop]], [[flamencolumn]], [[barbatos]], [[master moosifer]], [[vis mager (Dragon Quest VII)]], [[Ersatz Estark]], and [[Orgodemir]] (in his first form during Disc 1, and on his second and third forms during Disc 2). | ||
==={{DQ8}}=== | ==={{DQ8}}=== | ||
| Line 74: | Line 74: | ||
===''[[Dragon Quest Monsters]]''=== | ===''[[Dragon Quest Monsters]]''=== | ||
Explodet deals 130~140 points of explosion damage to all foes and is learned by monsters beginning at level 29 if the monster has at least 120 MP and 158 Intelligence. It is learned naturally by [[ | Explodet deals 130~140 points of explosion damage to all foes and is learned by monsters beginning at level 29 if the monster has at least 120 MP and 158 Intelligence. It is learned naturally by [[akubar]], [[arcdemon]], [[Balzak]], [[Baramos]], [[boneslave]], [[Moosifer|goathorn]], [[Hargon]], [[metabble]], and [[Nimzo|mirudraas]]. [http://www.gamefaqs.com/gbc/197155-dragon-warrior-monsters/faqs/8160] | ||
==={{DQM2}}=== | ==={{DQM2}}=== | ||
| Line 104: | Line 104: | ||
*[[Bang & Sizz|Bang & Sizz II]] (57 points) | *[[Bang & Sizz|Bang & Sizz II]] (57 points) | ||
*[[Bang & Sizz|Bang & Sizz III]] (15 points) | *[[Bang & Sizz|Bang & Sizz III]] (15 points) | ||
===''[[Dragon Quest Monsters: Terry's Wonderland 3D|Terry's Wonderland 3D]]'' & ''[[Dragon Quest Monsters 2: Iru and Luca's Marvelous Mysterious Key|Iru and Luca's Marvelous Mysterious Key]]''=== | |||
Kaboom costs 24 MP and deals 114~126 damage. Once the monster's wisdom surpasses 50, it will begin to increase in power until it deals 228~252 at 999 wisdom. | |||
==={{DQMJ3}}=== | ==={{DQMJ3}}=== | ||
Kaboom | Kaboom has the same parameters as in the previous title. | ||
=== | ==={{DQM3}}=== | ||
Kaboom costs 24 MP and is learned through the [[Aamon (Talent)|Aamon]], [[Bang Virtuoso]], [[Bombshell]], [[Fire Chief]], [[Impactor]], [[Mordegon, Lord of Shadows]], [[Mortamor (Talent)|Mortamor]], [[Nimzo (Talent)|Nimzo]], and [[Orgodemir (Talent)|Orgodemir]] talents. It has a base damage of 120 and will deal an average of 240 damage at 999 wisdom. | |||
==={{DQH}}=== | ==={{DQH}}=== | ||
| Line 119: | Line 122: | ||
==={{DQH2}}=== | ==={{DQH2}}=== | ||
Nera returns in the sequel, and Kaboom behaves as it did before. The spell now requires 15 skill points to learn and its MP cost has increased to 28. | Nera returns in the sequel, and Kaboom behaves as it did before. The spell now requires 15 skill points to learn and its MP cost has increased to 28. | ||
==={{DQTreasures}}=== | |||
Kaboom deals Explosion damage to all enemies in a wide area. It is learned by [[drackyma]], [[hat hamwitch]]s, [[jade slime]]s, [[metal king slime]]s, [[pearly wight]]s, and [[sham hatwitch]]s, and it costs 24 MP to cast. | |||
===''[[Dragon Quest of the Stars]]''=== | ===''[[Dragon Quest of the Stars]]''=== | ||
| Line 130: | Line 136: | ||
===''[[Dragon Quest Tact]]''=== | ===''[[Dragon Quest Tact]]''=== | ||
Kaboom can be learned by [[ | Kaboom can be learned by [[archdemon]]s at level 54 and can also be learned by [[Imp]] through [[Talent Blossoming]]. It costs 137 MP to cast. It has a range of two squares away from the caster in any direction and inflicts major Bang-type spell damage to all enemies in a plus sign-shaped area of effect. Upgrading the spell increases its damage and reduces the amount of MP it costs to cast. The spell can also be taught to any unit with a Kaboom Scroll, which can be purchased from the Legend League Season 2 Medal Swap Shop for 5,000 Medals. | ||
There are also variations of the spell, including [[Compressed Kaboom]], [[Earth-Shattering Kaboom]], [[Necroboom]], [[Arc Kaboom]], [[Dual Kaboom]], and [[Extreme Explosion Spell]]. | There are also variations of the spell, including [[Compressed Kaboom]], [[Earth-Shattering Kaboom]], [[Necroboom]], [[Arc Kaboom]], [[Dual Kaboom]], and [[Extreme Explosion Spell]]. | ||
| Line 146: | Line 152: | ||
|monsters=Archdemon, Imp | |monsters=Archdemon, Imp | ||
}} | }} | ||
===''[[Dragon Quest: The Adventure of Dai]]''=== | ===''[[Dragon Quest: The Adventure of Dai]]''=== | ||
| Line 188: | Line 191: | ||
{{ScreenshotGallery/Item|image=[[File:Kaboom dqm.gif]]|game=''[[Dragon Quest Monsters]]''|platform=GBC}} | {{ScreenshotGallery/Item|image=[[File:Kaboom dqm.gif]]|game=''[[Dragon Quest Monsters]]''|platform=GBC}} | ||
{{ScreenshotGallery/Item|image=[[File:Kaboom dqm psx.gif]]|game=''[[Dragon Quest Monsters 1-2]]''|platform=PSX}} | {{ScreenshotGallery/Item|image=[[File:Kaboom dqm psx.gif]]|game=''[[Dragon Quest Monsters 1-2]]''|platform=PSX}} | ||
{{ScreenshotGallery/Item|image=[[File:Kaboom caravan.gif]]|game=''[[Dragon Quest Monsters: Caravan Heart]]''|platform=GBA}} | {{ScreenshotGallery/Item|image=[[File:Kaboom caravan.gif]]|game=''[[Dragon Quest Monsters: Caravan Heart|Caravan Heart]]''|platform=GBA}} | ||
{{ScreenshotGallery/Item|image=[[File:Kaboom dqm joker 2.gif]]|game=''[[Dragon Quest Monsters: Joker 2]]''|platform=NDS}} | {{ScreenshotGallery/Item|image=[[File:Kaboom dqm joker 2.gif]]|game=''[[Dragon Quest Monsters: Joker 2|Joker 2]]''|platform=NDS}} | ||
{{ScreenshotGallery/Item|image=[[File:Kaboom dqm | {{ScreenshotGallery/Item|image=[[File:Kaboom dqm 3ds.gif]]|game=''[[Dragon Quest Monsters: Terry's Wonderland 3D|Terry's Wonderland 3D]]''|platform=3DS}} | ||
{{ScreenshotGallery/Item|image=[[File:Kaboom dqm | {{ScreenshotGallery/Item|image=[[File:Kaboom dqm joker 3.gif]]|game=''[[Dragon Quest Monsters: Joker 3|Joker 3]]''|platform=3DS}} | ||
{{ScreenshotGallery/Item|image=[[File:Kaboom heroes.gif]]|game=''[[Dragon Quest Heroes]]''|platform=PS4}} | {{ScreenshotGallery/Item|image=[[File:Kaboom heroes.gif]]|game=''[[Dragon Quest Heroes]]''|platform=PS4}} | ||
{{ScreenshotGallery/Item|image=[[File:Kaboom 5 ds.gif]]|game=''[[Zenithia Trilogy]]''|platform=NDS}} | {{ScreenshotGallery/Item|image=[[File:Kaboom 5 ds.gif]]|game=''[[Zenithia Trilogy]]''|platform=NDS}} | ||
Revision as of 22:46, 18 February 2024
| Kaboom | |
|---|---|

| |
| Japanese | イオナズン |
| Rōmaji | Ionazun |
| Type | Offensive |
| Older names | Explodet |
Kaboom is a spell in the Dragon Quest series. It causes high damage to all enemies with an immense explosion of light particles. It is related to the weaker spells Bang and Boom, and the stronger spell Kaboomle.
Appearances
Dragon Quest II: Luminaries of the Legendary Line
Kaboom is learned by the Princess of Moonbrooke at level 19. The spell costs a mere 8 MP, but deals only 55~68 in the original version and 68~92 in the remakes and ports. On the enemy side, Kaboom can be cast by archdemons, wrecktors, Pazuzu, Belial, and Hargon.
Dragon Quest III: The Seeds of Salvation
Kaboom is learned by Mages and Sages at level 38, and deals between 140~160 points of damage. It costs 18 MP to cast.
The enemies imp, hocus-poker, abracadabrer, EvilCloud, Baramos, Soul of Baramos, Baramonster, Xenlon, and Gran Dragon can use this spell against the party, although Imps don't have enough MP to cast it.
Dragon Quest IV: Chapters of the Chosen
Kaboom is learned by Maya at level 36, and is already known by Psaro upon joining. It deals between 140~160 damage as before, and now costs only 15 MP to cast.
The enemies Imp, Barbatos, Vis mager, can use this spell against the party (though Imps fail to cast it), and it's also used in Chapter 6 of the remakes by the first, second, and third forms of Aamon.
Dragon Quest V: Hand of the Heavenly Bride
Deals 120~160 damage, and costs 15 magic points.
| Name | Level |
|---|---|
| Archdemon | -- |
| Barbatos | -- |
| Conkjurer | -- |
| Wiz pip | -- |
| Liquid metal slime | 8 |
| Minidemon | 28 |
| Daughter | 36 |
| Nera | 37 |
| Starkers | 45 |
The bosses King Korol and Nimzo also use it.
Dragon Quest VI: Realms of Revelation
Kaboom can only be obtained by mastering the Sage vocation. The force of the explosion has been focused slightly, dealing 130~150 damage for 15 MP.
It is used by the enemies pudgedevil, demon overlord, and Mortamor in his first and third forms.
Dragon Quest VII: Fragments of the Forgotten Past
Kaboom has the same aspects as in the previous game and is learned through the same method.
It can be cast by the enemies wiz pip, nutty professor (though these two always fail to cast it), infernal kernel, black bishop, flamencolumn, barbatos, master moosifer, vis mager (Dragon Quest VII), Ersatz Estark, and Orgodemir (in his first form during Disc 1, and on his second and third forms during Disc 2).
Dragon Quest VIII: Journey of the Cursed King
Kaboom is learned by Jessica at level 33, with a base range of 104~120. Once Miss Albert's wisdom surpasses 251 the spell will gradually increase in power, until her cognitive prowess peaks at 556. From there the spell will blast all enemies for 184~200 damage.
- The spell has been given a damage boost in the 3DS port, with the base range growing to 112~128 and the upper limit reaching 208~224. This zenith requires a wisdom score of 620 to reach.
Dragon Quest IX: Sentinels of the Starry Skies
Kaboom is available to Mages at level 47 and Sages at level 48. It costs 28 MP to cast and will deal 140 base explosion/lightning damage, improving once the sorcerer's magical might reaches 250. The upper limit of this spell is 218~238.
Dragon Quest X
Magi will learn Kaboom at level 68, while Sages learn it at level 69, and it costs 23 MP to cast. The range is a 7 meter radius around the caster, dealing a minimum of 94~106 Light damage, with the formula calculated as (Magical might - 200) x0.25 + 94~106. The spell will begin to increase in power proportionally starting with a Magical Might of 200. Once the caster's Magical Might surpasses 999 via buffs, the formula becomes (Magical might - 999) /4 + 298~310 for an upper limit of 423~435
Dragon Quest XI: Echoes of an Elusive Age
Veronica will learn Kaboom at level 57, and can cast it for 24 MP. It deals 156~172 light-element damage, slowly rising to a maximum of 262~278 at 390 magical might.
Dragon Quest Monsters
Explodet deals 130~140 points of explosion damage to all foes and is learned by monsters beginning at level 29 if the monster has at least 120 MP and 158 Intelligence. It is learned naturally by akubar, arcdemon, Balzak, Baramos, boneslave, goathorn, Hargon, metabble, and mirudraas. [1]
Dragon Quest Monsters 2
Explodet now requires 285 to learn. It is no longer naturally learned by Hargon.
Dragon Quest Monsters: Joker
Kaboom cost 15 MP, deals up to 220~236, and can be learned from:
- Bang & Crack II (57 points)
- Bang & Crack III (14 points)
- Bang & Woosh II (57 points)
- Bang & Woosh III (14 points)
- Bang & Zam II (58 points)
- Bang & Zam III (15 points)
- Bang & Zap II (55 points)
- Bang & Zap III (15 points)
- Bombardier (85 points)
- Cluboon II (70 points)
- Diamagon III (50 points)
- Frizz & Bang II (60 points)
- Frizz & Bang III (16 points)
- Mortamor (55 points)
- Nimzo (65 points)
- Über Dark Dynamiter (13 points)
Dragon Quest Monsters: Joker 2
Kaboom has a base range of 106~116 and a maximum range of 229~239. It can no longer be learned from Bombardier. It can also be learned from:
- Bang & Sizz II (57 points)
- Bang & Sizz III (15 points)
Terry's Wonderland 3D & Iru and Luca's Marvelous Mysterious Key
Kaboom costs 24 MP and deals 114~126 damage. Once the monster's wisdom surpasses 50, it will begin to increase in power until it deals 228~252 at 999 wisdom.
Dragon Quest Monsters: Joker 3
Kaboom has the same parameters as in the previous title.
Dragon Quest Monsters: The Dark Prince
Kaboom costs 24 MP and is learned through the Aamon, Bang Virtuoso, Bombshell, Fire Chief, Impactor, Mordegon, Lord of Shadows, Mortamor, Nimzo, and Orgodemir talents. It has a base damage of 120 and will deal an average of 240 damage at 999 wisdom.
Dragon Quest Heroes: The World Tree's Woe and the Blight Below
Kaboom is the third tier spell of Nera and can be learned by investing 16 skill points. After charging her Boom spell for a short time, she will set off a massive explosion in front of her for 25 MP. If used in conjunction with the magical bubbles that Nera can unleash with her wand, she will cause them to explode, as well.
| Game | Description |
| Blasts enemies over a huge area with an insane explosion.[1] |
Dragon Quest Heroes II: Twin Kings and the Prophecy's End
Nera returns in the sequel, and Kaboom behaves as it did before. The spell now requires 15 skill points to learn and its MP cost has increased to 28.
Dragon Quest Treasures
Kaboom deals Explosion damage to all enemies in a wide area. It is learned by drackyma, hat hamwitchs, jade slimes, metal king slimes, pearly wights, and sham hatwitchs, and it costs 24 MP to cast.
Dragon Quest of the Stars
|
|
This article is a stub. You can help by expanding it. |
Dragon Quest Rivals
Kaboom appeared in the basic card pool as a spell card exclusive for Mage leaders. It cost 7 MP to use and inflicts 3 damage to all enemy units.
Dragon Quest Walk
|
|
This article is a stub. You can help by expanding it. |
Dragon Quest Tact
Kaboom can be learned by archdemons at level 54 and can also be learned by Imp through Talent Blossoming. It costs 137 MP to cast. It has a range of two squares away from the caster in any direction and inflicts major Bang-type spell damage to all enemies in a plus sign-shaped area of effect. Upgrading the spell increases its damage and reduces the amount of MP it costs to cast. The spell can also be taught to any unit with a Kaboom Scroll, which can be purchased from the Legend League Season 2 Medal Swap Shop for 5,000 Medals.
There are also variations of the spell, including Compressed Kaboom, Earth-Shattering Kaboom, Necroboom, Arc Kaboom, Dual Kaboom, and Extreme Explosion Spell.
| Kaboom (イオナズン Ionazun) |  |
| Kaboom | |||
| Role * | Type * | Element | MP cost |
| Attack | Spell | 137 | |
| Range | Additional effects | ||
2 |
None | ||
| Description | |||
| Deals major Bang-type spell damage to all enemies in area of effect | |||
| Naturally learnt by | |||
| Archdemon, Imp | |||
Dragon Quest: The Adventure of Dai
In the series, Kaboom is a spell commonly associated with the former Demon Lord Hadlar. It is depicted as a powerful wave beam of light fired from both of the caster's hands after gathering sparkling energy. He first casts it in the battle against Avan on Dermline Island.
Dragon Quest: The Adventure of Dai: A Hero's Bonds
Kaboom is a spell finisher for Leona and the Luminary Leader as a Priest or Sage. It is a long-range attack that inflicts magical Light damage over a wide area and temporarily raises all allies' Light damage. The spell can be unlocked by obtaining a Cherub Staff from limited Treasure Hunts or obtaining Kaboom Scrolls from the Shop Exchange.
Super Smash Bros. Ultimate
Kaboom is available via the Command Selection, and costs a hefty 37 MP. The detonation projectile travels out from the Hero and will explode upon contact with an opponent or after enough distance has been covered. The explosion has a slight vacuum effect, and boasts considerable knockback.
Enemy versions
Kaboom will deal 60~80 damage when cast by an enemy in III, 72~88 damage in IV and V, and 95~115 in VI, VII and IX. The blast radius was weakened in VIII, where it deals 72~92 damage.
In Other Languages
| Language | Translation | Meaning |
| Megaexplosión | From the Greek mega and explosión. | |
| Mégabang | From the Greek mega and bang. | |
| Bumm | German onomatopoeia for the sound of an explosion. | |
| Baboom | Onomatopoeic term for the sound of an explosion. | |
| 이오나즌 | Transliteration of the Japanese name Ionazun. |
Battle Visuals


Gallery
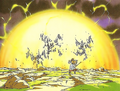
DQII
DQIII

Rivals card
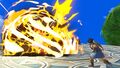
Arusu casting Kaboom in Super Smash Bros. Ultimate
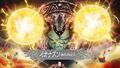
An eyecatch of Hadlar casting Kaboom in The Adventure of Dai

Skill icon in A Hero's Bonds


References
- ↑ Sony PlayStation 4 and Steam versions
- Stubs
- Spells
- Explosion spells
- Dragon Quest II spells
- Dragon Quest III spells
- Dragon Quest IV spells
- Dragon Quest V spells
- Dragon Quest VI spells
- Dragon Quest VII spells
- Dragon Quest VIII spells
- Dragon Quest IX spells
- Dragon Quest X spells
- Dragon Quest XI spells
- Dragon Quest Monsters spells
- Dragon Quest Monsters 2 spells
- Dragon Quest Monsters: Joker spells
- Dragon Quest Monsters: Joker 2 spells
- Dragon Quest Monsters: Joker 3 spells
- Dragon Quest Monsters: Terry's Wonderland 3D spells
- Dragon Quest Monsters 2: Iru and Luca's Marvelous Mysterious Key spells
- Dragon Quest Heroes spells
- Dragon Quest Heroes II spells
- Dragon Quest of the Stars spells
- Dragon Quest Rivals spells
- Dragon Quest Walk spells
- Dragon Quest Tact spells
- Dragon Quest Treasures spells
- Dragon Quest: The Adventure of Dai spells
- A Hero's Bonds skills
- Super Smash Bros. Ultimate spells