Tower of the Moon: Difference between revisions
Antiyonder (talk | contribs) No edit summary |
|||
| (6 intermediate revisions by 3 users not shown) | |||
| Line 1: | Line 1: | ||
{{LocationInfobox | {{LocationInfobox | ||
|game = {{Dragon Quest II}} | |game = {{Dragon Quest II}}<br>{{DQ2HD}} | ||
|title = Tower of the Moon | |title = Tower of the Moon | ||
|type= Dungeon | |type= Dungeon | ||
|image = [[File: | |image = [[File:Tower of the moon I & II HD concept art.png|300px]] | ||
|caption = | |caption = HD concept art | ||
|japanese=満月の塔 | |japanese=満月の塔 | ||
|romaji= | |romaji=Mangetsu no tō (Fullmoon Tower) | ||
|old=Luna/Lune tower | |||
}} | }} | ||
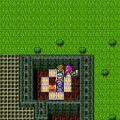
The '''Tower of the Moon''' | The '''Tower of the Moon''' is a tower dungeon in {{Dragon Quest II}}. It is located directly south of [[Slewse]] in the western hemisphere of Greater [[Alefgard]]. It is accessible only by [[Ship]] and only after using the [[Floodgate Key]] on the floodgates in [[Slewse]] releases enough water for the vessel to sail over the submerged land. The [[moonshard]] which is necessary for entry into the [[Volcanic Grotto]] is found here. | ||
==Appearances== | |||
==={{DQ2}}=== | |||
====[[Moonshard]]==== | |||
To find your way to the [[moonshard]], you must head to the staircase straight south from the entrance. On floor 2F, head north and take the staircase in the central room. Make your way up to floor 5F, and take the staircase locked behind two doors. From there, its a straight shot down to the first floor, where an old man waits with your prize. | |||
= | ====Other treasures==== | ||
===Other treasures=== | |||
{| border="0" cellpadding="5" cellspacing="0" width="100%" | {| border="0" cellpadding="5" cellspacing="0" width="100%" | ||
| valign="top" width="50%" | | | valign="top" width="50%" | | ||
| Line 28: | Line 28: | ||
*[[Prayer ring]] | *[[Prayer ring]] | ||
*[[Seed of magic]] | *[[Seed of magic]] | ||
* | *{{Seed of resilience}} (2) | ||
*[[Seed of strength]] | *[[Seed of strength]] | ||
|} | |} | ||
=={{Monster}}s== | ===={{Monster}}s==== | ||
*[[Whackolyte]] | *[[Whackolyte]] | ||
*[[Heyedra]] | *[[Heyedra]] | ||
| Line 46: | Line 46: | ||
*[[Terrordactyl]] | *[[Terrordactyl]] | ||
==Nearby {{MFamilies}}s== | ====Nearby {{MFamilies}}s==== | ||
*[[Orc chieftain]] | *[[Orc chieftain]] | ||
*[[Bloody hand]] | *[[Bloody hand]] | ||
| Line 56: | Line 56: | ||
*[[Dirty rat]] | *[[Dirty rat]] | ||
*[[Sorcerer]] | *[[Sorcerer]] | ||
==={{DQ2HD}}=== | |||
The [[Scions of Erdrick]] are made aware of the tower when first speaking to [[Roge Fastfinger]] in the jail of [[Burrowell]]. The eccentric man explains that members of the [[Children of Hargon]] have taken residence in the tower and have used a strange jewel to do something peculiar to the minds of the people of [[Slewse]], reducing them to mere children in adult bodies. Roge had locked the floodgates and taken the key with him as he fled the region, hoping that the monsters would be trapped in the tower long enough for him to find help, and he gives the key to the [[Scions of Erdrick|Scions]]. Upon opening the gates and flooding the river bed, the quartet are able to reach the tower by sailing to a lake just south of [[Slewse]]. | |||
The Tower of the Moon is more akin to an ivy-covered ziggurat than a typical tower, walled by ceremonial spires. The windows and spire caps are all done in a rich sky blue, with the dome on the apex being a cream colour to represent the moon over the vast sky. The interior is a combination of navy blue with gold trim, and several constellations can be found on the walls and floors. As the player ascends the six storeys, the air is filled with a purple mist. | |||
Upon entering the [[Scions of Erdrick]] witness an [[antlerkazam]] furiously scolding a group of people for seeing through the lies that the [[Children of Hargon]] told to lure them into the tower and decides to slaughter them then and there instead of tolerating their stubbornness to the top of the tower. The [[Scions of Erdrick]] make quick work of the [[antlerkazam|monster]], and the people they saved explained that the [[antlerkazam|beast]] tricked them by pretending to be a kindly old priest to lower their guard. A young man states the group began to suspect him despite his disguise when he told them the [[Children of Hargon]] would reward them for committing crimes against their own neighbors; when the [[Princess of Moonbrooke]] points out that this is similar to what was seen in [[Rippleport]] and [[Moonahan]], the [[Princess of Cannock]] suggests the tower may well be the cult's base of operations outside of [[Rendarak]]. | |||
Reaching the top floor, the [[Scions of Erdrick|Scions]] witness the [[Lunagriff]] and a [[whackolyte]] are using a blood-red crystal to hypnotize a group of [[Slewse]] villagers into acting like children, ordering them to act upon every desire and give no heed for others. The quartet of heroes interrupt the brainwashing and press the [[Lunagriff]] for information. The birdbrain reveals that the operation was [[Pazuzu]]'s idea, who realized that [[human]]s could be made to commit acts of wickedness more easily should they have the minds of petulant and selfish children. Ordering the [[whackolyte]] to take the crystal and flee to [[Pazuzu]] in the [[Volcanic Grotto]] before engaging the [[Scions of Erdrick|Scions]]. | |||
Once the [[Lunagriff|beast]] is dealt with, the Princess of Moonbrooke and the [[Prince of Cannock]] wonder why the [[Children of Hargon]] are so hellbent on spreading misery among [[human]]ity while the [[Princess of Cannock]] retrieves the [[moonshard]] from the [[Lunagriff]]'s death grip. None of the four understand what purpose it serves but note that they can hear the sounds of waves emanating from it, and decide to return to [[Burrowell]] to inform Roge of what transpired as well convene with [[Elmoo]] about the whereabouts of [[Pazuzu]]. | |||
====Treasures==== | |||
{| class="wikitable" | |||
|- | |||
| [[File:ICON-Moonshard I & II HD.png|link=Moonshard]] || [[File:ICON-Mini medal III HD.png|link=List of mini medals in Dragon Quest II HD-2D Remake]] || [[File:ICON-Magic water III HD.png|link=Magic water]] || [[File:ICON-Prayer ring III HD.png|link=Prayer ring]] || [[File:ICON-Moonwort bulb III HD.png|link=Moonwort bulb]] || [[File:ICON-Seed of magic III HD.png|link=Seed of magic]] || [[File:ICON-Scourge whip III HD.png|link=Scourge whip]] | |||
|- | |||
| x1 || x1 || x2 || x1 || x2 || x1 || x1 | |||
|} | |||
There are also [[List of special scrolls in Dragon Quest II HD-2D Remake|scrolls that teaches the Harvest Moon, Hypnowhip, & Spooky Aura]] skills on the tower's second, fourth, & sixth floors respectively. | |||
====Monsters==== | |||
{| class="wikitable" | |||
|- | |||
| [[File:Cosmic chimaera I & II HD sprite.png|100px|link=Cosmic chimaera]] || [[File:Headhunter I & II HD sprite.png|link=Headhunter]] || [[File:Minidemon DQ III HD sprite.png|link=Minidemon]] || [[File:Rockbomb DQ III HD sprite.png|link=Rockbomb]] || [[File:Smackanape DQ III HD sprite.png|link=Smackanape]] || [[File:Whackolyte I & II HD sprite.png|link=Whackolyte]] || [[File:Antlerkazam I & II HD sprite.png|link=Antlerkazam]] || [[File:Lunagriff I & II HD sprite.png|link=Lunagriff]] | |||
|} | |||
==In other languages== | |||
{{OtherLanguages | |||
|es=Torre Plenilunio|es-meaning=''Full Moon Tower'', from ''{{tt|plenilunio|full moon}}'' | |||
|les=Torre de la Luna|les-meaning=''Tower of the Moon'' | |||
|fr=Tour de la Lune|fr-meaning=''Tower of the Moon'' | |||
|de=Vollmondturm|de-meaning=''Full Moon Tower'' | |||
|it=Torre della Luna|it-meaning=''Tower of the Moon'' | |||
|ko=만월의 탑, ''Manwol-ui Tap''|ko-meaning=''Tower of the Full Moon'' | |||
|zh-cn=满月塔, ''Mǎnyuè Tǎ''|zh-cn-meaning=''Full Moon Tower'' | |||
|zh-tw=滿月之塔, ''Mǎnyuè zhī Tǎ''|zh-tw-meaning=''Tower of the Full Moon'' | |||
}} | |||
==Map & Gallery== | ==Map & Gallery== | ||
<center><gallery> | <center><gallery> | ||
Tower of the moon interior I & II HD concept art.png|Interior concept art. | |||
DQ II NES Tower of Moon.png|Map. ({{NES}}}} | DQ II NES Tower of Moon.png|Map. ({{NES}}}} | ||
DQ II SFC Tower Of The Moon.png|Map. ({{SFC}}) | DQ II SFC Tower Of The Moon.png|Map. ({{SFC}}) | ||
Tower of the Moon 1F map I & II HD2D.png|HD map | |||
Tower of the Moon 2F map I & II HD2D.png | |||
Tower of the Moon 3F map I & II HD2D.png | |||
Tower of the Moon 4F map I & II HD2D.png | |||
Tower of the Moon 5F map I & II HD2D.png | |||
Tower of the Moon 6F map I & II HD2D.png | |||
DQ II Android Tower Of The Moon Entrance.jpg | |||
DQ II Android Tower Of The Moon 1.jpg|Tower of the Moon. ([[Cell phone]]) | DQ II Android Tower Of The Moon 1.jpg|Tower of the Moon. ([[Cell phone]]) | ||
DQ II Android Tower Of The Moon 2.jpg| | DQ II Android Tower Of The Moon 2.jpg| | ||
</gallery></center> | </gallery></center> | ||
{{DQII}} | {{DQII}} | ||
{{DQI&IIHD}} | |||
[[Category:Dragon Quest II locations]] | [[Category:Dragon Quest II locations]] | ||
[[Category:Dragon Quest II HD-2D Remake locations]] | |||
Latest revision as of 05:16, 25 September 2026
The Tower of the Moon is a tower dungeon in Dragon Quest II. It is located directly south of Slewse in the western hemisphere of Greater Alefgard. It is accessible only by Ship and only after using the Floodgate Key on the floodgates in Slewse releases enough water for the vessel to sail over the submerged land. The moonshard which is necessary for entry into the Volcanic Grotto is found here.
| Dungeon | |
|---|---|
| Tower of the Moon | |
 HD concept art | |
| Japanese | 満月の塔 |
| Romaji | Mangetsu no tō (Fullmoon Tower) |
| Game | Dragon Quest II Dragon Quest II HD-2D Remake |
| Old localization | Luna/Lune tower |
AppearancesEdit
Dragon Quest II: Luminaries of the Legendary LineEdit
MoonshardEdit
To find your way to the moonshard, you must head to the staircase straight south from the entrance. On floor 2F, head north and take the staircase in the central room. Make your way up to floor 5F, and take the staircase locked behind two doors. From there, its a straight shot down to the first floor, where an old man waits with your prize.
Other treasuresEdit
(NES version)Edit
|
(GBC version)Edit
|
MonstersEdit
- Whackolyte
- Heyedra
- Bloody hand
- Gargoyle
- Mummy
- Ghoul
- Orc chieftain
- Headhunter
- Drackmage
- Magic marionette
- Liquid metal slime
- Terrordactyl
Nearby monstersEdit
- Orc chieftain
- Bloody hand
- Liquid metal slime
- Brainy badboon
- Headhunter
- Magic marionette
- Drackmage
- Dirty rat
- Sorcerer
Dragon Quest II HD-2D RemakeEdit
The Scions of Erdrick are made aware of the tower when first speaking to Roge Fastfinger in the jail of Burrowell. The eccentric man explains that members of the Children of Hargon have taken residence in the tower and have used a strange jewel to do something peculiar to the minds of the people of Slewse, reducing them to mere children in adult bodies. Roge had locked the floodgates and taken the key with him as he fled the region, hoping that the monsters would be trapped in the tower long enough for him to find help, and he gives the key to the Scions. Upon opening the gates and flooding the river bed, the quartet are able to reach the tower by sailing to a lake just south of Slewse.
The Tower of the Moon is more akin to an ivy-covered ziggurat than a typical tower, walled by ceremonial spires. The windows and spire caps are all done in a rich sky blue, with the dome on the apex being a cream colour to represent the moon over the vast sky. The interior is a combination of navy blue with gold trim, and several constellations can be found on the walls and floors. As the player ascends the six storeys, the air is filled with a purple mist.
Upon entering the Scions of Erdrick witness an antlerkazam furiously scolding a group of people for seeing through the lies that the Children of Hargon told to lure them into the tower and decides to slaughter them then and there instead of tolerating their stubbornness to the top of the tower. The Scions of Erdrick make quick work of the monster, and the people they saved explained that the beast tricked them by pretending to be a kindly old priest to lower their guard. A young man states the group began to suspect him despite his disguise when he told them the Children of Hargon would reward them for committing crimes against their own neighbors; when the Princess of Moonbrooke points out that this is similar to what was seen in Rippleport and Moonahan, the Princess of Cannock suggests the tower may well be the cult's base of operations outside of Rendarak.
Reaching the top floor, the Scions witness the Lunagriff and a whackolyte are using a blood-red crystal to hypnotize a group of Slewse villagers into acting like children, ordering them to act upon every desire and give no heed for others. The quartet of heroes interrupt the brainwashing and press the Lunagriff for information. The birdbrain reveals that the operation was Pazuzu's idea, who realized that humans could be made to commit acts of wickedness more easily should they have the minds of petulant and selfish children. Ordering the whackolyte to take the crystal and flee to Pazuzu in the Volcanic Grotto before engaging the Scions.
Once the beast is dealt with, the Princess of Moonbrooke and the Prince of Cannock wonder why the Children of Hargon are so hellbent on spreading misery among humanity while the Princess of Cannock retrieves the moonshard from the Lunagriff's death grip. None of the four understand what purpose it serves but note that they can hear the sounds of waves emanating from it, and decide to return to Burrowell to inform Roge of what transpired as well convene with Elmoo about the whereabouts of Pazuzu.
TreasuresEdit
 |
 |
 |
 |
 |
 |

|
| x1 | x1 | x2 | x1 | x2 | x1 | x1 |
There are also scrolls that teaches the Harvest Moon, Hypnowhip, & Spooky Aura skills on the tower's second, fourth, & sixth floors respectively.
MonstersEdit
 |
 |
 |
 |
 |
 |
 |

|
In other languagesEdit
| Language | Translation | Meaning |
 Español castellano Español castellano | Torre Plenilunio | Full Moon Tower, from plenilunio |
 Español latinoamericano Español latinoamericano | Torre de la Luna | Tower of the Moon |
 Français Français | Tour de la Lune | Tower of the Moon |
 Deutsch Deutsch | Vollmondturm | Full Moon Tower |
 Italiano Italiano | Torre della Luna | Tower of the Moon |
 한국어 한국어 | 만월의 탑, Manwol-ui Tap | Tower of the Full Moon |
 简体中文 简体中文 | 满月塔, Mǎnyuè Tǎ | Full Moon Tower |
 繁體中文 繁體中文 | 滿月之塔, Mǎnyuè zhī Tǎ | Tower of the Full Moon |
Map & GalleryEdit

Interior concept art.

Map. (NES}}

Map. (SFC)

HD map


Tower of the Moon. (Cell phone)