Cantlin: Difference between revisions
Antiyonder (talk | contribs) No edit summary |
(→{{DQ}}) |
||
| (12 intermediate revisions by 5 users not shown) | |||
| Line 1: | Line 1: | ||
{{LocationInfobox | {{LocationInfobox | ||
|game = {{ | |game = {{Dragon Quest}}<br>{{DQB}} | ||
|title = Cantlin | |title = Cantlin | ||
|type= City | |type= City | ||
|image = [[Image:Mercado.jpg|center| | |image = [[Image:Mercado.jpg|center|250px]] | ||
|caption = Official art of Cantlin. | |caption = Official art of Cantlin. | ||
|japanese=メルキド | |japanese=メルキド | ||
| Line 16: | Line 16: | ||
==Appearances== | ==Appearances== | ||
==={{DQ}}=== | ==={{DQ}}=== | ||
The city of Cantlin is typically the last city the player visits due to | The city of Cantlin is typically the last city the player visits due to its distance from [[Tantegel]] and the strength of the surrounding monsters. When first approached, the city is guarded by a [[Golem]] whose battle is triggered when the {{Hero 1}} first attempts to enter the ramparts surrounding the city. This battle is a one time event, and is the only place where a Golem can be encountered. The weapons and armor shop in Cantlin sells the best equipment the character can purchase in the game. [[File:DQB Golem.png|right|thumb|150px|{{DQB}}]]Despite all of this, Cantlin is a not a required location to visit in order to complete the game. | ||
====Locked doors==== | ====Locked doors==== | ||
The first game has two doors in southwestern part of town, the first of which leads to man with [[Damdara|clues]] to find | The first game has two doors in southwestern part of town, the first of which leads to man with [[Damdara|clues]] to find [[Erdrick's Armour]], and the second to the hidden shops. | ||
====Shops & Services==== | ====Shops & Services==== | ||
| Line 25: | Line 25: | ||
| valign="top" width="50%" | | | valign="top" width="50%" | | ||
{{ItemShop/Start|title=NorthwestItem Shop|subtitle=}} | {{ItemShop/Start|title=NorthwestItem Shop|subtitle=}} | ||
{{ItemShop/Item|name=Medicinal herb|price=8|attributes=}} | {{ItemShop/Item|name=Medicinal herb|price=8|attributes=Restores 20-35 {{HP}} to the Hero.}} | ||
{{ItemShop/Item|name=Torch|price=8|attributes=}} | {{ItemShop/Item|name=Torch|price=8|attributes=Lights up the darkness of dungeons.}} | ||
{{ItemShop/End|note=}} | {{ItemShop/End|note=}} | ||
| Line 32: | Line 32: | ||
| valign="top" width="50%" | | | valign="top" width="50%" | | ||
{{ItemShop/Start|title=Western Item Shop|subtitle=}} | {{ItemShop/Start|title=Western Item Shop|subtitle=}} | ||
{{ItemShop/Item|name=Chimaera wing|price=25|attributes=}} | {{ItemShop/Item|name=Chimaera wing|price=25|attributes=Instantly teleports the Hero to [[Tantegel]] Castle.}} | ||
{{ItemShop/Item|name=Dragon's scale|price=20|attributes=}} | {{ItemShop/Item|name=Dragon's scale|price=20|attributes=Defence +5}} | ||
{{ItemShop/End|note=}} | {{ItemShop/End|note=}} | ||
| Line 39: | Line 39: | ||
| valign="top" width="50%" | | | valign="top" width="50%" | | ||
{{ItemShop/Start|title=Holy water Shop|subtitle=}} | {{ItemShop/Start|title=Holy water Shop|subtitle=}} | ||
{{ItemShop/Item|name=Holy water|price=20|attributes=}} | {{ItemShop/Item|name=Holy water|price=20|attributes=Wards off weaker monsters.}} | ||
{{ItemShop/End|note=}} | {{ItemShop/End|note=}} | ||
| Line 49: | Line 49: | ||
{{ArmourShop/Start|title=Northern Armor Shop|subtitle=}} | {{ArmourShop/Start|title=Northern Armor Shop|subtitle=}} | ||
{{ArmourShop/Item|name=Leather armour|price=70|attributes= | {{ArmourShop/Item|name=Leather armour|price=70|attributes=Defence +4}} | ||
{{ArmourShop/Item|name=Chain mail|price=300|attributes= | {{ArmourShop/Item|name=Chain mail|price=300|attributes=Defence +10}} | ||
{{ArmourShop/Item|name=Iron shield|price=800|attributes= | {{ArmourShop/Item|name=Iron shield|price=800|attributes=Defence +10}} | ||
{{ArmourShop/End|note=}} | {{ArmourShop/End|note=}} | ||
| Line 60: | Line 60: | ||
{{ArmourShop/Start|title=Southern Armor Shop|subtitle=}} | {{ArmourShop/Start|title=Southern Armor Shop|subtitle=}} | ||
{{ArmourShop/Item|name=Full plate armour|price=3,000|attributes= | {{ArmourShop/Item|name=Full plate armour|price=3,000|attributes=Defence +24}} | ||
{{ArmourShop/Item|name=Magic armour|price=7,700|attributes= | {{ArmourShop/Item|name=Magic armour|price=7,700|attributes=Defence +24}} | ||
{{ArmourShop/End|note=}} | {{ArmourShop/End|note=}} | ||
{{WeaponShop/Start|title=Magic Key Weapon Shop|subtitle=}} | {{WeaponShop/Start|title=Magic Key Weapon Shop|subtitle=}} | ||
| Line 70: | Line 69: | ||
{{ArmourShop/Start|title=Magic Key Armor Shop|subtitle=}} | {{ArmourShop/Start|title=Magic Key Armor Shop|subtitle=}} | ||
{{ArmourShop/Item|name=Silver shield|price=14,800|attributes= | {{ArmourShop/Item|name=Silver shield|price=14,800|attributes=Defence +20}} | ||
{{ArmourShop/End|note=}} | {{ArmourShop/End|note=}} | ||
====Treasures==== | ====Treasures==== | ||
*[[Seed of resilience]] (dresser in the inn) | *[[Seed of resilience]] (dresser in the [[inn]]) | ||
*[[Magic Key]] (dresser in southwestern man's house) | *[[Magic Key]] (dresser in southwestern man's house) | ||
====Nearby | ====Nearby {{MFamilies}}s==== | ||
*[[Cosmic chimaera]] | *[[Cosmic chimaera]] | ||
*[[Green dragon]] | *[[Green dragon]] | ||
| Line 87: | Line 86: | ||
==={{DQ3}}=== | ==={{DQ3}}=== | ||
The people of Cantlin have given into despair due to [[Zoma]]'s tyranny, with the shops being left unattended and the merchants languishing in the streets. A family above the unmanaged inn despair as their child is slowly succumbing to his misery of living in such a world, and even withdraws his plea to The {{Hero 3}} to slay the archfiend out of hopelessness. The man in the next room over researches the technique to build an artificial guardian for the town, but with the people seeing the futility in even tending the fields it is a wasted effort. The only person not depressed is | The people of Cantlin have given into despair due to [[Zoma]]'s tyranny, with the shops being left unattended and the merchants languishing in the streets. A family above the unmanaged inn despair as their child is slowly succumbing to his misery of living in such a world, and even withdraws his plea to The {{Hero 3}} to slay the archfiend out of hopelessness. The man in the next room over researches the technique to build an artificial guardian for the town, but with the people seeing the futility in even tending the fields it is a wasted effort. The only person not depressed is {{Galen}} the bard, who traveled to the town after a falling out with his parents. | ||
A [[Monster Arena]] lies beneath the town, where some citizens go to project themselves into the life and death struggles of the monsters to feel alive. It's just a distraction from the somber reality that surrounds them, and the only one to not dupe themselves into the false furor is a little girl looking for her father. | A [[Monster Arena]] lies beneath the town, where some citizens go to project themselves into the life and death struggles of the monsters to feel alive. It's just a distraction from the somber reality that surrounds them, and the only one to not dupe themselves into the false furor is a little girl looking for her father. | ||
| Line 93: | Line 92: | ||
The elder of Cantlin will instruct the player to travel to the [[Sanctum]] after acquiring the [[Sunstone]], [[Staff of Rain]], and [[Sacred amulet]]. This will open the way to [[Zoma's Citadel]]. | The elder of Cantlin will instruct the player to travel to the [[Sanctum]] after acquiring the [[Sunstone]], [[Staff of Rain]], and [[Sacred amulet]]. This will open the way to [[Zoma's Citadel]]. | ||
After the devil is defeated, the people of Cantlin will find new meaning in life and beseech the | After the devil is defeated, the people of Cantlin will find new meaning in life and beseech the {{Hero 3}} as their savior, with the languishing child becoming active again and the researching tossing away his notes for future generations to pick up instead now that the town no longer needs a guardian. | ||
====Treasures==== | ====Treasures==== | ||
| Line 114: | Line 113: | ||
*[[T'n'T ticket]] (left drawer upstairs in the larger shop on the left side of the town) | *[[T'n'T ticket]] (left drawer upstairs in the larger shop on the left side of the town) | ||
====Nearby | ====Nearby {{MFamilies}}s==== | ||
*[[Boss troll]] | *[[Boss troll]] | ||
*[[Chimaera]] | *[[Chimaera]] | ||
| Line 121: | Line 120: | ||
*[[Muddy hand]] | *[[Muddy hand]] | ||
*[[Skelegon]] | *[[Skelegon]] | ||
*[[Stone guardian]] (Called by Muddy hand) | *[[Stone guardian]] (Called by [[Muddy hand]]) | ||
*[[Walking corpse]] (Called by Darth voodoo) | *[[Walking corpse]] (Called by [[Darth voodoo]]) | ||
*[[Voodoogooder]] (Called by Ghoul) | *[[Voodoogooder]] (Called by [[Ghoul]]) | ||
==={{DQM}}=== | |||
A Golem appears as the boss of the Gate of Talisman traveler's gate, with the level being based on the encounter with the Golem in Cantlin from the original game. After defeating it, it will join [[Terry]] as a companion. | |||
==={{DQB}}=== | ==={{DQB}}=== | ||
''See it's [[Challenges_(Dragon_Quest_Builders)#Chapter_1_challenges|list of challenges]].'' | |||
[[File:DQB Alefgard Map Ch1.jpeg|thumb|right|Map of Alefgard, highlighting the Cantlin region.]] | [[File:DQB Alefgard Map Ch1.jpeg|thumb|right|Map of Alefgard, highlighting the Cantlin region.]] | ||
Cantlin serves as the first area visited by the Builder, and it is the region less affected by the Dragonlord's influence. The Cantlin region consists of four different areas, the town region and three other areas that can be reached by using teleportals: | |||
*[[The Ravaged Realm|Cantlin Plains]], where the base will be located. | *[[The Ravaged Realm|Cantlin Plains]], where the base will be located. | ||
*[[Hammerhood Heights]]. | *[[Hammerhood Heights]], where the builder learns how to make mallets. | ||
*[[The Damdara Desert]]. | *[[The Damdara Desert]]. | ||
*[[Rockbomb Ravine]]. | *[[Rockbomb Ravine]]. | ||
| Line 136: | Line 138: | ||
These areas collectively serve as the tutorial for the game, easing the player into the concepts of building, crafting, hunger, and the passage of time. Since the hunger meter and passage of time are activated after finishing Pippa's room request, it's adviced players explore and stock as much as possible before doing said quest. | These areas collectively serve as the tutorial for the game, easing the player into the concepts of building, crafting, hunger, and the passage of time. Since the hunger meter and passage of time are activated after finishing Pippa's room request, it's adviced players explore and stock as much as possible before doing said quest. | ||
In this chapter, The Builder learns the dark truth of the time [[Alefgard]] fell, and how the survivors from Cantlin succumbed to selfishness which only made the Golem rage and destroy the citadel in order to stop humans from hurting each other. Larouche, despite believing the Builder's efforts will only bring chaos once again, does nothing to stop the Builder and the other villagers from rebuilding Cantlin | In this chapter, The Builder learns the dark truth of the time [[Alefgard]] fell, and how the survivors from Cantlin succumbed to selfishness which only made the Golem rage and destroy the citadel in order to stop humans from hurting each other. While most of the villagers believe the Builder will bring Cantlin to its former glory and defeat the Golem, one of them -a villager named Larouche- isn't so certain. Larouche, despite believing the Builder's efforts will only bring chaos once again, does nothing to stop the Builder and the other villagers from rebuilding Cantlin. In the end, the [[Golem]] is defeated and Cantlin is bursting with life once more. | ||
==={{DQB2}}=== | ==={{DQB2}}=== | ||
Despite Cantlin not appearing directly in the game, it is also established that the [[Builder (Dragon Quest Builders 2)|Player]] is originally from Cantlin. | Despite Cantlin not appearing directly in the game, it is also established that the [[Builder (Dragon Quest Builders 2)|Player]] is originally from Cantlin. | ||
==={{DQTact}}=== | |||
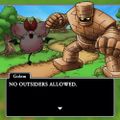
The party comes across the city in Chapter 3, Episode 5 of the game's limited ''Dragon Quest I'' event, hoping to find some way that will allow them to return to Orchesterra. They are stopped by the [[Golem]], who refuses to let any visitors into the city. [[Mindini]] becomes enraged and tries to force her way in with brute force, much to the frustration of her companions. | |||
==Etymology== | ==Etymology== | ||
| Line 166: | Line 151: | ||
==Gallery== | ==Gallery== | ||
<center><gallery> | <center><gallery> | ||
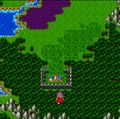
Golem Battle.png| | Golem Battle.png|{{I}} Golem battle. | ||
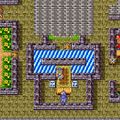
DQ NES Cantlin.png|Map for {{Dragon Warrior}}. ({{NES}}) | |||
Cantlin | DQ SFC Cantlin.png|Map for {{I}}. ({{SFC}}) | ||
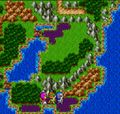
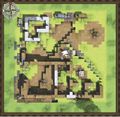
DQ III NES Cantlin.png|Map for {{Dragon Warrior III}}. ({{NES}}) | |||
DQ III SFC Cantlin.png|Map for {{III}}. ({{SFC}}) | |||
The ravaged realm.jpg|The Ravaged Realm. | The ravaged realm.jpg|The Ravaged Realm. | ||
Hammerhood Heights.jpg|Hammerhood Heights. | Hammerhood Heights.jpg|Hammerhood Heights. | ||
Damdara Desert.jpg|Damdara Desert. | Damdara Desert.jpg|Damdara Desert. | ||
Rockbomb ravine.jpg|Rockbomb Ravine. | Rockbomb ravine.jpg|Rockbomb Ravine. | ||
DQ Stars Android Soldier of Cantlin.jpg|Appearance in {{Stars}}. | DQ Android Cantlin Entrance.jpg| | ||
DQ Android Cantlin Temple.jpg| | |||
DQ II Android Site Of Cantlin.jpg|Former site of Cantlin and the [[Shrine of the Spirit]] from {{II}}. ([[Cell phone]]) | |||
DQ III Android Cantlin.jpg|Cantlin from {{III}}. ([[Cell phone]]) | |||
DQ Stars Android Soldier of Cantlin.jpg|Appearance in {{Stars}}. ([[Cell phone]]) | |||
DQ Stars Android Elderly Man of Cantlin.jpg| | DQ Stars Android Elderly Man of Cantlin.jpg| | ||
Banner of light in use.jpg|Rubiss directing the player towards the ruins of Cantlin in | Banner of light in use.jpg|Rubiss directing the player towards the ruins of Cantlin in {{Builders}}. | ||
DQB_Cantlin_Start.jpeg|How the ruined city looks upon placing the [[Banner of Hope]]. | DQB_Cantlin_Start.jpeg|How the ruined city looks upon placing the [[Banner of Hope]]. | ||
DQT Cantlin.jpg|The [[Golem]] guarding the city in {{Tact}}. | |||
</gallery></center> | </gallery></center> | ||
| Line 186: | Line 178: | ||
[[Category:Dragon Quest III locations]] | [[Category:Dragon Quest III locations]] | ||
[[Category:Dragon Quest Builders locations]] | [[Category:Dragon Quest Builders locations]] | ||
[[Category:Dragon Quest Tact locations]] | |||
Latest revision as of 11:04, 29 March 2024
| City | |
|---|---|
| Cantlin | |
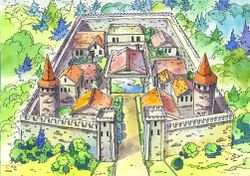
Official art of Cantlin. | |
| Japanese | メルキド |
| Rōmaji | Merukido |
| Game | Dragon Quest Dragon Quest Builders |
| Old localization | Mercado (GBC era) |
Cantlin is a walled city located in the south central region of Alefgard in Dragon Quest and Dragon Quest III: The Seeds of Salvation.
Cantlin is most famous for it's heavy fortifications and for being guarded by a Golem in the original game. It was recently featured in Dragon Quest Builders as the starting city, followed by Rimuldar.
Appearances[edit]
Dragon Quest[edit]
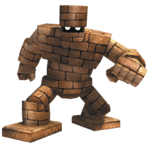
The city of Cantlin is typically the last city the player visits due to its distance from Tantegel and the strength of the surrounding monsters. When first approached, the city is guarded by a Golem whose battle is triggered when the Hero first attempts to enter the ramparts surrounding the city. This battle is a one time event, and is the only place where a Golem can be encountered. The weapons and armor shop in Cantlin sells the best equipment the character can purchase in the game.
Despite all of this, Cantlin is a not a required location to visit in order to complete the game.
Locked doors[edit]
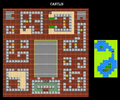
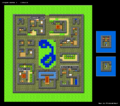
The first game has two doors in southwestern part of town, the first of which leads to man with clues to find Erdrick's Armour, and the second to the hidden shops.
Shops & Services[edit]
|
