| Dragon Quest VI (All) | |
|---|---|
| Weapon | Modifier(s) |
| Cypress stick | Attack +5 |
| Bamboo spear | Attack +5 |
| Oaken club | Attack +9 |
| Copper sword | Attack +12 |
| Boomerang | Attack +15 |
| Edged boomerang | Attack +25 |
| Chain sickle | Attack +27 |
| Steel broadsword | Attack +33 |
| Cautery sword | Attack+42 |
| Battleaxe | Attack+49 |
| Gracos' trident | Attack+58 |
| Platinum sword | Attack+60 |
| Rusty sword | Attack +63 |
| Magma Staff | Attack+63 |
| Flametang boomerang | Attack +65 |
| Dream blade | Attack +65 |
| Staff of resurrection | Attack +65 |
| Falcon blade | Attack +67 |
| Zombiesbane | Attack +80 |
| Fire blade | Attack +87 |
| Dragonsbane | Attack +95 |
| Sunderbolt blade | Attack +95 |
| Miracle sword | Attack +100 |
| Blizzard blade | Attack +105 |
| Sword of Ramias | Attack +130 |
| Metal king sword | Attack +130 |
Hero (Dragon Quest VI): Difference between revisions
From Dragon Quest Wiki
No edit summary |
Tag: Undo |
||
| (25 intermediate revisions by 14 users not shown) | |||
| Line 1: | Line 1: | ||
{{Character | {{Character | ||
|Name="Hero" | |Name="Hero" | ||
|Game= | |Game={{DQ6}} | ||
|Image=[[Image:DQVI_DS_Hero.png| | |Image=[[Image:DQVI_DS_Hero.png|200px|center|Artwork of the Hero for the DS remake, Dragon Quest VI: Realms of Revelation.]] | ||
|Sprite=[[Image:Dq6 hero-sprite.gif]] | |Sprite=[[Image:Dq6 hero-sprite.gif]]<br>[[Image:DQVI Hero mugshot.png|75px]] [[File:Somnia mimic transparent.png|100px]] | ||
|Japanese name= | |Japanese name= | ||
|Roumaji= | |Roumaji= | ||
|Title=Village Lad | |Title=Village Lad<br>{{spoiler|start}}Prince of {{Somnia U}} (After fusing with his real self.){{spoiler|end}} | ||
|Class=Hero | |Class=Hero | ||
|Race=Human | |Race=Human | ||
|Age=17 | |Age=17 | ||
|Voice Actor | |Voice Actor= [[Tomokazu Seki]] (''[[Dragon Quest VI CD Theater|CD Theater]]'') | ||
|}} | |}} | ||
The '''[[Hero]]''' of {{Dragon Quest VI}} begins his journey awakening from a strange dream in the village of [[Weaver's Peak]]. He lives there with his sister [[Tania]]. | |||
The ''' | The Hero has many official names in Japanese. The default name for him in the games is '''Rek''' (レック). In the ''[[Dragon Quest VI CD Theater|CD theater]]'' drama, his name is '''Will''' (ウィル). In the manga, his name is '''Botts''' (ボッツ). In the novelization, his name is '''Iza''' (イザ). | ||
The Hero | ==Appearance and personality== | ||
The Hero is a young, physically fit man with spiky blue hair. He wears an orange, asymmetrical toga over purple shorts and under a teal, sleeveless coat. For accessories, he wears gold earrings, a necklace, a torc on his right arm, and a large belt with a pterodactyl emblem in the center. His wears fingerless gloves, steel-toed boots, and wrappings over his calves and feet. | |||
== | As with all protagonists in the series, the Hero is a silent character upon which the player is meant to project their own personality. However, flashbacks to the Hero's past show him being a caring older brother to his little sister. | ||
{{clear}} | |||
==Appearances== | |||
==={{DQ6}}=== | |||
{{spoiler|start}} | {{spoiler|start}} | ||
The game begins in the middle of the Hero's then-unexplained quest to defeat the Dread | The game begins in the middle of the Hero's then-unexplained quest to defeat the Dread Fiend [[Murdaw]]. He is accompanied by two companions, [[Carver]] and [[Milly]]. The trio, with the help of a [[The mysterious dragon|small dragon]] summoned by [[Milly]], reach the Dread Fiend's castle situated high above the mountains. When they confront their foe, however, [[Murdaw]] will unexpectedly overcome the {{Party 6}}, banishing them to parts unknown. | ||
The Hero | The Hero wakes up from what appeared to be a dream and is greeted by an unknown girl, [[Tania]], who claims to be his sister. The Hero, who is amnesiac at this point, is asked by the mayor of his supposed home village, [[Weaver's Peak]], to go to [[Haggleton]] to sell goods in order to buy a crown for the village's upcoming ceremony. The Hero gladly accepts and begins the first step of his journey. When he returns to the village the celebration begins. When Tania who is praying to the [[Goddess]] becomes possessed by the [[Rubiss|Spirit of the Mountains]], the Hero is told that he must venture out and defeat the demon king [[Murdaw]] and discover his true identity. | ||
The | The Hero arrives at the kingdom of Somnia, a city that never sleeps, where he enlists in the King's army alongside [[Carver]], neither of whom are able to recognize one another. The recruits are instructed by [[List_of_characters_in_Dragon_Quest_VI#Major_Characters|Captain Blade]] to retrieve a [[Restless heart]] from [[Gardsbane Tower]] as a symbol of a warrior's strength. While all the other recruits cop out, either the Hero or [[Carver]] will retrieve the heart (the victor depends on whether the Hero is successful in defeating [[Garrett]] or not; the outcome will not change). The two become travelling companions regardless of the victor and, during their travels, come across moments where they are not visible to the eyes of everyone else. They eventually meet up with [[Milly]] at [[Port Haven]], who is able to see them. She introduces the duo to her master, [[Madame Luca Luminista]], who uses [[List_of_characters_in_Dragon_Quest_VI#Major_Characters|Dream dew]] to make the two visible. [[Milly]] joins the {{Party 6}} at this point. | ||
The | The three continue the journey where it becomes evident that there are two distinct worlds, the [[Lower World]] and the [[Upper World]] also known as the Real World and Dream World respectively, both of which are being terrorized by the same being. During their travels in the [[Lower World]], they encounter [[Ashlynn]], a mysterious girl who is similarly invisible to her surroundings until the Hero uses Dream dew on her. [[Ashlynn]] joins the Hero at this point as well. Later on, the {{Party 6}} subdues a ravaging horse, [[Peggy Sue]]. | ||
The Hero and his [[Party (Dragon Quest VI)|companions]] reach {{Somnia L}} in the [[Lower World]] where, much to his confusion, he is mistaken to be the King's son. The Hero takes advantage of this confusion to enter the otherwise-inaccessible castle wearing a [[Noble garb]] but is eventually caught and kicked out, though not before finding out that this King Somnus is in a state of never-ending sleep. | |||
The recent events caused the King and Queen of | Under [[Madame Luca Luminista|Madame Luca]]'s instructions, the party obtain the [[Ra's Mirror]], an object that reveals the true identity in a case of deception, and take it to King Somnus of the [[Upper World]]. The Ra's Mirror reveals that the king is actually [[List_of_characters_in_Dragon_Quest_VI#Non-Combatant_Members|Queen Apnea]] and that the real king is missing. The queen accompanies the {{Party 6}} as they journey to the [[Underkeep]], [[Murdaw]]'s underground lair. The {{Party 6}} encounter and defeat [[Murdaw]]. However, the Ra's Mirror]] reveals that "Murdaw]]" is actually the missing King Somnus. The recent events caused the King and Queen of [[Lower World]] Somnus to wake from their eternal slumber. While the {{Party 6}} is initially imprisoned for their attempts at deception, the King and Queen recognize the {{Party 6}} from their nightmare and give them permission to engage the real [[Murdaw]] in battle. | ||
The Hero and the | The Hero and the {{Party 6}} journey to the newly-accessible lands that lead to [[Murdaw]]'s lair, during which they meet a new companion, [[Nevan]], as well as a new [[ship]]. The {{Party 6}} journey to [[Murdaw's Keep]], where they encounter the real [[Murdaw]]. The same events from the beginning of the game unfold once again, and the Hero is once again thrust into the [[Upper World]]'s [[Weaver's Peak]]. However, he breaks through the deception this time using the [[Ra's Mirror]] and is returned to [[Murdaw's Keep]], where the party finally engages the [[Dread Fiend]] in battle. [[Murdaw]] is finally defeated, and the {{Party 6}} returns to {{Somnia L}}. The Hero is given the [[Lightning staff]] as a reward. | ||
The Hero sets off on another journey to find his "real" self. During his travels, it becomes clear that Murdaw was not the only threat and there are other Dread Fiends terrorizing both worlds. The | The Hero sets off on another journey to find his "real" self. During his travels, it becomes clear that [[Murdaw]] was not the only threat and there are other Dread Fiends terrorizing both worlds. The {{Party 6}} also learns of and collects a set of [[Zenithian Equipment|Legendary equipment]] that only the Hero can equip. Eventually, the Hero finds [[Weaver's Peak]] of the [[Lower World]], where he finds the village to be under attack by {{MFamilies}}s. He and the {{Party 6}} fight their way into [[Tania]]'s home, where they find the [[Lower World]] version of the Hero battling the leader of the {{MFamilies}}s, a [[Demon-at-arms]]. The Hero and his other self merge into one, resulting in the Hero to regain all his lost memories and learn a new spell, [[Zap]] (this can happen before or after defeating the [[Demon-at-arms]]; other than the difficulty of the boss battle, the outcome will not be any different). Upon the fusion, the Hero will learn his true identity, which is indeed that he is the Prince of {{Somnia L}}, who disappeared shortly before the start of the game in a quest to defeat [[Murdaw]]. | ||
After collecting the full set of the Legendary | After collecting the full set of the [[Zenithian Equipment|Legendary Equipment]], the Hero comes across the [[Shrine of Legend]] where he summons the [[Stormsgate Citadel (boss)|Stormsgate Citadel]] that must be defeated in battle. The castle will turn out to be [[Cloudsgate Citadel]], which is currently occupied by [[Dhuran]], the last of the four Dread Fiends terrorizing the two worlds. Upon defeat, [[Dhuran]] reveals that he and the other [[Dread Fiend]]s are minions of the Archfiend [[Mortamor]], the true main antagonist. Upon his defeat, the {{Party 6}} recruits [[Terry]], a swordsman whom they encountered frequently on their journey and who happens to be [[Milly]]'s long-lost brother. | ||
The Hero is able to gain access to the [[Dread Realm]], the dark world where Mortamor resides | The Hero is able to gain access to the [[Dread Realm]], the dark world where Mortamor resides upon unlocking [[Peggy Sue]]'s real powers at the [[Pillar of Pegasus]]. The now fully-formed {{Party 6}} journey to the depths of the realm, where with the aid of Supreme Sages Benjamin and Isaac, gain access to [[Mortamor's Dreadlair]]. The Hero and his [[Party (Dragon Quest VI)|companions]] engage the Demon Lord in combat, where they win and vanquish the source of the worlds' evils once and for all. | ||
The Hero and his companions return to the | The Hero and his [[Party (Dragon Quest VI)|companions]] return to the [[Upper World]], where they find out that due to Mortamor's death, the Dream World will no longer exist. To his horror, this would mean that [[Ashlynn]] would cease to exist as well since she does not have a [[Lower World]] counterpart like the rest of the {{Party 6}}. The Hero parts ways with his companions and returns to his kingdom, where he will prepare to resume his role as the Prince of {{Somnia L}}. Sometime afterwards, the Hero joins [[Milly]], [[Carver]], [[Nevan]] and [[Terry]] in [[Madame Luca Luminista|Madame Luca]]'s house, where they witness through [[Milly]]'s crystal ball not only the [[Zenith Dragon|start of a new era]] but that [[Ashlynn]] is alive and well, residing in the castle that will soon come to be called [[Zenithia]]. | ||
{{spoiler|end}} | {{spoiler|end}} | ||
{{clear}} | |||
==Base | ====Base stats==== | ||
{| style="width:55%; height:100px; text-align:center" border="1" | {| style="width:55%; height:100px; text-align:center" border="1" | ||
|-<---!Headings are up first.!---> style="font-weight:bold; background:#A3AB47" | |-<---!Headings are up first.!---> style="font-weight:bold; background:#A3AB47" | ||
| Line 51: | Line 56: | ||
| Level || 1 || 99 | | Level || 1 || 99 | ||
|- | |- | ||
| HP || 28 || 800 | | {{HP}} || 28 || 800 | ||
|- | |- | ||
| MP || 0 || 700 | | {{MP}} || 0 || 700 | ||
|- | |- | ||
| Strength || 11 || 350 | | {{Strength}} || 11 || 350 | ||
|- | |- | ||
| Agility || 6 || 200 | | {{Agility}} || 6 || 200 | ||
|- | |- | ||
| Resilience || 3 || 210 | | {{Resilience}} || 3 || 210 | ||
|- | |- | ||
| Wisdom || 5 || 330 | | {{Wisdom}} || 5 || 330 | ||
|- | |- | ||
| Style || 5 || 100 | | {{Style}} || 5 || 100 | ||
|- | |- | ||
| Initial gear ||colspan=2|[[Cypress stick]], [[Plain clothes]] | | Initial gear ||colspan=2|[[Cypress stick]], [[Plain clothes]] | ||
|} | |} | ||
{{clear}} | |||
== | ====Abilities==== | ||
The Hero only requires one mastered [[ | The Hero only requires one mastered [[List of vocations in Dragon Quest VI|vocation]] to attain the {{Hero V}} {{Vocation}}, as opposed to the four necessitated for other characters. He also learns several unique skills regardless of profession. | ||
{| style="width:65%; height:100px; text-align:center" border="1" | {| style="width:65%; height:100px; text-align:center" border="1" | ||
|-<---!Headings are up first.!---> style="font-weight:bold; background:#9747AB" | |-<---!Headings are up first.!---> style="font-weight:bold; background:#9747AB" | ||
| Name || MP || Level || Target || Description | | Name || {{MP}} || Level || Target || Description | ||
|- style="font-weight:normal" | |- style="font-weight:normal" | ||
!bgcolor="#a1a1a1"| | !bgcolor="#a1a1a1"|[[Recall]]* | ||
|0 | |0 | ||
|1 | |1 | ||
|Self | |Self | ||
| | |Used to recall the memorized speeches of people. | ||
|- | |- | ||
!bgcolor="#a1a1a1"|[[Heal]] | !bgcolor="#a1a1a1"|[[Heal]] | ||
| Line 85: | Line 91: | ||
|4 | |4 | ||
|One ally | |One ally | ||
|Restores at least 30 HP to a single ally. | |Restores at least 30 {{HP}} to a single ally. | ||
|- | |- | ||
!bgcolor="#a1a1a1"|[[Peep]] | !bgcolor="#a1a1a1"|[[Peep]] | ||
| Line 91: | Line 97: | ||
|6 | |6 | ||
|One item | |One item | ||
|Reveals the nature of the treasure in a | |Reveals the nature of the treasure in a {{Chest}}. Also enables item [[Appraise|appraisal]]. | ||
|- | |- | ||
!bgcolor="#a1a1a1"|[[Sap]] | !bgcolor="#a1a1a1"|[[Sap]] | ||
| Line 97: | Line 103: | ||
| 7 | | 7 | ||
| One enemy | | One enemy | ||
| Reduces the | | Reduces the {{Defence}} of a single enemy. | ||
|- | |- | ||
!bgcolor="#a1a1a1"|[[Zoom]] | !bgcolor="#a1a1a1"|[[Zoom]] | ||
| Line 105: | Line 111: | ||
|Teleports to a previously visited town | |Teleports to a previously visited town | ||
|- | |- | ||
!bgcolor="#a1a1a1"|Remember | !bgcolor="#a1a1a1"|[[Remember]]* | ||
| 0 | | 0 | ||
| 10 | | 10 | ||
|Self | |Self | ||
| | |Used to deeply recall the memorized speeches of people. | ||
|- | |- | ||
!bgcolor="#a1a1a1"|Forget* | !bgcolor="#a1a1a1"|[[Forget]]* | ||
| 0 | | 0 | ||
| 13 | | 13 | ||
| Self | | Self | ||
| | |Used to forget the memorized speeches of people. | ||
|- | |- | ||
!bgcolor="#a1a1a1"| | !bgcolor="#a1a1a1"|[[Recollect]]* | ||
| 0 | | 0 | ||
| 18 | | 18 | ||
| Self | | Self | ||
| | |Used to greatly recall the memorized speeches of people. | ||
|- | |- | ||
!bgcolor="#a1a1a1"|[[Zap]] | !bgcolor="#a1a1a1"|[[Zap]] | ||
| Line 130: | Line 136: | ||
|} | |} | ||
'''Notes:''' | '''Notes:''' | ||
*The memory spells are related to conversations you can record with the | *The memory spells are related to conversations you can record with the X button. They are not present in the {{DS}} version. | ||
*Zap is learned through an event in the game. | *[[Zap]] is learned through an event in the game. | ||
{{clear}} | |||
==Equipment== | ====Equipment==== | ||
{{VersionTabs|Weapons|{{CharacterEquipmentList|header|title=Dragon Quest VI|subtitle=All|equipmentType=Weapon}} | {{VersionTabs|Weapons|{{CharacterEquipmentList|header|title=Dragon Quest VI|subtitle=All|equipmentType=Weapon}} | ||
{{CharacterEquipmentList|entry|item=[[Cypress | {{CharacterEquipmentList|entry|item=[[Cypress stick]]|statModifier=Attack +5}} | ||
{{CharacterEquipmentList|entry|item=[[Bamboo | {{CharacterEquipmentList|entry|item=[[Bamboo spear]]|statModifier=Attack +5}} | ||
{{CharacterEquipmentList|entry|item=[[Oaken | {{CharacterEquipmentList|entry|item=[[Oaken club]]|statModifier=Attack +9}} | ||
{{CharacterEquipmentList|entry|item=[[Copper | {{CharacterEquipmentList|entry|item=[[Copper sword]]|statModifier=Attack +12}} | ||
{{CharacterEquipmentList|entry|item= | {{CharacterEquipmentList|entry|item={{Boomerang W}}|statModifier=Attack +15}} | ||
{{CharacterEquipmentList|entry|item=[[Edged | {{CharacterEquipmentList|entry|item=[[Edged boomerang]]|statModifier=Attack +25}} | ||
{{CharacterEquipmentList|entry|item=[[Chain | {{CharacterEquipmentList|entry|item=[[Chain sickle]]|statModifier=Attack +27}} | ||
{{CharacterEquipmentList|entry|item=[[Steel | {{CharacterEquipmentList|entry|item=[[Steel broadsword]]|statModifier=Attack +33}} | ||
{{CharacterEquipmentList|entry|item=[[Cautery | {{CharacterEquipmentList|entry|item=[[Cautery sword]]|statModifier=Attack+42}} | ||
{{CharacterEquipmentList|entry|item=[[Battleaxe]]|statModifier=Attack+49}}{{CharacterEquipmentList|entry|item=[[Gracos' | {{CharacterEquipmentList|entry|item=[[Battleaxe]]|statModifier=Attack+49}} | ||
{{CharacterEquipmentList|entry|item=[[Rusty | {{CharacterEquipmentList|entry|item=[[Gracos' trident]]|statModifier=Attack+58}} | ||
{{CharacterEquipmentList|entry|item=[[Platinum sword]]|statModifier=Attack+60}} | |||
{{CharacterEquipmentList|entry|item=[[Rusty sword]]|statModifier=Attack +63}} | |||
{{CharacterEquipmentList|entry|item=[[Magma Staff]]|statModifier=Attack+63}} | {{CharacterEquipmentList|entry|item=[[Magma Staff]]|statModifier=Attack+63}} | ||
{{CharacterEquipmentList|entry|item=[[Flametang | {{CharacterEquipmentList|entry|item=[[Flametang boomerang]]|statModifier=Attack +65}} | ||
{{CharacterEquipmentList|entry|item=[[Dream | {{CharacterEquipmentList|entry|item=[[Dream blade]]|statModifier=Attack +65}} | ||
{{CharacterEquipmentList|entry|item=[[Staff of | {{CharacterEquipmentList|entry|item=[[Staff of resurrection]]|statModifier=Attack +65}} | ||
{{CharacterEquipmentList|entry|item=[[Falcon | {{CharacterEquipmentList|entry|item=[[Falcon blade]]|statModifier=Attack +67}} | ||
{{CharacterEquipmentList|entry|item=[[Zombiesbane]]|statModifier=Attack +80}} | {{CharacterEquipmentList|entry|item=[[Zombiesbane]]|statModifier=Attack +80}} | ||
{{CharacterEquipmentList|entry|item=[[Fire | {{CharacterEquipmentList|entry|item=[[Fire blade]]|statModifier=Attack +87}} | ||
{{CharacterEquipmentList|entry|item=[[Dragonsbane]]|statModifier=Attack +95}} | {{CharacterEquipmentList|entry|item=[[Dragonsbane]]|statModifier=Attack +95}} | ||
{{CharacterEquipmentList|entry|item=[[Sunderbolt | {{CharacterEquipmentList|entry|item=[[Sunderbolt blade]]|statModifier=Attack +95}} | ||
{{CharacterEquipmentList|entry|item=[[Miracle | {{CharacterEquipmentList|entry|item=[[Miracle sword]]|statModifier=Attack +100}} | ||
{{CharacterEquipmentList|entry|item=[[Blizzard | {{CharacterEquipmentList|entry|item=[[Blizzard blade]]|statModifier=Attack +105}} | ||
{{CharacterEquipmentList|entry|item= | {{CharacterEquipmentList|entry|item={{Sword of Ramias}}|statModifier=Attack +130}} | ||
{{CharacterEquipmentList|entry|item=[[Metal | {{CharacterEquipmentList|entry|item=[[Metal king sword]]|statModifier=Attack +130}} | ||
{{CharacterEquipmentList|note|text=}} | {{CharacterEquipmentList|note|text=}} | ||
{{CharacterEquipmentList|footer}}|Helmets| | {{CharacterEquipmentList|footer}}|Helmets| | ||
{{CharacterEquipmentList|header|title=Dragon Quest VI|subtitle=All|equipmentType=Helmet}} | {{CharacterEquipmentList|header|title=Dragon Quest VI|subtitle=All|equipmentType=Helmet}} | ||
{{CharacterEquipmentList|entry|item=[[Leather | {{CharacterEquipmentList|entry|item=[[Leather hat]]|statModifier=Defense +2}} | ||
{{CharacterEquipmentList|entry|item=[[Hardwood | {{CharacterEquipmentList|entry|item=[[Hardwood headwear]]|statModifier=Defense +6}} | ||
{{CharacterEquipmentList|entry|item=[[Iron | {{CharacterEquipmentList|entry|item=[[Iron helmet]]|statModifier=Defense +16}} | ||
{{CharacterEquipmentList|entry|item=[[Iron | {{CharacterEquipmentList|entry|item=[[Iron mask]]|statModifier=Defense +25}} | ||
{{CharacterEquipmentList|entry|item=[[Hermes' | {{CharacterEquipmentList|entry|item=[[Hermes' hat]]|statModifier=Defense +28}} | ||
{{CharacterEquipmentList|entry|item=[[Platinum | {{CharacterEquipmentList|entry|item=[[Platinum headgear]]|statModifier=Defense +38}} | ||
{{CharacterEquipmentList|entry|item=[[Thinking | {{CharacterEquipmentList|entry|item=[[Thinking cap]]|statModifier=Defense +40}} | ||
{{CharacterEquipmentList|entry|item= | {{CharacterEquipmentList|entry|item={{Helm of Sebath}}|statModifier=Defense +45}} | ||
{{CharacterEquipmentList|entry|item=[[Great | {{CharacterEquipmentList|entry|item=[[Great helm]]|statModifier=Defense +50}} | ||
{{CharacterEquipmentList|entry|item=[[Metal | {{CharacterEquipmentList|entry|item={{Helmet of Max Wynne}}|statModifier=Defense +55}} | ||
{{CharacterEquipmentList|entry|item=[[Metal king helm]]|statModifier=Defense +70}} | |||
{{CharacterEquipmentList|note|text=}} | {{CharacterEquipmentList|note|text=}} | ||
{{CharacterEquipmentList|footer}}|Armor| | {{CharacterEquipmentList|footer}}|Armor| | ||
{{CharacterEquipmentList|header|title=Dragon Quest VI|subtitle=All|equipmentType=Armor}} | {{CharacterEquipmentList|header|title=Dragon Quest VI|subtitle=All|equipmentType=Armor}} | ||
{{CharacterEquipmentList|entry|item=[[Plain | {{CharacterEquipmentList|entry|item=[[Plain clothes]]|statModifier=Defense+4}} | ||
{{CharacterEquipmentList|entry|item=[[Wayfarer's | {{CharacterEquipmentList|entry|item=[[Wayfarer's clothes]]|statModifier=Defense+7}} | ||
{{CharacterEquipmentList|entry|item=[[Silk | {{CharacterEquipmentList|entry|item=[[Silk tuxedo]]|statModifier=Defense+10}} | ||
{{CharacterEquipmentList|entry|item=[[Leather | {{CharacterEquipmentList|entry|item=[[Leather armour]]|statModifier=Defense+11}} | ||
{{CharacterEquipmentList|entry|item=[[Boxer | {{CharacterEquipmentList|entry|item=[[Boxer shorts]]|statModifier=Defense+13}} | ||
{{CharacterEquipmentList|entry|item=[[Scale | {{CharacterEquipmentList|entry|item=[[Scale armour]]|statModifier=Defense+15}} | ||
{{CharacterEquipmentList|entry|item=[[Fur | {{CharacterEquipmentList|entry|item=[[Fur cape]]|statModifier=Defense+18}} | ||
{{CharacterEquipmentList|entry|item=[[Chain | {{CharacterEquipmentList|entry|item=[[Chain mail]]|statModifier=Defense+19}} | ||
{{CharacterEquipmentList|entry|item=[[Bronze | {{CharacterEquipmentList|entry|item=[[Bronze armour]]|statModifier=Defense+21}} | ||
{{CharacterEquipmentList|entry|item=[[Iron | {{CharacterEquipmentList|entry|item=[[Iron cuirass]]|statModifier=Defense+23}} | ||
{{CharacterEquipmentList|entry|item=[[Noble | {{CharacterEquipmentList|entry|item=[[Noble garb]]|statModifier=Defense+23}} | ||
{{CharacterEquipmentList|entry|item=[[Iron | {{CharacterEquipmentList|entry|item=[[Iron armour]]|statModifier=Defense+25}} | ||
{{CharacterEquipmentList|entry|item=[[Full | {{CharacterEquipmentList|entry|item=[[Full plate armour]]|statModifier=Defense+30}} | ||
{{CharacterEquipmentList|entry|item=[[Tortoise | {{CharacterEquipmentList|entry|item=[[Tortoise shell]]|statModifier=Defense+33}} | ||
{{CharacterEquipmentList|entry|item=[[Silver | {{CharacterEquipmentList|entry|item=[[Silver cuirass]]|statModifier=Defense+36}} | ||
{{CharacterEquipmentList|entry|item=[[Glombolero]]|statModifier=Defense+40}} | {{CharacterEquipmentList|entry|item=[[Glombolero]]|statModifier=Defense+40}} | ||
{{CharacterEquipmentList|entry|item=[[Silver | {{CharacterEquipmentList|entry|item=[[Silver mail]]|statModifier=Defense+43}} | ||
{{CharacterEquipmentList|entry|item=[[Heavy | {{CharacterEquipmentList|entry|item=[[Heavy armour]]|statModifier=Defense+50}} | ||
{{CharacterEquipmentList|entry|item=[[Magic | {{CharacterEquipmentList|entry|item=[[Magic armour]]|statModifier=Defense+50}} | ||
{{CharacterEquipmentList|entry|item=[[Enchanted | {{CharacterEquipmentList|entry|item=[[Enchanted armour]]|statModifier=Defense+55}} | ||
{{CharacterEquipmentList|entry|item=[[Spiked | {{CharacterEquipmentList|entry|item=[[Spiked armour]]|statModifier=Defense+55}} | ||
{{CharacterEquipmentList|entry|item=[[Dragon | {{CharacterEquipmentList|entry|item=[[Dragon mail]]|statModifier=Defense+60}} | ||
{{CharacterEquipmentList|entry|item=[[Platinum | {{CharacterEquipmentList|entry|item=[[Platinum mail]]|statModifier=Defense+66}} | ||
{{CharacterEquipmentList|entry|item=[[Flame | {{CharacterEquipmentList|entry|item=[[Flame armour]]|statModifier=Defense+70}} | ||
{{CharacterEquipmentList|entry|item=[[Sacred | {{CharacterEquipmentList|entry|item=[[Sacred armour]]|statModifier=Defense+75}} | ||
{{CharacterEquipmentList|entry|item= | {{CharacterEquipmentList|entry|item={{Armour of Orgo}}|statModifier=Defense+80}} | ||
{{CharacterEquipmentList|entry|item= | {{CharacterEquipmentList|entry|item={{Armour of Max Wynne}}|statModifier=Defense+90}} | ||
{{CharacterEquipmentList|entry|item=[[Gigant | {{CharacterEquipmentList|entry|item=[[Gigant armour]]|statModifier=Defense+92}} | ||
{{CharacterEquipmentList|entry|item=[[Mirror | {{CharacterEquipmentList|entry|item=[[Mirror armour]]|statModifier=Defense+95}} | ||
{{CharacterEquipmentList|entry|item=[[Dragon | {{CharacterEquipmentList|entry|item=[[Dragon robe]]|statModifier=Defense+95}} | ||
{{CharacterEquipmentList|entry|item=[[Metal | {{CharacterEquipmentList|entry|item=[[Metal king armour]]|statModifier=Defense+115}} | ||
{{CharacterEquipmentList|note|text=}} | {{CharacterEquipmentList|note|text=}} | ||
{{CharacterEquipmentList|footer}}|Shields| | {{CharacterEquipmentList|footer}}|Shields| | ||
{{CharacterEquipmentList|header|title=Dragon Quest VI|subtitle=All|equipmentType=Shields}} | {{CharacterEquipmentList|header|title=Dragon Quest VI|subtitle=All|equipmentType=Shields}} | ||
{{CharacterEquipmentList|entry|item=[[Pot | {{CharacterEquipmentList|entry|item=[[Pot lid]]|statModifier=Defense+2}} | ||
{{CharacterEquipmentList|entry|item=[[Leather | {{CharacterEquipmentList|entry|item=[[Leather shield]]|statModifier=Defense+4}} | ||
{{CharacterEquipmentList|entry|item=[[Scale | {{CharacterEquipmentList|entry|item=[[Scale shield]]|statModifier=Defense+7}} | ||
{{CharacterEquipmentList|entry|item=[[Bronze | {{CharacterEquipmentList|entry|item=[[Bronze shield]]|statModifier=Defense+11}} | ||
{{CharacterEquipmentList|entry|item=[[Iron | {{CharacterEquipmentList|entry|item=[[Iron shield]]|statModifier=Defense+16}} | ||
{{CharacterEquipmentList|entry|item=[[Magic | {{CharacterEquipmentList|entry|item=[[Magic shield]]|statModifier=Defense+20}} | ||
{{CharacterEquipmentList|entry|item=[[Platinum | {{CharacterEquipmentList|entry|item=[[Platinum shield]]|statModifier=Defense+25}} | ||
{{CharacterEquipmentList|entry|item=[[Dragon | {{CharacterEquipmentList|entry|item=[[Dragon shield]]|statModifier=Defense+30}} | ||
{{CharacterEquipmentList|entry|item=[[Tempest | {{CharacterEquipmentList|entry|item=[[Tempest shield]]|statModifier=Defense+35}} | ||
{{CharacterEquipmentList|entry|item=[[Flame | {{CharacterEquipmentList|entry|item=[[Flame shield]]|statModifier=Defense+40}} | ||
{{CharacterEquipmentList|entry|item=[[Power | {{CharacterEquipmentList|entry|item=[[Power shield]]|statModifier=Defense+45}} | ||
{{CharacterEquipmentList|entry|item= | {{CharacterEquipmentList|entry|item={{Shield of Max Wynne}}|statModifier=Defense+60}} | ||
{{CharacterEquipmentList|entry|item=[[Ruinous | {{CharacterEquipmentList|entry|item=[[Ruinous shield]]|statModifier=Defense+62}} | ||
{{CharacterEquipmentList|entry|item= | {{CharacterEquipmentList|entry|item={{Shield of Valora}}|statModifier=Defense+65}} | ||
{{CharacterEquipmentList|entry|item=[[Metal | {{CharacterEquipmentList|entry|item=[[Metal king shield]]|statModifier=Defense+70}} | ||
{{CharacterEquipmentList|note|text=}} | {{CharacterEquipmentList|note|text=}} | ||
{{CharacterEquipmentList|footer}}|Accessories| | {{CharacterEquipmentList|footer}}|Accessories| | ||
{{CharacterEquipmentList|header|title=Dragon Quest VI|subtitle=All|equipmentType=Accessories}} | {{CharacterEquipmentList|header|title=Dragon Quest VI|subtitle=All|equipmentType=Accessories}} | ||
{{CharacterEquipmentList|entry|item=[[Slime | {{CharacterEquipmentList|entry|item=[[Slime earrings]]|statModifier=Strength+5}} | ||
{{CharacterEquipmentList|entry|item=[[Raging | {{CharacterEquipmentList|entry|item=[[Raging ruby]]|statModifier=Strength+20}} | ||
{{CharacterEquipmentList|entry|item=[[Antique | {{CharacterEquipmentList|entry|item=[[Antique ring]]|statModifier=Defense+2}} | ||
{{CharacterEquipmentList|entry|item=[[Bow | {{CharacterEquipmentList|entry|item=[[Bow tie]]|statModifier=Defense+2}} | ||
{{CharacterEquipmentList|entry|item=[[Gold | {{CharacterEquipmentList|entry|item=[[Gold ring]]|statModifier=Defense+5}} | ||
{{CharacterEquipmentList|entry|item=[[Prayer | {{CharacterEquipmentList|entry|item=[[Prayer ring]]|statModifier=Defense+5}} | ||
{{CharacterEquipmentList|entry|item=[[Trailblazing | {{CharacterEquipmentList|entry|item=[[Trailblazing bandana]]|statModifier=Defense+5}} | ||
{{CharacterEquipmentList|entry|item=[[Kerplunk | {{CharacterEquipmentList|entry|item=[[Kerplunk bracer]]|statModifier=Defense+10}} | ||
{{CharacterEquipmentList|entry|item=[[Orb of | {{CharacterEquipmentList|entry|item=[[Orb of truth]]|statModifier=Defense+10}} | ||
{{CharacterEquipmentList|entry|item=[[Restless | {{CharacterEquipmentList|entry|item=[[Restless heart]]|statModifier=Defense+15}} | ||
{{CharacterEquipmentList|entry|item=[[Gold | {{CharacterEquipmentList|entry|item=[[Gold bracer]]|statModifier=Defense+15}} | ||
{{CharacterEquipmentList|entry|item=[[Agility | {{CharacterEquipmentList|entry|item=[[Agility ring]]|statModifier=Agility+30}} | ||
{{CharacterEquipmentList|entry|item=[[Meteorite | {{CharacterEquipmentList|entry|item=[[Meteorite bracer]]|statModifier=Agilityx2}} | ||
{{CharacterEquipmentList|entry|item=[[ | {{CharacterEquipmentList|entry|item=[[Kamikazee bracer]]|statModifier=Style+10}} | ||
{{CharacterEquipmentList|entry|item=[[Old | {{CharacterEquipmentList|entry|item=[[Old pipe]]|statModifier=Style+15}} | ||
{{CharacterEquipmentList|entry|item=[[Turnscote | {{CharacterEquipmentList|entry|item=[[Turnscote pendant]]|statModifier=Style+45}} | ||
{{CharacterEquipmentList|footer}}}} | {{CharacterEquipmentList|footer}}}} | ||
{{clear}} | |||
==Remake changes== | ====Remake changes==== | ||
*In the | *In the {{Super Famicom}} version, the Hero had an innate 25% resistance to [[Zap]]-type damage, and a full immunity to all party-removal abilities. | ||
==Trivia== | ==Trivia== | ||
*The Hero's | *The Hero's father thinks that the Hero and [[Ashlynn]] are a couple in the ending credits. This has led many fans to speculate that the two are indeed a couple. Additionally, at the end of the [[Dragon_Quest_VI:_Realms_of_Revelation#Related_media|manga adaptation]], [[Ashlynn]] did not disapper and got married to the Hero. | ||
*The | *The Hero underwent a drastic redesign in the early planning stages of {{VI}}, shifting from a moody looking warrior with red hair to the positive, blue-haired lad players are familiar with. This discarded design would be tweaked and become the basis for [[Terry]]. | ||
*His spiky blue hair is reminiscent of [[Hero's Son (Dragon Quest V)|Nera's son]] | *His spiky blue hair is reminiscent of [[Hero's Son (Dragon Quest V)|Nera's son]]. | ||
==Gallery== | ==Gallery== | ||
<center><gallery> | <center><gallery> | ||
Prototype HeroDQVI.jpg|Early design. | |||
DQVI_Hero.png|Artwork from the {{Super Famicom}} release of {{VI}}. | |||
Dq6hero-b.jpg| | |||
DQVI_Hero_Super_Famicom.png| | |||
Graceskull Well.png|The well at [[Castle Graceskull]]. | |||
DQVI DS Hero 2.png|Artwork from the release of {{VI}}. ({{DS}}) | |||
DQVI Hero fur cape.png|Wearing the [[Fur cape]]. | |||
Armour of Orgo.png|Wearing the {{Armour of Orgo}}. | |||
The Spiegelspire.png|The Hero and [[Milly]] atop [[The Spiegelspire]] with [[Spiegel]]. | |||
DQVI Hero fighting.png|Using [[Knuckle Sandwich]]. | |||
DQVI trio injured.png| | |||
DQ DB Toriyama.png|Comparison between {{VI}} and ''[[Dragon Ball]] Z''. | |||
Dragon callback.jpg|Comparison between {{VI}} and ''DBZ'' 2 | |||
DQ6Herosofubi.jpg|''[[Dragon Quest Sofubi Character]]'' merchandise series. | |||
Legendary equipment VI.jpg|Wearing the [[Zenithian Equipment|legendary equipment]]. | |||
DQMBR Heroes.png|''Dragon Quest Monsters: Battle Victory'' (first from left). | |||
DQVI Hero Stats.png|Hero's Stats. | |||
DQVI Hero slashing.png|Using [[Flame Slash]]. | |||
DQVI Manga Hero and Carver.jpg|[[Carver]] and The Hero from ''Maboroshi no Daichi''. | |||
DQVI Manga Hero, Nevan and Weak Spot.jpg|The Hero, [[Nevan]] and Weak Spot from ''Maboroshi no Daichi''. | |||
FinalSmashHeroes.png|{{VI}}'s Hero in the {{Hero Smash}}'s Final Smash. | |||
DQ Stars Android Zenithian Hero 3.jpg|Cameo in {{Stars}}. | |||
</gallery></center> | </gallery></center> | ||
| Line 284: | Line 294: | ||
{{SSBU}} | {{SSBU}} | ||
[[Category: | [[Category:Royalty]] | ||
[[Category:Party members]] | [[Category:Party members]] | ||
[[Category:Dragon Quest VI characters]] | [[Category:Dragon Quest VI characters]] | ||
[[fr:Héros (Dragon Quest VI)]] | |||
Revision as of 11:54, 22 March 2024
| "Hero" | |
| Dragon Quest VI: Realms of Revelation | |
 | |
| Sprite(s) |  
|
| Title | Village Lad |
| Class | Hero |
| Race | Human |
| Age | 17 |
| Voice actor | Tomokazu Seki (CD Theater) |
The Hero of Dragon Quest VI begins his journey awakening from a strange dream in the village of Weaver's Peak. He lives there with his sister Tania.
The Hero has many official names in Japanese. The default name for him in the games is Rek (レック). In the CD theater drama, his name is Will (ウィル). In the manga, his name is Botts (ボッツ). In the novelization, his name is Iza (イザ).
Appearance and personality
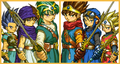
The Hero is a young, physically fit man with spiky blue hair. He wears an orange, asymmetrical toga over purple shorts and under a teal, sleeveless coat. For accessories, he wears gold earrings, a necklace, a torc on his right arm, and a large belt with a pterodactyl emblem in the center. His wears fingerless gloves, steel-toed boots, and wrappings over his calves and feet.
As with all protagonists in the series, the Hero is a silent character upon which the player is meant to project their own personality. However, flashbacks to the Hero's past show him being a caring older brother to his little sister.
Appearances
Dragon Quest VI: Realms of Revelation
Base stats
| Attribute | Starting Stats | Maximum Stats |
| Level | 1 | 99 |
| HP | 28 | 800 |
| MP | 0 | 700 |
| Strength | 11 | 350 |
| Agility | 6 | 200 |
| Resilience | 3 | 210 |
| Wisdom | 5 | 330 |
| Style | 5 | 100 |
| Initial gear | Cypress stick, Plain clothes | |
Abilities
The Hero only requires one mastered vocation to attain the Hero Vocation, as opposed to the four necessitated for other characters. He also learns several unique skills regardless of profession.
| Name | MP | Level | Target | Description |
| Recall* | 0 | 1 | Self | Used to recall the memorized speeches of people. |
|---|---|---|---|---|
| Heal | 2 | 4 | One ally | Restores at least 30 HP to a single ally. |
| Peep | 1 | 6 | One item | Reveals the nature of the treasure in a chest. Also enables item appraisal. |
| Sap | 3 | 7 | One enemy | Reduces the Defence of a single enemy. |
| Zoom | 1 | 8 | Self | Teleports to a previously visited town |
| Remember* | 0 | 10 | Self | Used to deeply recall the memorized speeches of people. |
| Forget* | 0 | 13 | Self | Used to forget the memorized speeches of people. |
| Recollect* | 0 | 18 | Self | Used to greatly recall the memorized speeches of people. |
| Zap | 6 | * | All enemies | Calls down lightning on all enemies. |
Notes:
- The memory spells are related to conversations you can record with the X button. They are not present in the DS version.
- Zap is learned through an event in the game.
Equipment
| Dragon Quest VI (All) | |
|---|---|
| Helmet | Modifier(s) |
| Leather hat | Defense +2 |
| Hardwood headwear | Defense +6 |
| Iron helmet | Defense +16 |
| Iron mask | Defense +25 |
| Hermes' hat | Defense +28 |
| Platinum headgear | Defense +38 |
| Thinking cap | Defense +40 |
| Helm of Sebath | Defense +45 |
| Great helm | Defense +50 |
| Helmet of Max Wynne | Defense +55 |
| Metal king helm | Defense +70 |
| Dragon Quest VI (All) | |
|---|---|
| Armor | Modifier(s) |
| Plain clothes | Defense+4 |
| Wayfarer's clothes | Defense+7 |
| Silk tuxedo | Defense+10 |
| Leather armour | Defense+11 |
| Boxer shorts | Defense+13 |
| Scale armour | Defense+15 |
| Fur cape | Defense+18 |
| Chain mail | Defense+19 |
| Bronze armour | Defense+21 |
| Iron cuirass | Defense+23 |
| Noble garb | Defense+23 |
| Iron armour | Defense+25 |
| Full plate armour | Defense+30 |
| Tortoise shell | Defense+33 |
| Silver cuirass | Defense+36 |
| Glombolero | Defense+40 |
| Silver mail | Defense+43 |
| Heavy armour | Defense+50 |
| Magic armour | Defense+50 |
| Enchanted armour | Defense+55 |
| Spiked armour | Defense+55 |
| Dragon mail | Defense+60 |
| Platinum mail | Defense+66 |
| Flame armour | Defense+70 |
| Sacred armour | Defense+75 |
| Armour of Orgo | Defense+80 |
| Armour of Max Wynne | Defense+90 |
| Gigant armour | Defense+92 |
| Mirror armour | Defense+95 |
| Dragon robe | Defense+95 |
| Metal king armour | Defense+115 |
| Dragon Quest VI (All) | |
|---|---|
| Shields | Modifier(s) |
| Pot lid | Defense+2 |
| Leather shield | Defense+4 |
| Scale shield | Defense+7 |
| Bronze shield | Defense+11 |
| Iron shield | Defense+16 |
| Magic shield | Defense+20 |
| Platinum shield | Defense+25 |
| Dragon shield | Defense+30 |
| Tempest shield | Defense+35 |
| Flame shield | Defense+40 |
| Power shield | Defense+45 |
| Shield of Max Wynne | Defense+60 |
| Ruinous shield | Defense+62 |
| Shield of Valoria | Defense+65 |
| Metal king shield | Defense+70 |
| Dragon Quest VI (All) | |
|---|---|
| Accessories | Modifier(s) |
| Slime earrings | Strength+5 |
| Raging ruby | Strength+20 |
| Antique ring | Defense+2 |
| Bow tie | Defense+2 |
| Gold ring | Defense+5 |
| Prayer ring | Defense+5 |
| Trailblazing bandana | Defense+5 |
| Kerplunk bracer | Defense+10 |
| Orb of truth | Defense+10 |
| Restless heart | Defense+15 |
| Gold bracer | Defense+15 |
| Agility ring | Agility+30 |
| Meteorite bracer | Agilityx2 |
| Kamikazee bracer | Style+10 |
| Old pipe | Style+15 |
| Turnscote pendant | Style+45 |
Remake changes
- In the Super Famicom version, the Hero had an innate 25% resistance to Zap-type damage, and a full immunity to all party-removal abilities.
Trivia
- The Hero's father thinks that the Hero and Ashlynn are a couple in the ending credits. This has led many fans to speculate that the two are indeed a couple. Additionally, at the end of the manga adaptation, Ashlynn did not disapper and got married to the Hero.
- The Hero underwent a drastic redesign in the early planning stages of VI, shifting from a moody looking warrior with red hair to the positive, blue-haired lad players are familiar with. This discarded design would be tweaked and become the basis for Terry.
- His spiky blue hair is reminiscent of Nera's son.
Gallery

Early design.

Artwork from the Super Famicom release of VI.


The well at Castle Graceskull.

Wearing the Fur cape.

Wearing the Armour of Orgo.

The Hero and Milly atop The Spiegelspire with Spiegel.

Using Knuckle Sandwich.


Comparison between VI and Dragon Ball Z.

Comparison between VI and DBZ 2

Dragon Quest Sofubi Character merchandise series.

Wearing the legendary equipment.
Dragon Quest Monsters: Battle Victory (first from left).

Hero's Stats.

Using Flame Slash.

Carver and The Hero from Maboroshi no Daichi.

The Hero, Nevan and Weak Spot from Maboroshi no Daichi.

Cameo in Stars.


