| Dragon Quest VI (All) | |
|---|---|
| Weapon | Modifier(s) |
| Poison needle | Attack +1 |
| Bone stake | Attack +6 |
| Stone fangs | Attack +12 |
| Boomerang | Attack +15 |
| Staff of Ghent | Attack +15 |
| Iron claw | Attack +21 |
| Poison moth knife | Attack +24 |
| Edged boomerang | Attack +25 |
| Falcon knife earrings | Attack +30 |
| Steel fangs | Attack +35 |
| Fire claw | Attack+53 |
| Lunar fan | Attack+60 |
| Icicle dirk | Attack +62 |
| Flametang boomerang | Attack +65 |
| Ferocious fangs | Attack +73 |
| Cobra claw | Attack +90 |
| Wizardly whip | Attack +97 |
| Miracle sword | Attack +100 |
| Solar fan | Attack +110 |
| Metal king sword | Attack +130 |
| Orichalcum fangs | Attack +135 |
Healie: Difference between revisions
Jump to navigation
Jump to search

Main article: Healer (Recruit)
Molacarthy (talk | contribs) mNo edit summary |
Antiyonder (talk | contribs) No edit summary |
||
| Line 1: | Line 1: | ||
{{Character | {{Character | ||
|Name=Healie | |Name=Healie | ||
|Game={{ | |Game={{Dragon Quest IV}}<br>{{Dragon Quest VI}}<br>{{Dragon Quest VIII}} | ||
|Image=[[Image:Healie_artwork.png|center|180px]] | |Image=[[Image:Healie_artwork.png|center|180px]] | ||
|Sprite=[[Image:Dq4healie-sprite-NES.gif|16px]] | |Sprite=[[Image:Dq4healie-sprite-NES.gif|16px]] | ||
| Line 7: | Line 7: | ||
|Roumaji=[[Heal|Hoimin]] | |Roumaji=[[Heal|Hoimin]] | ||
|Title= | |Title= | ||
|Class=Kind Healer<br>( | |Class=Kind Healer<br>({{NES}} Version) | ||
|Race=Healslime (later human) | |Race=Healslime (later human) | ||
|Age=? | |Age=? | ||
|}} | |}} | ||
{{quote|style=1|quote='''''Whooze in need of some healing?'''''|source=Healie, in ''VI''|console= | {{quote|style=1|quote='''''Whooze in need of some healing?'''''|source=Healie, in ''VI''|console={{DS}}|align=center|bgcolor=4d4dff}} | ||
{{translation|'''Healie'''|ホイミン|[[Heal|Hoimin]]}} is a minor character and temporary party member in {{DQ4}}, an optional character and eligible party member in {{DQ6}}, and has a cameo in {{DQ8}}. He is a [[Healslime | {{translation|'''Healie'''|ホイミン|[[Heal|Hoimin]]}} is a minor character and temporary party member in {{DQ4}}, an optional character and eligible party member in {{DQ6}}, and has a cameo in {{DQ8}}. He is a [[Healslime]] who seeks to become a human. Whether this is the same character in each appearance or just a homage is unknown, and left open to player interpretation. | ||
==Appearance and personality== | ==Appearance and personality== | ||
| Line 19: | Line 19: | ||
==Appearances== | ==Appearances== | ||
==={{DQ4}}=== | ==={{DQ4}}=== | ||
{{spoiler|start}}[[Ragnar]] first encounters him in [[Dragon Quest IV Chapter 1|his chapter]] within the [[Auld Well]], at which point he joins the party. Healie uses his knowledge of local geography to help Ragnar in his quest to locate the missing children of [[Burland]]. He proves to be an extremely useful ally in battle, as Ragnar is incapable of using any spells, so the only way he can heal himself without Healie's help is with items such as [[herb | {{spoiler|start}}[[Ragnar McRyan]] first encounters him in [[Dragon Quest IV Chapter 1|his chapter]] within the [[Auld Well]], at which point he joins the party. Healie uses his knowledge of local geography to help {{Ragnar}} in his quest to locate the missing children of [[Burland]]. He proves to be an extremely useful ally in battle, as Ragnar is incapable of using any spells, so the only way he can heal himself without Healie's help is with items such as [[herb]]s. Healie can also contribute to combat, though the damage he is capable of dealing is fairly unimpressive. As an AI-controlled character, his behavior is also somewhat random and unreliable. | ||
Towards the end of [[Dragon Quest IV Chapter 1|Chapter 1]], he states that he has resolved to become a human. He apparently continues to travel with Ragnar because they can be found together in [[Dragon Quest IV Chapter 5|Chapter 5]], shortly before the fight with [[Balzack]]. Healie has succeeded in becoming a human through unknown means and has taken on the sprite of a bard. This, however, is the last he is seen in the game; after Ragnar joins the Hero's party, it seems Healie continues his travels alone.{{spoiler|end}} | Towards the end of [[Dragon Quest IV Chapter 1|Chapter 1]], he states that he has resolved to become a human. He apparently continues to travel with Ragnar because they can be found together in [[Dragon Quest IV Chapter 5|Chapter 5]], shortly before the fight with [[Balzack]]. Healie has succeeded in becoming a human through unknown means and has taken on the sprite of a bard. This, however, is the last he is seen in the game; after Ragnar joins the Hero's party, it seems Healie continues his travels alone.{{spoiler|end}} | ||
| Line 25: | Line 25: | ||
====Base stats==== | ====Base stats==== | ||
[[File:Healie Hero and Alena.png|thumb|Healie with Alena and the | [[File:Healie Hero and Alena.png|thumb|Healie with Alena and the {{Hero 4}}.|right]] | ||
{| style="width:65%; height:100px; text-align:center" border="1" | {| style="width:65%; height:100px; text-align:center" border="1" | ||
|-<---!Headings are up first.!---> style="font-weight:bold; background:#4d4dff | |-<---!Headings are up first.!---> style="font-weight:bold; background:#4d4dff | ||
| Line 32: | Line 32: | ||
| Level || Unknown | | Level || Unknown | ||
|- | |- | ||
| HP || 35 | | {{HP}} || 35 | ||
|- | |- | ||
| MP || 30 | | {{MP}} || 30 | ||
|- | |- | ||
| Strength || 9 (18 in the | | {{Strength}} || 9 (18 in the {{NES}} Version) | ||
|- | |- | ||
| Agility || 56 (18 in the | | {{Agility}} || 56 (18 in the {{NES}} Version) | ||
|- | |- | ||
| Resilience || 28 (Not listed in the | | {{Resilience}} || 28 (Not listed in the {{NES} Version) | ||
|- | |- | ||
| Wisdom || 12 (Not listed in the [ | | {{Wisdom}} || 12 (Not listed in the {[NES}} Version) | ||
|- | |- | ||
| Luck || 30 (Not listed in the | | {{Luck}} || 30 (Not listed in the {{NES}} Version) | ||
|- | |- | ||
| Attack || 9 | | {{Attack}} || 9 | ||
|- | |- | ||
| Defence || 28 (20 in the | | {{Defence}} || 28 (20 in the {{NES}} Version) | ||
|- | |- | ||
| Spell || [[Heal]] | | Spell || [[Heal]] | ||
| Line 58: | Line 58: | ||
| valign="top" width="25%" | | | valign="top" width="25%" | | ||
{{quote|style=2|quote= | {{quote|style=2|quote= | ||
I met another human. He was wearing armour like you. I wanted to goo with him, but he refoozed. Maybe he didn't think a slime was goo enough for him? I was very hurt... (slurp)|source= Healie, in [[Auld Well]]|console= | I met another human. He was wearing armour like you. I wanted to goo with him, but he refoozed. Maybe he didn't think a slime was goo enough for him? I was very hurt... (slurp)|source= Healie, in [[Auld Well]]|console={{DS}}|align=center}} | ||
|} | |} | ||
{| border="0" cellpadding="5" cellspacing="0" width="100%" | {| border="0" cellpadding="5" cellspacing="0" width="100%" | ||
| valign="top" width="25%" | | | valign="top" width="25%" | | ||
{{quote|style=2|quote=Remember, you can't goo easy on other healslimes, even if they do remind you of your pal Healie. | {{quote|style=2|quote=Remember, you can't goo easy on other healslimes, even if they do remind you of your pal Healie. | ||
|source= Healie, in [[Loch Tur]]|console= | |source= Healie, in [[Loch Tur]]|console={{DS}}|align=center}} | ||
|} | |} | ||
{| border="0" cellpadding="5" cellspacing="0" width="100%" | {| border="0" cellpadding="5" cellspacing="0" width="100%" | ||
| valign="top" width="25%" | | | valign="top" width="25%" | | ||
{{quote|style=2|quote=That's him! That's the human who refoozed to take me with him! What a horrible man! (slurp) But I suppooze he did me a favour. If I had gone with him, I'd never have met you! | {{quote|style=2|quote=That's him! That's the human who refoozed to take me with him! What a horrible man! (slurp) But I suppooze he did me a favour. If I had gone with him, I'd never have met you! | ||
|source= Healie, in [[Loch Tur]]|console= | |source= Healie, in [[Loch Tur]]|console={{DS}}|align=center}} | ||
|} | |} | ||
{{spoiler|end}} | {{spoiler|end}} | ||
| Line 74: | Line 74: | ||
==={{DQ6}}=== | ==={{DQ6}}=== | ||
{{spoiler|start}}In the SNES version of ''VI'', Healie can be randomly recruited when a | {{spoiler|start}}In the {{SNES}} version of ''VI'', Healie can be randomly recruited when a Healslime is defeated in battle and one of the party members is a rank 2 [[Monster Master]]. | ||
In the Nintendo DS remake of ''VI'', Healie can be recruited in [[Clearvale]] after obtaining the [[flying bed]]. In the ending credits, if Healie is interacted with in [[Somnia (Lower World)|Somnia]], he mentions his desire of becoming a human, foreshadowing his role in Dragon Quest IV.{{spoiler|end}} | In the Nintendo DS remake of ''VI'', Healie can be recruited in [[Clearvale]] after obtaining the [[flying bed]]. In the ending credits, if Healie is interacted with in [[Somnia (Lower World)|Somnia]], he mentions his desire of becoming a human, foreshadowing his role in {{Dragon Quest IV}}.{{spoiler|end}} | ||
| Line 86: | Line 86: | ||
| Level || 4 || 99 | | Level || 4 || 99 | ||
|- | |- | ||
| HP || 59 || 600 | | {{HP}} || 59 || 600 | ||
|- | |- | ||
| MP || 26 || 800 | | {{MP}} || 26 || 800 | ||
|- | |- | ||
| Strength || 23 || 200 | | {{Strength}} || 23 || 200 | ||
|- | |- | ||
| Agility || 21 || 210 | | {{Agility}} || 21 || 210 | ||
|- | |- | ||
| Resilience || 28 || 200 | | {{Resilience}} || 28 || 200 | ||
|- | |- | ||
| Wisdom || 6 || 150 | | {{Wisdom}} || 6 || 150 | ||
|- | |- | ||
| Style || 15 || 50 | | {{Style}} || 15 || 50 | ||
|- | |- | ||
| Initial gear ||colspan=2|''None'' | | Initial gear ||colspan=2|''None'' | ||
| Line 108: | Line 108: | ||
| colspan=2| Resistances | | colspan=2| Resistances | ||
|- style="font-weight:normal" | |- style="font-weight:normal" | ||
|align="left"| Flame | |align="left"| [[Flame Breath]] ||width="150"| 60% | ||
|- | |- | ||
|align="left"| Ice | |align="left"| Ice Breath || 0% | ||
|- | |- | ||
|align="left"| Frizz || 25% | |align="left"| [[Frizz]] || 25% | ||
|- | |- | ||
|align="left"| Sizz || 60% | |align="left"| [[Sizz]] || 60% | ||
|- | |- | ||
|align="left"| Bang || 60% | |align="left"| [[Bang]] || 60% | ||
|- | |- | ||
|align="left"| Woosh || 0% | |align="left"| [[Woosh]] || 0% | ||
|- | |- | ||
|align="left"| Crack || 0% | |align="left"| [[Crack]] || 0% | ||
|- | |- | ||
|align="left"| Zap || 60% | |align="left"| [[Zap]] || 60% | ||
|- | |- | ||
|align="left"| Strike/Rock|| 0% | |align="left"| Strike/Rock|| 0% | ||
| Line 128: | Line 128: | ||
|align="left"| Troop|| 0% | |align="left"| Troop|| 0% | ||
|- | |- | ||
|align="left"| Death|| 50% | |align="left"| {{Death}} || 50% | ||
|- | |- | ||
|align="left"| Kamikazee|| 50% | |align="left"| [[Kamikazee]] || 50% | ||
|- | |- | ||
|align="left"| Paralysis|| 50% | |align="left"| [[Paralysis]] || 50% | ||
|- | |- | ||
|align="left"| Poof || 80% | |align="left"| [[Poof]] || 80% | ||
|- | |- | ||
|align="left"| Dazzle || 15% | |align="left"| [[Dazzle]] || 15% | ||
|- | |- | ||
|align="left"| Snooze || 50% | |align="left"| [[Snooze]] || 50% | ||
|- | |- | ||
|align="left"| Drain Magic || 50% | |align="left"| [[Drain Magic]] || 50% | ||
|- | |- | ||
|align="left"| Fizzle || 15% | |align="left"| [[Fizzle]] || 15% | ||
|- | |- | ||
|align="left"| Fuddle || 0% | |align="left"| [[Fuddle]] || 0% | ||
|- | |- | ||
|align="left"| Sap || 0% | |align="left"| [[Sap]] || 0% | ||
|- | |- | ||
|align="left"| Poison || 50% | |align="left"| {{Poison}} || 50% | ||
|- | |- | ||
|align="left"| Ban Dance || 100% | |align="left"| Ban Dance || 100% | ||
| Line 196: | Line 196: | ||
====Equipment==== | ====Equipment==== | ||
{{VersionTabs|Weapons|{{CharacterEquipmentList|header|title=Dragon Quest VI|subtitle=All|equipmentType=Weapon}} | {{VersionTabs|Weapons|{{CharacterEquipmentList|header|title=Dragon Quest VI|subtitle=All|equipmentType=Weapon}} | ||
{{CharacterEquipmentList|entry|item=[[Poison | {{CharacterEquipmentList|entry|item=[[Poison needle]]|statModifier=Attack +1}} | ||
{{CharacterEquipmentList|entry|item=[[Bone | {{CharacterEquipmentList|entry|item=[[Bone stake]]|statModifier=Attack +6}} | ||
{{CharacterEquipmentList|entry|item=[[Stone | {{CharacterEquipmentList|entry|item=[[Stone fangs]]|statModifier=Attack +12}} | ||
{{CharacterEquipmentList|entry|item= | {{CharacterEquipmentList|entry|item={{Boomerang}}|statModifier=Attack +15}} | ||
{{CharacterEquipmentList|entry|item=[[Staff of Ghent]]|statModifier=Attack +15}} | {{CharacterEquipmentList|entry|item=[[Staff of Ghent]]|statModifier=Attack +15}} | ||
{{CharacterEquipmentList|entry|item=[[Iron | {{CharacterEquipmentList|entry|item=[[Iron claw]]|statModifier=Attack +21}} | ||
{{CharacterEquipmentList|entry|item=[[Poison | {{CharacterEquipmentList|entry|item=[[Poison moth knife]]|statModifier=Attack +24}} | ||
{{CharacterEquipmentList|entry|item=[[Edged | {{CharacterEquipmentList|entry|item=[[Edged boomerang]]|statModifier=Attack +25}} | ||
{{CharacterEquipmentList|entry|item=[[Falcon | {{CharacterEquipmentList|entry|item=[[Falcon knife earrings]]|statModifier=Attack +30}} | ||
{{CharacterEquipmentList|entry|item=[[Steel | {{CharacterEquipmentList|entry|item=[[Steel fangs]]|statModifier=Attack +35}} | ||
{{CharacterEquipmentList|entry|item=[[Fire | {{CharacterEquipmentList|entry|item=[[Fire claw]]|statModifier=Attack+53}} | ||
{{CharacterEquipmentList|entry|item=[[Icicle | {{CharacterEquipmentList|entry|item=[[Lunar fan]]|statModifier=Attack+60}} | ||
{{CharacterEquipmentList|entry|item=[[Flametang Boomerang]]|statModifier=Attack +65}} | {{CharacterEquipmentList|entry|item=[[Icicle dirk]]|statModifier=Attack +62}} | ||
{{CharacterEquipmentList|entry|item=[[Ferocious | {{CharacterEquipmentList|entry|item=[[Flametang Boomerang|Flametang boomerang]]|statModifier=Attack +65}} | ||
{{CharacterEquipmentList|entry|item=[[Cobra | {{CharacterEquipmentList|entry|item=[[Ferocious fangs]]|statModifier=Attack +73}} | ||
{{CharacterEquipmentList|entry|item=[[Wizardly | {{CharacterEquipmentList|entry|item=[[Cobra claw]]|statModifier=Attack +90}} | ||
{{CharacterEquipmentList|entry|item=[[Miracle | {{CharacterEquipmentList|entry|item=[[Wizardly whip]]|statModifier=Attack +97}} | ||
{{CharacterEquipmentList|entry|item=[[Solar | {{CharacterEquipmentList|entry|item=[[Miracle sword]]|statModifier=Attack +100}} | ||
{{CharacterEquipmentList|entry|item=[[Metal | {{CharacterEquipmentList|entry|item=[[Solar fan]]|statModifier=Attack +110}} | ||
{{CharacterEquipmentList|entry|item=[[Orichalcum | {{CharacterEquipmentList|entry|item=[[Metal king sword]]|statModifier=Attack +130}} | ||
{{CharacterEquipmentList|entry|item=[[Orichalcum fangs]]|statModifier=Attack +135}} | |||
{{CharacterEquipmentList|note|text=}} | {{CharacterEquipmentList|note|text=}} | ||
{{CharacterEquipmentList|footer}}|Helmets| | {{CharacterEquipmentList|footer}}|Helmets| | ||
{{CharacterEquipmentList|header|title=Dragon Quest VI|subtitle=All|equipmentType=Helmet}} | {{CharacterEquipmentList|header|title=Dragon Quest VI|subtitle=All|equipmentType=Helmet}} | ||
{{CharacterEquipmentList|entry|item=[[Pointy | {{CharacterEquipmentList|entry|item=[[Pointy hat]]|statModifier=Defense +3}} | ||
{{CharacterEquipmentList|entry|item=[[Shellmet]]|statModifier=Defense +7}} | {{CharacterEquipmentList|entry|item=[[Shellmet]]|statModifier=Defense +7}} | ||
{{CharacterEquipmentList|entry|item=[[Bunny | {{CharacterEquipmentList|entry|item=[[Bunny ears]]|statModifier=Defense +20}} | ||
{{CharacterEquipmentList|entry|item=[[Iron | {{CharacterEquipmentList|entry|item=[[Iron mask]]|statModifier=Defense +25}} | ||
{{CharacterEquipmentList|entry|item=[[Duplic | {{CharacterEquipmentList|entry|item=[[Duplic hat]]|statModifier=Defense +25}} | ||
{{CharacterEquipmentList|entry|item=[[Hermes' | {{CharacterEquipmentList|entry|item=[[Hermes' hat]]|statModifier=Defense +28}} | ||
{{CharacterEquipmentList|entry|item=[[Happy | {{CharacterEquipmentList|entry|item=[[Happy hat]]|statModifier=Defense +35}} | ||
{{CharacterEquipmentList|entry|item=[[Slime | {{CharacterEquipmentList|entry|item=[[Slime helmet]]|statModifier=Defense +40}} | ||
{{CharacterEquipmentList|entry|item=[[Metal | {{CharacterEquipmentList|entry|item=[[Metal king helm]]|statModifier=Defense +70}} | ||
{{CharacterEquipmentList|note|text=}} | {{CharacterEquipmentList|note|text=}} | ||
{{CharacterEquipmentList|footer}}|Armor| | {{CharacterEquipmentList|footer}}|Armor| | ||
{{CharacterEquipmentList|header|title=Dragon Quest VI|subtitle=All|equipmentType=Armor}} | {{CharacterEquipmentList|header|title=Dragon Quest VI|subtitle=All|equipmentType=Armor}} | ||
{{CharacterEquipmentList|entry|item=[[Rags]]|statModifier=Defense+3}} | {{CharacterEquipmentList|entry|item=[[Rags]]|statModifier=Defense+3}} | ||
{{CharacterEquipmentList|entry|item=[[Boxer | {{CharacterEquipmentList|entry|item=[[Boxer shorts]]|statModifier=Defense+13}} | ||
{{CharacterEquipmentList|entry|item=[[Scale | {{CharacterEquipmentList|entry|item=[[Scale armour]]|statModifier=Defense+15}} | ||
{{CharacterEquipmentList|entry|item=[[Fur | {{CharacterEquipmentList|entry|item=[[Leather cape|Fur cape]]|statModifier=Defense+18}} | ||
{{CharacterEquipmentList|entry|item=[[Slime | {{CharacterEquipmentList|entry|item=[[Slime gooniform]]|statModifier=Defense+20}} | ||
{{CharacterEquipmentList|entry|item=[[Bronze | {{CharacterEquipmentList|entry|item=[[Bronze armour]]|statModifier=Defense+21}} | ||
{{CharacterEquipmentList|entry|item=[[Iron | {{CharacterEquipmentList|entry|item=[[Iron cuirass]]|statModifier=Defense+23}} | ||
{{CharacterEquipmentList|entry|item=[[Cloak of | {{CharacterEquipmentList|entry|item=[[Cloak of evasion]]|statModifier=Defense+28}} | ||
{{CharacterEquipmentList|entry|item=[[Tortoise | {{CharacterEquipmentList|entry|item=[[Tortoise shell]]|statModifier=Defense+33}} | ||
{{CharacterEquipmentList|entry|item=[[Glombolero]]|statModifier=Defense+40}} | {{CharacterEquipmentList|entry|item=[[Glombolero]]|statModifier=Defense+40}} | ||
{{CharacterEquipmentList|entry|item=[[Magical | {{CharacterEquipmentList|entry|item=[[Magical skirt]]|statModifier=Defense+45}} | ||
{{CharacterEquipmentList|entry|item=[[Magic | {{CharacterEquipmentList|entry|item=[[Magic armour]]|statModifier=Defense+50}} | ||
{{CharacterEquipmentList|entry|item=[[Flowing | {{CharacterEquipmentList|entry|item=[[Flowing dress]]|statModifier=Defense+65}} | ||
{{CharacterEquipmentList|entry|item=[[Slime | {{CharacterEquipmentList|entry|item=[[Slime armour]]|statModifier=Defense+70}} | ||
{{CharacterEquipmentList|entry|item= | {{CharacterEquipmentList|entry|item={{Armour of Max Wynne}}|statModifier=Defense+90}} | ||
{{CharacterEquipmentList|entry|item=[[Angel | {{CharacterEquipmentList|entry|item=[[Angel leotard]]|statModifier=Defense+95}} | ||
{{CharacterEquipmentList|entry|item=[[Metal | {{CharacterEquipmentList|entry|item=[[Metal king armour]]|statModifier=Defense+115}} | ||
{{CharacterEquipmentList|note|text=}} | {{CharacterEquipmentList|note|text=}} | ||
{{CharacterEquipmentList|footer}}|Shields| | {{CharacterEquipmentList|footer}}|Shields| | ||
{{CharacterEquipmentList|header|title=Dragon Quest VI|subtitle=All|equipmentType=Shields}} | {{CharacterEquipmentList|header|title=Dragon Quest VI|subtitle=All|equipmentType=Shields}} | ||
{{CharacterEquipmentList|entry|item=[[Pot | {{CharacterEquipmentList|entry|item=[[Pot lid]]|statModifier=Defense+2}} | ||
{{CharacterEquipmentList|entry|item=[[Silver | {{CharacterEquipmentList|entry|item=[[Silver platter]]|statModifier=Defense+18}} | ||
{{CharacterEquipmentList|entry|item=[[Power | {{CharacterEquipmentList|entry|item=[[Power shield]]|statModifier=Defense+45}} | ||
{{CharacterEquipmentList|entry|item=[[Silver | {{CharacterEquipmentList|entry|item=[[Silver shield]]|statModifier=Defense+48}} | ||
{{CharacterEquipmentList|entry|item=[[Metal | {{CharacterEquipmentList|entry|item=[[Metal king shield]]|statModifier=Defense+70}} | ||
{{CharacterEquipmentList|note|text=}} | {{CharacterEquipmentList|note|text=}} | ||
{{CharacterEquipmentList|footer}}|Accessories| | {{CharacterEquipmentList|footer}}|Accessories| | ||
{{CharacterEquipmentList|header|title=Dragon Quest VI|subtitle=All|equipmentType=Accessories}} | {{CharacterEquipmentList|header|title=Dragon Quest VI|subtitle=All|equipmentType=Accessories}} | ||
{{CharacterEquipmentList|entry|item=[[Slime | {{CharacterEquipmentList|entry|item=[[Slime earrings]]|statModifier=Strength+5}} | ||
{{CharacterEquipmentList|entry|item=[[Raging | {{CharacterEquipmentList|entry|item=[[Raging ruby]]|statModifier=Strength+20}} | ||
{{CharacterEquipmentList|entry|item=[[Bow | {{CharacterEquipmentList|entry|item=[[Bow tie]]|statModifier=Defense+2}} | ||
{{CharacterEquipmentList|entry|item=[[Gold | {{CharacterEquipmentList|entry|item=[[Gold ring]]|statModifier=Defense+5}} | ||
{{CharacterEquipmentList|entry|item=[[Prayer | {{CharacterEquipmentList|entry|item=[[Prayer ring]]|statModifier=Defense+5}} | ||
{{CharacterEquipmentList|entry|item=[[Trailblazing | {{CharacterEquipmentList|entry|item=[[Trailblazing bandana]]|statModifier=Defense+5}} | ||
{{CharacterEquipmentList|entry|item=[[Kerplunk | {{CharacterEquipmentList|entry|item=[[Kerplunk bracer]]|statModifier=Defense+10}} | ||
{{CharacterEquipmentList|entry|item=[[Restless | {{CharacterEquipmentList|entry|item=[[Restless heart]]|statModifier=Defense+15}} | ||
{{CharacterEquipmentList|entry|item=[[Gold | {{CharacterEquipmentList|entry|item=[[Gold bracer]]|statModifier=Defense+15}} | ||
{{CharacterEquipmentList|entry|item=[[Meteorite | {{CharacterEquipmentList|entry|item=[[Meteorite bracer]]|statModifier=Agilityx2}} | ||
{{CharacterEquipmentList|entry|item=[[ | {{CharacterEquipmentList|entry|item=[[Kamikazee bracer]]|statModifier=Style+10}} | ||
{{CharacterEquipmentList|entry|item=[[Gospel | {{CharacterEquipmentList|entry|item=[[Gospel ring]]|statModifier=Style+30}} | ||
{{CharacterEquipmentList|entry|item=[[Pink | {{CharacterEquipmentList|entry|item=[[Pink pearl]]|statModifier=Style+40}} | ||
{{CharacterEquipmentList|entry|item=[[Glass | {{CharacterEquipmentList|entry|item=[[Glass slippers]]|statModifier=Style+45}} | ||
{{CharacterEquipmentList|footer}}}} | {{CharacterEquipmentList|footer}}}} | ||
| Line 281: | Line 282: | ||
| valign="top" width="25%" | | | valign="top" width="25%" | | ||
{{quote|style=2|quote=Once upon a time, I was an ordinary slime, you know. (slurp) | {{quote|style=2|quote=Once upon a time, I was an ordinary slime, you know. (slurp) | ||
|source= Healie|console= | |source= Healie|console={{DS}}|align=center}} | ||
|} | |} | ||
{| border="0" cellpadding="5" cellspacing="0" width="100%" | {| border="0" cellpadding="5" cellspacing="0" width="100%" | ||
| valign="top" width="25%" | | | valign="top" width="25%" | | ||
{{quote|style=2|quote= | {{quote|style=2|quote= | ||
By goolly, I wish I could float higher than this!|source= Healie|console= | By goolly, I wish I could float higher than this!|source= Healie|console={{DS}}|align=center}} | ||
|} | |} | ||
{| border="0" cellpadding="5" cellspacing="0" width="100%" | {| border="0" cellpadding="5" cellspacing="0" width="100%" | ||
| valign="top" width="25%" | | | valign="top" width="25%" | | ||
{{quote|style=2|quote=Goo-whiz, I'm thirsty... (slurp) | {{quote|style=2|quote=Goo-whiz, I'm thirsty... (slurp) | ||
|source= Healie|console= | |source= Healie|console={{DS}}|align=center}} | ||
|} | |} | ||
{| border="0" cellpadding="5" cellspacing="0" width="100%" | {| border="0" cellpadding="5" cellspacing="0" width="100%" | ||
| valign="top" width="25%" | | | valign="top" width="25%" | | ||
{{quote|style=2|quote= | {{quote|style=2|quote= | ||
Goo-whiz, I'd love to take a ride on that bed!|source= Healie|console= | Goo-whiz, I'd love to take a ride on that bed!|source= Healie|console={{DS}}|align=center}} | ||
|} | |} | ||
{| border="0" cellpadding="5" cellspacing="0" width="100%" | {| border="0" cellpadding="5" cellspacing="0" width="100%" | ||
| Line 306: | Line 307: | ||
| valign="top" width="25%" | | | valign="top" width="25%" | | ||
{{quote|style=2|quote=Just slurpin' around.... | {{quote|style=2|quote=Just slurpin' around.... | ||
|source= Healie|console= | |source= Healie|console={{DS}}|align=center}} | ||
|} | |} | ||
{{spoiler|end}} | {{spoiler|end}} | ||
| Line 316: | Line 317: | ||
==Trivia== | ==Trivia== | ||
*In the | *In the {{PlayStation}} and [[Nintendo DS]] version of ''{{Dragon Quest IV}}'', Healie's Heal spell can be used manually out of battle. | ||
*Healie, along with [[Tom Foolery]], are the only | *Healie, along with [[Tom Foolery]], are the only {{NPC}} allies to completely disappear later in the game. | ||
*Even if Chapter 1 is completed without recruiting Healie, he will still appear in Chapter 5 in his human form. | *Even if Chapter 1 is completed without recruiting Healie, he will still appear in Chapter 5 in his human form. | ||
| Line 331: | Line 332: | ||
==Gallery== | ==Gallery== | ||
<center><gallery> | <center><gallery> | ||
File:HealieArt.png|Famicom art | File:HealieArt.png|{{Famicom}} art. | ||
File:Healie PlayStation artwork.png|PlayStation art | File:Healie PlayStation artwork.png|PlayStation art. | ||
File:DQIV Healie.jpg|PlayStation art | File:DQIV Healie.jpg|PlayStation art | ||
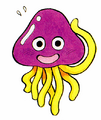
File:DQMB Healie.png|''Dragon Quest: Monster Battle II'' card | File:DQMB Healie.png|''Dragon Quest: Monster Battle II'' card. | ||
Image:LitD_Ragnar_and_Healie.png|"Legend in the Dark" novel | Image:LitD_Ragnar_and_Healie.png|"Legend in the Dark" novel. | ||
</gallery></center> | </gallery></center> | ||
{{DQIV}} | {{DQIV}} | ||
{{DQVI}} | {{DQVI}} | ||
{{DQVIII}} | {{DQVIII}} | ||
[[Category:Slimes]] | [[Category:Slimes]] | ||
[[Category:Party members]] | [[Category:Party members]] | ||
Revision as of 02:05, 4 March 2020
| Healie | |
| Dragon Quest IV Dragon Quest VI Dragon Quest VIII | |
| Sprite(s) | |
| Japanese name | ホイミン |
| Romaji | Hoimin |
| Class | Kind Healer (NES Version) |
| Race | Healslime (later human) |
| Age | ? |
"Whooze in need of some healing?"
—Healie, in VI (DS)
Healie (ホイミン Hoimin) is a minor character and temporary party member in Dragon Quest IV: Chapters of the Chosen, an optional character and eligible party member in Dragon Quest VI: Realms of Revelation, and has a cameo in Dragon Quest VIII: Journey of the Cursed King. He is a Healslime who seeks to become a human. Whether this is the same character in each appearance or just a homage is unknown, and left open to player interpretation.
Appearance and personality
|
|
This section is a stub. You can help by expanding it. |
Appearances
Dragon Quest IV: Chapters of the Chosen
Base stats

Healie with Alena and the Hero.
| Attribute | Stats |
| Level | Unknown |
| HP | 35 |
| MP | 30 |
| Strength | 9 (18 in the NES Version) |
| Agility | 56 (18 in the NES Version) |
| Resilience | 28 (Not listed in the {{NES} Version) |
| Wisdom | 12 (Not listed in the {[NES}} Version) |
| Luck | 30 (Not listed in the NES Version) |
| Attack | 9 |
| Defence | 28 (20 in the NES Version) |
| Spell | Heal |
Selected quotes
Dragon Quest VI: Realms of Revelation
Base stats
| Attribute | Starting Stats | Maximum Stats |
| Level | 4 | 99 |
| HP | 59 | 600 |
| MP | 26 | 800 |
| Strength | 23 | 200 |
| Agility | 21 | 210 |
| Resilience | 28 | 200 |
| Wisdom | 6 | 150 |
| Style | 15 | 50 |
| Initial gear | None | |
Abilities
| Resistances | |
| Flame Breath | 60% |
| Ice Breath | 0% |
| Frizz | 25% |
| Sizz | 60% |
| Bang | 60% |
| Woosh | 0% |
| Crack | 0% |
| Zap | 60% |
| Strike/Rock | 0% |
| Troop | 0% |
| Death | 50% |
| Kamikazee | 50% |
| Paralysis | 50% |
| Poof | 80% |
| Dazzle | 15% |
| Snooze | 50% |
| Drain Magic | 50% |
| Fizzle | 15% |
| Fuddle | 0% |
| Sap | 0% |
| Poison | 50% |
| Ban Dance | 100% |
| Stun | 0% |
Spells
Aside from class abilities, Healie learns several spells on his own. Along with Curie, Healie is one of the only two party members that can cast Omniheal.
| Name | MP | Level | Target | Description |
| Heal | 2 | 4 | One ally | Restores at least 30 HP to a single ally. |
|---|---|---|---|---|
| Midheal | 5 | 9 | One ally | Restores at least 75 HP to a single ally. |
| Fullheal | 7 | 15 | One ally | Restores all HP to a single ally. |
| Multiheal | 18 | 18 | Party | Restores at least 100 HP to all party members. |
| Omniheal | 36 | 23 | Party | Restores all HP to all party members. |
Equipment
| Dragon Quest VI (All) | |
|---|---|
| Helmet | Modifier(s) |
| Pointy hat | Defense +3 |
| Shellmet | Defense +7 |
| Bunny ears | Defense +20 |
| Iron mask | Defense +25 |
| Duplic hat | Defense +25 |
| Hermes' hat | Defense +28 |
| Happy hat | Defense +35 |
| Slime helmet | Defense +40 |
| Metal king helm | Defense +70 |
| Dragon Quest VI (All) | |
|---|---|
| Armor | Modifier(s) |
| Rags | Defense+3 |
| Boxer shorts | Defense+13 |
| Scale armour | Defense+15 |
| Fur cape | Defense+18 |
| Slime gooniform | Defense+20 |
| Bronze armour | Defense+21 |
| Iron cuirass | Defense+23 |
| Cloak of evasion | Defense+28 |
| Tortoise shell | Defense+33 |
| Glombolero | Defense+40 |
| Magical skirt | Defense+45 |
| Magic armour | Defense+50 |
| Flowing dress | Defense+65 |
| Slime armour | Defense+70 |
| Armour of Max Wynne | Defense+90 |
| Angel leotard | Defense+95 |
| Metal king armour | Defense+115 |
| Dragon Quest VI (All) | |
|---|---|
| Shields | Modifier(s) |
| Pot lid | Defense+2 |
| Silver platter | Defense+18 |
| Power shield | Defense+45 |
| Silver shield | Defense+48 |
| Metal king shield | Defense+70 |
| Dragon Quest VI (All) | |
|---|---|
| Accessories | Modifier(s) |
| Slime earrings | Strength+5 |
| Raging ruby | Strength+20 |
| Bow tie | Defense+2 |
| Gold ring | Defense+5 |
| Prayer ring | Defense+5 |
| Trailblazing bandana | Defense+5 |
| Kerplunk bracer | Defense+10 |
| Restless heart | Defense+15 |
| Gold bracer | Defense+15 |
| Meteorite bracer | Agilityx2 |
| Kamikazee bracer | Style+10 |
| Gospel ring | Style+30 |
| Pink pearl | Style+40 |
| Glass slippers | Style+45 |
Selected quotes
Dragon Quest VIII: Journey of the Cursed King
Healie appears as an infamous monster in VIII, and can be found near the coast of Port Prospect.
Trivia
- In the PlayStation and Nintendo DS version of 'Dragon Quest IV', Healie's Heal spell can be used manually out of battle.
- Healie, along with Tom Foolery, are the only NPC allies to completely disappear later in the game.
- Even if Chapter 1 is completed without recruiting Healie, he will still appear in Chapter 5 in his human form.
See also
Gallery
Famicom art.

PlayStation art.

PlayStation art
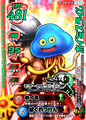
Dragon Quest: Monster Battle II card.
"Legend in the Dark" novel.


