Prickly Wilds: Difference between revisions
m (→See also: Whoops, had The Neverending Story on the brain.) |
LiquidMetal (talk | contribs) mNo edit summary |
||
| (3 intermediate revisions by 2 users not shown) | |||
| Line 1: | Line 1: | ||
{{LocationInfobox | {{LocationInfobox | ||
|game = | |game = {{DQB}} | ||
|title = Prickly Wilds | |title = Prickly Wilds | ||
|type= Tropical coast | |type= Tropical coast | ||
| Line 8: | Line 8: | ||
|romanji= | |romanji= | ||
}} | }} | ||
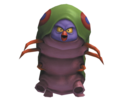
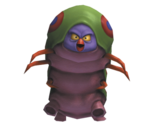
The '''Prickly Wilds''' are the second area in the [[Rimuldar]] region. The introductory section is a palmtree filled plain that rises into hills in the south and western reaches, but the coastline seen in the further south is what gives the area it's name. This section is filled with the incredibly dangerous flowers that cause [[ | The '''Prickly Wilds''' are the second area in the [[Rimuldar]] region. The introductory section is a palmtree filled plain that rises into hills in the south and western reaches, but the coastline seen in the further south is what gives the area it's name. This section is filled with tingleweed, the incredibly dangerous flowers that cause [[paralysis]] upon contact. Numbness is a recurring theme of this area, with the [[killerpillar]] doing their best to infect the Builder. | ||
== | ==Overview== | ||
This is the first region of Rimuldar where the player can encounter healthy palm trees and, thus, wood. This lush jungle contains many dangers such as paralyzing plants and monsters, or confusing scarewolves. | |||
== | ==Sidequests & Points of interest== | ||
=== | ===Getting the fishing rod=== | ||
Following Nosh's quest to the second Q mark below the mid line of the map, there is a ruined fishing hub is where a friendly bodkin archer spends his time fishing. His hut is damaged, but if it is restored he will teach the Builder how to create a rod of their own and how to cast like a master. | |||
=== | ===World map=== | ||
A little bit to the east from the fishing hut, following the river, an earthen tower can be seen. There is a chest containing the world map in the top of the tower. | |||
===Protected room=== | |||
When going towards the fishing hub from the teleportal, players might notice a brick room with a locked key. Upon returning to this place after learning how to produce keys in later parts of the Rimuldar chapter, players can obtain a pair of [[List of accessories in Dragon Quest Builders|featherfall footwear]], an accssory that nulls fall damage. | |||
===Challenge: Fix the roof of the ruins=== | |||
Deep inside the mountains to the west of the blue teleportal, there is a ruined mansion with a broken roof. There is a note on the top of the mansion asking for someone to fix the roof with the materials in a chest nearby. Filling the holes with the appropriate roof parts will award the player with the recipes to make roof tiles on their own. | |||
===Challenge: Thalamus's quizz=== | |||
This is the second part of this challenge. It is located north from the ruined mansion, west from the blue teleportal. The challenge in this region is extremely simple: players just need to plant a palm seedling in the exposed earth block to solve it. The two chests in the front contain gold and a blue block. | |||
===Bodkin archer's houses=== | |||
There are three wooden towers in the jungle that serve as homes for paralyzed friendly bodkin archers. Aiding them with [[List of items in Dragon Quest Builders|tingle tablets]] and they will reward the builders with gold, a seed of life and x50 [[List of items in Dragon Quest Builders|thowing stones]]. | |||
===Bewarewolf's temple=== | |||
In the western-most side of the island players can find an temple with two evil idols at the entrace. Some friendly bewerewolves and a [[tearwolf]] reside in it. Talking with the leader -the tearwolf-, will allow the player to learn how to make defuddle drops, which help cure confusion. If the player returns to the tearwolf after making some defuddle drops in an herbalist's cauldron -unlocked a bit later in this chapter's story-, he will award the builders with a [[List of accessories in Dragon Quest Builders|ring of clarity]], which prevents confusion if equipped. | |||
There is a [[List of accessories in Dragon Quest Builders|gold ring]] on the top of the temple. | |||
==Resources== | |||
List of available materials in Prickly Wilds. | |||
{| class="wikitable" style="width: 86%; text-align: center; margin: auto; " | |||
|+ | |||
|- | |||
| colspan="7" | Raw materials | |||
|- | |||
| style="width: 14%" |[[File:Broken branch icon.png|50px]]<br>[[List of raw materials in Dragon Quest Builders|Broken branch]] | |||
| style="width: 14%" |[[File:Butterbeans icon.png|50px]]<br>[[List of raw materials in Dragon Quest Builders|Butterbeans]] | |||
| style="width: 14%" |[[File:Coal icon.png|50px]]<br>[[List of raw materials in Dragon Quest Builders|Coal]] | |||
| style="width: 14%" |[[File:Cotton icon.png|50px]]<br>[[List of raw materials in Dragon Quest Builders|Cotton]] | |||
| style="width: 14%" |[[File:Fibrous frond icon.png|50px]]<br>[[List of raw materials in Dragon Quest Builders|Fibrous frond]] | |||
| style="width: 14%" |[[File:Ivy icon.png|50px]]<br>[[List of raw materials in Dragon Quest Builders|Ivy]] | |||
| style="width: 14%" |[[File:Medicinal leaf icon.png|50px]]<br>[[List of raw materials in Dragon Quest Builders|Medicinal leaf]] | |||
|- | |||
| style="width: 14%" |[[File:Palm seedling icon.png|50px]]<br>[[List of raw materials in Dragon Quest Builders|Palm seedling]] | |||
| style="width: 14%" |[[File:Plumberry seedling icon.png|50px]]<br>[[List of raw materials in Dragon Quest Builders|Plumberry seedling]] | |||
| style="width: 14%" |[[File:Pongsettia icon.png|50px]]<br>[[List of raw materials in Dragon Quest Builders|Pongsettia leaf]] | |||
| style="width: 14%" |[[File:Pumice pieces icon.png|50px]]<br>[[List of raw materials in Dragon Quest Builders|Pumice pieces]] | |||
| style="width: 14%" |[[File:DQB stone icon.png|50px]]<br>[[List of raw materials in Dragon Quest Builders|Stone]] | |||
| style="width: 14%" |[[File:White petals icon.png|50px]]<br>[[List of raw materials in Dragon Quest Builders|White petals]] | |||
|} | |||
{{clear}} | |||
{| class="wikitable" style="width: 86%; text-align: center; margin: auto; " | |||
|+ | |||
|- | |||
| colspan="7" | Raw materials requiring a shovel | |||
|- | |||
| style="width: 14%" | [[File:Branch icon.png|50px]]<br>[[List of raw materials in Dragon Quest Builders|Branch]] | |||
| style="width: 14%" | [[File:Cotton plant icon.png|50px]]<br>[[List of raw materials in Dragon Quest Builders|Cotton plant]] | |||
| style="width: 14%" | [[File:Fibrous fern icon.png|50px]]<br>[[List of raw materials in Dragon Quest Builders|Fibrous fern]] | |||
| style="width: 14%" | [[File:Grass icon.png|50px]]<br>[[List of raw materials in Dragon Quest Builders|Grass]] | |||
| style="width: 14%" |[[File:Medicinal shrub icon.png|50px]]<br>[[List of raw materials in Dragon Quest Builders|Medicinal shrub]] | |||
| style="width: 14%" |[[File:Milkblossom icon.png|50px]]<br>[[List of raw materials in Dragon Quest Builders|Milkblossom]] | |||
| style="width: 14%" |[[File:Tingleweed icon.png|50px]]<br>[[List of raw materials in Dragon Quest Builders|Tingleweed]] | |||
|- | |||
| style="width: 14%" |[[File:Stalwort icon.png|50px]]<br>[[List of raw materials in Dragon Quest Builders|Stalwort]] | |||
|} | |||
{{clear}} | |||
{| class="wikitable" style="width: 86%; text-align: center; margin: auto; " | |||
|+ | |||
|- | |||
| colspan="7" | Building materials and decorations | |||
|- | |||
| style="width: 14%" | [[File:Chalk icon.png|50px]]<br>[[List of construction materials in Dragon Quest Builders#Natural blocks|Chalk]] | |||
| style="width: 14%" | [[File:Earth block.png|50px]]<br>[[List of construction materials in Dragon Quest Builders#Natural blocks|Earth]] | |||
| style="width: 14%" | [[File:Palm lumber icon.png|50px]]<br>[[List of construction materials in Dragon Quest Builders#Natural blocks|Palm lumber]] | |||
| style="width: 14%" | [[File:Pebblestone block icon.png|50px]]<br>[[List of construction materials in Dragon Quest Builders#Natural blocks|Pebblestone]] | |||
| style="width: 14%" | [[File:Plumberry lumber icon.png|50px]]<br>[[List of construction materials in Dragon Quest Builders#Natural blocks|Plumberry lumber]] | |||
| style="width: 14%" | [[File:Sand block icon.png|50px]]<br>[[List of construction materials in Dragon Quest Builders#Natural blocks|Sand]] | |||
| style="width: 14%" | | |||
|} | |||
==Monsters== | ==Monsters== | ||
List of monsters who live in the wilds. | |||
{| class="wikitable" style="width: 72%; text-align: center; margin: auto; " | |||
|+ | |||
|- | |||
| style="width: 15%" | Image | |||
| style="width: 15%" | Name | |||
| style="width: 10%" | HP | |||
| style="width: 10%" | Attack | |||
| style="width: 10%" | Defense | |||
| style="width: 20%" | Drop 1 | |||
| style="width: 20%" | Drop 2 | |||
|- | |||
| [[File:DQB Bewarewolf.png|200px]] | |||
| [[Bewarewolf]] (Small) | |||
| 27-66 | |||
| 15-20 | |||
| 0-12 | |||
|[[File:Fur icon.png]]<br>[[List of raw materials in Dragon Quest Builders|Fur]] | |||
|- | |||
| [[File:DQB Brownie.png|150px]] | |||
| [[Brownie]] (Small) | |||
| 30 | |||
| 14 | |||
| 4 | |||
|[[File:Fur icon.png]]<br>[[List of raw materials in Dragon Quest Builders|Fur]] | |||
| | |||
|- | |||
| [[File:DQB Brownie.png|200px]] | |||
| [[Brownie]] (Large) | |||
| 38 | |||
| 16 | |||
| 6 | |||
|[[File:Leather sack icon.png]]<br>[[List of decorations in Dragon Quest Builders|Leather sack]] | |||
| | |||
|- | |||
| [[File:DQB Chimaera.png|150px]] | |||
| [[Chimaera]] | |||
| 19 | |||
| 12 | |||
| 0 | |||
|[[File:Chimaera feather icon.png]]<br>[[List of raw materials in Dragon Quest Builders|Chimaera feather]] | |||
|[[File:Monster egg icon.png]]<br>[[List of raw materials in Dragon Quest Builders|Monster egg]] | |||
|- | |||
| [[File:DQB Drackolyte.png|150px]] | |||
| [[Drackolyte]] | |||
| 24 | |||
| 11 | |||
| 0 | |||
|[[File:Tingleweed bud icon.png]]<br>[[List of raw materials in Dragon Quest Builders|Tingleweed bud]] | |||
|[[File:Limegrass seed icon.png]]<br>[[List of raw materials in Dragon Quest Builders|Limegrass seed]] | |||
|- | |||
| [[File:DQB Fightgeist.png|150px]] | |||
| [[Fightgeist]] <br>(Night only) | |||
| 56 | |||
| 22 | |||
| 8 | |||
|[[File:Chimaera feather icon.png]]<br>[[List of raw materials in Dragon Quest Builders|Chimaera feather]] | |||
|[[File:Monster egg icon.png]]<br>[[List of raw materials in Dragon Quest Builders|Monster egg]] | |||
|- | |||
| [[File:DQB Ghost.png|150px]] | |||
| [[Ghost]] <br>(Night only) | |||
| 30 | |||
| 12 | |||
| 0 | |||
|[[File:Chimaera feather icon.png]]<br>[[List of raw materials in Dragon Quest Builders|Chimaera feather]] | |||
|[[File:Monster egg icon.png]]<br>[[List of raw materials in Dragon Quest Builders|Monster egg]] | |||
|- | |||
| [[File:DQB Hammerhood.png|150px]] | |||
| [[Hammerhood]] | |||
| 28-84 | |||
| 13-26 | |||
| 0-10 | |||
|[[File:Fur icon.png]]<br>[[List of raw materials in Dragon Quest Builders|Fur]] | |||
| | |||
|- | |||
| [[File:Killerpillar builders.png|120px]] | |||
| [[Killerpillar]] (Small) | |||
| 26 | |||
| 10 | |||
| 4 | |||
|[[File:Paralystinger icon.png]]<br>[[List of raw materials in Dragon Quest Builders|Paralystinger]] | |||
| | |||
|- | |||
| [[File:Killerpillar builders.png|150px]] | |||
| [[Killerpillar]] (Large) | |||
| 32 | |||
| 17 | |||
| 8 | |||
|[[File:Paralystinger icon.png]]<br>[[List of raw materials in Dragon Quest Builders|Paralystinger]] | |||
|[[File:Tingleweed bud icon.png]]<br>[[List of raw materials in Dragon Quest Builders|Tingleweed bud]] | |||
|- | |||
| [[File:Metal slime builders.png|150px]] | |||
| [[Metal slime]] | |||
| 5 | |||
| 10 | |||
| 255 | |||
|[[File:Silvery sludge icon.png]]<br>[[List of raw materials in Dragon Quest Builders|Silvery sludge]] | |||
| | |||
|- | |||
| [[File:Muddy Box Slime.png|120px]] | |||
| [[Muddy box slime|Rocky Box Slime]] (Small) | |||
| 26 | |||
| 10 | |||
| 4 | |||
|[[File:Small stones icon.png]]<br>[[List of construction materials in Dragon Quest Builders#Natural blocks|Mossy earth]] | |||
|[[File:Bottles icon.png]]<br>[[List of decorations in Dragon Quest Builders|Bottles]] | |||
|- | |||
| [[File:Muddy Box Slime.png|150px]] | |||
| [[Muddy box slime|Rocky Box Slime]] (Large) | |||
| 32 | |||
| 13 | |||
| 8 | |||
|[[File:Window icon.png]]<br>[[List of construction materials in Dragon Quest Builders|Window]] (x1-3) | |||
| | |||
|- | |||
| [[File:Rocky Box Slime.png|120px]] | |||
| [[Rocky box slime|Rocky Box Slime]] (Small) | |||
| 27 | |||
| 10 | |||
| 4 | |||
|[[File:Small stones icon.png]]<br>[[List of raw materials in Dragon Quest Builders|Small stones]] | |||
|[[File:Pumice icon.png]]<br>[[List of raw materials in Dragon Quest Builders|Pumice]] | |||
|- | |||
| [[File:Rocky Box Slime.png|150px]] | |||
| [[Rocky box slime|Rocky Box Slime]] (Large) | |||
| 32 | |||
| 12 | |||
| 8 | |||
|[[File:Bathtub icon.png]]<br>[[List of decorations in Dragon Quest Builders|Bathtub]] | |||
|[[File:Big rock icon.png]]<br>[[List of raw materials in Dragon Quest Builders|Big rock]] | |||
|- | |||
| [[File:DQB Scarewolf.png|150px]] | |||
| [[Scarewolf]] | |||
| 40 | |||
| 14 | |||
| 7 | |||
|[[File:Fur icon.png]]<br>[[List of raw materials in Dragon Quest Builders|Fur]] | |||
|[[File:Confusing claw icon.png]]<br>[[List of raw materials in Dragon Quest Builders|Confusing claw]] | |||
|- | |||
| [[File:DQB She-Slime.png|150px]] | |||
| [[She-Slime]] | |||
| 16 | |||
| 8 | |||
| 0 | |||
|[[File:Orange oil icon.png]]<br>[[List of raw materials in Dragon Quest Builders|Orange oil]] | |||
|[[File:Daffodaisy bud icon.png]]<br>[[List of raw materials in Dragon Quest Builders|Daffodaisy bud]] | |||
|- | |||
|} | |||
==Gallery== | |||
<center><gallery> | |||
File:Friendly bodkin 1.jpg|The fishing bodkin asks for help. | |||
File:Friendly bodkin 2.jpg|Continued. | |||
File:Killarpillar nest.jpg|Approaching the nest. | |||
File:Killarpillar boss.png|Clashing with the boss pillar. | |||
</gallery></center> | |||
==See also== | ==See also== | ||
| Line 66: | Line 254: | ||
*[[Ancient Palace]] | *[[Ancient Palace]] | ||
*[[Holy Sanctum]] | *[[Holy Sanctum]] | ||
{{ | |||
{{DQBI}} | |||
[[Category:Dragon Quest Builders locations]] | [[Category:Dragon Quest Builders locations]] | ||
Latest revision as of 14:40, 12 February 2024
| Tropical coast | |
|---|---|
| Prickly Wilds | |
 Click for higher resolution | |
| Game | Dragon Quest Builders |
The Prickly Wilds are the second area in the Rimuldar region. The introductory section is a palmtree filled plain that rises into hills in the south and western reaches, but the coastline seen in the further south is what gives the area it's name. This section is filled with tingleweed, the incredibly dangerous flowers that cause paralysis upon contact. Numbness is a recurring theme of this area, with the killerpillar doing their best to infect the Builder.
Overview[edit]
This is the first region of Rimuldar where the player can encounter healthy palm trees and, thus, wood. This lush jungle contains many dangers such as paralyzing plants and monsters, or confusing scarewolves.
Sidequests & Points of interest[edit]
Getting the fishing rod[edit]
Following Nosh's quest to the second Q mark below the mid line of the map, there is a ruined fishing hub is where a friendly bodkin archer spends his time fishing. His hut is damaged, but if it is restored he will teach the Builder how to create a rod of their own and how to cast like a master.
World map[edit]
A little bit to the east from the fishing hut, following the river, an earthen tower can be seen. There is a chest containing the world map in the top of the tower.
Protected room[edit]
When going towards the fishing hub from the teleportal, players might notice a brick room with a locked key. Upon returning to this place after learning how to produce keys in later parts of the Rimuldar chapter, players can obtain a pair of featherfall footwear, an accssory that nulls fall damage.
Challenge: Fix the roof of the ruins[edit]
Deep inside the mountains to the west of the blue teleportal, there is a ruined mansion with a broken roof. There is a note on the top of the mansion asking for someone to fix the roof with the materials in a chest nearby. Filling the holes with the appropriate roof parts will award the player with the recipes to make roof tiles on their own.
Challenge: Thalamus's quizz[edit]
This is the second part of this challenge. It is located north from the ruined mansion, west from the blue teleportal. The challenge in this region is extremely simple: players just need to plant a palm seedling in the exposed earth block to solve it. The two chests in the front contain gold and a blue block.
Bodkin archer's houses[edit]
There are three wooden towers in the jungle that serve as homes for paralyzed friendly bodkin archers. Aiding them with tingle tablets and they will reward the builders with gold, a seed of life and x50 thowing stones.
Bewarewolf's temple[edit]
In the western-most side of the island players can find an temple with two evil idols at the entrace. Some friendly bewerewolves and a tearwolf reside in it. Talking with the leader -the tearwolf-, will allow the player to learn how to make defuddle drops, which help cure confusion. If the player returns to the tearwolf after making some defuddle drops in an herbalist's cauldron -unlocked a bit later in this chapter's story-, he will award the builders with a ring of clarity, which prevents confusion if equipped.
There is a gold ring on the top of the temple.
Resources[edit]
List of available materials in Prickly Wilds.
| Raw materials | ||||||
Broken branch |
Butterbeans |
Coal |
Cotton |
Fibrous frond |
Ivy |
Medicinal leaf |
Palm seedling |
Plumberry seedling |
Pongsettia leaf |
Pumice pieces |
Stone |
White petals | |
| Raw materials requiring a shovel | ||||||
Branch |
Cotton plant |
Fibrous fern |
Grass |
Medicinal shrub |
Milkblossom |
Tingleweed |
Stalwort | ||||||
| Building materials and decorations | ||||||
Chalk |
 Earth |
Palm lumber |
Pebblestone |
Plumberry lumber |
Sand |
|
Monsters[edit]
List of monsters who live in the wilds.
| Image | Name | HP | Attack | Defense | Drop 1 | Drop 2 |
|
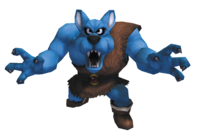
Bewarewolf (Small) | 27-66 | 15-20 | 0-12 | Fur | |

|
Brownie (Small) | 30 | 14 | 4 | Fur |
|
|
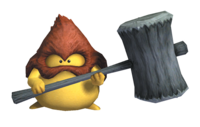
Brownie (Large) | 38 | 16 | 6 | Leather sack |
|
|
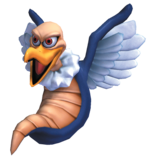
Chimaera | 19 | 12 | 0 | Chimaera feather |
Monster egg |
|
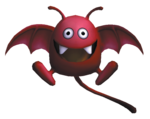
Drackolyte | 24 | 11 | 0 | Tingleweed bud |
Limegrass seed |

|
Fightgeist (Night only) |
56 | 22 | 8 | Chimaera feather |
Monster egg |

|
Ghost (Night only) |
30 | 12 | 0 | Chimaera feather |
Monster egg |

|
Hammerhood | 28-84 | 13-26 | 0-10 | Fur |
|
|
Killerpillar (Small) | 26 | 10 | 4 | Paralystinger |
|
|
Killerpillar (Large) | 32 | 17 | 8 | Paralystinger |
Tingleweed bud |

|
Metal slime | 5 | 10 | 255 | Silvery sludge |
|
|
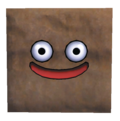
Rocky Box Slime (Small) | 26 | 10 | 4 | Mossy earth |
Bottles |
|
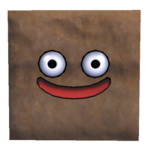
Rocky Box Slime (Large) | 32 | 13 | 8 | Window (x1-3) |
|

|
Rocky Box Slime (Small) | 27 | 10 | 4 | Small stones |
Pumice |

|
Rocky Box Slime (Large) | 32 | 12 | 8 | Bathtub |
Big rock |

|
Scarewolf | 40 | 14 | 7 | Fur |
Confusing claw |

|
She-Slime | 16 | 8 | 0 | Orange oil |
Daffodaisy bud |


