Hammerhood Heights: Difference between revisions
LiquidMetal (talk | contribs) (general info, visual lists) |
LiquidMetal (talk | contribs) m (→Monsters: image sizes) |
||
| (7 intermediate revisions by the same user not shown) | |||
| Line 17: | Line 17: | ||
Kenelm can be rescued from some monsters in the small peninsula in the northern area of the island. He later teaches the builder how to do charged attacks. | Kenelm can be rescued from some monsters in the small peninsula in the northern area of the island. He later teaches the builder how to do charged attacks. | ||
==Sidequests== | ==Sidequests & Points of interest== | ||
[[File:DQB Alefgard Map Ch1.jpeg|thumb|right|Map of Alefgard, highlighting the Cantlin region.]] | [[File:DQB Alefgard Map Ch1.jpeg|thumb|right|Map of Alefgard, highlighting the Cantlin region.]] | ||
A list of side-activites to do while in the heights. | A list of side-activites to do while in the heights. | ||
| Line 26: | Line 26: | ||
From a friendly hammerhood warming himself at the fire, go north carefully by the edge of the cliffs. A small cave awaits, containg a treasure chest with a world map inside. | From a friendly hammerhood warming himself at the fire, go north carefully by the edge of the cliffs. A small cave awaits, containg a treasure chest with a world map inside. | ||
===The graveyard=== | ===Challenge: The hammerhood graveyard=== | ||
In another | In another hole near Clobberina's home, lies a ruined [[hammerhood]] cementery. One of this chapter's challenges is repairing this resting place, however it cannot be done the first time the location is visited. In order to unlock all the needed recipes, the builder must travel to a hidden island in the north of [[The Damdara Desert|the Damdara Desert]]. After talking to the [[brownie]], the builder must return and build the needed stone memorials and place them down. | ||
==="The Greasy Mallet" blueprint=== | ==="The Greasy Mallet" blueprint=== | ||
| Line 44: | Line 44: | ||
Atop of the fortress, a chest containing a chimaera wing awaits. | Atop of the fortress, a chest containing a chimaera wing awaits. | ||
=== | ===Challenge: the three dragons (2)=== | ||
The second dragon needed for the [[Cantlin#Challenges|challenge]] is located deep in the western mountains, much further than the fortress. It will drop the Dragon Scale accessory when defeated. | The second dragon needed for the [[Cantlin#Challenges|challenge]] is located deep in the western mountains, much further than the fortress. It will drop the Dragon Scale accessory when defeated. | ||
| Line 54: | Line 54: | ||
| colspan="7" | Raw materials | | colspan="7" | Raw materials | ||
|- | |- | ||
| style="width: 14%" |[[File:Broken branch icon.png]]<br>[[List of raw materials in Dragon Quest Builders#Broken branch|Broken branch]] | | style="width: 14%" |[[File:Broken branch icon.png|50px]]<br>[[List of raw materials in Dragon Quest Builders#Broken branch|Broken branch]] | ||
| style="width: 14%" |[[File:Butterbeans icon.png]]<br>[[List of raw materials in Dragon Quest Builders#Butterbeans|Butterbeans]] | | style="width: 14%" |[[File:Butterbeans icon.png|50px]]<br>[[List of raw materials in Dragon Quest Builders#Butterbeans|Butterbeans]] | ||
| style="width: 14%" |[[File:Coal icon.png]]<br>[[List of raw materials in Dragon Quest Builders#Coal|Coal]] | | style="width: 14%" |[[File:Coal icon.png|50px]]<br>[[List of raw materials in Dragon Quest Builders#Coal|Coal]] | ||
| style="width: 14%" |[[File:Copper icon.png]]<br>[[List of raw materials in Dragon Quest Builders#Copper|Copper]] | | style="width: 14%" |[[File:Copper icon.png|50px]]<br>[[List of raw materials in Dragon Quest Builders#Copper|Copper]] | ||
| style="width: 14%" |[[File:Grassy leaves icon.png]]<br>[[List of raw materials in Dragon Quest Builders#Grassy leaves|Grassy leaves]] | | style="width: 14%" |[[File:Grassy leaves icon.png|50px]]<br>[[List of raw materials in Dragon Quest Builders#Grassy leaves|Grassy leaves]] | ||
| style="width: 14%" |[[File:Ivy icon.png]]<br>[[List of raw materials in Dragon Quest Builders#Ivy|Ivy]] | | style="width: 14%" |[[File:Ivy icon.png|50px]]<br>[[List of raw materials in Dragon Quest Builders#Ivy|Ivy]] | ||
| style="width: 14%" |[[File:Marshroom icon.png]]<br>[[List of raw materials in Dragon Quest Builders#Marshroom|Marshroom]] | | style="width: 14%" |[[File:Marshroom icon.png|50px]]<br>[[List of raw materials in Dragon Quest Builders#Marshroom|Marshroom]] | ||
|- | |- | ||
| style="width: 14%" |[[File:Medicinal leaf icon.png]]<br>[[List of raw materials in Dragon Quest Builders#Medicinal leaf|Medicinal leaf]] | | style="width: 14%" |[[File:Medicinal leaf icon.png|50px]]<br>[[List of raw materials in Dragon Quest Builders#Medicinal leaf|Medicinal leaf]] | ||
| style="width: 14%" |[[File:Plumberry icon.png]]<br>[[List of raw materials in Dragon Quest Builders#Plumberry|Plumberry]] | | style="width: 14%" |[[File:Plumberry icon.png|50px]]<br>[[List of raw materials in Dragon Quest Builders#Plumberry|Plumberry]] | ||
| style="width: 14%" |[[File:Plumberry seedling icon.png]]<br>[[List of raw materials in Dragon Quest Builders#Plumberry seedling|Plumberry seedling]] | | style="width: 14%" |[[File:Plumberry seedling icon.png|50px]]<br>[[List of raw materials in Dragon Quest Builders#Plumberry seedling|Plumberry seedling]] | ||
| style="width: 14%" |[[File:Pumice pieces icon.png]]<br>[[List of raw materials in Dragon Quest Builders#Pumice pieces|Pumice pieces]] | | style="width: 14%" |[[File:Pumice pieces icon.png|50px]]<br>[[List of raw materials in Dragon Quest Builders#Pumice pieces|Pumice pieces]] | ||
| style="width: 14%" |[[File:Silver icon.png]]<br>[[List of raw materials in Dragon Quest Builders#Silver|Silver]] | | style="width: 14%" |[[File:Silver icon.png|50px]]<br>[[List of raw materials in Dragon Quest Builders#Silver|Silver]] | ||
| style="width: 14%" |[[File: | | style="width: 14%" |[[File:DQB stone icon.png|50px]]<br>[[List of raw materials in Dragon Quest Builders#Stone|Stone]] | ||
| style="width: 14%" |[[File:Wheat icon.png]]<br>[[List of raw materials in Dragon Quest Builders#Wheat|Wheat]] | | style="width: 14%" |[[File:Wheat icon.png|50px]]<br>[[List of raw materials in Dragon Quest Builders#Wheat|Wheat]] | ||
|- | |- | ||
| style="width: 14%" |[[File:White petals icon.png]]<br>[[List of raw materials in Dragon Quest Builders#White petals|White petals]] | | style="width: 14%" |[[File:White petals icon.png|50px]]<br>[[List of raw materials in Dragon Quest Builders#White petals|White petals]] | ||
|} | |} | ||
{{clear}} | {{clear}} | ||
| Line 78: | Line 78: | ||
| colspan="7" | Raw materials requiring a shovel | | colspan="7" | Raw materials requiring a shovel | ||
|- | |- | ||
| style="width: 14%" | [[File:Branch icon.png]]<br>[[List of raw materials in Dragon Quest Builders#Branch|Branch]] | | style="width: 14%" | [[File:Branch icon.png|50px]]<br>[[List of raw materials in Dragon Quest Builders#Branch|Branch]] | ||
| style="width: 14%" | [[File:Grass icon.png]]<br>[[List of raw materials in Dragon Quest Builders#Grass|Grass]] | | style="width: 14%" | [[File:Grass icon.png|50px]]<br>[[List of raw materials in Dragon Quest Builders#Grass|Grass]] | ||
| style="width: 14%" |[[File:Medicinal shrub icon.png]]<br>[[List of raw materials in Dragon Quest Builders#Medicinal shrub|Medicinal shrub]] | | style="width: 14%" |[[File:Medicinal shrub icon.png|50px]]<br>[[List of raw materials in Dragon Quest Builders#Medicinal shrub|Medicinal shrub]] | ||
| style="width: 14%" |[[File:Milkblossom icon.png]]<br>[[List of raw materials in Dragon Quest Builders#Milkblossom|Milkblossom]] | | style="width: 14%" |[[File:Milkblossom icon.png|50px]]<br>[[List of raw materials in Dragon Quest Builders#Milkblossom|Milkblossom]] | ||
| style="width: 14%" |[[File:Pristine plumberry icon.png]]<br>[[List of raw materials in Dragon Quest Builders#Pristine plumberry|Pristine plumberry]] | | style="width: 14%" |[[File:Pristine plumberry icon.png|50px]]<br>[[List of raw materials in Dragon Quest Builders#Pristine plumberry|Pristine plumberry]] | ||
| style="width: 14%" |[[File:Stalwort icon.png]]<br>[[List of raw materials in Dragon Quest Builders#Stalwort|Stalwort]] | | style="width: 14%" |[[File:Stalwort icon.png|50px]]<br>[[List of raw materials in Dragon Quest Builders#Stalwort|Stalwort]] | ||
| style="width: 14%" | | | style="width: 14%" | | ||
|} | |} | ||
| Line 92: | Line 92: | ||
| colspan="7" | Building materials and decorations | | colspan="7" | Building materials and decorations | ||
|- | |- | ||
| style="width: 14%" | [[File: | | style="width: 14%" | [[File:Broken barricade icon.png|50px]]<br>Broken barricade | ||
| style="width: 14%" | [[File: | | style="width: 14%" | [[File:Broken brickwork icon.png|50px]]<br>Broken brickwork | ||
| style="width: 14%" | [[File:Chalk icon.png]]<br>[[List_of_construction_materials_in_Dragon_Quest_Builders#Natural_blocks|Chalk]] | | style="width: 14%" | [[File:Chalk icon.png|50px]]<br>[[List_of_construction_materials_in_Dragon_Quest_Builders#Natural_blocks|Chalk]] | ||
| style="width: 14%" | [[File:Clay block icon.png]]<br>[[List of construction materials in Dragon Quest Builders#Clay|Clay]] | | style="width: 14%" | [[File:Clay block icon.png|50px]]<br>[[List of construction materials in Dragon Quest Builders#Clay|Clay]] | ||
| style="width: 14%" | [[File: | | style="width: 14%" | [[File:Dilapidated crate icon.png|50px]]<br>Dilapidated crate | ||
| style="width: 14%" | [[File:Earth block.png]]<br>[[List_of_construction_materials_in_Dragon_Quest_Builders#Natural_blocks|Earth]] | | style="width: 14%" | [[File:Earth block.png|50px]]<br>[[List_of_construction_materials_in_Dragon_Quest_Builders#Natural_blocks|Earth]] | ||
| style="width: 14%" | [[File:Obsidian block icon.png]]<br>[[List_of_construction_materials_in_Dragon_Quest_Builders#Natural_blocks|Obsidian]] | | style="width: 14%" | [[File:Obsidian block icon.png|50px]]<br>[[List_of_construction_materials_in_Dragon_Quest_Builders#Natural_blocks|Obsidian]] | ||
|- | |- | ||
| style="width: 14%" | [[File: | | style="width: 14%" | [[File:Pebblestone block icon.png|50px]]<br>[[List_of_construction_materials_in_Dragon_Quest_Builders#Natural_blocks|Pebblestone]] | ||
| style="width: 14%" | [[File:Plumberry lumber icon.png]]<br>[[List_of_construction_materials_in_Dragon_Quest_Builders#Natural_blocks|Plumberry lumber]] | | style="width: 14%" | [[File:Plumberry lumber icon.png|50px]]<br>[[List_of_construction_materials_in_Dragon_Quest_Builders#Natural_blocks|Plumberry lumber]] | ||
|} | |} | ||
==Monsters== | ==Monsters== | ||
List of enemies available in the | List of enemies available in the Hammerhood Heights. | ||
{| class="wikitable" style="width: 72%; text-align: center; margin: auto; " | {| class="wikitable" style="width: 72%; text-align: center; margin: auto; " | ||
|+ | |+ | ||
| Line 114: | Line 114: | ||
| style="width: 10%" | Attack | | style="width: 10%" | Attack | ||
| style="width: 10%" | Defense | | style="width: 10%" | Defense | ||
| style="width: 20%" | | style="width: 20%" | Drop 1 | ||
| style="width: 20%" | | style="width: 20%" | Drop 2 | ||
|- | |- | ||
| [[File:DQB Brownie.png|150px]] | | [[File:DQB Brownie.png|150px]] | ||
| [[Brownie]] | | [[Brownie]] (Small) | ||
| 20 | | 20 | ||
| 11 | | 11 | ||
| 6 | | 6 | ||
|[[File:Fur icon.png]]<br>[[List of raw materials in Dragon Quest Builders|Fur]] | |[[File:Fur icon.png]]<br>[[List of raw materials in Dragon Quest Builders|Fur]] | ||
| | |||
|- | |||
| [[File:DQB Brownie.png|150px]] | |||
| [[Brownie]] (Large) | |||
| 40 | |||
| 16 | |||
| 7 | |||
|[[File:Leather sack icon.png]]<br>[[List of decorations in Dragon Quest Builders|Leather sack]] | |||
| | | | ||
|- | |- | ||
| Line 142: | Line 150: | ||
|- | |- | ||
| [[File:DQB Fightgeist.png|150px]] | | [[File:DQB Fightgeist.png|150px]] | ||
| [[Fightgeist]] | | [[Fightgeist]] (Night only) | ||
| 56 | | 56 | ||
| 24 | | 24 | ||
| Line 150: | Line 158: | ||
|- | |- | ||
| [[File:DQB Ghost.png|150px]] | | [[File:DQB Ghost.png|150px]] | ||
| [[Ghost]] | | [[Ghost]] (Night only) | ||
| 56 | | 56 | ||
| 24 | | 24 | ||
| Line 159: | Line 167: | ||
| [[File:DQB Hammerhood.png|150px]] | | [[File:DQB Hammerhood.png|150px]] | ||
| [[Hammerhood]] | | [[Hammerhood]] | ||
| 18 | | 18 | ||
| 12 | | 12 | ||
| 4 | | 4 | ||
|[[File:Fur icon.png]]<br>[[List of raw materials in Dragon Quest Builders|Fur]] | |[[File:Fur icon.png]]<br>[[List of raw materials in Dragon Quest Builders|Fur]] | ||
|[[File:Whopping needle icon.png]]<br>[[List of raw materials in Dragon Quest Builders|Whopping needle]] | |[[File:Whopping needle icon.png]]<br>[[List of raw materials in Dragon Quest Builders|Whopping needle]] | ||
|- | |- | ||
| [[File:Rocky Box Slime.png|150px]] | | [[File:Rocky Box Slime.png|150px]] | ||
| [[Rocky box slime|Rocky Box Slime]] | | [[Rocky box slime|Rocky Box Slime]] (Small) | ||
| | | 24 | ||
| | | 10 | ||
| | | 12 | ||
|[[File: | |[[File:Small stones icon.png]]<br>[[List of raw materials in Dragon Quest Builders|Small stones]] | ||
|[[File: | |[[File:Pumice icon.png]]<br>[[List of raw materials in Dragon Quest Builders|Pumice]] | ||
|- | |||
| [[File:Rocky Box Slime.png|150px]] | |||
| [[Rocky box slime|Rocky Box Slime]] (Large) | |||
| 14 | |||
| 10 | |||
| 12 | |||
|[[File:Bathtub icon.png]]<br>[[List of decorations in Dragon Quest Builders|Bathtub]] | |||
|[[File:Big rock icon.png]]<br>[[List of raw materials in Dragon Quest Builders|Big rock]] | |||
|- | |- | ||
| [[File:DQB She-Slime.png|150px]] | | [[File:DQB She-Slime.png|150px]] | ||
| Line 181: | Line 197: | ||
|[[File:Daffodaisy bud icon.png]]<br>[[List of raw materials in Dragon Quest Builders|Daffodaisy bud]] | |[[File:Daffodaisy bud icon.png]]<br>[[List of raw materials in Dragon Quest Builders|Daffodaisy bud]] | ||
|- | |- | ||
| [[File: | | [[File:DQB Skeleton.png|150px]] | ||
| [[Skeleton]] | | [[Skeleton]] | ||
| 23 | | 23 | ||
| 14 | | 14 | ||
| 6 | | 6 | ||
|[[File:Coarse cloth icon.png]]<br>[[List of raw materials in Dragon Quest Builders|Coarse cloth shard]] | |[[File:Coarse cloth icon.png]]<br>[[List of raw materials in Dragon Quest Builders|Coarse cloth shard]] | ||
|[[File: | |[[File:Bones icon.png]]<br>[[List of raw materials in Dragon Quest Builders|Bones]] | ||
|- | |- | ||
| [[File:DQB Slime.png|150px]] | | [[File:DQB Slime.png|150px]] | ||
Latest revision as of 13:35, 31 January 2024
| Forested hills | |
|---|---|
| Hammerhood Heights | |
 Click for higher resolution | |
| Japanese | おおきづちの里 |
| Game | Dragon Quest Builders |
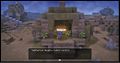
The rolling hills of Hammerhood Heights are the second region the players can explore in Dragon Quest Builders. As the name suggests, it is populated by a large tribe of Hammerhoods that will teach the Builder the technique for crafting a basic mallet as thanks for a small favor. This area is accessed via the blue teleportal in Cantlin.
Overview[edit]
The island is home to a friendly tribe of Hammerhoods whose leader is Clobberina, a larger female hammerhood. She teacher the Builder how to make mallets in order to be able to break rocks and harder blocks to get more materials to work with.
The land is can be divided in three areas: a dirt mountain filled with coal and other minerals where the hammerhoods reside, a small grassy peninsula in the north, and a range of mountains and forests in the southern and western regions. Deep in the mountain range, past survivors from Cantlin made a fortress, but it's long gone.
Kenelm can be rescued from some monsters in the small peninsula in the northern area of the island. He later teaches the builder how to do charged attacks.
Sidequests & Points of interest[edit]

A list of side-activites to do while in the heights.
A present from a Hammerhood[edit]
In the nearest depression, a happy hammerhood will hint to building a path and taking a chest nearby. It contains a Seed of life.
Finding the map of Alefgard[edit]
From a friendly hammerhood warming himself at the fire, go north carefully by the edge of the cliffs. A small cave awaits, containg a treasure chest with a world map inside.
Challenge: The hammerhood graveyard[edit]
In another hole near Clobberina's home, lies a ruined hammerhood cementery. One of this chapter's challenges is repairing this resting place, however it cannot be done the first time the location is visited. In order to unlock all the needed recipes, the builder must travel to a hidden island in the north of the Damdara Desert. After talking to the brownie, the builder must return and build the needed stone memorials and place them down.
"The Greasy Mallet" blueprint[edit]
West from Clobberina's home, there is a earthy structure topped by a stone well. After breaking some blocks, the path inside should be opened. The treasure inside is the extra blueprint "The Greasy Mallet", which will allow the Builder to create a neat little cookfire cafe.
Ladder recipe[edit]
In another earthy structure three hammehood stand. Speaking with them will make them reveal how to make ladders to the protagonist.
"The Hammerton Hothouse" blueprint[edit]
In the central southern area of the Hammerhood Heights, there is a forest. Inside, two friendly hammerhoods compete against each other to see which one has the best garden, but one of them is winning by a landside. The other hammerhood wants the builder's help to copy the winning garden. To do so, the builder needs a shovel,which is learnt after having access to the Damdara Desert. Once the shovel is obtained, the player has to return to the gardens with at least: three milkblossom flowers (or buds), a coralily (or bud), a prickly peach cactus, three cactus trunks, two cactus crowns, sandwort, and a medicinal shrub. After finishing the job, one hammerhood will reward the builder with a bench, and the other with an additional blueprint: the Hammerton Hothouse. This blueprint makes a nice indoors garden.
Double-jump boots[edit]
The Talaria can be obtained inside a cave in this region. This accessory allows the builder to double jump. Their exact location changes from savefile to savefile, however they are always in the same area: the area surrounding the fallen fortress. In order to obtain them, the player must locate the randomly-generated cave with the remains of a man, and place a dirt block and a tombstone on top of the bones. Afterwards, the ghost of the Talaria's previous owner will appear and give them to the player as a sign of gratitude for buring him.
Chimaera wings[edit]
Atop of the fortress, a chest containing a chimaera wing awaits.
Challenge: the three dragons (2)[edit]
The second dragon needed for the challenge is located deep in the western mountains, much further than the fortress. It will drop the Dragon Scale accessory when defeated.
Resources[edit]
List of available materials in Cantlin Plains.
| Raw materials | ||||||
Broken branch |
Butterbeans |
Coal |
Copper |
Grassy leaves |
Ivy |
Marshroom |
Medicinal leaf |
Plumberry |
Plumberry seedling |
Pumice pieces |
Silver |
Stone |
Wheat |
White petals | ||||||
| Raw materials requiring a shovel | ||||||
Branch |
Grass |
Medicinal shrub |
Milkblossom |
Pristine plumberry |
Stalwort |
|
| Building materials and decorations | ||||||
Broken barricade |
Broken brickwork |
Chalk |
Clay |
Dilapidated crate |
 Earth |
Obsidian |
Pebblestone |
Plumberry lumber | |||||
Monsters[edit]
List of enemies available in the Hammerhood Heights.
| Image | Name | HP | Attack | Defense | Drop 1 | Drop 2 |

|
Brownie (Small) | 20 | 11 | 6 | Fur |
|
|
|
Brownie (Large) | 40 | 16 | 7 | Leather sack |
|

|
Chimaera | 12 | 2 | 2 | Chimaera feather |
Monster egg |

|
Dracky | 11 | 8 | 1 | Coralily bud |
Grass seed |

|
Fightgeist (Night only) | 56 | 24 | 16 | Chimaera feather |
Monster egg |

|
Ghost (Night only) | 56 | 24 | 16 | Chimaera feather |
Monster egg |

|
Hammerhood | 18 | 12 | 4 | Fur |
Whopping needle |

|
Rocky Box Slime (Small) | 24 | 10 | 12 | Small stones |
Pumice |
|
|
Rocky Box Slime (Large) | 14 | 10 | 12 | Bathtub |
Big rock |

|
She-Slime | 12 | 6 | 4 | Orange oil |
Daffodaisy bud |

|
Skeleton | 23 | 14 | 6 | Coarse cloth shard |
Bones |

|
Slime | 7 | 4 | 0 | Blue goo |
Milkblossom bud |
| Minibosses available in this area | ||||||

|
Green Dragon | 550~662 | 33-36 | 40-43 | Dragon scale | |
Gallery[edit]
The welcoming sign.

Speaking with Clobberina.


See also[edit]