The Damdara Desert: Difference between revisions
Antiyonder (talk | contribs) No edit summary |
LiquidMetal (talk | contribs) m (→Monsters: image sizes) |
||
| (4 intermediate revisions by the same user not shown) | |||
| Line 9: | Line 9: | ||
}} | }} | ||
The '''Damdara Desert''' is an open waste north of the ruins of [[Cantlin]]. Even more desolate than before, all traces of human habitation have long since succumbed to the elements and been swallowed by the shifting sands. Instead, a foreboding pyramid looms over the Builder from across a shallow river. | The '''Damdara Desert''' is an open waste north of the ruins of [[Cantlin]]. Even more desolate than before, all traces of human habitation have long since succumbed to the elements and been swallowed by the shifting sands. Instead, a foreboding pyramid looms over the Builder from across a shallow river. | ||
== | ==Overview== | ||
As it's name implies, this region is mostly desert. A menacing pyramid looms in the southwestern area. The ruins of the town of [[Damdara]] remain visible in the central part of the island. In the northeast side of the land, a small and calm island stands. | |||
* | There are mineral veins all over the area, be it in rocky structures in the desert or in caves inside the mountains. Surprisingly, there is also a large amount of plants to gather. | ||
In the northwest side, far behind the mountains a dragon rests on the plains. Around the plains, there are forests filled with monsters and materials. | |||
==Sidequests & Points of interest== | |||
An overview of the main points of interests and optional activities to do in this island: | |||
===The stone arch=== | |||
[[File:DQB1 Damdara stone arch.png|thumb|right|Someone's remains on the stone arch.]] | |||
Between the red teleportal and the pyramid stands a stone arch. There's a note next to some bones, and pot on top of the arch. A [[Seed of life|seed of life]] can be obained by reading the note. | |||
===The Pyramid=== | |||
The pyramid is one of the main points of interest in this island. It is visited for story purposes, and is filled with cultists. | |||
Besides the mandatory path, the pyramid holds two secret chests, one containing a Fireplace, and the other containing the Featherfall footwear, which cuts 100% of the fall damage. To find them, one must find and destroy a dirt wall inside the lower floor of the pyramid, near the stairs that lead towards the main room. To find the fireplace, simply follow the new path. The Fallfeather footwear are in a chest accessed by climbing some ivy. | |||
In the area nearby the pyramid, Iron scorpions and Knight errants can be found. The former can drop an item necessary for forging the best hammer available in chapter 1. | |||
===Damdara ruins=== | |||
Another place visited for story reasons. Only one building stands, a room that is used as a cell by Dragonlord's minions. In the nearby area there are some poisionous lakes; and some trees and ruined walls reminiscent of the town's better days. | |||
===Challenge: the hammerhood graveyard (Part 2)=== | |||
A small separate island is visible from the northeast side of the Damdara desert. The small island is accessible by foot, as the water is very shallow over the sand connecting both islands. | |||
Once there, the player can find a small hammerhood cementery guarded by a [[Brownie|brownie]]. The grumpy brownie will tell the builder how to make memorials. With that knowledge, the builder can return to [[Hammerhood_Heights|Hammerhood Heights]], repair the graveyard near Clobberina's home and complete one of the chapter's challenges. | |||
===Challenge: the three dragons (3)=== | |||
Far in the northeastern plains, a dragon rests. It drops a Fireplace once defeated. If the other two dragons found in [[The Ravaged Realm|the Ravaged Realm]] and [[Hammerhood_Heights|Hammerhood Heights]] are also defeated, another of the episode's [[Cantlin#Challenges|challenges]] will be completed. | |||
==Resources== | |||
List of available materials in the Damdara desert. | |||
{| class="wikitable" style="width: 86%; text-align: center; margin: auto; " | |||
|+ | |||
|- | |||
| colspan="7" | Raw materials | |||
|- | |||
| style="width: 14%" |[[File:Broken branch icon.png|50px]]<br>[[List of raw materials in Dragon Quest Builders#Broken branch|Broken branch]] | |||
| style="width: 14%" |[[File:Cactus cutlet icon.png|50px]]<br>[[List of raw materials in Dragon Quest Builders#Cactus cutlet|Cactus cutlet]] | |||
| style="width: 14%" |[[File:Coal icon.png|50px]]<br>[[List of raw materials in Dragon Quest Builders#Coal|Coal]] | |||
| style="width: 14%" |[[File:Copper icon.png|50px]]<br>[[List of raw materials in Dragon Quest Builders#Copper|Copper]] | |||
| style="width: 14%" |[[File:Grassy leaves icon.png|50px]]<br>[[List of raw materials in Dragon Quest Builders#Grassy leaves|Grassy leaves]] | |||
| style="width: 14%" |[[File:Iron icon.png|50px]]<br>*[[List of raw materials in Dragon Quest Builders#Iron|Iron]] | |||
| style="width: 14%" |[[File:Ivy icon.png|50px]]<br>[[List of raw materials in Dragon Quest Builders#Ivy|Ivy]] | |||
|- | |||
| style="width: 14%" |[[File:Marshroom icon.png|50px]]<br>[[List of raw materials in Dragon Quest Builders#Marshroom|Marshroom]] | |||
| style="width: 14%" |[[File:Medicinal leaf icon.png|50px]]<br>[[List of raw materials in Dragon Quest Builders#Medicinal leaf|Medicinal leaf]] | |||
| style="width: 14%" |[[File:Plumberry icon.png|50px]]<br>[[List of raw materials in Dragon Quest Builders#Plumberry|Plumberry]] | |||
| style="width: 14%" |[[File:Plumberry seedling icon.png|50px]]<br>[[List of raw materials in Dragon Quest Builders#Plumberry seedling|Plumberry seedling]] | |||
| style="width: 14%" |[[File:Prickly peach icon.png|50px]]<br>[[List of raw materials in Dragon Quest Builders#Prickly peach|Prickly peach]] | |||
| style="width: 14%" |[[File:Pumice pieces icon.png|50px]]<br>[[List of raw materials in Dragon Quest Builders#Pumice pieces|Pumice pieces]] | |||
| style="width: 14%" |[[File:Ruby icon.png|50px]]<br>[[List of raw materials in Dragon Quest Builders#Ruby|Ruby]] | |||
|- | |||
| style="width: 14%" |[[File:Silver icon.png|50px]]<br>[[List of raw materials in Dragon Quest Builders#Silver|Silver]] | |||
| style="width: 14%" |[[File:DQB stone icon.png|50px]]<br>[[List of raw materials in Dragon Quest Builders#Stone|Stone]] | |||
| style="width: 14%" |[[File:Strong stalks icon.png|50px]]<br>[[List of raw materials in Dragon Quest Builders#Strong stalks|Strong stalks]] | |||
| style="width: 14%" |[[File:Wheat icon.png|50px]]<br>[[List of raw materials in Dragon Quest Builders#Wheat|Wheat]] | |||
| style="width: 14%" |[[File:White petals icon.png|50px]]<br>[[List of raw materials in Dragon Quest Builders#White petals|White petals]] | |||
|} | |||
{{clear}} | |||
{| class="wikitable" style="width: 86%; text-align: center; margin: auto; " | |||
|+ | |||
|- | |||
| colspan="7" | Raw materials requiring a shovel | |||
|- | |||
| style="width: 14%" | [[File:Bogwort icon.png|50px]]<br>[[List of raw materials in Dragon Quest Builders#Bogwort|Bogwort]] | |||
| style="width: 14%" | [[File:Branch icon.png|50px]]<br>[[List of raw materials in Dragon Quest Builders#Branch|Branch]] | |||
| style="width: 14%" | [[File:Cactus crown icon.png|50px]]<br>[[List of raw materials in Dragon Quest Builders#Cactus crown|Cactus crown]] | |||
| style="width: 14%" | [[File:Cactus trunk icon.png|50px]]<br>[[List of raw materials in Dragon Quest Builders#Cactus trunk|Cactus trunk]] | |||
| style="width: 14%" | [[File:Grass icon.png|50px]]<br>[[List of raw materials in Dragon Quest Builders#Grass|Grass]] | |||
| style="width: 14%" |[[File:Medicinal shrub icon.png|50px]]<br>[[List of raw materials in Dragon Quest Builders#Medicinal shrub|Medicinal shrub]] | |||
| style="width: 14%" |[[File:Milkblossom icon.png|50px]]<br>[[List of raw materials in Dragon Quest Builders#Milkblossom|Milkblossom]] | |||
|- | |||
| style="width: 14%" |[[File:Prickly peach cactus icon.png|50px]]<br>[[List of raw materials in Dragon Quest Builders#Prickly peach cactus|Prickly peach cactus]] | |||
| style="width: 14%" |[[File:Pristine plumberry icon.png|50px]]<br>[[List of raw materials in Dragon Quest Builders#Pristine plumberry|Pristine plumberry]] | |||
| style="width: 14%" |[[File:Sandgrass icon.png|50px]]<br>[[List of raw materials in Dragon Quest Builders#Sandgrass|Sandgrass]] | |||
| style="width: 14%" |[[File:Sandwort icon.png|50px]]<br>[[List of raw materials in Dragon Quest Builders#Sandwort|Sandwort]] | |||
| style="width: 14%" |[[File:Stalwort icon.png|50px]]<br>[[List of raw materials in Dragon Quest Builders#Stalwort|Stalwort]] | |||
| style="width: 14%" |[[File:Witchgrass icon.png|50px]]<br>[[List of raw materials in Dragon Quest Builders#Witchgrass|Witchgrass]] | |||
|} | |||
{{clear}} | |||
{| class="wikitable" style="width: 86%; text-align: center; margin: auto; " | |||
|+ | |||
|- | |||
| colspan="7" | Building materials and decorations | |||
|- | |||
| style="width: 14%" | [[File:Broken brickwork icon.png|50px]]<br>Broken brickwork | |||
| style="width: 14%" | [[File:Chalk icon.png|50px]]<br>[[List_of_construction_materials_in_Dragon_Quest_Builders#Natural_blocks|Chalk]] | |||
| style="width: 14%" | [[File:Clay block icon.png|50px]]<br>[[List of construction materials in Dragon Quest Builders#Clay|Clay]] | |||
| style="width: 14%" | [[File:Earth block.png|50px]]<br>[[List_of_construction_materials_in_Dragon_Quest_Builders#Natural_blocks|Earth]] | |||
| style="width: 14%" | [[File:Obsidian block icon.png|50px]]<br>[[List_of_construction_materials_in_Dragon_Quest_Builders#Natural_blocks|Obsidian]] | |||
| style="width: 14%" | [[File:Pebblestone block icon.png|50px]]<br>[[List_of_construction_materials_in_Dragon_Quest_Builders#Natural_blocks|Pebblestone]] | |||
| style="width: 14%" | [[File:Plumberry lumber icon.png|50px]]<br>[[List_of_construction_materials_in_Dragon_Quest_Builders#Natural_blocks|Plumberry lumber]] | |||
|- | |||
| style="width: 14%" | [[File:Poisonous peat icon.png|50px]]<br>[[List of raw materials in Dragon Quest Builders#Poisonous peat|Poisonous peat]] | |||
| style="width: 14%" | [[File:Sand block icon.png|50px]]<br>[[List of raw materials in Dragon Quest Builders#Sand|Sand]] | |||
| style="width: 14%" | [[File:Sandstone icon.png|50px]]<br>[[List of construction materials in Dragon Quest Builders#Sandstone|Sandstone]] | |||
| style="width: 14%" | [[File:Sandy sandstone icon.png|50px]]<br>[[List of construction materials in Dragon Quest Builders#Sandy sandstone|Sandy sandstone]] | |||
|} | |||
==Monsters== | ==Monsters== | ||
{| class="wikitable" style="width: 72%; text-align: center; margin: auto; " | |||
|+ | |||
|- | |||
| style="width: 15%" | Image | |||
| style="width: 15%" | Name | |||
| style="width: 10%" | HP | |||
| style="width: 10%" | Attack | |||
| style="width: 10%" | Defense | |||
| style="width: 20%" | Drop 1 | |||
| style="width: 20%" | Drop 2 | |||
|- | |||
| [[File:DQB Brownie.png|150px]] | |||
| [[Brownie]] (Small) | |||
| 20 | |||
| 11 | |||
| 6 | |||
|[[File:Fur icon.png]]<br>[[List of raw materials in Dragon Quest Builders|Fur]] | |||
| | |||
|- | |||
| [[File:DQB Brownie.png|150px]] | |||
| [[Brownie]] (Large) | |||
| 40 | |||
| 16 | |||
| 7 | |||
|[[File:Leather sack icon.png]]<br>[[List of decorations in Dragon Quest Builders|Leather sack]] | |||
| | |||
|- | |||
| [[File:DQB Bunicorn.png|150px]] | |||
| [[Bunicorn]] | |||
| 28 | |||
| 14 | |||
| 9 | |||
|[[File:Meat icon.png]]<br>[[List of raw materials in Dragon Quest Builders|Meat]] | |||
| | |||
|- | |||
| [[File:DQB Chimaera.png|150px]] | |||
| [[Chimaera]] | |||
| 12 | |||
| 2 | |||
| 2 | |||
|[[File:Chimaera feather icon.png]]<br>[[List of raw materials in Dragon Quest Builders|Chimaera feather]] | |||
|[[File:Monster egg icon.png]]<br>[[List of raw materials in Dragon Quest Builders|Monster egg]] | |||
|- | |||
| [[File:DQB Dracky.png|150px]] | |||
| [[Dracky]] | |||
| 11 | |||
| 8 | |||
| 1 | |||
|[[File:Coralily bud icon.png]]<br>[[List of raw materials in Dragon Quest Builders|Coralily bud]] | |||
|[[File:Grass seed icon.png]]<br>[[List of raw materials in Dragon Quest Builders|Grass seed]] | |||
|- | |||
| [[File:DQB Fightgeist.png|150px]] | |||
| [[Fightgeist]] (Night only) | |||
| 56 | |||
| 24 | |||
| 16 | |||
|[[File:Chimaera feather icon.png]]<br>[[List of raw materials in Dragon Quest Builders|Chimaera feather]] | |||
|[[File:Monster egg icon.png]]<br>[[List of raw materials in Dragon Quest Builders|Monster egg]] | |||
|- | |||
| [[File:DQB Ghost.png|150px]] | |||
| [[Ghost]] (Night only) | |||
| 56 | |||
| 24 | |||
| 16 | |||
|[[File:Chimaera feather icon.png]]<br>[[List of raw materials in Dragon Quest Builders|Chimaera feather]] | |||
|[[File:Monster egg icon.png]]<br>[[List of raw materials in Dragon Quest Builders|Monster egg]] | |||
|- | |||
| [[File:DQB Hammerhood.png|150px]] | |||
| [[Hammerhood]] | |||
| 18~88 | |||
| 12~26 | |||
| 4~8 | |||
|[[File:Fur icon.png]]<br>[[List of raw materials in Dragon Quest Builders|Fur]] | |||
|[[File:Whopping needle icon.png]]<br>[[List of raw materials in Dragon Quest Builders|Whopping needle]] | |||
|- | |||
| [[File:Iron Scorpion Builders.png|150px]] | |||
| [[Iron scorpion|Iron Scorpion]] | |||
| 45 | |||
| 21 | |||
| 20 | |||
|[[File:Scorpion horn icon.png]]<br>[[List of raw materials in Dragon Quest Builders|Scorpion horn]] | |||
|[[File:Healing cream icon.png]]<br>[[List of items in Dragon Quest Builders|Healing cream]] | |||
|- | |||
| [[File:Knight errant builders.png|150px]] | |||
| [[Knight errant|Knight Errant]] | |||
| 65 | |||
| 25 | |||
| 26 | |||
|[[File:Iron ingot icon.png]]<br>[[List of items in Dragon Quest Builders|Iron ingot]] | |||
|[[File:Healing cream icon.png]]<br>[[List of items in Dragon Quest Builders|Healing cream]] | |||
|- | |||
| [[File:Rocky Box Slime.png|150px]] | |||
| [[Rocky box slime|Rocky Box Slime]] (Small) | |||
| 24 | |||
| 10 | |||
| 12 | |||
|[[File:Small stones icon.png]]<br>[[List of raw materials in Dragon Quest Builders|Small stones]] | |||
|[[File:Pumice icon.png]]<br>[[List of raw materials in Dragon Quest Builders|Pumice]] | |||
|- | |||
| [[File:Rocky Box Slime.png|150px]] | |||
| [[Rocky box slime|Rocky Box Slime]] (Large) | |||
| 14 | |||
| 10 | |||
| 12 | |||
|[[File:Bathtub icon.png]]<br>[[List of decorations in Dragon Quest Builders|Bathtub]] | |||
|[[File:Big rock icon.png]]<br>[[List of raw materials in Dragon Quest Builders|Big rock]] | |||
|- | |||
| [[File:DQB Scorpion.png|150px]] | |||
| [[Scorpion]] | |||
| 44 | |||
| 16 | |||
| 12 | |||
|[[File:Chains icon.png]]<br>[[List of decorations in Dragon Quest Builders|Chains]] | |||
|[[File:Medicinal herb builders icon.png]]<br>[[List of items in Dragon Quest Builders|Medicinal herb]] | |||
|- | |||
| [[File:DQB She-Slime.png|150px]] | |||
| [[She-Slime]] | |||
| 12 | |||
| 6 | |||
| 4 | |||
|[[File:Orange oil icon.png]]<br>[[List of raw materials in Dragon Quest Builders|Orange oil]] | |||
|[[File:Daffodaisy bud icon.png]]<br>[[List of raw materials in Dragon Quest Builders|Daffodaisy bud]] | |||
|- | |||
| [[File:DQB Skeleton.png|150px]] | |||
| [[Skeleton]] | |||
| 28 | |||
| 16 | |||
| 8 | |||
|[[File:Coarse cloth icon.png]]<br>[[List of raw materials in Dragon Quest Builders|Coarse cloth shard]] | |||
|[[File:Bones icon.png]]<br>[[List of raw materials in Dragon Quest Builders|Bones]] | |||
|- | |||
| [[File:DQB Slime.png|150px]] | |||
| [[Slime]] | |||
| 7 | |||
| 4 | |||
| 0 | |||
|[[File:Blue goo icon.png]]<br>[[List of raw materials in Dragon Quest Builders|Blue goo]] | |||
|[[File:Milkblossom bud icon.png]]<br>[[List of raw materials in Dragon Quest Builders|Milkblossom bud]] | |||
|- | |||
| colspan="7" | '''Minibosses''' available in this area | |||
|- | |||
| [[File:DQB Green Dragon.png|150px]] | |||
| [[Green dragon|Green Dragon]] | |||
| 550~662 | |||
| 33-36 | |||
| 40-43 | |||
|[[File:Fireplace icon.png]]<br>[[List of decorations in Dragon Quest Builders|Fireplace]] | |||
|- | |||
| [[File:DQB Stone Golem.png|150px]] | |||
| [[Stone golem|Stone Golem]] (Small) | |||
| 79 | |||
| ? | |||
| ? | |||
|[[File:Round table icon.png]]<br>[[List of decorations in Dragon Quest Builders|Round table]] | |||
|[[File:Bathtub icon.png]]<br>[[List of decorations in Dragon Quest Builders|Bathtub]] | |||
|- | |||
| [[File:DQB Stone Golem.png|150px]] | |||
| [[Stone golem|Stone Golem]] (Big) | |||
| 100 | |||
| ? | |||
| ? | |||
|[[File:Golemite icon.png]]<br>[[List of construction materials in Dragon Quest Builders|Golemite]] | |||
| | |||
|} | |||
The bigger stone golem can only be defeated with Wrecking balls, which can be made after visiting the Rockbomb Ravine. All other monsters can be defeated via regular means. | |||
==See also== | ==See also== | ||
| Line 86: | Line 284: | ||
*[[Rockbomb Ravine]] | *[[Rockbomb Ravine]] | ||
{{clear}} | |||
{{DQBI}} | {{DQBI}} | ||
[[Category:Dragon Quest Builders locations]] | [[Category:Dragon Quest Builders locations]] | ||
Latest revision as of 13:35, 31 January 2024
| Desert | |
|---|---|
| The Damdara Desert | |
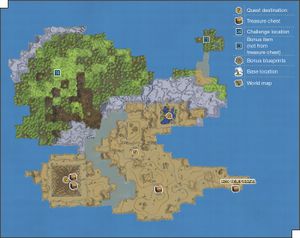 Click for higher resolution | |
| Japanese | ドムドーラ マ巳ら臣尺卞 |
| Game | Dragon Quest Builders |
The Damdara Desert is an open waste north of the ruins of Cantlin. Even more desolate than before, all traces of human habitation have long since succumbed to the elements and been swallowed by the shifting sands. Instead, a foreboding pyramid looms over the Builder from across a shallow river.
Overview[edit]
As it's name implies, this region is mostly desert. A menacing pyramid looms in the southwestern area. The ruins of the town of Damdara remain visible in the central part of the island. In the northeast side of the land, a small and calm island stands.
There are mineral veins all over the area, be it in rocky structures in the desert or in caves inside the mountains. Surprisingly, there is also a large amount of plants to gather.
In the northwest side, far behind the mountains a dragon rests on the plains. Around the plains, there are forests filled with monsters and materials.
Sidequests & Points of interest[edit]
An overview of the main points of interests and optional activities to do in this island:
The stone arch[edit]
Between the red teleportal and the pyramid stands a stone arch. There's a note next to some bones, and pot on top of the arch. A seed of life can be obained by reading the note.
The Pyramid[edit]
The pyramid is one of the main points of interest in this island. It is visited for story purposes, and is filled with cultists.
Besides the mandatory path, the pyramid holds two secret chests, one containing a Fireplace, and the other containing the Featherfall footwear, which cuts 100% of the fall damage. To find them, one must find and destroy a dirt wall inside the lower floor of the pyramid, near the stairs that lead towards the main room. To find the fireplace, simply follow the new path. The Fallfeather footwear are in a chest accessed by climbing some ivy.
In the area nearby the pyramid, Iron scorpions and Knight errants can be found. The former can drop an item necessary for forging the best hammer available in chapter 1.
Damdara ruins[edit]
Another place visited for story reasons. Only one building stands, a room that is used as a cell by Dragonlord's minions. In the nearby area there are some poisionous lakes; and some trees and ruined walls reminiscent of the town's better days.
Challenge: the hammerhood graveyard (Part 2)[edit]
A small separate island is visible from the northeast side of the Damdara desert. The small island is accessible by foot, as the water is very shallow over the sand connecting both islands.
Once there, the player can find a small hammerhood cementery guarded by a brownie. The grumpy brownie will tell the builder how to make memorials. With that knowledge, the builder can return to Hammerhood Heights, repair the graveyard near Clobberina's home and complete one of the chapter's challenges.
Challenge: the three dragons (3)[edit]
Far in the northeastern plains, a dragon rests. It drops a Fireplace once defeated. If the other two dragons found in the Ravaged Realm and Hammerhood Heights are also defeated, another of the episode's challenges will be completed.
Resources[edit]
List of available materials in the Damdara desert.
| Raw materials requiring a shovel | ||||||
Bogwort |
Branch |
Cactus crown |
Cactus trunk |
Grass |
Medicinal shrub |
Milkblossom |
Prickly peach cactus |
Pristine plumberry |
Sandgrass |
Sandwort |
Stalwort |
Witchgrass | |
| Building materials and decorations | ||||||
Broken brickwork |
Chalk |
Clay |
 Earth |
Obsidian |
Pebblestone |
Plumberry lumber |
Poisonous peat |
Sand |
Sandstone |
Sandy sandstone | |||
Monsters[edit]
| Image | Name | HP | Attack | Defense | Drop 1 | Drop 2 |

|
Brownie (Small) | 20 | 11 | 6 | Fur |
|

|
Brownie (Large) | 40 | 16 | 7 | Leather sack |
|

|
Bunicorn | 28 | 14 | 9 | Meat |
|
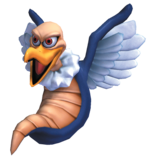
|
Chimaera | 12 | 2 | 2 | Chimaera feather |
Monster egg |

|
Dracky | 11 | 8 | 1 | Coralily bud |
Grass seed |

|
Fightgeist (Night only) | 56 | 24 | 16 | Chimaera feather |
Monster egg |

|
Ghost (Night only) | 56 | 24 | 16 | Chimaera feather |
Monster egg |

|
Hammerhood | 18~88 | 12~26 | 4~8 | Fur |
Whopping needle |
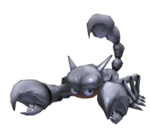
|
Iron Scorpion | 45 | 21 | 20 | Scorpion horn |
Healing cream |
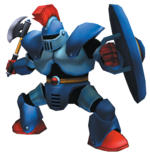
|
Knight Errant | 65 | 25 | 26 | Iron ingot |
Healing cream |
|
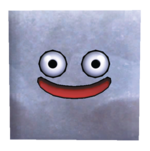
Rocky Box Slime (Small) | 24 | 10 | 12 | Small stones |
Pumice |

|
Rocky Box Slime (Large) | 14 | 10 | 12 | Bathtub |
Big rock |
|
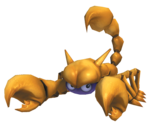
Scorpion | 44 | 16 | 12 | Chains |
Medicinal herb |

|
She-Slime | 12 | 6 | 4 | Orange oil |
Daffodaisy bud |
|
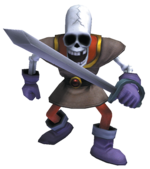
Skeleton | 28 | 16 | 8 | Coarse cloth shard |
Bones |

|
Slime | 7 | 4 | 0 | Blue goo |
Milkblossom bud |
| Minibosses available in this area | ||||||

|
Green Dragon | 550~662 | 33-36 | 40-43 | Fireplace | |
|
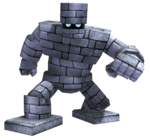
Stone Golem (Small) | 79 | ? | ? | Round table |
Bathtub |

|
Stone Golem (Big) | 100 | ? | ? | Golemite |
|
The bigger stone golem can only be defeated with Wrecking balls, which can be made after visiting the Rockbomb Ravine. All other monsters can be defeated via regular means.
See also[edit]
