Moonbrooke: Difference between revisions
DQorg-Admin (talk | contribs) No edit summary |
No edit summary |
||
| (31 intermediate revisions by 11 users not shown) | |||
| Line 1: | Line 1: | ||
{{LocationInfobox | |||
|game = {{Dragon Quest II}}<br>{{DQ2HD}}<br>{{DQB2}} | |||
|title = Moonbrooke | |||
|type= Kingdom | |||
|image = [[File:Moonbrooke II HD concept art.jpg|250px]] | |||
|caption = HD concept art | |||
|japanese=ムーンブルク | |||
|romaji=mūnburuku (Moonbrooke) | |||
|old=Moonbrook ({{II}} {{GBC}}) | |||
}} | |||
'''Moonbrooke''' is a [[List of Kingdoms in Dragon Quest|kingdom]] near the center of greater [[Alefgard]] | |||
It serves a critical part in the plot of {{Dragon Quest II}} when it is sacked by [[Hargon]]'s forces in the prelude, being the castle nearest to the frozen wasteland of [[Rendarak]] that the mad cultist lurks in. | |||
== | ==Appearances== | ||
==={{DQ2}}=== | |||
The opening cinematic of {{Dragon Quest II}} witnesses the attack on Moonbrooke and the death of its king. This event sets up the quest for the rest of the game. | |||
During the game, Moonbrooke can be explored as a burned out ruin which then houses monsters. It is not required that the player visit in order to complete the game, however, useful information can be gained regarding how to find the [[Princess of Moonbrooke]] by speaking to the various ghosts of its citizens. If the player brings the princess and speaks to the ghost of her father, special dialogue will play. | |||
== | ====Treasures==== | ||
*[[Seed of life]] (remakes only) | |||
== | ===={{Monster}}s==== | ||
*[[Corpse corporal]] | |||
*[[Cobra king]] | |||
*[[Metal slime]] | |||
*[[Smog]] | |||
== | ==={{DQ2HD}}=== | ||
[[File:Moonbrooke national emblem.png|200px|right|thumb|Moonbrooke's national emblem]] | |||
In the game's opening Moonbrooke is shown to be the most-recently founded of the three kingdoms, and became a hub for the magical arts with conjurers travelling from the world over to practice their craft within its walls. The layout of the castle was built around a circular, walled garden where the Princess's magical training took place. The throne room was illuminated by colossal stained glass windows bearing Erdrick's phoenix emblem, and next to it was a museum housing replicas of the fabled ancestor's paraphernalia. Outside the castle's wall were the guard's training grounds, with the lookout post built into a treehouse. | |||
[[Category:Dragon | The siege of Moonbrooke is led by none other than the [[Deities of Destruction|Deity of Destruction]] [[Belial]], accompanied by the [[lumpfather]] as his subordinate. The [[King of Moonbrooke]] fends off a pair of [[gargoyle]]s as in previous versions of the game, but now a second wave appears with the leader identifying their targets by name. After dispatching flight of gargoyles the King is mortified to realize the monsters recognize his daughter and he takes her to the castle basement where he casts a spell to turn her into a dog in the hopes that the monsters will ignore her. | ||
When the [[Prince of Midenhall]] and the [[Prince of Cannock]] explore the ruins of the castle, the ghost of the King is seen in human form instead of the fiery spirits the citizens of the kingdom became upon being murdered. The duo are led to the courtyard by a mysterious sound where they spot a blue rose that survived the siege, and are contacted by the spirit of the [[Queen of Moonbrooke]]. Her disembodied voice urges them to venture to the [[Swamp Shrine]] east of the kingdom, tipping the player off to the existence of [[Ra's mirror]]. | |||
Returning when the Princess has joined the party leads to a cutscene where she attempts to retrieve the [[Mark of Moonbrooke]] from its hiding place behind a portrait, only to find that it was stolen by the monsters during their raid. The scene then reveals that the [[Chancellor of Moonbrooke]] and a pair of guards survived by being sent out to [[Rippleport]] to the north a few days before Belial launched his attack. The trio were unable to cross the strait between the [[Dragon's Horn]] towers, and advise the party to seek out the [[windbraker]] cloak the King had stored within the [[Pillar of Winds]] to the southeast. The Chancellor then gives the Princess the [[thief's key]] to aid group on their quest and swears to restore the fallen kingdom. | |||
Should the player return after obtaining the [[Eye of Rubiss]], the Chancellor has begun to make good on his word and guards have been dispatched from [[Midenhall]] and [[Cannock]] to aid in the restoration. The large force has driven off the monsters lurking in the ruins and the music track that plays has switched back to the proper castle theme. During the game's finale, the restoration has made great progress and fetid swamps that encircled the castle have been cleared. Other survivors who were away from Moonbrooke during the siege have returned, and as the party departs the spirits of the King and Queen materialize to see their daughter off. | |||
====Treasures==== | |||
{| class="wikitable sortable" | |||
|- | |||
| [[File:ICON-Thief's key III HD.png|link=Thief's key]] | |||
| [[Thief's key]] | |||
| x1 | |||
|Unmissable | |||
|- | |||
| [[File:ICON-Mini medal III HD.png|link=List of mini medals in Dragon Quest II HD-2D Remake]] | |||
| [[List of mini medals in Dragon Quest II HD-2D Remake|Mini medal]] | |||
| x1 | |||
|N/A | |||
|- | |||
| [[File:ICON-Ability scroll I & II HD.png|link=List of special scrolls in Dragon Quest II HD-2D Remake]] | |||
| [[List of special scrolls in Dragon Quest II HD-2D Remake|Bounce scroll]] | |||
| x1 | |||
| [[Magic key]] | |||
|- | |||
| [[File:ICON-Ability scroll I & II HD.png|link=List of special scrolls in Dragon Quest II HD-2D Remake]] | |||
| [[List of special scrolls in Dragon Quest II HD-2D Remake|Undead Undoer scroll]] | |||
| x1 | |||
| N/A | |||
|- | |||
| [[File:ICON-Medicinal herb III HD.png|link=Medicinal herb]] | |||
| [[Medicinal herb]] | |||
| x1 | |||
|N/A | |||
|- | |||
| [[File:ICON-Magic water III HD.png|link=Magic water]] | |||
| [[Magic water]] | |||
| x2 | |||
|N/A | |||
|- | |||
| [[File:ICON-Antidotal herb III HD.png|link=Antidotal herb]] | |||
| [[Antidotal herb]] | |||
| x1 | |||
|N/A | |||
|- | |||
| [[File:ICON-Dazzle-me-not III HD.png|link=Dazzle-me-not]] | |||
| [[Dazzle-me-not]] | |||
| x2 | |||
|N/A | |||
|- | |||
| [[File:Unsealant III HD icon.png|link=Unsealant]] | |||
| [[Unsealant]] | |||
| x2 | |||
|N/A | |||
|- | |||
| [[File:ICON-Holy water III HD.png|link=Holy water]] | |||
| [[Holy water]] | |||
| x2 | |||
|N/A | |||
|- | |||
| [[File:Seed of luck III HD icon.png|link=Seed of luck]] | |||
| [[Seed of luck]] | |||
| x1 | |||
|N/A | |||
|- | |||
| [[File:Seed of magic III HD icon.png|link=Seed of magic]] | |||
| [[Seed of magic]] | |||
| x1 | |||
|N/A | |||
|- | |||
| [[File:Full moon ring III HD icon.png|link=Full moon ring]] | |||
| [[Full moon ring]] | |||
| x1 | |||
|N/A | |||
|- | |||
| [[File:Holy lance I & II HD icon.png|link=Holy lance]] | |||
| [[Holy lance]] | |||
| x1 | |||
| N/A | |||
|- | |||
| [[File:Saviour's staff I & II HD icon.png|link=Saviour's staff]] | |||
| [[Saviour's staff]] | |||
| x1 | |||
| [[Ultimate key]] | |||
|- | |||
| [[File:Snooze stick III HD icon.png|link=Snooze stick]] | |||
| [[Snooze stick]] | |||
| x1 | |||
| [[Thief's key]] | |||
|- | |||
| [[File:Fizzle-retardant blouse I & II HD icon.png|link=Fizzle-retardant blouse]] | |||
| [[Fizzle-retardant blouse]] | |||
| x1 | |||
|N/A | |||
|- | |||
| [[File:Scholar's cap III HD icon.png|link=Scholar's cap]] | |||
| [[Scholar's cap]] | |||
| x1 | |||
|N/A | |||
|- | |||
|} | |||
====Monsters==== | |||
{| class="wikitable" | |||
| [[File:Corpse corporal I & II HD sprite.png|64px|link=Corpse corporal]] || [[File:Cumaulus DQ III HD sprite.png|link=Cumaulus]] || [[File:Illerpillar DQ III HD sprite.png|link=Illerpillar]] || [[File:Restless armour DQ III HD sprite.png|link=Restless armour]] || [[File:Skeleton scrapper I & II HD sprite.png|link=Skeleton scrapper]] || [[File:Smog I & II HD sprite.png|64px|link=Smog]] | |||
|} | |||
Note that this is the only locations where illerpillars appear in the game, and if the player misses encountering one prior to the reconstruction then it cannot be added to the bestiary. | |||
==={{DQB2}}=== | |||
Moonbrooke was the third island visited by the Builder and was in the midst of a seemingly never-ending war with monsters lead by the monster [[Atlas]]. | |||
==Map & Gallery== | |||
<center><gallery> | |||
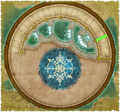
DQ II NES Moonbrooke Castle.gif|Map. ({{NES}}) | |||
Ruins of Moonbrooke 16-bit.png|Map. ({{SFC}}) | |||
Moonbrooke 1F 1 map II HD2D.png|HD map | |||
Moonbrooke 1F 2 map II HD2D.png|After restoration | |||
Moonbrooke 1B 1 map II HD2D.png | |||
Moonbrooke 1B 2 map II HD2D.png | |||
DQ II NES Prologue.jpg|Moonbrooke in the Prologue before the attack. ({{NES}}) | |||
DQ II Android Moonbrooke Prologue 1.jpg|Moonbrooke in the Prologue before the attack. ([[Cell phone]]) | |||
DQ II Android Moonbrooke Entrance.jpg|The ruined Moonbrooke | |||
DQ II Android Moonbrooke Prologue 2.jpg| | |||
DQ II Android Moonbrooke Prologue 3.jpg| | |||
DQ II Android Moonbrooke Prologue 4.jpg| | |||
DQ II Android Moonbrooke Prologue 5.jpg|Moonbrooke in ruins. ([[Cell phone]]) | |||
DQ II Android Moonbrooke Prologue 6.jpg| | |||
DQ II Android Moonbrooke Prologue 7.jpg| | |||
DQ II Android Moonbrooke Ghost King 1.jpg|Fallen King. ([[Cell phone]]) | |||
DQ II Android Moonbrooke Ghost King 2.jpg| | |||
DQ II Android Fallen Moonbrooke Guard A1.jpg|Speaking to a fallen guard before recruiting the [[Princess of Moonbrooke]]. ([[Cell phone]]) | |||
DQ II Android Fallen Moonbrooke Guard A2.jpg| | |||
DQ II Android Moonbrooke Hidden Seed 1.jpg|Hidden [[Seed of life]]. ([[Cell phone]]) | |||
DQ II Android Moonbrooke Hidden Seed 2.jpg|Hidden [[Seed of magic]]. ([[Cell phone]]) | |||
DQ II Android Fallen Moonbrooke Guard B1.jpg|Speaking to a fallen guard after recruiting the [[Princess of Moonbrooke]]. ([[Cell phone]]) | |||
DQ II Android Fallen Moonbrooke Guard B2.jpg| | |||
DQ Stars Android Soldier of Moonbrooke.jpg|Appearance in {{Stars}}. ([[Cell phone]]) | |||
</gallery></center> | |||
{{DQII}} | |||
{{DQI&IIHD}} | |||
{{DQBII}} | |||
[[Category:Dragon Quest II locations]] | |||
[[Category:Dragon Quest II HD-2D Remake locations]] | |||
[[Category:Dragon Quest Builders 2 locations]] | |||
Latest revision as of 18:46, 2 June 2026
| Kingdom | |
|---|---|
| Moonbrooke | |
 HD concept art | |
| Japanese | ムーンブルク |
| Romaji | mūnburuku (Moonbrooke) |
| Game | Dragon Quest II Dragon Quest II HD-2D Remake Dragon Quest Builders 2 |
| Old localization | Moonbrook (II GBC) |
Moonbrooke is a kingdom near the center of greater Alefgard
It serves a critical part in the plot of Dragon Quest II when it is sacked by Hargon's forces in the prelude, being the castle nearest to the frozen wasteland of Rendarak that the mad cultist lurks in.
Appearances[edit]
Dragon Quest II: Luminaries of the Legendary Line[edit]
The opening cinematic of Dragon Quest II witnesses the attack on Moonbrooke and the death of its king. This event sets up the quest for the rest of the game. During the game, Moonbrooke can be explored as a burned out ruin which then houses monsters. It is not required that the player visit in order to complete the game, however, useful information can be gained regarding how to find the Princess of Moonbrooke by speaking to the various ghosts of its citizens. If the player brings the princess and speaks to the ghost of her father, special dialogue will play.
Treasures[edit]
- Seed of life (remakes only)
Monsters[edit]
Dragon Quest II HD-2D Remake[edit]

In the game's opening Moonbrooke is shown to be the most-recently founded of the three kingdoms, and became a hub for the magical arts with conjurers travelling from the world over to practice their craft within its walls. The layout of the castle was built around a circular, walled garden where the Princess's magical training took place. The throne room was illuminated by colossal stained glass windows bearing Erdrick's phoenix emblem, and next to it was a museum housing replicas of the fabled ancestor's paraphernalia. Outside the castle's wall were the guard's training grounds, with the lookout post built into a treehouse.
The siege of Moonbrooke is led by none other than the Deity of Destruction Belial, accompanied by the lumpfather as his subordinate. The King of Moonbrooke fends off a pair of gargoyles as in previous versions of the game, but now a second wave appears with the leader identifying their targets by name. After dispatching flight of gargoyles the King is mortified to realize the monsters recognize his daughter and he takes her to the castle basement where he casts a spell to turn her into a dog in the hopes that the monsters will ignore her.
When the Prince of Midenhall and the Prince of Cannock explore the ruins of the castle, the ghost of the King is seen in human form instead of the fiery spirits the citizens of the kingdom became upon being murdered. The duo are led to the courtyard by a mysterious sound where they spot a blue rose that survived the siege, and are contacted by the spirit of the Queen of Moonbrooke. Her disembodied voice urges them to venture to the Swamp Shrine east of the kingdom, tipping the player off to the existence of Ra's mirror.
Returning when the Princess has joined the party leads to a cutscene where she attempts to retrieve the Mark of Moonbrooke from its hiding place behind a portrait, only to find that it was stolen by the monsters during their raid. The scene then reveals that the Chancellor of Moonbrooke and a pair of guards survived by being sent out to Rippleport to the north a few days before Belial launched his attack. The trio were unable to cross the strait between the Dragon's Horn towers, and advise the party to seek out the windbraker cloak the King had stored within the Pillar of Winds to the southeast. The Chancellor then gives the Princess the thief's key to aid group on their quest and swears to restore the fallen kingdom.
Should the player return after obtaining the Eye of Rubiss, the Chancellor has begun to make good on his word and guards have been dispatched from Midenhall and Cannock to aid in the restoration. The large force has driven off the monsters lurking in the ruins and the music track that plays has switched back to the proper castle theme. During the game's finale, the restoration has made great progress and fetid swamps that encircled the castle have been cleared. Other survivors who were away from Moonbrooke during the siege have returned, and as the party departs the spirits of the King and Queen materialize to see their daughter off.
Treasures[edit]
| Thief's key | x1 | Unmissable | |
| Mini medal | x1 | N/A | |
| Bounce scroll | x1 | Magic key | |
| Undead Undoer scroll | x1 | N/A | |
| Medicinal herb | x1 | N/A | |
| Magic water | x2 | N/A | |
| Antidotal herb | x1 | N/A | |
| Dazzle-me-not | x2 | N/A | |
| Unsealant | x2 | N/A | |
| Holy water | x2 | N/A | |
| Seed of luck | x1 | N/A | |
| Seed of magic | x1 | N/A | |
| Full moon ring | x1 | N/A | |
| Holy lance | x1 | N/A | |
| Saviour's staff | x1 | Ultimate key | |
| Snooze stick | x1 | Thief's key | |
| Fizzle-retardant blouse | x1 | N/A | |
| Scholar's cap | x1 | N/A |
Monsters[edit]
Note that this is the only locations where illerpillars appear in the game, and if the player misses encountering one prior to the reconstruction then it cannot be added to the bestiary.
Dragon Quest Builders 2[edit]
Moonbrooke was the third island visited by the Builder and was in the midst of a seemingly never-ending war with monsters lead by the monster Atlas.
Map & Gallery[edit]

Map. (NES)

Map. (SFC)

HD map

After restoration


Moonbrooke in the Prologue before the attack. (NES)

Moonbrooke in the Prologue before the attack. (Cell phone)

The ruined Moonbrooke


Moonbrooke in ruins. (Cell phone)


Fallen King. (Cell phone)


Speaking to a fallen guard before recruiting the Princess of Moonbrooke. (Cell phone)


Hidden Seed of life. (Cell phone)

Hidden Seed of magic. (Cell phone)

Speaking to a fallen guard after recruiting the Princess of Moonbrooke. (Cell phone)


Appearance in Stars. (Cell phone)


