Rimuldar: Difference between revisions
No edit summary |
Antiyonder (talk | contribs) |
||
| (13 intermediate revisions by 3 users not shown) | |||
| Line 1: | Line 1: | ||
{{LocationInfobox | {{LocationInfobox | ||
|game = {{Dragon Quest}}<br>{{Dragon Quest III}}<br>{{DQB}} | |game = {{Dragon Quest}}<br>{{DQ1HD}}<br>{{DQ2HD}}<br>{{Dragon Quest III}}<br>{{DQ3HD}}<br>{{DQB}} | ||
|title = Rimuldar | |title = Rimuldar | ||
|type= Town | |type= Town | ||
|image = [[ | |image = [[File:Rimuldar III HD concept art.png|250px]] | ||
|caption = | |caption = HD concept art | ||
|japanese=リムルダール | |japanese=リムルダール | ||
|romaji=Rimurudāru | |romaji=Rimurudāru | ||
|old=Same | |old=Same | ||
}} | }} | ||
'''Rimuldar''' is a town located on the southeastern continent of [[Alefgard]]. Rimuldar is the closest town to the final dungeon in both {{DQ}} and {{ | '''Rimuldar''' is a lake town located on the southeastern continent of [[Alefgard]]. | ||
Rimuldar is the closest town to the final dungeon in both {{DQ}} and {{Dragon Quest III}}, [[Dragonlord's Castle|Charlock Castle]]. | |||
It is also the first location the {{Hero 1}} can purchase [[Magic Key]]s in {{Dragon Quest}}, making it a significant location to visit. | It is also the first location the {{Hero 1}} can purchase [[Magic Key]]s in {{Dragon Quest}}, making it a significant location to visit. | ||
| Line 45: | Line 47: | ||
*[[Seed of resilience]] | *[[Seed of resilience]] | ||
==={{ | ==={{DQ1HD}}=== | ||
Rimuldar uses the same 3D model that was created for ''Dragon Quest III HD''. Instead of just being the location where the {{Hero 1}} can accumulate disposable keys, the lake town plays a central role in the story of the [[Captain (Dragon Quest)|Captain of the royal guard]], [[Gwaelin's Guard|Princess Gwaelin's body guard]], and the acquisition of the [[magic key]]. | |||
The Captain will be taken to the inn by Gwaelin's Guard after the two exit the [[Quagmire Cave]] to the north, with the older man having succumb to the miasma that festers in the unnatural swamps which have sprung up in the wake of the [[Dragonlord]]'s rising. The resident [[Priest]] is at wits end to aid him as the illness is entirely unnatural and thus unaffected by the [[Squelch]] spell. Gwaelin's Guard reveals to the Hero that the Captain is her father, forced out of his retirement when the division of royal guards she led to escort the Princess to the [[Shrine of Rain]] were ambushed and annihilated by the Dragonlord. The Priest gravely informs her of the nature of her father's illness and that his condition appears terminal, which causes her to succumb to despair. | |||
When the Priest mentions that one versed in magical arts might know more about the blight than he does, the Hero opts to question the villagers for information. This leads him to the eccentric hermit dubbed the [[Warlock of Doorlocks]], who replaces the generic coot that sold the single-use keys in past versions of the game. The old [[Sage]] states that his magical knowledge is quite broad and can likely aid the ailing Captain, but he needs help with his own circumstances first. He is on the edge of completing his life's work, an inexhaustible key that can break magic seals, but his [[Dwarven Crafstman|dwarven assistant]] has recently disappeared and the journey to the [[Cave of the Dwarves|little fellow's home]] is too dangerous now that monster hordes roam Alefgard. Eager to pursue any lead that can help the Captain and Gwaelin's Guard, the Hero volunteers to make the trip in the Warlock's stead if he agrees to help. This begins a long journey that takes the Hero from the dwarven caverns to the [[Faerie Village (Dragon Quest I)|Faerie Village]] in the west, culminating in the fair folk brewing a [[sun-up syrup|concoction]] that cures swamp sickness. | |||
Returning to Rimuldar, the Hero finds Gwaelin's Guard by the bridge leading into the town. She sadly informs him that the Priest and Warlock were unable to make any headway in helping her father and she is preparing herself for the worst, but he insists she not give up hope and humorously pushes her along to the inn so she can witness the Captain's recovery. The fair folk's brew takes immediate affect and Gwaelin's Guard is astonished to learn that the Hero enlisted the aid of faeries just to help her father. She sprints out of the inn and sulks near the lake when the Hero approaches, lamenting that she had given up hope and lamented on her past failures while he searched tirelessly for a cure. She thanks the Hero and gives him [[Princess Pledge|Gwaelin's necklace]], informing him it was found discarded in Quagmire Cave. | |||
Rimuldar plays no further role in the game's plot after this, though it is the final destination in the sidequest of [[Zalen]] the wandering musician. Should the player speak to the Soothsayer in the church, she will guide the Hero to the [[Sanctum]]. Speaking to the prisoner in the same building will warn players of the [[Weirdwood]] far to the southwest and the [[Mirage|monster responsible for wrapping it in illusions]]. | |||
====Shops & services==== | |||
<div style="float:left; margin-right:1em;"> | |||
{{ItemShop/Start|title=|subtitle=|float=}} | |||
{{ItemShop/Item|name=Medicinal herb|price=8|attributes=Heals 35~45 HP<br>Restores 45~53 HP with the [[water sigil]]}} | |||
{{ItemShop/Item|name=Antidotal herb III HD|display='''[[Antidotal herb]]'''|price=10|attributes=Cures poison}} | |||
{{ItemShop/Item|name=Holy water III HD|display='''[[Holy water]]'''|price=20|attributes=Repels weaker monsters for 64 steps<br>Deals 15~32 damage to one foe<br>Deals 30~64 damage with [[water sigil]]}} | |||
{{ItemShop/Item|name=Musk III HD|display='''[[Musk]]'''|price=150|attributes=Monsters attack more often for a brief time}} | |||
{{ItemShop/Item|name=Chimaera wing III HD|display='''[[Chimaera wing]]'''|price=25|attributes=Casts [[Zoom]]}} | |||
{{ItemShop/End|note=}} | |||
</div> | |||
<div style="float:left;"> | |||
{{WeaponShop/Start|title=|subtitle=|float=}} | |||
{{WeaponShop/Item|name=Iron lance III HD|display='''[[Iron lance]]'''|price=660|attributes=Attack +17}} | |||
{{WeaponShop/Item|name=Steel broadsword III HD|display='''[[Steel broadsword]]'''|price=1,700|attributes=Attack +22}} | |||
{{WeaponShop/Item|name=Staff of sentencing III HD|display='''[[Staff of sentencing]]'''|price=3,180|attributes=Attack +36<br>Casts [[Woosh]]}} | |||
{{WeaponShop/Item|name=Cloak of evasion III HD|display='''[[Cloak of evasion]]'''|price=1,200|attributes=Defence +25<br>Evasion +1/8th}} | |||
{{WeaponShop/Item|name=Magic armour III HD|display='''[[Magic armour]]'''|price=7,700|attributes=Defence +50<br>Spell damage resistance +33%}} | |||
{{WeaponShop/Item|name=Hardwood headwear III HD|display='''[[Hardwood headwear]]'''|price=350|attributes=Defence +11}} | |||
{{WeaponShop/Item|name=Iron helmet III HD|display='''[[Iron helmet]]'''|price=1,100|attributes=Defence +20}} | |||
{{WeaponShop/Item|name=Iron shield III HD|display='''[[Iron shield]]'''|price=900|attributes=Defence +20}} | |||
{{WeaponShop/Item|name=Light shield III HD|display='''[[Light shield]]'''|price=2,050|attributes=Defence +32}} | |||
{{WeaponShop/End|note=}} | |||
</div> | |||
{{Clear}} | |||
====Treasures==== | |||
{| class="wikitable sortable" | |||
|- | |||
| [[File:ICON-Magic key III HD.png|link=Magic key]] | |||
| [[Magic key]] | |||
| x1 | |||
|Unmissable | |||
|- | |||
| [[File:ICON-Princess's Pledge I & II HD.png|link=Princess Pledge]] | |||
| [[Princess pledge]] | |||
| x1 | |||
|Unmissable | |||
|- | |||
|[[File:ICON-Mini medal III HD.png|link=Mini medal]] | |||
|[[List of mini medals in Dragon Quest I HD-2D Remake|Mini medal]] | |||
|x1 | |||
|N/A | |||
|- | |||
| [[File:ICON-Ability scroll I & II HD.png|link=List of special scrolls in Dragon Quest I HD-2D Remake]] | |||
| [[List of special scrolls in Dragon Quest I HD-2D Remake|Magic Barrier scroll]] | |||
| x1 | |||
| [[Magic key]] | |||
|- | |||
| [[File:ICON-Special medicine III HD.png|link=Special medicine]] | |||
| [[Special medicine]] | |||
| x2 | |||
| [[Magic key]] | |||
|- | |||
| [[File:ICON-Magic water III HD.png|link=Magic water]] | |||
| [[Magic water]] | |||
| x1 | |||
|N/A | |||
|- | |||
| [[File:ICON-Sage's elixir III HD.png|link=Sage's elixir]] | |||
| [[Sage's elixir]] | |||
| x1 | |||
|[[Ultimate key]] | |||
|- | |||
| [[File:ICON-Tangleweb III HD.png|link=Tangleweb]] | |||
| [[Tangleweb]] | |||
| x1 | |||
|N/A | |||
|- | |||
| [[File:ICON-Pure water I & II HD.png|link=Pure water]] | |||
| [[Pure water]] | |||
| x1 | |||
|N/A | |||
|- | |||
| [[File:ICON-Seed of luck III HD.png|link=Seed of luck]] | |||
| [[Seed of luck]] | |||
| x1 | |||
|N/A | |||
|- | |||
| [[File:ICON-Seed of wisdom III HD.png|link=Seed of wisdom]] | |||
| [[Seed of wisdom]] | |||
| x1 | |||
|N/A | |||
|- | |||
| [[File:ICON-Bamboo pole I & II HD.png|link=Bamboo pole]] | |||
| [[Bamboo pole]] | |||
| x1 | |||
|N/A | |||
|} | |||
====Nearby monsters==== | |||
{| class="wikitable" | |||
| [[File:Bewarewolf I & II HD sprite.png|64px|link=Bewarewolf]] || [[File:Bullmustiff DQ III HD sprite.png|link=Bullmustiff]] || [[File:Fat rat I & II HD sprite.png|link=Fat rat]] || [[File:Imp DQ III HD sprite.png|link=Imp]] || [[File:Restless armour DQ III HD sprite.png|link=Restless armour]] || [[File:Shade DQ III HD sprite.png|link=Shade]] || [[File:Skeleton scrapper I & II HD sprite.png|link=Skeleton scrapper]] | |||
|} | |||
==={{DQ2HD}}=== | |||
Rimuldar once again reuses the model created for ''Dragon Quest III HD'', maintaning consistency across each title in the [[Erdrick Trilogy]]. The lake town is entirely optional in this game. | |||
The soothesayer operating in the first floor of the church managed to predict the siege of [[Moonbrooke]], saving a travelling customer's life by ordering him to remain in town instead of venturing to the ill-fated kingdom as he intended. A member of the [[Children of Hargon]] is locked away in the town jail under the watch of a Tantegel guard, having been caught attempting to convert children to the cult by engaging in hedonism and theft. | |||
The Warlock of Doorlocks has passed his key-making knowledge on to his descendants, as evidenced by the woman dwelling in his old home. She boasts of following in his footsteps and crafted her own magical key, seemingly without the assistance of dwarves, but dropped it into the sea while foolishly showed it off while travelling via ship and laments that she will have to make another. | |||
====Shops & services==== | |||
{{WeaponShop/Start|title=|subtitle=|float=}} | |||
{{WeaponShop/Item|name=Steel broadsword III HD|display='''[[Steel broadsword]]'''|price=1,500|attributes=Attack +22}} | |||
{{WeaponShop/Item|name=Knuckledusters III HD|display='''[[Knuckledusters]]'''|price=3,300|attributes=Attack +35}} | |||
{{WeaponShop/Item|name=Sledgehammer III HD|display='''[[Sledgehammer]]'''|price=4,600|attributes=Attack +45}} | |||
{{WeaponShop/Item|name=Full plate armour III HD|display='''[[Full plate armour]]'''|price=3,300|attributes=Defence +37}} | |||
{{WeaponShop/Item|name=Silver mail I & II HD|display='''[[Silver mail]]'''|price=4,300|attributes=Defence +43<br>Spell damage resistance +10%}} | |||
{{WeaponShop/Item|name=Iron helmet III HD|display='''[[Iron helmet]]'''|price=1,100|attributes=Defence +20}} | |||
{{WeaponShop/Item|name=Steel helmet I & II HD|display='''[[Iron helmet]]'''|price=2,200|attributes=Defence +27}} | |||
{{WeaponShop/Item|name=White shield I & II HD|display='''[[White shield]]'''|price=1,300|attributes=Defence +24<br>Fire spell & breath resistance +25%}} | |||
{{WeaponShop/Item|name=Steel shield I & II HD|display='''[[Steel shield]]'''|price=1,800|attributes=Defence +29}} | |||
{{WeaponShop/End|note=}} | |||
====[[Tombola]]==== | |||
Each play requires two [[tombola ticket]]s. | |||
{| cellspacing="0" cellpadding="2" border="1" | |||
!style="background:#77479B; color: white;"|Rarity | |||
!style="background:#77479B; color: white;"|Prize | |||
|- | |||
|Ultimate | |||
|[[File:ICON-Gold bracer I & II HD.png|link=Gold bracer]] | |||
|- | |||
|1st Class | |||
|[[File:Cat suit III HD icon.png|link=Cat suit]] | |||
|- | |||
|2nd Class | |||
|[[File:Gusterang III HD icon.png|link=Gusterang]] | |||
|- | |||
|3rd Class | |||
|[[File:Dieamend III HD icon.png|link=Dieamend]] | |||
|- | |||
|4th Class | |||
|[[File:Musk III HD icon.png|link=Musk]] | |||
|- | |||
|} | |||
====Treasures==== | |||
{| class="wikitable sortable" | |||
|- | |||
| [[File:ICON-Mini medal III HD.png|link=Mini medal]] | |||
| [[List of mini medals in Dragon Quest II HD-2D Remake|Mini medal]] | |||
| x1 | |||
| N/A | |||
|- | |||
| [[File:ICON-Tombola Ticket I & II HD.png|link=Tombola ticket]] | |||
| [[Tombola ticket]] | |||
| x10 | |||
| [[Ultimate key]] (6) | |||
|- | |||
| [[File:ICON-Ability scroll I & II HD.png|link=List of special scrolls in Dragon Quest II HD-2D Remake]] | |||
| [[List of special scrolls in Dragon Quest II HD-2D Remake|Sap scroll]] | |||
| x1 | |||
| N/A | |||
|- | |||
| [[File:ICON-Ability scroll I & II HD.png|link=List of special scrolls in Dragon Quest II HD-2D Remake]] | |||
| [[List of special scrolls in Dragon Quest II HD-2D Remake|Snub scroll]] | |||
| x1 | |||
| [[Magic key]] | |||
|- | |||
| [[File:ICON-Medicinal herb III HD.png|link=Medicinal herb]] | |||
| [[Medicinal herb]] | |||
| x1 | |||
|N/A | |||
|- | |||
| [[File:ICON-Dazzle-me-not III HD.png|link=Dazzle-me-not]] | |||
| [[Dazzle-me-not]] | |||
| x1 | |||
|N/A | |||
|- | |||
| [[File:ICON-Unsealant III HD.png|link=Unsealant]] | |||
| [[Unsealant]] | |||
| x1 | |||
|N/A | |||
|- | |||
| [[File:ICON-Holy water III HD.png|link=Holy water]] | |||
| [[Holy water]] | |||
| x1 | |||
|N/A | |||
|- | |||
| [[File:ICON-Musk III HD.png|link=Musk]] | |||
| [[Musk]] | |||
| x1 | |||
|N/A | |||
|- | |||
| [[File:ICON-Seed of agility III HD.png|link=Seed of agility]] | |||
| [[Seed of agility]] | |||
| x1 | |||
| Ultimate key | |||
|- | |||
| [[File:ICON-Seed of strength III HD.png|link=Seed of strength]] | |||
| [[Seed of strength]] | |||
| x1 | |||
|N/A | |||
|- | |||
| [[File:ICON-Ring of clarity III HD.png|link=Ring of clarity]] | |||
| [[Ring of clarity]] | |||
| x1 | |||
|N/A | |||
|- | |||
| [[File:ICON-Silver platter III HD.png|link=Silver platter]] | |||
| [[Silver platter]] | |||
| x1 | |||
|N/A | |||
|} | |||
====Nearby monsters==== | |||
{| class="wikitable" | |||
| [[File:Dark skeleton I & II HD sprite.png|64px|link=Dark skeleton]] || [[File:Hocus chimaera DQ III HD sprite.png|link=Hocus chimaera]] || [[File:Hoodie DQ III HD sprite.png|link=Hoodie]] || [[File:Imp DQ III HD sprite.png|link=Imp]] || [[File:Scarewolf I & II HD sprite.png|64px|link=Scarewolf]] | |||
|} | |||
==={{DQ3}}=== | ==={{DQ3}}=== | ||
Rimuldar is typically the final town visited before the final dungeon in the game, [[Zoma's Citadel]]. It serves no other major purpose in the game and contains no required items. An old man in the northwest corner of the town is fascinated by the {{Hero 3}}'s sets of keys, and wants to create a mass-production model. Additionally, the ancestors of the couple with poor directional awareness are waiting for one another in the same spots their children's children will be. | Rimuldar is typically the final town visited before the final dungeon in the game, [[Zoma's Citadel]]. It serves no other major purpose in the game and contains no required items, though the frequency in which [[liquid metal slime]]s appear around the settlement makes it an ideal [[grinding]] spot. An old man in the northwest corner of the town is fascinated by the {{Hero 3}}'s sets of keys, and wants to create a mass-production model. Additionally, the ancestors of the couple with poor directional awareness are waiting for one another in the same spots their children's children will be. | ||
====Shops & services==== | ====Shops & services==== | ||
| Line 71: | Line 293: | ||
*[[Seed of strength]] | *[[Seed of strength]] | ||
*[[Seed of wisdom]] | *[[Seed of wisdom]] | ||
*[[Words of Wisdom]] | *[[Words of Wisdom]] (remake only) | ||
====Near {{MFamilies}}s==== | ====Near {{MFamilies}}s==== | ||
| Line 84: | Line 306: | ||
==={{DQ3HD}}=== | ==={{DQ3HD}}=== | ||
Rimuldar is among the villages that have been changed the least in the change to HD, with there now being a [[List of recruitable monsters in Dragon Quest III HD-2D Remake|friendly chimaera]] in front of the home of the old man interested in producing magical keys. The other point of interest is that that [[Ortega]] left a message behind in the chest containing the recovery ring, detailing that his memories are slowly returning. | |||
====Shops & services==== | ====Shops & services==== | ||
{{WeaponShop/Start|title=Weapon & armour shop|subtitle=|float=}} | {{WeaponShop/Start|title=Weapon & armour shop|subtitle=|float=}} | ||
| Line 95: | Line 319: | ||
{{WeaponShop/Item|name=Great helm III HD|display='''[[Great helm]]'''|price=26,000|attributes=Defence +67}} | {{WeaponShop/Item|name=Great helm III HD|display='''[[Great helm]]'''|price=26,000|attributes=Defence +67}} | ||
{{WeaponShop/End|note=}} | {{WeaponShop/End|note=}} | ||
====Treasures==== | |||
{| class="wikitable sortable" | |||
|- | |||
| [[File:ICON-Mini medal III HD.png|link=Mini medal]] | |||
| [[List of mini medal locations in Dragon Quest III HD-2D Remake|Mini medal]] | |||
| x1 | |||
| N/A | |||
|- | |||
| [[File:Moonwort bulb III HD icon.png|link=Moonwort bulb]] | |||
| [[Moonwort bulb]] | |||
| x1 | |||
| N/A | |||
|- | |||
| [[File:Sage's elixir III HD icon.png|link=Sage's elixir]] | |||
| [[Sage's elixir]] | |||
| x1 | |||
| N/A | |||
|- | |||
| [[File:Seed of luck III HD icon.png|link=Seed of luck]] | |||
| [[Seed of luck]] | |||
| x1 | |||
| N/A | |||
|- | |||
| [[File:Seed of strength III HD icon.png|link=Seed of strength]] | |||
| [[Seed of strength]] | |||
| x1 | |||
| N/A | |||
|- | |||
| [[File:Unsealant III HD icon.png|link=Unsealant]] | |||
| [[Unsealant]] | |||
| x1 | |||
| N/A | |||
|- | |||
| [[File:Hen's tooth III HD icon.png|link=Hen's tooth]] | |||
| [[Hen's tooth]] | |||
| x1 | |||
| N/A | |||
|- | |||
| [[File:Recovery ring III HD icon.png|link=Recovery ring]] | |||
| [[Recovery ring]] | |||
| x1 | |||
| N/A | |||
|- | |||
| [[File:Restless heart III HD icon.png|link=Restless heart]] | |||
| [[Restless heart]] | |||
| x1 | |||
| N/A | |||
|- | |||
| [[File:Silver rosary III HD icon.png|link=Silvery rosary]] | |||
| [[Silvery rosary]] | |||
| x1 | |||
| N/A | |||
|- | |||
| [[File:Oaken club III HD icon.png|link=Oaken club]] | |||
| [[Oaken club]] | |||
| x1 | |||
| N/A | |||
|- | |||
| [[File:Iron axe III HD icon.png|link=Iron axe]] | |||
| [[Iron axe]] | |||
| x1 | |||
| N/A | |||
|- | |||
| [[File:Magic shield III HD icon.png|link=Magic shield]] | |||
| [[Magic shield]] | |||
| x1 | |||
| N/A | |||
|- | |||
| [[File:Scholar's cap III HD icon.png|link=Scholar's cap]] | |||
| [[Scholar's cap]] | |||
| x1 | |||
| N/A | |||
|} | |||
====Nearby {{MFamilies}}s==== | |||
{| class="wikitable" | |||
| [[File:Chimaera DQ III HD sprite.png|link=Chimaera]] || [[File:Gold golem DQ III HD sprite.png|link=Gold digger]] || [[File:Liquid metal slime DQ III HD sprite.png|link=Liquid metal slime]] || [[File:Muddy hand DQ III HD sprite.png|link=Muddy hand]] || [[File:Rockbomb DQ III HD sprite.png|link=Rockbomb]] || [[File:Skelegon DQ III HD sprite.png|link=Skelegon]] || [[File:Stone guardian DQ III HD sprite.png|link=Stone guardian]] || [[File:Ursa mega DQ III HD sprite.png|link=Ursa mega]] | |||
|} | |||
==={{DQB}}=== | ==={{DQB}}=== | ||
In this game, Rimuldar consists of different areas that can be reached by using | In this game, Rimuldar consists of different areas that can be reached by using [[teleportal]]s: the [[Prickly Wilds]], the [[Ancient Palace]] and the [[Holy Sanctum]]. The boss of the area is a [[Hades' Condor]]. | ||
*[[Swamps of Sickness]] | *[[Swamps of Sickness]] | ||
*[[Prickly Wilds]] | *[[Prickly Wilds]] | ||
| Line 105: | Line 408: | ||
==Map & Gallery== | ==Map & Gallery== | ||
<center><gallery> | <center><gallery> | ||
Rimuldar_Famicom_artwork.png|{{Famicom}} era artwork. | Rimuldar_Famicom_artwork.png|{{Famicom}} era artwork | ||
File:Rimuldar.jpg|{{Super Famicom}} era artwork | |||
Rimuldar_DQI_GBC_1.PNG| | Rimuldar_DQI_GBC_1.PNG| | ||
NA Rimuldar DQ NES.gif|Map for {{Dragon | NA Rimuldar DQ NES.gif|Map for {{Dragon Quest}} ({{NES}}) | ||
DQ SFC Rimuldar.png|Map for {{I}} | DQ SFC Rimuldar.png|Map for {{I}} ({{SFC}}) | ||
DW III NES Rimuldar.png|Map for {{ | DW III NES Rimuldar.png|Map for {{III}}. ({{NES}}) | ||
DQ III SFC Rimuldar.png|Map for {{III}} | DQ III SFC Rimuldar.png|Map for {{III}} ({{SFC}}) | ||
Rimuldar map III HD2D.png|HD map for ''III''. | |||
Rimuldar map I HD2D.png|HD map for ''I & II''. | |||
DQ Smash Grow Rimuldar Map.jpg|Map for ''[[Dragon Quest Smash/Grow]]''. ([[Cell phone]]) | |||
DQ III Android Rimuldar.jpg| | |||
DQ III Android Rimuldar 1.jpg| | |||
DQ III Android Rimuldar 2.jpg| | |||
DQ III Android Rimuldar 3.jpg| | |||
DQ III Android Rimuldar 4.jpg| | |||
DQ III Android Rimuldar 5.jpg| | |||
DQ III Android Rimuldar 6.jpg| | |||
DQ III Android Rimuldar 7.jpg| | |||
DQ III Android Rimuldar 8.jpg| | |||
DQ Android Rimuldar Entrance.jpg|Rimuldar from {{I}}. ([[Cell phone]]) | DQ Android Rimuldar Entrance.jpg|Rimuldar from {{I}}. ([[Cell phone]]) | ||
DQ II Android Site Of Rimuldar.jpg|Former site of Rimuldar from {{II}}. ([[Cell phone]]) | DQ II Android Site Of Rimuldar.jpg|Former site of Rimuldar from {{II}}. ([[Cell phone]]) | ||
DQ Stars Android Enid of Rimuldar.jpg|Appearance in {{Stars}}. ([[Cell phone]]) | DQ Stars Android Enid of Rimuldar.jpg|Appearance in {{Stars}}. ([[Cell phone]]) | ||
DQ Stars Android Roderick of Rimuldar.jpg| | DQ Stars Android Roderick of Rimuldar.jpg| | ||
| Line 121: | Line 436: | ||
{{DQI}} | {{DQI}} | ||
{{DQIII}} | {{DQIII}} | ||
{{DQI&IIHD}} | |||
{{DQIIIHD}} | {{DQIIIHD}} | ||
{{DQBI}} | {{DQBI}} | ||
[[Category:Dragon Quest I locations]] | [[Category:Dragon Quest I locations]] | ||
[[Category:Dragon Quest I HD-2D Remake locations]] | |||
[[Category:Dragon Quest II HD-2D Remake locations]] | |||
[[Category:Dragon Quest III locations]] | [[Category:Dragon Quest III locations]] | ||
[[Category:Dragon Quest III HD-2D Remake locations]] | [[Category:Dragon Quest III HD-2D Remake locations]] | ||
[[Category:Dragon Quest Builders locations]] | [[Category:Dragon Quest Builders locations]] | ||
Latest revision as of 15:07, 24 June 2026
| Town | |
|---|---|
| Rimuldar | |
 HD concept art | |
| Japanese | リムルダール |
| Romaji | Rimurudāru |
| Game | Dragon Quest Dragon Quest I HD-2D Remake Dragon Quest II HD-2D Remake Dragon Quest III Dragon Quest III HD-2D Remake Dragon Quest Builders |
| Old localization | Same |
Rimuldar is a lake town located on the southeastern continent of Alefgard.
Rimuldar is the closest town to the final dungeon in both Dragon Quest and Dragon Quest III, Charlock Castle.
It is also the first location the Hero can purchase Magic Keys in Dragon Quest, making it a significant location to visit.
Rimuldar is the second town saved from the blight, after Cantlin, in Dragon Quest Builders.
Appearances[edit]
Dragon Quest[edit]
Rimuldar is the first location where the Hero may purchase Magic Keys. This is the primary purpose for visiting, as keys are required in order to complete the game. Rimuldar is also the closest town to Charlock Castle, but since the game cannot be saved anywhere outside of Tantegel, this is not significant.
Shops & services[edit]
| Item | Price | Attributes |
| 8 | ? | |
| 8 | ? | |
| 24 | ? | |
| 53/16 | ? |
| Item | Price | Attributes |
| 180 | Attack +10 | |
| 560 | Attack +15 | |
| 1500 | Attack +20 |
| Item | Price | Attributes |
| 1000 | Defense +16 | |
| 3000 | Defense +24 | |
| 7700 | Defense +24 |
Treasures[edit]
- 117 gold coins
- Chimaera wing (2)
- Seed of resilience
Dragon Quest I HD-2D Remake[edit]
Rimuldar uses the same 3D model that was created for Dragon Quest III HD. Instead of just being the location where the Hero can accumulate disposable keys, the lake town plays a central role in the story of the Captain of the royal guard, Princess Gwaelin's body guard, and the acquisition of the magic key.
The Captain will be taken to the inn by Gwaelin's Guard after the two exit the Quagmire Cave to the north, with the older man having succumb to the miasma that festers in the unnatural swamps which have sprung up in the wake of the Dragonlord's rising. The resident Priest is at wits end to aid him as the illness is entirely unnatural and thus unaffected by the Squelch spell. Gwaelin's Guard reveals to the Hero that the Captain is her father, forced out of his retirement when the division of royal guards she led to escort the Princess to the Shrine of Rain were ambushed and annihilated by the Dragonlord. The Priest gravely informs her of the nature of her father's illness and that his condition appears terminal, which causes her to succumb to despair.
When the Priest mentions that one versed in magical arts might know more about the blight than he does, the Hero opts to question the villagers for information. This leads him to the eccentric hermit dubbed the Warlock of Doorlocks, who replaces the generic coot that sold the single-use keys in past versions of the game. The old Sage states that his magical knowledge is quite broad and can likely aid the ailing Captain, but he needs help with his own circumstances first. He is on the edge of completing his life's work, an inexhaustible key that can break magic seals, but his dwarven assistant has recently disappeared and the journey to the little fellow's home is too dangerous now that monster hordes roam Alefgard. Eager to pursue any lead that can help the Captain and Gwaelin's Guard, the Hero volunteers to make the trip in the Warlock's stead if he agrees to help. This begins a long journey that takes the Hero from the dwarven caverns to the Faerie Village in the west, culminating in the fair folk brewing a concoction that cures swamp sickness.
Returning to Rimuldar, the Hero finds Gwaelin's Guard by the bridge leading into the town. She sadly informs him that the Priest and Warlock were unable to make any headway in helping her father and she is preparing herself for the worst, but he insists she not give up hope and humorously pushes her along to the inn so she can witness the Captain's recovery. The fair folk's brew takes immediate affect and Gwaelin's Guard is astonished to learn that the Hero enlisted the aid of faeries just to help her father. She sprints out of the inn and sulks near the lake when the Hero approaches, lamenting that she had given up hope and lamented on her past failures while he searched tirelessly for a cure. She thanks the Hero and gives him Gwaelin's necklace, informing him it was found discarded in Quagmire Cave.
Rimuldar plays no further role in the game's plot after this, though it is the final destination in the sidequest of Zalen the wandering musician. Should the player speak to the Soothsayer in the church, she will guide the Hero to the Sanctum. Speaking to the prisoner in the same building will warn players of the Weirdwood far to the southwest and the monster responsible for wrapping it in illusions.
Shops & services[edit]
| Item | Price | Attributes |
| 8 | Heals 35~45 HP Restores 45~53 HP with the water sigil | |
| 10 | Cures poison | |
| 20 | Repels weaker monsters for 64 steps Deals 15~32 damage to one foe Deals 30~64 damage with water sigil | |
| 150 | Monsters attack more often for a brief time | |
| 25 | Casts Zoom |
| Item | Price | Attributes |
| 660 | Attack +17 | |
| 1,700 | Attack +22 | |
| 3,180 | Attack +36 Casts Woosh | |
| 1,200 | Defence +25 Evasion +1/8th | |
| 7,700 | Defence +50 Spell damage resistance +33% | |
| 350 | Defence +11 | |
| 1,100 | Defence +20 | |
| 900 | Defence +20 | |
| 2,050 | Defence +32 |
Treasures[edit]
| Magic key | x1 | Unmissable | |
| Princess pledge | x1 | Unmissable | |
| Mini medal | x1 | N/A | |
| Magic Barrier scroll | x1 | Magic key | |
| Special medicine | x2 | Magic key | |
| Magic water | x1 | N/A | |
| Sage's elixir | x1 | Ultimate key | |
| Tangleweb | x1 | N/A | |
| Pure water | x1 | N/A | |
| Seed of luck | x1 | N/A | |
| Seed of wisdom | x1 | N/A | |
| Bamboo pole | x1 | N/A |
Nearby monsters[edit]
Dragon Quest II HD-2D Remake[edit]
Rimuldar once again reuses the model created for Dragon Quest III HD, maintaning consistency across each title in the Erdrick Trilogy. The lake town is entirely optional in this game.
The soothesayer operating in the first floor of the church managed to predict the siege of Moonbrooke, saving a travelling customer's life by ordering him to remain in town instead of venturing to the ill-fated kingdom as he intended. A member of the Children of Hargon is locked away in the town jail under the watch of a Tantegel guard, having been caught attempting to convert children to the cult by engaging in hedonism and theft.
The Warlock of Doorlocks has passed his key-making knowledge on to his descendants, as evidenced by the woman dwelling in his old home. She boasts of following in his footsteps and crafted her own magical key, seemingly without the assistance of dwarves, but dropped it into the sea while foolishly showed it off while travelling via ship and laments that she will have to make another.
Shops & services[edit]
| Item | Price | Attributes |
| 1,500 | Attack +22 | |
| 3,300 | Attack +35 | |
| 4,600 | Attack +45 | |
| 3,300 | Defence +37 | |
| 4,300 | Defence +43 Spell damage resistance +10% | |
| 1,100 | Defence +20 | |
| 2,200 | Defence +27 | |
| 1,300 | Defence +24 Fire spell & breath resistance +25% | |
| 1,800 | Defence +29 |
Tombola[edit]
Each play requires two tombola tickets.
| Rarity | Prize |
|---|---|
| Ultimate | |
| 1st Class | |
| 2nd Class | |
| 3rd Class | |
| 4th Class |
Treasures[edit]
| Mini medal | x1 | N/A | |
| Tombola ticket | x10 | Ultimate key (6) | |
| Sap scroll | x1 | N/A | |
| Snub scroll | x1 | Magic key | |
| Medicinal herb | x1 | N/A | |
| Dazzle-me-not | x1 | N/A | |
| Unsealant | x1 | N/A | |
| Holy water | x1 | N/A | |
| Musk | x1 | N/A | |
| Seed of agility | x1 | Ultimate key | |
| Seed of strength | x1 | N/A | |
| Ring of clarity | x1 | N/A | |
| Silver platter | x1 | N/A |
Nearby monsters[edit]
Dragon Quest III: The Seeds of Salvation[edit]
Rimuldar is typically the final town visited before the final dungeon in the game, Zoma's Citadel. It serves no other major purpose in the game and contains no required items, though the frequency in which liquid metal slimes appear around the settlement makes it an ideal grinding spot. An old man in the northwest corner of the town is fascinated by the Hero's sets of keys, and wants to create a mass-production model. Additionally, the ancestors of the couple with poor directional awareness are waiting for one another in the same spots their children's children will be.
Shops & services[edit]
| Item | Price | Attributes |
| 25000 | Attack +5 | |
| 45000 | Attack +105 |
| Item | Price | Attributes |
| 2900 | Defense +20 | |
| 5800 | Defense +40 | |
| 8800 | Defense +30 | |
| 3500 | Defense +25 |
Treasures[edit]
- Hen's tooth
- Mini medal (3)
- Recovery ring
- Restless heart
- Seed of strength
- Seed of wisdom
- Words of Wisdom (remake only)
Near monsters[edit]
Dragon Quest III HD-2D Remake[edit]
Rimuldar is among the villages that have been changed the least in the change to HD, with there now being a friendly chimaera in front of the home of the old man interested in producing magical keys. The other point of interest is that that Ortega left a message behind in the chest containing the recovery ring, detailing that his memories are slowly returning.
Shops & services[edit]
| Item | Price | Attributes |
| 43,000 | Attack +113 | |
| 14,800 | Attack +77 | |
| 9,600 | Attack +56 -25% Fire damage | |
| 13,800 | Defence +80 -33% breath damage | |
| 6,200 | Defence +47 -25% all breath damage | |
| 13,700 | Defence +63 | |
| 11,000 | Defence +53 | |
| 26,000 | Defence +67 |
Treasures[edit]
| Mini medal | x1 | N/A | |
| Moonwort bulb | x1 | N/A | |
| Sage's elixir | x1 | N/A | |
| Seed of luck | x1 | N/A | |
| Seed of strength | x1 | N/A | |
| Unsealant | x1 | N/A | |
| Hen's tooth | x1 | N/A | |
| Recovery ring | x1 | N/A | |
| Restless heart | x1 | N/A | |
| Silvery rosary | x1 | N/A | |
| Oaken club | x1 | N/A | |
| Iron axe | x1 | N/A | |
| Magic shield | x1 | N/A | |
| Scholar's cap | x1 | N/A |
Nearby monsters[edit]
Dragon Quest Builders[edit]
In this game, Rimuldar consists of different areas that can be reached by using teleportals: the Prickly Wilds, the Ancient Palace and the Holy Sanctum. The boss of the area is a Hades' Condor.
Map & Gallery[edit]
Famicom era artwork

Super Famicom era artwork


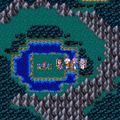
Map for Dragon Quest (NES)
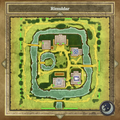
HD map for III.

HD map for I & II.

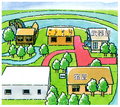
Map for Dragon Quest Smash/Grow. (Cell phone)
- Error creating thumbnail: File missing
- Error creating thumbnail: File missing
- Error creating thumbnail: File missing
- Error creating thumbnail: File missing
- Error creating thumbnail: File missing
- Error creating thumbnail: File missing
- Error creating thumbnail: File missing
- Error creating thumbnail: File missing

Rimuldar from DQ. (Cell phone)

Former site of Rimuldar from II. (Cell phone)

Appearance in Stars. (Cell phone)


