Tantegel: Difference between revisions
Antiyonder (talk | contribs) |
Antiyonder (talk | contribs) |
||
| (37 intermediate revisions by 9 users not shown) | |||
| Line 1: | Line 1: | ||
{{LocationInfobox | {{LocationInfobox | ||
|game = {{DQ}}<br>{{DQB}} | |game = {{DQ}}<br>''[[Dragon Quest II]]''<br>{{DQ1HD}}<br>{{DQ2HD}}<br>''[[Dragon Quest III]]''<br>{{DQ3HD}}<br>{{Dragon Quest XI}}<br>{{DQB}} | ||
|title = Tantegel | |title = Tantegel | ||
|type= Town and Castle | |type= Town and Castle | ||
|image = [[ | |image = [[File:Tantegel castle.jpg|250px]] | ||
|caption = | |caption = | ||
|japanese=ラダトーム | |japanese=ラダトーム | ||
|romaji=Radatōmu | |romaji=Radatōmu | ||
|old=Tantegel | |old=Tantegel | ||
}} | }} | ||
'''Tantegel''' is a castle and accompanying town which serve as the capital of [[Alefgard]]. It is featured in the first three ''Dragon Quest'' games: {{DQ}}, {{ | '''Tantegel''' is a castle and accompanying town which serve as the capital of [[Alefgard]]. | ||
It is featured in the first three ''Dragon Quest'' games: {{DQ}}, {{Dragon Quest II}}, and {{Dragon Quest III}}, as part of the [[Erdrick trilogy]]. | |||
Tantegel is the starting and central location in the original {{Dragon Quest}} and is the only location in [[Alefgard]] which has a castle and a reigning king. | |||
In the original {{Famicom}} release of {{Dragon Quest}}, the town surrounding the Ladutorm Castle (ラダトーム城, ''radatōmu shiro'') is called the same name as the castle, Ladutorm Town (ラダトームの町, ''radatōmu no machi''). When the game was localized and released overseas it was decided to give the castle and town different names ('''Tantegel''' and '''Brecconary''' respectively). In all other English version releases both town and castle are referred to as Tantegel, and combined into one icon on the world map. | In the original {{Famicom}} release of {{Dragon Quest}}, the town surrounding the Ladutorm Castle (ラダトーム城, ''radatōmu shiro'') is called the same name as the castle, Ladutorm Town (ラダトームの町, ''radatōmu no machi''). When the game was localized and released overseas it was decided to give the castle and town different names ('''Tantegel''' and '''Brecconary''' respectively). In all other English version releases both town and castle are referred to as Tantegel, and combined into one icon on the world map. | ||
| Line 15: | Line 19: | ||
==Appearances== | ==Appearances== | ||
==={{DQ}}=== | ==={{DQ}}=== | ||
Tantegel is a | Tantegel is the capital of Alefgard, ruled over by [[King Lorik|King Lorik XVI]]. The kingdom has been thrown into chaos with the theft of the [[Sphere of Light]] by the [[Dragonlord]], unleashing a horde of monsters across the archipelago. Adding insult to injury is the kidnapping of [[Princess Gwaelin]], also by the sovereign of serpents. | ||
The {{Hero 1}} begins his quest within the throne room of Tantegel castle where he is debriefed on the situation by [[King Lorik]] in a subtle tutorial designed for the player to become familiar with all non-battle options of the [[Command menu]]; the player cannot leave the throne room without learning to speak with {{NPC}}s, examine treasure chests, use items, and descend the stairs. Beyond this Tantegel is a location of central importance for many reasons: | |||
*It is the only location where the player can save the game. | *It is the only location where the player can save the game. | ||
*It is the only | *It is the only source of free {{MP}}-recovery in the game, via speaking to the resident sage. | ||
*It contains one of the essential items to complete the game, the ([[sunstone]]). | |||
*It contains one of the essential items to complete the game, the ([[ | |||
*It is the location the {{Hero 1}} returns to after completing the game. | *It is the location the {{Hero 1}} returns to after completing the game. | ||
====Shops | ====Shops & Services==== | ||
{{ItemShop/Start|float=left}} | |||
{{ItemShop/Item|name=Medicinal herb|price=24|attributes=Heals a small amount of HP}} | |||
{{ItemShop/Item|name=Torch|price=8|attributes=Lights a radius around the Hero}} | |||
{{ItemShop/Item|name=Dragon's scale|price=20|attributes=Provides a small amount of Defense}} | |||
{{ItemShop/End|note=}} | |||
{{clear}} | |||
{{WeaponShop/Start|float=left}} | {{WeaponShop/Start|float=left}} | ||
{{WeaponShop/Item|name=Bamboo lance|price=10|attributes=+2 Attack}} | {{WeaponShop/Item|name=Bamboo lance|price=10|attributes=+2 Attack}} | ||
| Line 32: | Line 42: | ||
{{WeaponShop/Item|name=Leather armour|price=70|attributes=+4 Defense}} | {{WeaponShop/Item|name=Leather armour|price=70|attributes=+4 Defense}} | ||
{{WeaponShop/Item|name=Leather shield|Small Shield|price=90|attributes=+4 Defense}} | {{WeaponShop/Item|name=Leather shield|Small Shield|price=90|attributes=+4 Defense}} | ||
{{WeaponShop/End | {{WeaponShop/End|note=}} | ||
{{Clear}} | |||
====Nearby {{MFamilies}}s==== | |||
{{ | |||
{{ | |||
*[[Slime]] | *[[Slime]] | ||
*[[She-slime]] | *[[She-slime]] | ||
| Line 50: | Line 53: | ||
*[[Torch]] | *[[Torch]] | ||
*[[Chimaera wing]] | *[[Chimaera wing]] | ||
* | *{{Gold}} | ||
*[[Magic Key]] | *[[Magic Key]] | ||
*[[Seed of life]] (remakes only) | *[[Seed of life]] (remakes only) | ||
| Line 56: | Line 59: | ||
{{clear}} | {{clear}} | ||
==={{DQ1HD}}=== | |||
Tantegel uses the same in-game model asset that was created for ''Dragon Quest III HD'' and as such the castle and town are combined into one map. It is also no longer the starting point of the quest, as the Hero now awakens in the middles of a forest during the game's opening. After rushing to the aid of the nearby [[Captain (Dragon Quest)|Captain of the Guard]] and the [[Gwaelin's Guard|Princess' body guard]] and saving them from a horde of monsters, the pair of knights escort the Hero to Tantegel to speak with King Lorik. | |||
As the Hero bears no proof of his claim that he is of Erdrick's bloodline, he is met with suspicion by the [[Chancellor of Tantagel]]. King Lorik, however, remains cautiously optimistic and orders the young man to venture to the [[Shrine of Rain]] and report back to him after speaking with the [[Sage of Rain|resident Sage]]. Returning once this mission has been completed will reveal the full scope of the game's plot, including the Dragonlord's abduction of Princess Gwaelin and his theft of the Sphere of Light―while the commoners know their Princess was taken from them, King Lorik has ordered that no word of the sacred sphere's disappearance be spoken so as to not cause widespread panic. | |||
With the castle and town being merged into a single map and the player having easy access to the cathedral in the center of the town, there is no obligation to enter the castle proper beyond delivering Princess Gwaelin once she is rescued. Doing so will result in a cutscene where the maiden is developing powerful feelings for her rescuer and gives him her [[Princess Pledge|necklace]] as in the original version. | |||
Players who want to carry the Princess along for the remainder of the quest cannot enter the castle with her as she will automatically leave: in order to avoid this the player must return to Tantegel as soon as the [[magic key]] is obtained in [[Rimuldar]] and retrieve the sunstone from the castle gazebo in the southeast of the map. This is the only key item necessary to complete the game that is found in the castle. | |||
Should the player stand on the coastline directly south of the castle entrance, a brief scene of the Hero staring up at the Dragonlord's castle will play. | |||
====Shops & services==== | |||
<div style="float:left; margin-right:1em;"> | |||
{{ItemShop/Start|title=|subtitle=|float=}} | |||
{{ItemShop/Item|name=Bamboo pole I & II HD|display='''[[Bamboo pole]]'''|price=10|attributes=Attack +3}} | |||
{{ItemShop/Item|name=Pot lid III HD|display='''[[Pot lid]]'''|price=40|attributes=Defence +2}} | |||
{{ItemShop/Item|name=Medicinal herb|price=8|attributes=Heals 35~45 HP<br>Restores 45~53 HP with the [[water sigil]]}} | |||
{{ItemShop/Item|name=Antidotal herb III HD|display='''[[Antidotal herb]]'''|price=10|attributes=Cures poison<br>Cures party with [[water sigil]]}} | |||
{{ItemShop/Item|name=Moonwort bulb III HD|display='''[[Moonwort bulb]]'''|price=30|attributes=Cures paralysis<br>Cures party with [[water sigil]]}} | |||
{{ItemShop/Item|name=Holy water III HD|display='''[[Holy water]]'''|price=20|attributes=Repels weaker monsters for 64 steps<br>Deals 15~32 damage to one foe<br>Deals 30~64 damage with [[water sigil]]}} | |||
{{ItemShop/Item|name=Musk III HD|display='''[[Musk]]'''|price=150|attributes=Monsters attack more often for a brief time}} | |||
{{ItemShop/Item|name=Chimaera wing III HD|display='''[[Chimaera wing]]'''|price=25|attributes=Casts [[Zoom]]}} | |||
{{ItemShop/End|note=}} | |||
</div> | |||
<div style="float:left;"> | |||
{{WeaponShop/Start|title=|subtitle=|float=}} | |||
{{WeaponShop/Item|name=Oaken club III HD|display='''[[Oaken club]]'''|price=40|attributes=Attack +5}} | |||
{{WeaponShop/Item|name=Copper sword III HD|display='''[[Copper sword]]'''|price=180|attributes=Attack +9}} | |||
{{WeaponShop/Item|name=Divine dagger III HD|display='''[[Divine dagger]]'''|price=240|attributes=Attack +10<br>+30% damage to [[Undead family|the undead]]}} | |||
{{WeaponShop/Item|name=Iron lance III HD|display='''[[Iron lance]]'''|price=660|attributes=Attack +17}} | |||
{{WeaponShop/Item|name=Plain clothes III HD|display='''[[Plain clothes]]'''|price=130|attributes=Defence +4}} | |||
{{WeaponShop/Item|name=Leather suit I & II HD|display='''[[Leather suit]]'''|price=50|attributes=Defence +6}} | |||
{{WeaponShop/Item|name=Leather armour III HD|display='''[[Leather armour]]'''|price=180|attributes=Defence +12}} | |||
{{WeaponShop/Item|name=Leather shield III HD|display='''[[Leather shield]]'''|price=120|attributes=Defence +4}} | |||
{{WeaponShop/Item|name=Leather hat III HD|display='''[[Leather hat]]'''|price=65|attributes=Defence +4}} | |||
{{WeaponShop/Item|name=Hardwood headwear III HD|display='''[[Hardwood headwear]]'''|price=350|attributes=Defence +11}} | |||
{{WeaponShop/End|note=}} | |||
</div> | |||
{{Clear}} | |||
===Treasures=== | |||
{| class="wikitable sortable" | |||
! Icon | |||
! Name | |||
! Amount | |||
! Requirements | |||
|- | |||
| [[File:ICON-Princess's Pledge I & II HD.png|link=Princess's pledge]] | |||
| [[Princess's pledge]] | |||
| x1 | |||
| Deliver [[Princess Gwaelin]] | |||
|- | |||
| [[File:ICON-Mini medal III HD.png|link=List of mini medals in Dragon Quest I HD-2D Remake]] | |||
| [[List of mini medals in Dragon Quest I HD-2D Remake|Mini medal]] | |||
| x3 | |||
| [[Magic key]] (1)<br>[[Ultimate key]] (1) | |||
|- | |||
| [[File:ICON-Ability scroll I & II HD.png|link=List of special scrolls in Dragon Quest I HD-2D Remake]] | |||
| [[List of special scrolls in Dragon Quest I HD-2D Remake|Snoop scroll]] | |||
| x1 | |||
| N/A | |||
|- | |||
| [[File:ICON-Medicinal herb III HD.png|link=Medicinal herb]] | |||
| [[Medicinal herb]] | |||
| x5 | |||
| N/A | |||
|- | |||
| [[File:ICON-Magic water III HD.png|link=Magic water]] | |||
| [[Magic water]] | |||
| x1 | |||
| [[Thief's key]] | |||
|- | |||
| [[File:ICON-Elfin elixir III HD.png|link=Elfin elixir]] | |||
| [[Elfin elixir]] | |||
| x1 | |||
| [[Ultimate key]] | |||
|- | |||
| [[File:ICON-Prayer ring III HD.png|link=Prayer ring]] | |||
| [[Prayer ring]] | |||
| x1 | |||
| [[Thief's key]] | |||
|- | |||
| [[File:ICON-Antidotal herb III HD.png|link=Antidotal herb]] | |||
| [[Antidotal herb]] | |||
| x1 | |||
| N/A | |||
|- | |||
| [[File:ICON-Holy water III HD.png|link=Holy water]] | |||
| [[Holy water]] | |||
| x1 | |||
| N/A | |||
|- | |||
| [[File:ICON-Chimaera wing III HD.png|link=Chimaera wing]] | |||
| [[Chimaera wing]] | |||
| x1 | |||
| N/A | |||
|- | |||
| [[File:ICON-Hextract I & II HD.png|link=Hextract]] | |||
| [[Hextract]] | |||
| x3 | |||
| [[Ultimate key]] | |||
|- | |||
| [[File:ICON-Pure water I & II HD.png|link=Pure water]] | |||
| [[Pure water]] | |||
| x1 | |||
| [[Thief's key]] | |||
|- | |||
| [[File:ICON-Spider web I & II HD.png|link=Spider web]] | |||
| [[Spider web]] | |||
| x1 | |||
| [[Ultimate key]] | |||
|- | |||
| [[File:ICON-Seed of agility III HD.png|link=Seed of agility]] | |||
| [[Seed of agility]] | |||
| x2 | |||
| [[Thief's key]] (1) | |||
|- | |||
| [[File:ICON-Seed of defence III HD.png|link=Seed of defence]] | |||
| [[Seed of defence]] | |||
| x1 | |||
| N/A | |||
|- | |||
| [[File:ICON-Seed of life III HD.png|link=Seed of life]] | |||
| [[Seed of life]] | |||
| x2 | |||
| [[Thief's key]] (1) | |||
|- | |||
| [[File:ICON-Seed of luck III HD.png|link=Seed of luck]] | |||
| [[Seed of luck]] | |||
| x1 | |||
| N/A | |||
|- | |||
| [[File:ICON-Seed of magic III HD.png|link=Seed of magic]] | |||
| [[Seed of magic]] | |||
| x1 | |||
| N/A | |||
|- | |||
| [[File:ICON-Seed of strength III HD.png|link=Seed of strength]] | |||
| [[Seed of strength]] | |||
| x2 | |||
| [[Thief's key]] (1) | |||
|- | |||
| [[File:ICON-Bunny tail III HD.png|link=Bunny tail]] | |||
| [[Bunny tail]] | |||
| x1 | |||
| N/A | |||
|- | |||
| [[File:ICON-Rousing ring III HD.png|link=Rousing ring]] | |||
| [[Rousing ring]] | |||
| x1 | |||
| [[Thief's key]] | |||
|- | |||
| [[File:ICON-Oaken club III HD.png|link=Oaken club]] | |||
| [[Oaken club]] | |||
| x1 | |||
| N/A | |||
|- | |||
| [[File:ICON-Headsman's axe III HD.png|link=Headsman's axe]] | |||
| [[Headsman's axe]] | |||
| x1 | |||
| [[Ultimate key]] | |||
|- | |||
| [[File:ICON-Boxer shorts III HD.png|link=Boxer shorts]] | |||
| [[Boxer shorts]] | |||
| x1 | |||
| N/A | |||
|- | |||
| [[File:ICON-Leather armour III HD.png|link=Leather armour]] | |||
| [[Leather armour]] | |||
| x1 | |||
| [[Thief's key]] | |||
|- | |||
| [[File:ICON-Dog suit I & II HD.png|link=Dog suit]] | |||
| [[Dog suit]] | |||
| x1 | |||
| [[Thief's key]] | |||
|} | |||
====Nearby monsters==== | |||
{| class="wikitable" | |||
|- | |||
| [[File:Batterfly DQ III HD sprite.png|link=Batterfly]] || [[File:Dracky I & II HD sprite.png|link=Dracky]] || [[File:Ghost I & II HD sprite.png|64px|link=Ghost]] || [[File:Prestidigitator I & II HD sprite.png|link=Prestidigitator (Dragon Quest)]] || [[File:She-slime DQ III HD sprite.png|link=She-slime]] || [[File:Slime DQ III HD sprite.png|link=Slime]] | |||
|} | |||
==={{DQ2}}=== | ==={{DQ2}}=== | ||
In {{Dragon Quest II}}, Tantegel is much less important. It is not reached until nearly halfway into the game, and the new king is hiding out of fear of [[Hargon]]. No major items | [[File:Tantegel 2 DQ I & II official guidebook art.jpg|thumb|right|400px|Alternate art seen in ''I & II's'' official SFC guidebook]] | ||
In {{Dragon Quest II}}, Tantegel is much less important. It is not reached until nearly halfway into the game, and the new king is hiding out of fear of [[Hargon]]. No major items or information are located there and it can be skipped altogether if desired. | |||
====Shops & Services==== | |||
{{ItemShop/Start|float=left|}} | |||
{{ItemShop/Item|name=Medicinal herb|price=15|attributes=Heals a small amount of {{HP}}.}} | |||
{{ItemShop/Item|name=Antidotal herb|price=8|attributes=Cures one party member of {{Poison}}.}} | |||
{{ItemShop/Item|name=Chimaera wing|price=80|attributes=Returns you to your last save location.}} | |||
{{ItemShop/Item|name=Holy water|price=40|attributes=Repels weaker monsters.}} | |||
{{ItemShop/Item|name=Banishing bell|price=640|attributes=Protects against non-damaging spells.}} | |||
{{ItemShop/End|note=}} | |||
{{WeaponShop/Start|float=left}} | {{WeaponShop/Start|float=left}} | ||
{{WeaponShop/Item|name=Wizard's staff|price=2500|attributes=+8 Attack ({{NES}} version)<br/>+27 Attack ({{SFC}}/{{GBC}} versions)<br/>Casts [[Sizz]] when used in battle}} | {{WeaponShop/Item|name=Wizard's staff|price=2500|attributes=+8 Attack ({{NES}} version)<br/>+27 Attack ({{SFC}}/{{GBC}} versions)<br/>Casts [[Sizz]] when used in battle}} | ||
| Line 69: | Line 265: | ||
{{WeaponShop/Item|name=Full plate armour|price=1000|attributes=+25 Defense}} | {{WeaponShop/Item|name=Full plate armour|price=1000|attributes=+25 Defense}} | ||
{{WeaponShop/Item|name=Iron helmet|price=3150|attributes=+6 Defense}} | {{WeaponShop/Item|name=Iron helmet|price=3150|attributes=+6 Defense}} | ||
{{WeaponShop/End | {{WeaponShop/End|note=}} | ||
{{Clear}} | |||
{{ | |||
====Nearby | ====Nearby {{MFamilies}}s==== | ||
*[[Mean spirit|Sekerleton]] | *[[Mean spirit|Sekerleton]] | ||
*[[Shaman]] | *[[Shaman]] | ||
*[[Gremlin]] | *[[Gremlin]] | ||
*[[ | *[[Big badboon]] | ||
*[[Drackmage]] | *[[Drackmage]] | ||
*[[Mud mannequin]] | *[[Mud mannequin]] | ||
| Line 91: | Line 279: | ||
====Treasures==== | ====Treasures==== | ||
*[[Holy water]] | *[[Holy water]] | ||
====Remake differences==== | |||
*The music played in the {{NES}} is the same one used for [[Midenhall]], [[Cannock]] and [[Dirkandor]]. The music in the remakes is the castle theme from {{I}}. | |||
*The King has the [[soul sigil]] in his possession and gives it to the [[Scions of Erdrick]] immediately when they find him. | |||
{{clear}} | {{clear}} | ||
==={{DQ2HD}}=== | |||
Tantegel is no longer an optional destination, much like in the 2014 Adroid/iOS port. Once more the assets created for ''Dragon Quest III HD'' are used, unifying the kingdom across all three titles. When the [[Scions of Erdrick]] arrive at the castle gate, the [[Princess of Moonbrooke]] takes a moment to reflect on Tantegel and their family's history, how their storied ancestor took the hand of Princess Gwaelin in marriage and ventured out into the wider world to found their own kingdom, [[Midenhall]]. The next generation would do the same, leaving their parents' land and creating [[Cannock]] and [[Moonbrooke]], with the bloodline of the world's ruling families all tracing back to Tantegel. | |||
When the young heroes enter the throne room they find it empty save for the Chancellor, who is puzzled to see the Princess so soon after she departed the castle yesterday and assumes she brought her cousins along because wants to include the armies of Midenhall and Cannock in the joint training session she proposed for Tantegel and her own kingdom. The Princess is baffled at this and asserts that this is the first time she has ever set foot in Tantegel, and that her kingdom had been destroyed by Hargon's fiends. The Chancellor states that the Princess of the day before presented the [[Mark of Moonbrooke]] as proof of her identity, which the Scions lack. The real Princess tells the Chancellor that the royal mark was stolen by monsters during the raid, which only leads to more confusion. | |||
The [[King of Tantegel (Dragon Quest II)|King of Tantegel]] then makes his appearance, emerging from behind the throne with an empty bottle in hand. Despite his partial inebriation he presses the Chancellor for any more details about the impostor Princess, who answers that beyond the training drill proposal her main focus was finding out how to reach the Dragonlord's Castle. The King then turns his attention to the heroes and asks if Moonbrooke has indeed been destroyed. | |||
Upon being informed of the cousin's quest to slay Hargon, the King remains skeptical and porposes that it is possible the Princess who visited the castle yesterday was the real McCoy while the group before him are the fakes. The [[Prince of Cannock]] is insulted by this and insists the King stare him in the eyes to meet the steely gaze of a royal instead of some lowly monster, but the King points out the Princess of before looked just as convincing. Nevertheless the thought of monsters impersonating royalty in ''his'' kingdom infuriates the King, and the Prince of Cannock suddenly remembers that they carry the [[Princess's pledge]] with them as proof of their identity. As the bauble shines brightly in the presence of the descendants of Princess Gwaelin, the Scions' identities are confirmed. The King expresses his condolences to the Princess for the loss of her kingdom then orders the Chancellor to shore up the castle defences at once, realizing the impostor wanted to have the guards wearing naught but light training equipment to make a raid and slaughter all the easier. | |||
The King asks that the heroes wait for him atop the castle while he discusses preparations with the Chancellor. There, the Scions reflect back on the [[Dream-Whisperer|mysterious voice]] that spoke to them in their dreams at [[Rippleport]], wondering if this attempted sabotage of Tantegel's defences was one of the great disasters it warned of. When the King arrives he asks the group if they know of where Hargon lurks, but the children do not as that is why they travel the world looking for leads. The King hands them the rainbow drop and tells them to speak with the one who dwells in the ruins of the Dragonlord's castle, elaborating that while the two have never met in person the King is certain that little escape's the hermit's eye and if any know of Hargon's hiding place then it is him. | |||
The Scions will revisit Tantegel much later in the game when looking for the [[Firstborn Protector]] of [[Cantlin]], who is in possession of the [[faerie flute]]. He will be seen leaving the first floor of the castle and making his way to [[Kol]]. | |||
====Shops & services==== | |||
<div style="float:left; margin-right:1em;"> | |||
{{ItemShop/Start|title=|subtitle=|float=}} | |||
{{ItemShop/Item|name=Bamboo pole I & II HD|display='''[[Bamboo pole]]'''|price=10|attributes=Attack +3}} | |||
{{ItemShop/Item|name=Pot lid III HD|display='''[[Pot lid]]'''|price=40|attributes=Defence +2}} | |||
{{ItemShop/Item|name=Strong medicine III HD|display='''[[Strong medicine]]'''|price=48|attributes=Restores 50~60 HP<br>Restores 67~79 HP with [[water sigil]]}} | |||
{{ItemShop/Item|name=Medicinal herb|price=8|attributes=Heals 35~45 HP<br>Restores 45~53 HP with the [[water sigil]]}} | |||
{{ItemShop/Item|name=Antidotal herb III HD|display='''[[Antidotal herb]]'''|price=10|attributes=Cures poison<br>Cures party with [[water sigil]]}} | |||
{{ItemShop/Item|name=Moonwort bulb III HD|display='''[[Moonwort bulb]]'''|price=30|attributes=Cures paralysis<br>Cures party with [[water sigil]]}} | |||
{{ItemShop/Item|name=Dazzle-me-not III HD|display='''[[Dazzle-me-not]]'''|price=120|attributes=Cures bedazzlement<br>Cures party with [[water sigil]]}} | |||
{{ItemShop/Item|name=Unsealant III HD|display='''[[Unsealant]]'''|price=150|attributes=Cures [[Fizzle]]<br>Cures party with [[water sigil]]}} | |||
{{ItemShop/Item|name=Holy water III HD|display='''[[Holy water]]'''|price=20|attributes=Repels weaker monsters for 64 steps<br>Deals 15~32 damage to one foe<br>Deals 30~64 damage with [[water sigil]]}} | |||
{{ItemShop/Item|name=Musk III HD|display='''[[Musk]]'''|price=150|attributes=Monsters attack more often for a brief time}} | |||
{{ItemShop/Item|name=Chimaera wing III HD|display='''[[Chimaera wing]]'''|price=25|attributes=Casts [[Zoom]]}} | |||
{{ItemShop/End|note=}} | |||
</div> | |||
<div style="float:left;"> | |||
{{WeaponShop/Start|title=|subtitle=|float=}} | |||
{{WeaponShop/Item|name=Oaken club III HD|display='''[[Oaken club]]'''|price=40|attributes=Attack +5}} | |||
{{WeaponShop/Item|name=Copper sword III HD|display='''[[Copper sword]]'''|price=180|attributes=Attack +9}} | |||
{{WeaponShop/Item|name=Divine dagger III HD|display='''[[Divine dagger]]'''|price=240|attributes=Attack +10<br>+30% damage to [[Undead family|the undead]]}} | |||
{{WeaponShop/Item|name=Iron lance III HD|display='''[[Iron lance]]'''|price=660|attributes=Attack +17}} | |||
{{WeaponShop/Item|name=Plain clothes III HD|display='''[[Plain clothes]]'''|price=130|attributes=Defence +4}} | |||
{{WeaponShop/Item|name=Leather suit I & II HD|display='''[[Leather suit]]'''|price=50|attributes=Defence +6}} | |||
{{WeaponShop/Item|name=Leather armour III HD|display='''[[Leather armour]]'''|price=180|attributes=Defence +12}} | |||
{{WeaponShop/Item|name=Full plate armour III HD|display='''[[Full plate armour]]'''|price=3,500|attributes=Defence +39}} | |||
{{WeaponShop/Item|name=Warrior's armour I & II HD|display='''[[Warrior's armour]]'''|price=4,100|attributes=Defence +41<br>[[Whack]] resistance +6.25%}} | |||
{{WeaponShop/Item|name=Leather shield III HD|display='''[[Leather shield]]'''|price=120|attributes=Defence +4}} | |||
{{WeaponShop/Item|name=Scale shield III HD|display='''[[Scale shield]]'''|price=350|attributes=Defence +11}} | |||
{{WeaponShop/Item|name=Steel shield I & II HD|display='''[[Steel shield]]'''|price=1,800|attributes=Defence +29}} | |||
{{WeaponShop/Item|name=Leather hat III HD|display='''[[Leather hat]]'''|price=65|attributes=Defence +4}} | |||
{{WeaponShop/Item|name=Hardwood headwear III HD|display='''[[Hardwood headwear]]'''|price=350|attributes=Defence +11}} | |||
{{WeaponShop/Item|name=Steel helmet I & II HD|display='''[[Steel helmet]]'''|price=2,200|attributes=Defence +27}} | |||
{{WeaponShop/Item|name=Iron mask III HD|display='''[[Iron mask]]'''|price=3,600|attributes=Defence +31}} | |||
{{WeaponShop/End|note=}} | |||
</div> | |||
{{Clear}} | |||
====Treasures==== | |||
{| class="wikitable sortable" | |||
|- | |||
| [[File:ICON-Rainbow drop I & II HD.png|link=Rainbow drop]] | |||
| [[Rainbow drop]] | |||
| x1 | |||
|Unmissable | |||
|- | |||
| [[File:ICON-Mini medal III HD.png|link=List of mini medals in Dragon Quest II HD-2D Remake]] | |||
| [[List of mini medals in Dragon Quest II HD-2D Remake|Mini medal]] | |||
| x1 | |||
| [[Magic key]] (1) | |||
|- | |||
| [[File:ICON-Tombola Ticket I & II HD.png|link=Tombola ticket]] | |||
| [[Tombola ticket]] | |||
| x20 | |||
|[[Magic key]] (7)<br>[[Ultimate key]] (9) | |||
|- | |||
| [[File:ICON-Ability scroll I & II HD.png|link=List of special scrolls in Dragon Quest II HD-2D Remake]] | |||
| [[List of special scrolls in Dragon Quest II HD-2D Remake|Bang scroll]] | |||
| x1 | |||
| N/A | |||
|- | |||
| [[File:ICON-Strong medicine III HD.png|link=Strong medicine]] | |||
| [[Strong medicine]] | |||
| x1 | |||
|N/A | |||
|- | |||
| [[File:ICON-Special medicine III HD.png|link=Special medicine]] | |||
| [[Special medicine]] | |||
| x1 | |||
|[[Ultimate key]] | |||
|- | |||
| [[File:ICON-Medicinal herb III HD.png|link=Medicinal herb]] | |||
| [[Medicinal herb]] | |||
| x3 | |||
|N/A | |||
|- | |||
| [[File:ICON-Magic water III HD.png|link=Magic water]] | |||
| [[Magic water]] | |||
| x1 | |||
|N/A | |||
|- | |||
| [[File:ICON-Angel bell III HD.png|link=Angel's bell]] | |||
| [[Angel bell]] | |||
| x2 | |||
| [[Magic key]] (1) | |||
|- | |||
| [[File:ICON-Coagulant III HD.png|link=Coagulant]] | |||
| [[Coagulant]] | |||
| x1 | |||
|N/A | |||
|- | |||
| [[File:ICON-Dazzle-me-not III HD.png|link=Dazzle-me-not]] | |||
| [[Dazzle-me-not]] | |||
| x1 | |||
|N/A | |||
|- | |||
| [[File:ICON-Moonwort bulb III HD.png|link=Moonwort bulb]] | |||
| [[Moonwort bulb]] | |||
| x1 | |||
|N/A | |||
|- | |||
| [[File:ICON-Oomph powder III HD.png|link=Oomph powder]] | |||
| [[Oomph powder]] | |||
| x1 | |||
| [[Ultimate key]] | |||
|- | |||
| [[File:ICON-Unsealant III HD.png|link=Unsealant]] | |||
| [[Unsealant]] | |||
| x1 | |||
|N/A | |||
|- | |||
| [[File:ICON-Holy water III HD.png|link=Holy water]] | |||
| [[Holy water]] | |||
| x1 | |||
|N/A | |||
|- | |||
| [[File:ICON-Chimaera wing III HD.png|link=Chimaera wing]] | |||
| [[Chimaera wing]] | |||
| x1 | |||
|N/A | |||
|- | |||
| [[File:ICON-Seed of agility III HD.png|link=Seed of agility]] | |||
| [[Seed of agility]] | |||
| x1 | |||
|N/A | |||
|- | |||
| [[File:ICON-Seed of defence III HD.png|link=Seed of defence]] | |||
| [[Seed of defence]] | |||
| x1 | |||
|N/A | |||
|- | |||
| [[File:ICON-Seed of life III HD.png|link=Seed of life]] | |||
| [[Seed of life]] | |||
| x1 | |||
|[[Magic key]] | |||
|- | |||
| [[File:ICON-Seed of luck III HD.png|link=Seed of luck]] | |||
| [[Seed of luck]] | |||
| x2 | |||
| [[Magic key]] (1) | |||
|- | |||
| [[File:ICON-Seed of strength III HD.png|link=Seed of strength]] | |||
| [[Seed of strength]] | |||
| x1 | |||
|N/A | |||
|- | |||
| [[File:ICON-Seed of wisdom III HD.png|link=Seed of wisdom]] | |||
| [[Seed of wisdom]] | |||
| x1 | |||
|N/A | |||
|- | |||
| [[File:ICON-Banishing bell III HD.png|link=Banishing bell]] | |||
| [[Banishing bell]] | |||
| x1 | |||
|[[Magic key]] | |||
|- | |||
| [[File:ICON-Fishnet stockings I & II HD.png|link=Fishnet stockings]] | |||
| [[Fishnet stockings]] | |||
| x1 | |||
|[[Magic key]] | |||
|- | |||
| [[File:ICON-Bastard sword III HD.png|link=Bastard sword]] | |||
| [[Bastard sword]] | |||
| x1 | |||
|[[Ultimate key]] | |||
|- | |||
| [[File:ICON-Boxer shorts III HD.png|link=Boxer shorts]] | |||
| [[Boxer shorts]] | |||
| x1 | |||
|N/A | |||
|- | |||
| [[File:ICON-Enchanted robes I & II HD.png|link=Enchanted robes]] | |||
| [[Enchanted robes]] | |||
| x1 | |||
|[[Ultimate key]] | |||
|- | |||
| [[File:ICON-Leather cape III HD.png|link=Leather cape]] | |||
| [[Leather cape]] | |||
| x1 | |||
|N/A | |||
|- | |||
| [[File:ICON-Noble garb I & II HD.png|link=Noble garb]] | |||
| [[Noble garb]] | |||
| x1 | |||
|N/A | |||
|- | |||
| [[File:ICON-Pot lid III HD.png|link=Pot lid]] | |||
| [[Pot lid]] | |||
| x1 | |||
|N/A | |||
|- | |||
| [[File:ICON-Goddess's tiara I & II HD.png|link=Goddess's tiara]] | |||
| [[Goddess's tiara]] | |||
| x1 | |||
|[[Ultimate key]] | |||
|- | |||
| [[File:ICON-Great helm III HD.png|link=Great helm]] | |||
| [[Great helm]] | |||
| x1 | |||
|[[Ultimate key]] | |||
|} | |||
====Nearby monsters==== | |||
{| class="wikitable" | |||
|- | |||
| [[File:Dracky I & II HD sprite.png|link=Dracky]] || [[File:Scarewolf I & II HD sprite.png|64px|link=Scarewolf]] || [[File:She-slime DQ III HD sprite.png|link=She-slime]] || [[File:Shell slime DQ III HD sprite.png|link=Shell slime]] || [[File:Skeleton I & II HD sprite.png|link=Skeleton]] || [[File:Slime DQ III HD sprite.png|link=Slime]] | |||
|} | |||
==={{DQ3}}=== | ==={{DQ3}}=== | ||
Tantegel is the location of central importance in the | Tantegel is the location of central importance in the dark world of [[Alefgard]] in {{Dragon Quest III}} and is the first place the {{Hero 3}} is guided to after descending through the [[Great Pit of Giaga]]. The castle town is ruled over by the [[King of Alefgard]], who struggles to keep hope alive within his subjects through the eternal night created by the archfiend [[Zoma]]. Tantegel contains the essential sunstone item in this game as well, though it it kept within the castle walls instead of an exterior basement. The treasury was also where the fabled [[Sword of Kings]] was held, though [[Zoma]] stole the [[Sword of Kings|sword]] from the king and spent three years trying to destroy it so that it could never be used against him. | ||
====Shops | The king was served by an amnesiac [[Ortega]] for some time after the lost [[Ortega|hero]] survived his injuries on [[Mt. Necrogond]] and fell into the underworld. Upon learning of his host's plight and the despair of the people, [[Ortega]] set out to slay [[Zoma]] himself. There is another unlikely visitor from the world above: [[Robbin' 'Ood]], who was imprisoned above the church after being caught conning one of the townsfolk. | ||
====Shops & Services==== | |||
{{ItemShop/Start|float=left|}} | |||
{{ItemShop/Item|name=Medicinal herb|price=15|attributes=Heals a small amount of {{HP}}.}} | |||
{{ItemShop/Item|name=Antidotal herb|price=8|attributes=Cures one party member of [[poison]].}} | |||
{{ItemShop/Item|name=Chimaera wing|price=80|attributes=Returns you to your last save location.}} | |||
{{ItemShop/Item|name=Holy water|price=40|attributes=Repels weaker monsters.}} | |||
{{ItemShop/Item|name=Moonwort bulb|price=30g|attributes=Cures paralysis}} | |||
{{ItemShop/Item|name=Fading Jenny|price=300g|attributes=Makes party invisible for a short time}} | |||
{{ItemShop/End|note=}} | |||
{{Clear}} | |||
{{WeaponShop/Start|float=left}} | {{WeaponShop/Start|float=left}} | ||
{{WeaponShop/Item|name=Wizard's staff|price=1500|attributes=Attack +15}} | {{WeaponShop/Item|name=Wizard's staff|price=1500|attributes=Attack +15}} | ||
| Line 105: | Line 529: | ||
{{WeaponShop/Item|name=Angel's robe|price=3000|attributes=Defence +35}} | {{WeaponShop/Item|name=Angel's robe|price=3000|attributes=Defence +35}} | ||
{{WeaponShop/Item|name=Dragon mail|price=9800|attributes=Defence +45}} | {{WeaponShop/Item|name=Dragon mail|price=9800|attributes=Defence +45}} | ||
{{WeaponShop/End | {{WeaponShop/End|note=}} | ||
{{Clear}} | {{Clear}} | ||
====Nearby | ====Nearby {{MFamilies}}s==== | ||
*[[Muddy hand]] | *[[Muddy hand]] | ||
*[[Stone guardian]] (Called by Muddy hand) | *[[Stone guardian]] (Called by [[Muddy hand]]) | ||
*[[Healslime]] | *[[Healslime]] | ||
*[[Armful | *[[Armful]] | ||
*[[Infernal serpent]] | *[[Infernal serpent]] | ||
*[[She-slime]] | *[[She-slime]] | ||
*[[Slime]] | *[[Slime]] | ||
*[[ | *[[Shell slime]] | ||
*{{Living statue}} | *{{Living statue}} | ||
| Line 131: | Line 546: | ||
*[[Boxer shorts]] | *[[Boxer shorts]] | ||
*[[Mini medal]] | *[[Mini medal]] | ||
*[[T'n'T ticket]] | *[[T'n'T ticket]] (4) (unavailable in {{NES}} and [[Cell phone]] versions) | ||
*[[Seed of agility]] | *[[Seed of agility]] | ||
*[[Seed of life]] | *[[Seed of life]] | ||
| Line 137: | Line 552: | ||
*[[Sunstone]] | *[[Sunstone]] | ||
{{ | ====Remake changes==== | ||
*As with the remakes of {{II}}, the castle theme for Tantegel is from {{I}}, with the town music also being from the first game. | |||
==={{DQ3HD}}=== | |||
Tantegel is depicted as a coastal town set high above the sea on a sheer cliffside. If the player speaks to an old man standing along the cliffs south of the castle, a brief cutscene showing [[Zoma's Citadel]] from the perspective of the townsfolk will be seen. | |||
When the player first enters the castle two guards will question the {{Party 3}} of strangers, and when told that the group sailed from the port to the west one guard will escort the {{Hero 3}} to the throne room for an audience with the king. His majesty asks if the {{Hero 3}} is familiar with the name "[[Ortega]]"; upon learning that the {{Hero 3}} is indeed [[Ortega]]'s child the king explains how the [[Ortega|wanderer]] came to his cursed land a decade prior. He was found on the verge of succumbing to his burns by the same guardsman who escorted the {{Hero 3}} to the king, and was nursed to health by the king's maid. | |||
Beyond this new elaboration of [[Ortega]]'s journey, the largest change to the castle town is that the imprisoned [[Robbin' 'Ood]] now informs the player of the location of the sunstone. | |||
====Shops & services==== | |||
<div style="float:left; margin-right:1em;"> | |||
{{ItemShop/Start|title=|subtitle=|float=}} | |||
{{ItemShop/Item|name=Medicinal herb III HD|display='''[[Medicinal herb]]'''|price=8|attributes=Restores at least 30 HP to a single ally}} | |||
{{ItemShop/Item|name=Strong medicine III HD|display='''[[Strong medicine]]'''|price=48|attributes=Restores at least 50 HP to a single ally}} | |||
{{ItemShop/Item|name=Antidotal herb III HD|display='''[[Antidotal herb]]'''|price=10|attributes=Cures poison from one party member}} | |||
{{ItemShop/Item|name=Holy water III HD|display='''[[Holy water]]'''|price=20|attributes=Wards off weaker monsters}} | |||
{{ItemShop/Item|name=Chimaera wing III HD|display='''[[Chimaera wing]]'''|price=25|attributes=Can be used to return to previously visited locations}} | |||
{{ItemShop/Item|name=Tangleweb III HD|display='''[[Tangleweb]]'''|price=35|attributes=Casts [[Deceleratle]] on one group}} | |||
{{ItemShop/Item|name=Coagulant III HD|display='''[[Coagulant]]'''|price=310|attributes=Casts [[Fuddle]]}} | |||
{{ItemShop/End|note=}} | |||
</div> | |||
<div style="float:left;"> | |||
{{WeaponShop/Start|title=Weapon & armour shop|subtitle=|float=}} | |||
{{WeaponShop/Item|name=Fire claws III HD|display='''[[Fire claws]]'''|price=16,500|attributes=Attack +80<br>Casts [[Frizzle]]}} | |||
{{WeaponShop/Item|name=Dragonsbane claws III HD|display='''[[Dragonsbane claws]]'''|price=18,000|attributes=Attack +87<br>+130% damage to [[Dragon family|dragons]]}} | |||
{{WeaponShop/Item|name=Dragon mail III HD|display='''[[Dragon mail]]'''|price=13,800|attributes=Defence +80<br>-33% breath damage}} | |||
{{WeaponShop/Item|name=Dragon shield III HD|display='''[[Dragon shield]]'''|price=6,200|attributes=Defence +47<br>-25% all breath damage}} | |||
{{WeaponShop/Item|name=Silver shield III HD|display='''[[Silver shield]]'''|price=13,700|attributes=Defence +63}} | |||
{{WeaponShop/Item|name=Mythril helm III HD|display='''[[Mythril helm]]'''|price=11,000|attributes=Defence +53}} | |||
{{WeaponShop/Item|name=Thinking cap III HD|display='''[[Thinking cap]]'''|price=17,700|attributes=Defence +60<br>Wisdom +40}} | |||
{{WeaponShop/Item|name=Dragon scale III HD|display='''[[Dragon scale]]'''|price=200|attributes=Defence +5}} | |||
{{WeaponShop/End|note=}} | |||
</div> | |||
{{Clear}} | |||
====Treasures==== | |||
{| class="wikitable" | |||
| [[File:ICON-Sunstone III HD.png|link=Sunstone]] || [[File:Strong medicine III HD icon.png|link=Strong medicine]] || [[File:Special medicine III HD icon.png|link=Special medicine]] || [[File:Antidotal herb III HD icon.png|link=Antidotal herb]] || [[File:Coagulant III HD icon.png|link=Coagulant]] || [[File:Dieamend III HD icon.png|link=Dieamend]] || [[File:Elfin elixir III HD icon.png|link=Elfin elixir]] || [[File:Holy water III HD icon.png|link=Holy water]] || [[File:ICON-Loving Living- A Grinner's Guide III HD.png|link=Loving Living: A Grinner's Guide]] || [[File:Magic water III HD icon.png|link=Magic water]] || [[File:ICON-Mini medal III HD.png|link=Mini medal]] || [[File:Seed of agility III HD icon.png|link=Seed of agility]] || [[File:Seed of life III HD icon.png|link=Seed of life]] || [[File:Seed of luck III HD icon.png|link=Seed of luck]] || [[File:Seed of magic III HD icon.png|link=Seed of magic]] || [[File:ICON-Tears Before Bedtime III HD.png|link=Tears Before Bedtime]] || [[File:Yggdrasil leaf III HD icon.png|link=Yggdrasil leaf]] || [[File:Full moon ring III HD icon.png|link=Full moon ring]] || [[File:Ring of clarity III HD icon.png|link=Ring of clarity]] || [[File:Slime earrings III HD icon.png|link=Slime earrings]] || [[File:Iron lance III HD icon.png|link=Iron lance]] || [[File:Boxer shorts III HD icon.png|link=Boxer shorts]] || [[File:Cat suit III HD icon.png|link=Cat suit]] || [[File:Silk robe III HD icon.png|link=Silk robe]] | |||
|- | |||
|} | |||
====Nearby {{MFamilies}}s==== | |||
{| class="wikitable" | |||
| [[File:Armful DQ III HD sprite.png|link=Armful]] || [[File:Healslime DQ III HD sprite.png|link=Healslime]] || [[File:Infernal serpent DQ III HD sprite.png|link=Infernal serpent]] || [[File:Muddy hand DQ III HD sprite.png|link=Muddy hand]] || [[File:She-slime DQ III HD sprite.png|link=She-slime]] || [[File:Shell slime DQ III HD sprite.png|link=Shell slime]] || [[File:Slime DQ III HD sprite.png|link=Slime]] || [[File:Stone guardian DQ III HD sprite.png|link=Stone guardian]] | |||
|} | |||
==={{DQ11}}=== | ==={{DQ11}}=== | ||
The {{Luminary}} can visit Tantegel during the era of the first game through the [[Echo Chamber]]. Here he will find that King Lorik has fallen mute, and needs some spectrum nectar to speak again. This nectar is given to the Luminary upon entering [[Tickington]] after beating [[Calasmos]]. The monarch will reward his saviors with a [[ | The {{Luminary}} can visit Tantegel during the era of the [[Dragon Quest|first game]] through the [[Echo Chamber]]. Here he will find that [[King Lorik]] has fallen mute, and needs some spectrum nectar to speak again. This nectar is given to the {{Luminary}} upon entering [[Tickington]] after beating [[Calasmos]]. The monarch will reward his saviors with a [[pallium regale]], and a ballad sung in their honor. | ||
==={{DQB}}=== | ==={{DQB}}=== | ||
| Line 154: | Line 615: | ||
==Trivia== | ==Trivia== | ||
*One reason the town was given a different name in the {{NES}} version is because the localizers may have thought that it would be odd to call it the same name as its castle, as it is entirely separate from the castle on the world map. However, in | *One reason the town was given a different name in the {{NES}} version is because the localizers may have thought that it would be odd to call it the same name as its castle, as it is entirely separate from the castle on the world map. However, in {{Dragon Quest II}} and {{III}}, Tantegel is composed of both combined locations. | ||
*In all remakes of | *In all remakes of {{Dragon Quest}}, there is a woman in the Town of Tantegel who will remark on the {{Hero 1}}'s good looks and follow the player around until they enter a new area. Interestingly, if the player lodges at the [[inn]] with her in tow, the innkeeper will comment that they got up late. | ||
==Videos== | ==Videos== | ||
| Line 166: | Line 627: | ||
==Maps & Gallery== | ==Maps & Gallery== | ||
<center><gallery> | <center><gallery> | ||
DQ NES Tantegel Castle.gif|Castle {{ | Tantegel castle III HD concept art.png|HD concept art. | ||
DQ NES Brecconary.gif|Brecconary {{NES}} map for {{ | Tantegel castle exterior detail III HD concept art.png| | ||
DQ | DQ NES Tantegel Castle.gif|Castle map for {{Dragon Quest}}. ({{NES}}) | ||
DQ GBC Tantegel Town.gif|Town {{GBC}} map for {{ | DQ NES Brecconary.gif|Brecconary map for {{Dragon Quest}}. ({{NES}}) | ||
DQ II GBC Tantegal.png|Town and Castle {{ | DQ GBC Tantegel Castle.gif|Castle map for {{I}}. ({{GBC}}) | ||
DQ I&II SFC Tantegel.png| Town and Castle {{ | DQ SFC Tantegel Castle.png|Castle map for {{I}}. ({{SFC}}) | ||
DQ III GBC Tantegal.png|Town and Castle {{GBC}} map for | DQ SFC Tantegel Town.png|Town map for {{I}}. ({{SFC}}) | ||
Brecconary_DQI_NES.png|Brecconary {{NES}} | DQ GBC Tantegel Town.gif|Town map for {{I}}. ({{GBC}}) | ||
Tantegal entrance DQII GBC.png|Tantegal's exterior in {{II}} | DQ III NES Tantegel.png|Town and Castle map for {{Dragon Quest III}} ({{NES}}) | ||
Captain N | DQ III SFC Tantegel.png|Town and Castle map for {{III}}. ({{SFC}}) | ||
DQ II GBC Tantegal.png|Town and Castle map for {{II}}. ({{GBC}}) | |||
DQ I&II SFC Tantegel.png| Town and Castle map for {{II}}. ({{SFC}}) | |||
DQ III GBC Tantegal.png|Town and Castle map for {{III}}. ({{GBC}}) | |||
Tantegel map III HD2D.png|HD map for ''III''. | |||
Tantegel town map I HD2D.png|HD map for ''I & II''. | |||
Tantegel castle 1F map I HD2D.png| | |||
Tantegel castle 2F map I HD2D.png| | |||
Tantegel castle 3F map I HD2D.png| | |||
Tantegel castle 4F map I HD2D.png| | |||
Tantegel castle exterior map I HD2D.png| | |||
Tantegel castle roof map I HD2D.png| | |||
Tantegel castle 1B map I HD2D.png| | |||
DQSG Tantegel.jpg|In game map of Tantegel from ''[[Dragon Quest Smash/Grow]]''. ([[Cell phone]]) | |||
DQ Smash Grow Tantegel Town Map.jpg|Map of Tantegel Town from ''[[Dragon Quest Smash/Grow]]''. ([[Cell phone]]) | |||
DQ Smash Grow Tantegel Castle Map.jpg|Map of Tantegel Castle from ''[[Dragon Quest Smash/Grow]]''. ([[Cell phone]]) | |||
DQ III Android Tantegel.jpg| | |||
Brecconary_DQI_NES.png|Brecconary. ({{NES}}) | |||
Tantegal entrance DQII GBC.png|Tantegal's exterior in {{II}}. ({{GBC}}) | |||
DQ III Android Tantegel Town Church.jpg|Outside the town [[church]] in {{III}}. ([[Cell phone]]) | |||
DQ III Android Tantegel Town Church Inside.jpg| | |||
DQ III Android Robbin' 'Ood In Tantegel Jail.jpg|An old "[[Robbin' 'Ood|friend]] of the {{Hero 3}} and {{Party 3}} in the town church during {{III}}. ([[Cell phone]]) | |||
DQ III Android Tantegel Castle.jpg|Castle from {{III}}. ([[Cell phone]]) | |||
DQ III Android Empty Chests In Tantegel.jpg| | |||
DQ III Android King Of Tantegel.jpg| | |||
DQ III Android Outside Tantegel Throne Room 1.jpg| | |||
DQ III Android Outside Tantegel Throne Room 2.jpg| | |||
DQ Android Tantegel Castle And Town.jpg|Castle and Town from {{I}}. ([[Cell phone]]) | |||
DQ Android Tantegel Castle 1.jpg|Castle throne room. ([[Cell phone]]) | |||
DQ Android Tantegel Castle 2.jpg| | |||
DQ Android Tantegel Castle 3.jpg| | |||
DQ Android Tantegel Town 1.jpg|Town. ([[Cell phone]]) | |||
DQ Android Tantegel Town 2.jpg| | |||
DQ Android Tantegel Town 3.jpg| | |||
DQ II Android Tantegel Castle.jpg|Tantegel from {{II}}. ([[Cell phone]]) | |||
DQ II Android Tantegel 1.jpg| | |||
DQ II Android Tantegel 2.jpg| | |||
Captain N Brecconary 1.jpg|The town of Brecconary. | |||
Captain N Brecconary 2.jpg|Sign of the town [[weapon shop]]. | |||
Captain N Brecconary 3.jpg| | |||
Captain N Brecconary Weapon Shop 1.jpg|Captain N looking around in Brecconary's [[weapon shop]]. | |||
Captain N Brecconary Weapon Shop 2.jpg| | |||
Captain N Brecconary Weapon Shop 3.jpg| | |||
DW in Howard and Nester Page 1.jpg|Page 1 of ''Howard and Nester'' comic based on {{Dragon Quest}}. | DW in Howard and Nester Page 1.jpg|Page 1 of ''Howard and Nester'' comic based on {{Dragon Quest}}. | ||
DW in Howard and Nester Page 2.jpg|Page 2 of ''Howard and Nester'' comic based on {{Dragon Quest}}. | DW in Howard and Nester Page 2.jpg|Page 2 of ''Howard and Nester'' comic based on {{Dragon Quest}}. | ||
DQ Stars Android King Tantegel.jpg|King of Tantegel in {{Stars}}. | DQ Stars Android King Tantegel.jpg|King of Tantegel in {{Stars}}. ([[Cell phone]]) | ||
DQ Stars Android Nobleman of Tantegel.jpg|Nobleman of Tantegel in {{Stars}} | DQ Stars Android Nobleman of Tantegel.jpg|Nobleman of Tantegel in {{Stars}} ([[Cell phone]]) | ||
DQ Stars Android Princess Gwaelin 1.jpg|Princess Gwaelin of Tantegel in {{Stars}}. | DQ Stars Android Princess Gwaelin 1.jpg|Princess Gwaelin of Tantegel in {{Stars}}. ([[Cell phone]]) | ||
DQ Stars Android Princess Gwaelin 2.jpg| | DQ Stars Android Princess Gwaelin 2.jpg| | ||
DQ Stars Android Princess Gwaelin 3.jpg| | DQ Stars Android Princess Gwaelin 3.jpg| | ||
DQ Stars Android Tantegel Elderly Man.jpg|Elderly man guarding the [[Sunstone]] in {{Stars}}. | DQ Stars Android Tantegel Elderly Man.jpg|Elderly man guarding the [[Sunstone]] in {{Stars}}. ([[Cell phone]]) | ||
DQ Smash Grow King Of Tantegel Castle.jpg|King of Tantegel Castle in ''[[Dragon Quest Smash/Grow]]''. ([[Cell phone]]] | |||
DQ Smash Grow Tantegel Soldier 1.jpg|Soldier of Tantegel Castle meeting the [[party]]. ([[Cell phone]]) | |||
DQ Smash Grow Tantegel Soldier In Danger.jpg|Monster endangering Tantegel soldier. ([[Cell phone]]) | |||
DQ Smash Grow Tantegel Soldier 2.jpg|Soldier of Tantegel Castle at the ruined [[Damdara]]. ([[Cell phone]]) | |||
DQ Smash Grow Tantegel Captain.jpg|Tantegel Captain. ([[Cell phone]]) | |||
DQ Smash Grow Holy Water Vendor.jpg|[[Holy water]] vendor in Tantegel Town. ([[Cell phone]]) | |||
DQ Smash Grow Tantegel Castle Throne Room.jpg|Tantegel Castle Throne Room. ([[Cell phone]]) | |||
DQ Smash Grow Inside Tantegel Town House.jpg|Inside Tantegel Town House. ([[Cell phone]]) | |||
</gallery></center> | </gallery></center> | ||
| Line 189: | Line 700: | ||
{{DQII}} | {{DQII}} | ||
{{DQIII}} | {{DQIII}} | ||
{{DQI&IIHD}} | |||
{{DQIIIHD}} | |||
{{DQXI}} | {{DQXI}} | ||
{{DQBI}} | {{DQBI}} | ||
[[Category:English mythology]] | |||
[[Category:Dragon Quest I locations]] | [[Category:Dragon Quest I locations]] | ||
[[Category:Dragon Quest I HD-2D Remake locations]] | |||
[[Category:Dragon Quest II locations]] | [[Category:Dragon Quest II locations]] | ||
[[Category:Dragon Quest II HD-2D Remake locations]] | |||
[[Category:Dragon Quest III locations]] | [[Category:Dragon Quest III locations]] | ||
[[Category:Dragon Quest III HD-2D Remake locations]] | |||
[[Category:Dragon Quest XI locations]] | [[Category:Dragon Quest XI locations]] | ||
[[Category:Dragon Quest Builders locations]] | [[Category:Dragon Quest Builders locations]] | ||
Latest revision as of 21:35, 16 June 2026
| Town and Castle | |
|---|---|
| Tantegel | |

| |
| Japanese | ラダトーム |
| Romaji | Radatōmu |
| Game | Dragon Quest Dragon Quest II Dragon Quest I HD-2D Remake Dragon Quest II HD-2D Remake Dragon Quest III Dragon Quest III HD-2D Remake Dragon Quest XI Dragon Quest Builders |
| Old localization | Tantegel |
Tantegel is a castle and accompanying town which serve as the capital of Alefgard.
It is featured in the first three Dragon Quest games: Dragon Quest, Dragon Quest II, and Dragon Quest III, as part of the Erdrick trilogy.
Tantegel is the starting and central location in the original Dragon Quest and is the only location in Alefgard which has a castle and a reigning king.
In the original Famicom release of Dragon Quest, the town surrounding the Ladutorm Castle (ラダトーム城, radatōmu shiro) is called the same name as the castle, Ladutorm Town (ラダトームの町, radatōmu no machi). When the game was localized and released overseas it was decided to give the castle and town different names (Tantegel and Brecconary respectively). In all other English version releases both town and castle are referred to as Tantegel, and combined into one icon on the world map.
Appearances[edit]
Dragon Quest[edit]
Tantegel is the capital of Alefgard, ruled over by King Lorik XVI. The kingdom has been thrown into chaos with the theft of the Sphere of Light by the Dragonlord, unleashing a horde of monsters across the archipelago. Adding insult to injury is the kidnapping of Princess Gwaelin, also by the sovereign of serpents.
The Hero begins his quest within the throne room of Tantegel castle where he is debriefed on the situation by King Lorik in a subtle tutorial designed for the player to become familiar with all non-battle options of the Command menu; the player cannot leave the throne room without learning to speak with NPCs, examine treasure chests, use items, and descend the stairs. Beyond this Tantegel is a location of central importance for many reasons:
- It is the only location where the player can save the game.
- It is the only source of free MP-recovery in the game, via speaking to the resident sage.
- It contains one of the essential items to complete the game, the (sunstone).
- It is the location the Hero returns to after completing the game.
Shops & Services[edit]
 Item Shop
 | Item | Price | Attributes |
 Medicinal herb Medicinal herb | 24 | Heals a small amount of HP |
 Torch Torch | 8 | Lights a radius around the Hero |
 Dragon's scale Dragon's scale | 20 | Provides a small amount of Defense |
 Weapon Shop
 | Item | Price | Attributes |
 Bamboo lance Bamboo lance | 10 | +2 Attack |
 Oaken club Oaken club | 60 | +4 Attack |
 Copper sword Copper sword | 180 | +10 Attack |
 Plain clothes Plain clothes | 20 | +2 Defense |
 Leather armour Leather armour | 70 | +4 Defense |
 Leather shield Leather shield | 90 | +4 Defense |
Nearby monsters[edit]
Treasures[edit]
- Torch
- Chimaera wing
- gold coins
- Magic Key
- Seed of life (remakes only)
- Sunstone
Dragon Quest I HD-2D Remake[edit]
Tantegel uses the same in-game model asset that was created for Dragon Quest III HD and as such the castle and town are combined into one map. It is also no longer the starting point of the quest, as the Hero now awakens in the middles of a forest during the game's opening. After rushing to the aid of the nearby Captain of the Guard and the Princess' body guard and saving them from a horde of monsters, the pair of knights escort the Hero to Tantegel to speak with King Lorik.
As the Hero bears no proof of his claim that he is of Erdrick's bloodline, he is met with suspicion by the Chancellor of Tantagel. King Lorik, however, remains cautiously optimistic and orders the young man to venture to the Shrine of Rain and report back to him after speaking with the resident Sage. Returning once this mission has been completed will reveal the full scope of the game's plot, including the Dragonlord's abduction of Princess Gwaelin and his theft of the Sphere of Light―while the commoners know their Princess was taken from them, King Lorik has ordered that no word of the sacred sphere's disappearance be spoken so as to not cause widespread panic.
With the castle and town being merged into a single map and the player having easy access to the cathedral in the center of the town, there is no obligation to enter the castle proper beyond delivering Princess Gwaelin once she is rescued. Doing so will result in a cutscene where the maiden is developing powerful feelings for her rescuer and gives him her necklace as in the original version.
Players who want to carry the Princess along for the remainder of the quest cannot enter the castle with her as she will automatically leave: in order to avoid this the player must return to Tantegel as soon as the magic key is obtained in Rimuldar and retrieve the sunstone from the castle gazebo in the southeast of the map. This is the only key item necessary to complete the game that is found in the castle.
Should the player stand on the coastline directly south of the castle entrance, a brief scene of the Hero staring up at the Dragonlord's castle will play.
Shops & services[edit]
Item Shop | Item | Price | Attributes |
 Bamboo pole Bamboo pole | 10 | Attack +3 |
 Pot lid Pot lid | 40 | Defence +2 |
| Medicinal herb | 8 | Heals 35~45 HP Restores 45~53 HP with the water sigil |
 Antidotal herb Antidotal herb | 10 | Cures poison Cures party with water sigil |
 Moonwort bulb Moonwort bulb | 30 | Cures paralysis Cures party with water sigil |
 Holy water Holy water | 20 | Repels weaker monsters for 64 steps Deals 15~32 damage to one foe Deals 30~64 damage with water sigil |
 Musk Musk | 150 | Monsters attack more often for a brief time |
 Chimaera wing Chimaera wing | 25 | Casts Zoom |
Weapon Shop | Item | Price | Attributes |
 Oaken club Oaken club | 40 | Attack +5 |
 Copper sword Copper sword | 180 | Attack +9 |
 Divine dagger Divine dagger | 240 | Attack +10 +30% damage to the undead |
 Iron lance Iron lance | 660 | Attack +17 |
 Plain clothes Plain clothes | 130 | Defence +4 |
 Leather suit Leather suit | 50 | Defence +6 |
 Leather armour Leather armour | 180 | Defence +12 |
 Leather shield Leather shield | 120 | Defence +4 |
 Leather hat Leather hat | 65 | Defence +4 |
 Hardwood headwear Hardwood headwear | 350 | Defence +11 |
Treasures[edit]
| Icon | Name | Amount | Requirements |
|---|---|---|---|

|
Princess's pledge | x1 | Deliver Princess Gwaelin |

|
Mini medal | x3 | Magic key (1) Ultimate key (1) |

|
Snoop scroll | x1 | N/A |

|
Medicinal herb | x5 | N/A |

|
Magic water | x1 | Thief's key |

|
Elfin elixir | x1 | Ultimate key |

|
Prayer ring | x1 | Thief's key |

|
Antidotal herb | x1 | N/A |

|
Holy water | x1 | N/A |

|
Chimaera wing | x1 | N/A |

|
Hextract | x3 | Ultimate key |

|
Pure water | x1 | Thief's key |

|
Spider web | x1 | Ultimate key |

|
Seed of agility | x2 | Thief's key (1) |

|
Seed of defence | x1 | N/A |

|
Seed of life | x2 | Thief's key (1) |

|
Seed of luck | x1 | N/A |

|
Seed of magic | x1 | N/A |

|
Seed of strength | x2 | Thief's key (1) |

|
Bunny tail | x1 | N/A |

|
Rousing ring | x1 | Thief's key |

|
Oaken club | x1 | N/A |

|
Headsman's axe | x1 | Ultimate key |

|
Boxer shorts | x1 | N/A |

|
Leather armour | x1 | Thief's key |

|
Dog suit | x1 | Thief's key |
Nearby monsters[edit]
 |
 |
 |
 |
 |

|
Dragon Quest II: Luminaries of the Legendary Line[edit]

In Dragon Quest II, Tantegel is much less important. It is not reached until nearly halfway into the game, and the new king is hiding out of fear of Hargon. No major items or information are located there and it can be skipped altogether if desired.
Shops & Services[edit]
Item Shop | Item | Price | Attributes |
| Medicinal herb | 15 | Heals a small amount of HP. |
 Antidotal herb Antidotal herb | 8 | Cures one party member of Poison. |
 Chimaera wing Chimaera wing | 80 | Returns you to your last save location. |
 Holy water Holy water | 40 | Repels weaker monsters. |
 Banishing bell Banishing bell | 640 | Protects against non-damaging spells. |
Weapon Shop | Item | Price | Attributes |
 Wizard's staff Wizard's staff | 2500 | +8 Attack (NES version) +27 Attack (SFC/GBC versions) Casts Sizz when used in battle |
 Steel broadsword Steel broadsword | 1500 | +30 Attack |
 Sledgehammer Sledgehammer | 4000 | +35 Attack (NES version) +40 Attack (SFC/GBC versions) |
 Cloak of evasion Cloak of evasion | 1250 | +20 Defense (NES version) +35 Defense (SFC/GBC versions) |
 Full plate armour Full plate armour | 1000 | +25 Defense |
 Iron helmet Iron helmet | 3150 | +6 Defense |
Nearby monsters[edit]
Treasures[edit]
Remake differences[edit]
- The music played in the NES is the same one used for Midenhall, Cannock and Dirkandor. The music in the remakes is the castle theme from DQ.
- The King has the soul sigil in his possession and gives it to the Scions of Erdrick immediately when they find him.
Dragon Quest II HD-2D Remake[edit]
Tantegel is no longer an optional destination, much like in the 2014 Adroid/iOS port. Once more the assets created for Dragon Quest III HD are used, unifying the kingdom across all three titles. When the Scions of Erdrick arrive at the castle gate, the Princess of Moonbrooke takes a moment to reflect on Tantegel and their family's history, how their storied ancestor took the hand of Princess Gwaelin in marriage and ventured out into the wider world to found their own kingdom, Midenhall. The next generation would do the same, leaving their parents' land and creating Cannock and Moonbrooke, with the bloodline of the world's ruling families all tracing back to Tantegel.
When the young heroes enter the throne room they find it empty save for the Chancellor, who is puzzled to see the Princess so soon after she departed the castle yesterday and assumes she brought her cousins along because wants to include the armies of Midenhall and Cannock in the joint training session she proposed for Tantegel and her own kingdom. The Princess is baffled at this and asserts that this is the first time she has ever set foot in Tantegel, and that her kingdom had been destroyed by Hargon's fiends. The Chancellor states that the Princess of the day before presented the Mark of Moonbrooke as proof of her identity, which the Scions lack. The real Princess tells the Chancellor that the royal mark was stolen by monsters during the raid, which only leads to more confusion.
The King of Tantegel then makes his appearance, emerging from behind the throne with an empty bottle in hand. Despite his partial inebriation he presses the Chancellor for any more details about the impostor Princess, who answers that beyond the training drill proposal her main focus was finding out how to reach the Dragonlord's Castle. The King then turns his attention to the heroes and asks if Moonbrooke has indeed been destroyed.
Upon being informed of the cousin's quest to slay Hargon, the King remains skeptical and porposes that it is possible the Princess who visited the castle yesterday was the real McCoy while the group before him are the fakes. The Prince of Cannock is insulted by this and insists the King stare him in the eyes to meet the steely gaze of a royal instead of some lowly monster, but the King points out the Princess of before looked just as convincing. Nevertheless the thought of monsters impersonating royalty in his kingdom infuriates the King, and the Prince of Cannock suddenly remembers that they carry the Princess's pledge with them as proof of their identity. As the bauble shines brightly in the presence of the descendants of Princess Gwaelin, the Scions' identities are confirmed. The King expresses his condolences to the Princess for the loss of her kingdom then orders the Chancellor to shore up the castle defences at once, realizing the impostor wanted to have the guards wearing naught but light training equipment to make a raid and slaughter all the easier.
The King asks that the heroes wait for him atop the castle while he discusses preparations with the Chancellor. There, the Scions reflect back on the mysterious voice that spoke to them in their dreams at Rippleport, wondering if this attempted sabotage of Tantegel's defences was one of the great disasters it warned of. When the King arrives he asks the group if they know of where Hargon lurks, but the children do not as that is why they travel the world looking for leads. The King hands them the rainbow drop and tells them to speak with the one who dwells in the ruins of the Dragonlord's castle, elaborating that while the two have never met in person the King is certain that little escape's the hermit's eye and if any know of Hargon's hiding place then it is him.
The Scions will revisit Tantegel much later in the game when looking for the Firstborn Protector of Cantlin, who is in possession of the faerie flute. He will be seen leaving the first floor of the castle and making his way to Kol.
Shops & services[edit]
Item Shop | Item | Price | Attributes |
| Bamboo pole | 10 | Attack +3 |
| Pot lid | 40 | Defence +2 |
 Strong medicine Strong medicine | 48 | Restores 50~60 HP Restores 67~79 HP with water sigil |
| Medicinal herb | 8 | Heals 35~45 HP Restores 45~53 HP with the water sigil |
| Antidotal herb | 10 | Cures poison Cures party with water sigil |
| Moonwort bulb | 30 | Cures paralysis Cures party with water sigil |
 Dazzle-me-not Dazzle-me-not | 120 | Cures bedazzlement Cures party with water sigil |
 Unsealant Unsealant | 150 | Cures Fizzle Cures party with water sigil |
| Holy water | 20 | Repels weaker monsters for 64 steps Deals 15~32 damage to one foe Deals 30~64 damage with water sigil |
| Musk | 150 | Monsters attack more often for a brief time |
| Chimaera wing | 25 | Casts Zoom |
Weapon Shop | Item | Price | Attributes |
| Oaken club | 40 | Attack +5 |
| Copper sword | 180 | Attack +9 |
| Divine dagger | 240 | Attack +10 +30% damage to the undead |
| Iron lance | 660 | Attack +17 |
| Plain clothes | 130 | Defence +4 |
| Leather suit | 50 | Defence +6 |
| Leather armour | 180 | Defence +12 |
 Full plate armour Full plate armour | 3,500 | Defence +39 |
 Warrior's armour Warrior's armour | 4,100 | Defence +41 Whack resistance +6.25% |
| Leather shield | 120 | Defence +4 |
 Scale shield Scale shield | 350 | Defence +11 |
 Steel shield Steel shield | 1,800 | Defence +29 |
| Leather hat | 65 | Defence +4 |
| Hardwood headwear | 350 | Defence +11 |
 Steel helmet Steel helmet | 2,200 | Defence +27 |
 Iron mask Iron mask | 3,600 | Defence +31 |
Treasures[edit]

|
Rainbow drop | x1 | Unmissable |
|
|
Mini medal | x1 | Magic key (1) |

|
Tombola ticket | x20 | Magic key (7) Ultimate key (9) |
|
|
Bang scroll | x1 | N/A |

|
Strong medicine | x1 | N/A |

|
Special medicine | x1 | Ultimate key |
|
|
Medicinal herb | x3 | N/A |
|
|
Magic water | x1 | N/A |

|
Angel bell | x2 | Magic key (1) |

|
Coagulant | x1 | N/A |

|
Dazzle-me-not | x1 | N/A |

|
Moonwort bulb | x1 | N/A |

|
Oomph powder | x1 | Ultimate key |

|
Unsealant | x1 | N/A |
|
|
Holy water | x1 | N/A |
|
|
Chimaera wing | x1 | N/A |
|
|
Seed of agility | x1 | N/A |
|
|
Seed of defence | x1 | N/A |
|
|
Seed of life | x1 | Magic key |
|
|
Seed of luck | x2 | Magic key (1) |
|
|
Seed of strength | x1 | N/A |

|
Seed of wisdom | x1 | N/A |

|
Banishing bell | x1 | Magic key |

|
Fishnet stockings | x1 | Magic key |

|
Bastard sword | x1 | Ultimate key |
|
|
Boxer shorts | x1 | N/A |

|
Enchanted robes | x1 | Ultimate key |

|
Leather cape | x1 | N/A |

|
Noble garb | x1 | N/A |

|
Pot lid | x1 | N/A |

|
Goddess's tiara | x1 | Ultimate key |

|
Great helm | x1 | Ultimate key |
Nearby monsters[edit]
|
 |
|
 |
 |
|
Dragon Quest III: The Seeds of Salvation[edit]
Tantegel is the location of central importance in the dark world of Alefgard in Dragon Quest III and is the first place the Hero is guided to after descending through the Great Pit of Giaga. The castle town is ruled over by the King of Alefgard, who struggles to keep hope alive within his subjects through the eternal night created by the archfiend Zoma. Tantegel contains the essential sunstone item in this game as well, though it it kept within the castle walls instead of an exterior basement. The treasury was also where the fabled Sword of Kings was held, though Zoma stole the sword from the king and spent three years trying to destroy it so that it could never be used against him.
The king was served by an amnesiac Ortega for some time after the lost hero survived his injuries on Mt. Necrogond and fell into the underworld. Upon learning of his host's plight and the despair of the people, Ortega set out to slay Zoma himself. There is another unlikely visitor from the world above: Robbin' 'Ood, who was imprisoned above the church after being caught conning one of the townsfolk.
Shops & Services[edit]
Item Shop | Item | Price | Attributes |
| Medicinal herb | 15 | Heals a small amount of HP. |
| Antidotal herb | 8 | Cures one party member of poison. |
| Chimaera wing | 80 | Returns you to your last save location. |
| Holy water | 40 | Repels weaker monsters. |
 Moonwort bulb Moonwort bulb | 30g | Cures paralysis |
 Fading Jenny Fading Jenny | 300g | Makes party invisible for a short time |
Weapon Shop | Item | Price | Attributes |
| Wizard's staff | 1500 | Attack +15 |
 Staff of sentencing Staff of sentencing | 2700 | Attack +37 |
 Dragonsbane Dragonsbane | 15000 | Attack +79 |
 Falcon blade Falcon blade | 25000 | Attack +5 |
 Magic vestment Magic vestment | 4400 | Defence +30 |
 Angel's robe Angel's robe | 3000 | Defence +35 |
 Dragon mail Dragon mail | 9800 | Defence +45 |
Nearby monsters[edit]
- Muddy hand
- Stone guardian (Called by Muddy hand)
- Healslime
- Armful
- Infernal serpent
- She-slime
- Slime
- Shell slime
- Living statue
Treasures[edit]
- Boxer shorts
- Mini medal
- T'n'T ticket (4) (unavailable in NES and Cell phone versions)
- Seed of agility
- Seed of life
- Seed of magic
- Sunstone
Remake changes[edit]
- As with the remakes of II, the castle theme for Tantegel is from DQ, with the town music also being from the first game.
Dragon Quest III HD-2D Remake[edit]
Tantegel is depicted as a coastal town set high above the sea on a sheer cliffside. If the player speaks to an old man standing along the cliffs south of the castle, a brief cutscene showing Zoma's Citadel from the perspective of the townsfolk will be seen.
When the player first enters the castle two guards will question the party of strangers, and when told that the group sailed from the port to the west one guard will escort the Hero to the throne room for an audience with the king. His majesty asks if the Hero is familiar with the name "Ortega"; upon learning that the Hero is indeed Ortega's child the king explains how the wanderer came to his cursed land a decade prior. He was found on the verge of succumbing to his burns by the same guardsman who escorted the Hero to the king, and was nursed to health by the king's maid.
Beyond this new elaboration of Ortega's journey, the largest change to the castle town is that the imprisoned Robbin' 'Ood now informs the player of the location of the sunstone.
Shops & services[edit]
Item Shop | Item | Price | Attributes |
 Medicinal herb Medicinal herb | 8 | Restores at least 30 HP to a single ally |
| Strong medicine | 48 | Restores at least 50 HP to a single ally |
| Antidotal herb | 10 | Cures poison from one party member |
| Holy water | 20 | Wards off weaker monsters |
| Chimaera wing | 25 | Can be used to return to previously visited locations |
 Tangleweb Tangleweb | 35 | Casts Deceleratle on one group |
 Coagulant Coagulant | 310 | Casts Fuddle |
Weapon & armour shop | Item | Price | Attributes |
 Fire claws Fire claws | 16,500 | Attack +80 Casts Frizzle |
 Dragonsbane claws Dragonsbane claws | 18,000 | Attack +87 +130% damage to dragons |
 Dragon mail Dragon mail | 13,800 | Defence +80 -33% breath damage |
 Dragon shield Dragon shield | 6,200 | Defence +47 -25% all breath damage |
 Silver shield Silver shield | 13,700 | Defence +63 |
 Mythril helm Mythril helm | 11,000 | Defence +53 |
 Thinking cap Thinking cap | 17,700 | Defence +60 Wisdom +40 |
 Dragon scale Dragon scale | 200 | Defence +5 |
Treasures[edit]
 |
 |
 |
 |
 |
 |
 |
 |
 |
 |
|
 |
 |
 |
 |
 |
 |
 |
 |
 |
 |
 |
 |

|
Nearby monsters[edit]
 |
 |
 |
 |
|
|
|

|
Dragon Quest XI: Echoes of an Elusive Age[edit]
The Luminary can visit Tantegel during the era of the first game through the Echo Chamber. Here he will find that King Lorik has fallen mute, and needs some spectrum nectar to speak again. This nectar is given to the Luminary upon entering Tickington after beating Calasmos. The monarch will reward his saviors with a pallium regale, and a ballad sung in their honor.
Dragon Quest Builders[edit]
In this game, Tantegel has two areas that can be reached by using teleportals: Tantegel Moor and Charlock Castle. The boss of the fourth and final chapter is the Dragonlord.
In Animation[edit]
- In the Captain N: The Game Master episode "Three Men and a Dragon", The N Team arrived in Dragon's Den through a Warp Zone leading to Brecconary. While there, Kevin Keene/Captain N obtained Magical herb from the weapon store's shopkeeper in exchange for his digital watch. Simon Belmont purchased water skis, while Kid Icarus (aka Pit) got a magic helmet. The shopkeeper also offered a golden battle axe, but the N Team declined on it.
Comic/Manga[edit]
- Nintendo Power Volume 10: The issue contains a Howard & Nester comic where the titular duo arrive at Tantegel. The latter attempts in vain to get the Sunstone.
Etymology[edit]
- Tantegel is named after the real-life village of Tintagel and the nearby Tintagel Castle in Cornwall, England, United Kingdom. They are associated with the legend of King Arthur and the Knights of the Round Table, and have become one of the most visited places in Britain.
Trivia[edit]
- One reason the town was given a different name in the NES version is because the localizers may have thought that it would be odd to call it the same name as its castle, as it is entirely separate from the castle on the world map. However, in Dragon Quest II and III, Tantegel is composed of both combined locations.
- In all remakes of Dragon Quest, there is a woman in the Town of Tantegel who will remark on the Hero's good looks and follow the player around until they enter a new area. Interestingly, if the player lodges at the inn with her in tow, the innkeeper will comment that they got up late.
Videos[edit]
Dragon Quest I NES
Dragon Quest I SNES/SFC
Dragon Quest I GBC
Dragon Quest II NES
Dragon Quest III NES
Maps & Gallery[edit]

HD concept art.


Castle map for Dragon Quest. (NES)

Brecconary map for Dragon Quest. (NES)

Town and Castle map for Dragon Quest III (NES)

HD map for III.

HD map for I & II.


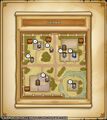
In game map of Tantegel from Dragon Quest Smash/Grow. (Cell phone)

Map of Tantegel Town from Dragon Quest Smash/Grow. (Cell phone)

Map of Tantegel Castle from Dragon Quest Smash/Grow. (Cell phone)


Brecconary. (NES)
- Error creating thumbnail: File missing
Outside the town church in III. (Cell phone)
- Error creating thumbnail: File missing
- Error creating thumbnail: File missing
An old "friend of the Hero and party in the town church during III. (Cell phone)

Castle from III. (Cell phone)
- Error creating thumbnail: File missing
- Error creating thumbnail: File missing
- Error creating thumbnail: File missing
- Error creating thumbnail: File missing

Castle and Town from DQ. (Cell phone)

Castle throne room. (Cell phone)


Town. (Cell phone)


Tantegel from II. (Cell phone)


The town of Brecconary.

Sign of the town weapon shop.
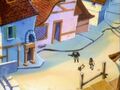

Captain N looking around in Brecconary's weapon shop.


Page 1 of Howard and Nester comic based on Dragon Quest.

Page 2 of Howard and Nester comic based on Dragon Quest.

King of Tantegel in Stars. (Cell phone)

Nobleman of Tantegel in Stars (Cell phone)

Princess Gwaelin of Tantegel in Stars. (Cell phone)


Elderly man guarding the Sunstone in Stars. (Cell phone)

King of Tantegel Castle in Dragon Quest Smash/Grow. (Cell phone]

Soldier of Tantegel Castle meeting the party. (Cell phone)

Monster endangering Tantegel soldier. (Cell phone)

Soldier of Tantegel Castle at the ruined Damdara. (Cell phone)

Tantegel Captain. (Cell phone)

Holy water vendor in Tantegel Town. (Cell phone)

Tantegel Castle Throne Room. (Cell phone)

Inside Tantegel Town House. (Cell phone)


