Cantlin: Difference between revisions
LiquidMetal (talk | contribs) m (→Dragon Quest Builders 2: link) |
Antiyonder (talk | contribs) |
||
| (36 intermediate revisions by 9 users not shown) | |||
| Line 1: | Line 1: | ||
{{LocationInfobox | {{LocationInfobox | ||
|game = {{ | |game = {{Dragon Quest}}<br>{{DQ1HD}}<br>{{DQ2HD}}{{Dragon Quest III}}<br>{{DQ3HD}}<br>{{DQB}} | ||
|title = Cantlin | |title = Cantlin | ||
|type= City | |type= City | ||
|image = [[ | |image = [[File:Mercado.jpg|250px]] | ||
|caption = | |caption = | ||
|japanese=メルキド | |japanese=メルキド | ||
|romaji=Merukido | |romaji=Merukido | ||
|old=Mercado (GBC | |old=Mercado ({{GBC}}) | ||
}} | }} | ||
'''Cantlin''' is a walled city located in the south central region of [[Alefgard]]. Cantlin is most famous for it's heavy fortifications and for being guarded by a [[ | '''Cantlin''' is a walled city located in the south central region of [[Alefgard]] in {{DQ}}, {{DQ1&2HD}}, {{Dragon Quest III}}, and {{DQB}}. | ||
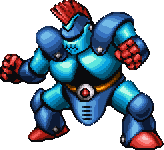
Cantlin is most famous for it's heavy fortifications and for being guarded by a [[Golem]] in the original game. It was featured in {{DQB}} as the starting city, followed by [[Rimuldar]]. | |||
==Appearances== | ==Appearances== | ||
==={{DQ}}=== | ==={{DQ}}=== | ||
The city of Cantlin is typically the last city the player visits due to | The city of Cantlin is typically the last city the player visits due to its distance from [[Tantegel]] and the strength of the surrounding monsters. When first approached, the city is guarded by a [[Golem]] whose battle is triggered when the {{Hero 1}} first attempts to enter the ramparts surrounding the city. This battle is a one time event, and is the only place where a [[Golem]] can be encountered. The weapons and armor shop in Cantlin sells the best equipment the character can purchase in the game. [[File:DQB Golem.png|right|thumb|150px|{{DQB}}]]Despite all of this, Cantlin is a not a required location to visit in order to complete the game. | ||
====Locked doors==== | ====Locked doors==== | ||
The first game has two doors in southwestern part of town, the first of which leads to man with clues [[ | The first game has two doors in southwestern part of town, the first of which leads to man with [[Damdara|clues]] to find [[Erdrick's Armour]], and the second to the hidden shops. | ||
====Shops & Services==== | ====Shops & Services==== | ||
| Line 23: | Line 25: | ||
| valign="top" width="50%" | | | valign="top" width="50%" | | ||
{{ItemShop/Start|title=NorthwestItem Shop|subtitle=}} | {{ItemShop/Start|title=NorthwestItem Shop|subtitle=}} | ||
{{ItemShop/Item|name=Medicinal herb|price=8|attributes=}} | {{ItemShop/Item|name=Medicinal herb|price=8|attributes=Restores 20-35 {{HP}} to the Hero.}} | ||
{{ItemShop/Item|name=Torch|price=8|attributes=}} | {{ItemShop/Item|name=Torch|price=8|attributes=Lights up the darkness of dungeons.}} | ||
{{ItemShop/End|note=}} | {{ItemShop/End|note=}} | ||
| Line 30: | Line 32: | ||
| valign="top" width="50%" | | | valign="top" width="50%" | | ||
{{ItemShop/Start|title=Western Item Shop|subtitle=}} | {{ItemShop/Start|title=Western Item Shop|subtitle=}} | ||
{{ItemShop/Item|name=Chimaera wing|price=25|attributes=}} | {{ItemShop/Item|name=Chimaera wing|price=25|attributes=Instantly teleports the Hero to [[Tantegel]] Castle.}} | ||
{{ItemShop/Item|name=Dragon's scale|price=20|attributes=}} | {{ItemShop/Item|name=Dragon's scale|price=20|attributes=Defence +5}} | ||
{{ItemShop/End|note=}} | {{ItemShop/End|note=}} | ||
{| border="0" cellpadding="5" cellspacing="0" width="100%" | {| border="0" cellpadding="5" cellspacing="0" width="100%" | ||
| valign="top" width="50%" | | | valign="top" width="50%" | | ||
{{ItemShop/Start|title=Holy | {{ItemShop/Start|title=Holy water Shop|subtitle=}} | ||
{{ItemShop/Item|name=Holy water|price=20|attributes=}} | {{ItemShop/Item|name=Holy water|price=20|attributes=Wards off weaker monsters.}} | ||
{{ItemShop/End|note=}} | {{ItemShop/End|note=}} | ||
| Line 47: | Line 49: | ||
{{ArmourShop/Start|title=Northern Armor Shop|subtitle=}} | {{ArmourShop/Start|title=Northern Armor Shop|subtitle=}} | ||
{{ArmourShop/Item|name=Leather armour|price=70|attributes= | {{ArmourShop/Item|name=Leather armour|price=70|attributes=Defence +4}} | ||
{{ArmourShop/Item|name=Chain mail|price=300|attributes= | {{ArmourShop/Item|name=Chain mail|price=300|attributes=Defence +10}} | ||
{{ArmourShop/Item|name=Iron shield|price=800|attributes= | {{ArmourShop/Item|name=Iron shield|price=800|attributes=Defence +10}} | ||
{{ArmourShop/End|note=}} | {{ArmourShop/End|note=}} | ||
| Line 58: | Line 60: | ||
{{ArmourShop/Start|title=Southern Armor Shop|subtitle=}} | {{ArmourShop/Start|title=Southern Armor Shop|subtitle=}} | ||
{{ArmourShop/Item|name=Full plate armour|price=3,000|attributes= | {{ArmourShop/Item|name=Full plate armour|price=3,000|attributes=Defence +24}} | ||
{{ArmourShop/Item|name=Magic armour|price=7,700|attributes= | {{ArmourShop/Item|name=Magic armour|price=7,700|attributes=Defence +24}} | ||
{{ArmourShop/End|note=}} | {{ArmourShop/End|note=}} | ||
{{WeaponShop/Start|title=Magic Key Weapon Shop|subtitle=}} | |||
{{WeaponShop/Start|title=Magic | |||
{{WeaponShop/Item|name=Fire blade|price=9,800|attributes=Attack +28}} | {{WeaponShop/Item|name=Fire blade|price=9,800|attributes=Attack +28}} | ||
{{WeaponShop/End|note=}} | {{WeaponShop/End|note=}} | ||
{{ArmourShop/Start|title=Magic | {{ArmourShop/Start|title=Magic Key Armor Shop|subtitle=}} | ||
{{ArmourShop/Item|name=Silver shield|price=14,800|attributes= | {{ArmourShop/Item|name=Silver shield|price=14,800|attributes=Defence +20}} | ||
{{ArmourShop/End|note=}} | {{ArmourShop/End|note=}} | ||
====Treasures==== | ====Treasures==== | ||
*[[Seed of | *[[Seed of resilience]] (dresser in the [[inn]]) | ||
*[[Magic Key]] (dresser in southwestern man's house) | *[[Magic Key]] (dresser in southwestern man's house) | ||
====Nearby | ====Nearby {{MFamilies}}s==== | ||
*[[Cosmic chimaera]] | *[[Cosmic chimaera]] | ||
*[[Green dragon]] | *[[Green dragon]] | ||
*[[Tearwolf]] | *[[Tearwolf]] | ||
*[[Vis mager (Dragon Quest)|Vis mager]] | *[[Vis mager (Dragon Quest)|Vis mager]] | ||
==={{DQ1HD}}=== | |||
Changes to the original game's non-linear nature now prevent players from walking to the walled city whenever they wish. Instead, the player must wait until [[Princess Gwaelin]] has been rescued from the [[Quagmire Cave]] so that she can dispel the supernatural fog that shrouds the [[Weirdwood]]. This odd and foreboding forest stretches all across the formerly barren stretch of land east of the mountain chain far to the east of the [[Damdara]] ruins, and cannot be walked around. | |||
Once the Weirdwood has been cleared, the trek to Cantlin is much the same as it was in past versions of the game and terminates in a battle with the [[Golem]]. After it is defeated the {{Hero 1}} is hailed by the gratfeul residents, who reveale that the material monster was indeed malfunctioning due to tampering by the wicked [[Spiketail]], distorting it's original purpose to defend the city by attacking anyone who attempted to enter or leave. This is shown in a flashback cutscene where Spiketail corrupts the Golem on [[Dragonlord|his master's orders]] while also ransacking Cantlin of [[Erdrick's sword]] as well as [[Erdrick's shield|his shield]], revealing the legendary heraldry were stored here due to the Golem's protection. The [[Protector of Cantlin]] lies defeated at Spiketail's feet and curses the fiend while it boasts that the citizens will all be killed as those of Damdara were: the [[Priest of Cantlin]] thinks quickly and tricks the insectoid by claiming that yet greater treasures are hidden and lay in wait for the Hero to claim them. Spiketail panics and abducts the Priest to it's lair on the [[Weeping Isle]], abandoning the slaughter of Cantlin to press the old man for information. | |||
The Isle is not far from Cantlin, but the bridge leading to it is out and the town's craftsmen cannot work fast enough to repair it without being attacked by monsters. Fortunately, the Hero is owed a favour by the [[dwarves]] living [[Cave of the Dwarves|far to the northeast]], and the little folk are happy to assist. Several dwarves depart for Cantlin and repair the bridge in a single night, allowing the Hero to raid the Weeping Isle. The Priest's gambit worked and Spiketail is lead on long enough to prevent it from making an attack on Cantlin before the Hero arrives, but his life is taken before the battle begins and Spiketail flees the isle for [[Kol]]. A funeral is held for the Priest, with the dwarves also attending, the Cantlin's role in the game's story is concluded. | |||
Cantlin is the third destination in the [[Zalen]] sidequest, where the wandering musician appears after the player obtains the [[ultimate key]] in Kol and have already spoken to him at the [[Nameless Ruins]] and in [[Damdara]]. | |||
====Shops & services==== | |||
<div style="float:left; margin-right:1em;"> | |||
{{ItemShop/Start|title=|subtitle=|float=}} | |||
{{ItemShop/Item|name=Dragon scale III HD|display='''[[Dragon scale]]'''|price=200|attributes=Defence +5}} | |||
{{ItemShop/Item|name=Ruby wristband III HD|display='''[[Ruby wristband]]'''|price=2,050|attributes=Defence +8}} | |||
{{ItemShop/Item|name=Medicinal herb|price=8|attributes=Heals 35~45 HP<br>Restores 45~53 HP with the [[water sigil]]}} | |||
{{ItemShop/Item|name=Strong medicine III HD|display='''[[Strong medicine]]'''|price=48|attributes=Restores 50~60 HP<br>Restores 67~79 HP with the [[water sigil]]}} | |||
{{ItemShop/Item|name=Antidotal herb III HD|display='''[[Antidotal herb]]'''|price=10|attributes=Cures poison}} | |||
{{ItemShop/Item|name=Dazzle-me-not III HD|display='''[[Dazzle-me-not]]'''|price=120|attributes=Cures bedazzlement}} | |||
{{ItemShop/Item|name=Coagulant III HD|display='''[[Coagulant]]'''|price=310|attributes=Casts [[Fuddle]]}} | |||
{{ItemShop/Item|name=Tangleweb III HD|display='''[[Tangleweb]]'''|price=35|attributes=Casts [[Deceleratle]]}} | |||
{{ItemShop/Item|name=Holy water III HD|display='''[[Holy water]]'''|price=20|attributes=Repels weaker monsters for 64 steps<br>Deals 15~32 damage to one foe<br>Deals 30~64 damage with [[water sigil]]}} | |||
{{ItemShop/Item|name=Musk III HD|display='''[[Musk]]'''|price=150|attributes=Monsters attack more often for a brief time}} | |||
{{ItemShop/Item|name=Chimaera wing III HD|display='''[[Chimaera wing]]'''|price=25|attributes=Casts [[Zoom]]}} | |||
{{ItemShop/End|note=}} | |||
</div> | |||
<div style="float:left;"> | |||
{{WeaponShop/Start|title=Northern shop|subtitle=|float=}} | |||
{{WeaponShop/Item|name=Oaken club III HD|display='''[[Oaken club]]'''|price=40|attributes=Attack +4}} | |||
{{WeaponShop/Item|name=Copper sword III HD|display='''[[Copper sword]]'''|price=180|attributes=Attack +9}} | |||
{{WeaponShop/Item|name=Iron lance III HD|display='''[[Iron lance]]'''|price=660|attributes=Attack +17}} | |||
{{WeaponShop/Item|name=Leather suit I & II HD|display='''[[Leather suit]]'''|price=50|attributes=Defence +6}} | |||
{{WeaponShop/Item|name=Chain mail III HD|display='''[[Chain mail]]'''|price=520|attributes=Defence +18}} | |||
{{WeaponShop/Item|name=Bronze shield III HD|display='''[[Bronze shield]]'''|price=680|attributes=Defence +15}} | |||
{{WeaponShop/Item|name=Iron shield III HD|display='''[[Iron shield]]'''|price=900|attributes=Defence +20}} | |||
{{WeaponShop/End|note=}} | |||
</div> | |||
<div style="float:left;"> | |||
{{WeaponShop/Start|title=Middle shop|subtitle=|float=}} | |||
{{WeaponShop/Item|name=Fire blade I & II HD|display='''[[Fire blade]]'''|price=23,000|attributes=Attack +84<br>Deals Fire-element bonus damage | |||
1/4th of normal damage}} | |||
{{WeaponShop/Item|name=Flame armour III HD|display='''[[Flame armour]]'''|price=343,000|attributes=Defence +94<br>Ice spell & breath resistance +25%}} | |||
{{WeaponShop/Item|name=Silver shield III HD|display='''[[Silver shield]]'''|price=13,700|attributes=Defence +63}} | |||
{{WeaponShop/End|note=}} | |||
</div> | |||
<div style="float:left;"> | |||
{{WeaponShop/Start|title=Southern shop|subtitle=|float=}} | |||
{{WeaponShop/Item|name=Steel broadsword III HD|display='''[[Steel broadsword]]'''|price=1,700|attributes=Attack +22}} | |||
{{WeaponShop/Item|name=Iron axe III HD|display='''[[Iron axe]]'''|price=2,700|attributes=Attack +27}} | |||
{{WeaponShop/Item|name=Leather suit I & II HD|display='''[[Leather suit]]'''|price=50|attributes=Defence +6}} | |||
{{WeaponShop/Item|name=Magic armour III HD|display='''[[Magic armour]]'''|price=7,700|attributes=Defence +50<br>Spell damage resistance +33%}} | |||
{{WeaponShop/Item|name=Dragon mail III HD|display='''[[Dragon mail]]'''|price=13,800|attributes=Defence +80<br>Fire spell & breath resistance +33%}} | |||
{{WeaponShop/Item|name=Iron mask III HD|display='''[[Iron mask]]'''|price=3,600|attributes=Defence +31}} | |||
{{WeaponShop/Item|name=Raging bull helm III HD|display='''[[Raging bull helm]]'''|price=8,800|attributes=Defence +45}} | |||
{{WeaponShop/Item|name=Light shield III HD|display='''[[Light shield]]'''|price=2,050|attributes=Defence +32}} | |||
{{WeaponShop/Item|name=Magic shield III HD|display='''[[Magic shield]]'''|price=4,300|attributes=Defence +38<br>Spell damage resistance +25%}} | |||
{{WeaponShop/End|note=}} | |||
</div> | |||
{{Clear}} | |||
====Treasures==== | |||
{| class="wikitable sortable" | |||
|- | |||
|[[File:ICON-Mini medal III HD.png|link=Mini medal]] | |||
|[[List of mini medals in Dragon Quest I HD-2D Remake|Mini medal]] | |||
|x2 | |||
|[[Ultimate key]] (1) | |||
|- | |||
| [[File:ICON-Ability scroll I & II HD.png|link=List of special scrolls in Dragon Quest I HD-2D Remake]] | |||
| [[List of special scrolls in Dragon Quest I HD-2D Remake|Attack Attacker scroll]] | |||
| x1 | |||
| N/A | |||
|- | |||
| [[File:ICON-Ability scroll I & II HD.png|link=List of special scrolls in Dragon Quest I HD-2D Remake]] | |||
| [[List of special scrolls in Dragon Quest I HD-2D Remake|Moreheal scroll]] | |||
| x1 | |||
| N/A | |||
|- | |||
| [[File:ICON-Medicinal herb III HD.png|link=Medicinal herb]] | |||
| [[Medicinal herb]] | |||
| x3 | |||
|N/A | |||
|- | |||
| [[File:ICON-Magic water III HD.png|link=Magic water]] | |||
| [[Magic water]] | |||
| x2 | |||
|N/A | |||
|- | |||
| [[File:ICON-Holy water III HD.png|link=Holy water]] | |||
| [[Holy water]] | |||
| x2 | |||
|N/A | |||
|- | |||
| [[File:ICON-Oomph powder III HD.png|link=Oomph powder]] | |||
| [[Oomph powder]] | |||
| x1 | |||
|N/A | |||
|- | |||
| [[File:ICON-Unsealant III HD.png|link=Unsealant]] | |||
| [[Unsealant]] | |||
| x1 | |||
|N/A | |||
|- | |||
| [[File:ICON-Two-leaf clover III HD.png|link=Two-leaf clover]] | |||
| [[Two-leaf clover]] | |||
| x1 | |||
|N/A | |||
|- | |||
| [[File:ICON-Seed of agility III HD.png|link=Seed of agility]] | |||
| [[Seed of agility]] | |||
| x1 | |||
|N/A | |||
|- | |||
| [[File:ICON-Seed of luck III HD.png|link=Seed of luck]] | |||
| [[Seed of luck]] | |||
| x1 | |||
|N/A | |||
|- | |||
| [[File:ICON-Seed of wisdom III HD.png|link=Seed of wisdom]] | |||
| [[Seed of wisdom]] | |||
| x1 | |||
|N/A | |||
|- | |||
| [[File:ICON-Boxer shorts III HD.png|link=Boxer shorts]] | |||
| [[Boxer shorts]] | |||
| x1 | |||
|N/A | |||
|- | |||
| [[File:ICON-Leather armour III HD.png|link=Leather armour]] | |||
| [[Leather armour]] | |||
| x1 | |||
|N/A | |||
|- | |||
| [[File:ICON-Chain mail III HD.png|link=Chain mail]] | |||
| [[Chain mail]] | |||
| x1 | |||
|N/A | |||
|- | |||
| [[File:ICON-Iron armour III HD.png|link=Iron armour]] | |||
| [[Iron armour]] | |||
| x1 | |||
|N/A | |||
|- | |||
| [[File:ICON-Pointy hat III HD.png|link=Pointy hat]] | |||
| [[Pointy hat]] | |||
| x1 | |||
|N/A | |||
|} | |||
====Nearby monsters==== | |||
{| class="wikitable" | |||
| [[File:Betterfly DQ III HD sprite.png|link=Betterfly]] || [[File:Cureslime DQ III HD sprite.png|link=Cureslime]] || [[File:Deadnaut I & II HD sprite.png|link=Deadnaut]] || [[File:Gold golem I & II HD sprite.png|link=Gold golem]] || [[File:Infernal armour DQ III HD sprite.png|link=Infernal armour]] || [[File:Treeface I & II HD sprite.png|link=Treeface]] | |||
|} | |||
==={{DQ2}}=== | ==={{DQ2}}=== | ||
Informing [[ | Informing The {{Hero 2}} and his [[Scions of Erdrick|cousins]] about the [[Lighthouse (Dragon Quest II)|Lighthouse]] containing 1 of [[five sigils]], the [[Dragonlord's great-grandson|grandson]] of the [[Dragonlord]] points them to an island south of where Cantlin once stood. | ||
==={{DQ2HD}}=== | |||
The Dragonlord's great-grandson's line about there once being a town named Cantlin has been removed, and the desert town now appears in all three games of the [[Erdrick Trilogy]]. In lieu of the people being unable to create a new Golem after the events of the previous game, Cantlin has been defened by the descendants of the Protector of Cantlin for many generations. The tragedy of the Priest of Cantlin has survived into the modern day, with a wandering [[Martial Artist]] reflecting on his life in the cemetery. | |||
Cantlin becomes relevant to the game's plot when the [[Scions of Erdrick]] need to make use of the [[faerie flute]], which was left by their ancestor here as a means of safekeeping, after amassing all [[five sigils]]. As it happens the flute was taken by the [[Firstborn Protector]] after an argument with his family about familial duty, and the troubled young man has fled for [[Kol]] to bury the artefact in its traditional resting place south of the hot spring. Beyond being informed of the flute's location and starting the Firstborn Protector sidequest, Cantlin does not play a significant role in the game. | |||
====Shops & services==== | |||
<div style="float:left; margin-right:1em;"> | |||
{{ItemShop/Start|title=East shop|subtitle=|float=}} | |||
{{ItemShop/Item|name=Necklace of immunity III HD|display='''[[Necklace of immunity]]'''|price=320|attributes=Defence +4<br>Poison res. +16.66%}} | |||
{{ItemShop/Item|name=Rousing ring III HD|display='''[[Rousing ring]]'''|price=550|attributes=Luck +7<br>[[Snooze]] res. +6.25%}} | |||
{{ItemShop/Item|name=Torc of truth III HD|display='''[[Torc of truth]]'''|price=700|attributes=Defence +4<br>[[Dazzle]] res. +16.66%}} | |||
{{ItemShop/Item|name=Care rivière III HD|display='''[[Care rivière]]'''|price=940|attributes=Defence +4<br>Fizzle resistance +16.66%}} | |||
{{ItemShop/Item|name=Full moon ring III HD|display='''[[Full moon ring]]'''|price=990|attributes=Luck +7<br>Paralysis resistance +6.25%}} | |||
{{ItemShop/Item|name=Medicinal herb|price=8|attributes=Heals 35~45 HP<br>Restores 45~53 HP with the [[water sigil]]}} | |||
{{ItemShop/Item|name=Strong medicine III HD|display='''[[Strong medicine]]'''|price=48|attributes=Restores 50~60 HP<br>Restores 67~79 HP with the [[water sigil]]}} | |||
{{ItemShop/Item|name=Antidotal herb III HD|display='''[[Antidotal herb]]'''|price=10|attributes=Cures poison}} | |||
{{ItemShop/Item|name=Moonwort bulb III HD|display='''[[Moonwort bulb]]'''|price=30|attributes=Cures paralysis<br>Cures party with [[water sigil]]}} | |||
{{ItemShop/Item|name=Coagulant III HD|display='''[[Coagulant]]'''|price=310|attributes=Casts [[Fuddle]]}} | |||
{{ItemShop/Item|name=Tangleweb III HD|display='''[[Tangleweb]]'''|price=35|attributes=Casts [[Deceleratle]]}} | |||
{{ItemShop/Item|name=Holy water III HD|display='''[[Holy water]]'''|price=20|attributes=Repels weaker monsters for 64 steps<br>Deals 15~32 damage to one foe<br>Deals 30~64 damage with [[water sigil]]}} | |||
{{ItemShop/Item|name=Musk III HD|display='''[[Musk]]'''|price=150|attributes=Monsters attack more often for a brief time}} | |||
{{ItemShop/Item|name=Chimaera wing III HD|display='''[[Chimaera wing]]'''|price=25|attributes=Casts [[Zoom]]}} | |||
{{ItemShop/End|note=}} | |||
</div> | |||
<div style="float:left; margin-right:1em;"> | |||
{{ItemShop/Start|title=West shop|subtitle=|float=}} | |||
{{ItemShop/Item|name=Dragon scale III HD|display='''[[Dragon scale]]'''|price=200|attributes=Defence +5}} | |||
{{ItemShop/Item|name=Slime earrings III HD|display='''[[Slime earrings]]'''|price=950|attributes=Defence +5}} | |||
{{ItemShop/Item|name=Medicinal herb|price=8|attributes=Heals 35~45 HP<br>Restores 45~53 HP with the [[water sigil]]}} | |||
{{ItemShop/Item|name=Strong medicine III HD|display='''[[Strong medicine]]'''|price=48|attributes=Restores 50~60 HP<br>Restores 67~79 HP with the [[water sigil]]}} | |||
{{ItemShop/Item|name=Antidotal herb III HD|display='''[[Antidotal herb]]'''|price=10|attributes=Cures poison}} | |||
{{ItemShop/Item|name=Angel bell III HD|display='''[[Angel bell]]'''|price=90|attributes=Cures a single ally of confusion}} | |||
{{ItemShop/Item|name=Dazzle-me-not III HD|display='''[[Dazzle-me-not]]'''|price=120|attributes=Cures bedazzlement<br>Cures party with [[water sigil]]}} | |||
{{ItemShop/Item|name=Moonwort bulb III HD|display='''[[Moonwort bulb]]'''|price=30|attributes=Cures paralysis<br>Cures party with [[water sigil]]}} | |||
{{ItemShop/Item|name=Unsealant III HD|display='''[[Unsealant]]'''|price=150|attributes=Cures [[Fizzle]]<br>Cures party with [[water sigil]]}} | |||
{{ItemShop/End|note=}} | |||
</div> | |||
<div style="float:left;"> | |||
{{WeaponShop/Start|title=Northern shop|subtitle=|float=}} | |||
{{WeaponShop/Item|name=Iron axe III HD|display='''[[Iron axe]]'''|price=2,200|attributes=Attack +27}} | |||
{{WeaponShop/Item|name=Rune staff III HD|display='''[[Rune staff]]'''|price=2,900|attributes=Attack +32}} | |||
{{WeaponShop/Item|name=Cautery sword I & II HD|display='''[[Cautery sword]]'''|price=4,400|attributes=Attack +41<br>Casts [[Sizz]]}} | |||
{{WeaponShop/Item|name=Full plate armour III HD|display='''[[Full plate armour]]'''|price=3,300|attributes=Defence +37}} | |||
{{WeaponShop/Item|name=Steel helmet I & II HD|display='''[[Steel helmet]]'''|price=2,200|attributes=Defence +27}} | |||
{{WeaponShop/Item|name=Steel shield I & II HD|display='''[[Steel shield]]'''|price=1,800|attributes=Defence +29}} | |||
{{WeaponShop/Item|name=Light shield III HD|display='''[[Light shield]]'''|price=2,050|attributes=Defence +30}} | |||
{{WeaponShop/End|note=}} | |||
</div> | |||
<div style="float:left;"> | |||
{{WeaponShop/Start|title=Middle shop|subtitle=|float=}} | |||
{{WeaponShop/Item|name=Copper sword III HD|display='''[[Copper sword]]'''|price=180|attributes=Attack +9}} | |||
{{WeaponShop/Item|name=Divine dagger III HD|display='''[[Divine dagger]]'''|price=240|attributes=Attack +10<br>+30% damage to undead monsters}} | |||
{{WeaponShop/Item|name=Iron lance III HD|display='''[[Iron lance]]'''|price=660|attributes=Attack +17}} | |||
{{WeaponShop/Item|name=Steel broadsword III HD|display='''[[Steel broadsword]]'''|price=1,500|attributes=Attack +22}} | |||
{{WeaponShop/Item|name=Full plate armour III HD|display='''[[Full plate armour]]'''|price=3,300|attributes=Defence +37}} | |||
{{WeaponShop/Item|name=Steel helmet I & II HD|display='''[[Steel helmet]]'''|price=2,200|attributes=Defence +27}} | |||
{{WeaponShop/Item|name=Steel shield I & II HD|display='''[[Steel shield]]'''|price=1,800|attributes=Defence +29}} | |||
{{ItemShop/Item|name=Ruby wristband III HD|display='''[[Ruby wristband]]'''|price=2,050|attributes=Defence +8}} | |||
{{WeaponShop/End|note=}} | |||
</div> | |||
<div style="float:left;"> | |||
{{WeaponShop/Start|title=Southern shop|subtitle=|float=}} | |||
{{WeaponShop/Item|name=Chain whip III HD|display='''[[Chain whip]]'''|price=1,300|attributes=Attack +17}} | |||
{{WeaponShop/Item|name=Holy lance III HD|display='''[[Holy lance]]'''|price=1,800|attributes=Attack +20<br>+30% damage to undead monsters}} | |||
{{WeaponShop/Item|name=Serpent sword I & II HD|display='''[[Serpent sword]]'''|price=2,700|attributes=Attack +31}} | |||
{{WeaponShop/Item|name=Fire blade I & II HD|display='''[[Fire blade]]'''|price=23,000|attributes=Attack +84<br>Deals Fire-element bonus damage | |||
1/4th of normal damage}} | |||
{{WeaponShop/Item|name=Full plate armour III HD|display='''[[Full plate armour]]'''|price=3,300|attributes=Defence +37}} | |||
{{WeaponShop/Item|name=Turban III HD|display='''[[Turban]]'''|price=190|attributes=Defence +5}} | |||
{{WeaponShop/Item|name=Black bandana III HD|display='''[[Black bandana]]'''|price=1,900|attributes=Defence +24}} | |||
{{WeaponShop/Item|name=Flame shield I & II HD|display='''[[Flame shield]]'''|price=10,600|attributes=Defence +56<br>Ice spell & breath resistance +25%}} | |||
{{WeaponShop/End|note=}} | |||
</div> | |||
<div style="float:left;"> | |||
{{Clear}} | |||
====Treasures==== | |||
{| class="wikitable sortable" | |||
|- | |||
|[[File:ICON-Mini medal III HD.png|link=Mini medal]] | |||
|[[List of mini medals in Dragon Quest II HD-2D Remake|Mini medal]] | |||
|x1 | |||
|N/A | |||
|- | |||
| [[File:ICON-Tombola Ticket I & II HD.png|link=Tombola ticket]] | |||
| [[Tombola ticket]] | |||
| x9 | |||
|[[Ultimate key]] (6) | |||
|- | |||
| [[File:ICON-Medicinal herb III HD.png|link=Medicinal herb]] | |||
| [[Medicinal herb]] | |||
| x1 | |||
|N/A | |||
|- | |||
| [[File:ICON-Moonwort bulb III HD.png|link=Moonwort bulb]] | |||
| [[Moonwort bulb]] | |||
| x2 | |||
|N/A | |||
|- | |||
| [[File:ICON-Seed of defence III HD.png|link=Seed of defence]] | |||
| [[Seed of defence]] | |||
| x1 | |||
|N/A | |||
|- | |||
| [[File:ICON-Seed of life III HD.png|link=Seed of life]] | |||
| [[Seed of life]] | |||
| x1 | |||
|N/A | |||
|- | |||
| [[File:ICON-Seed of stamina III HD.png|link=Seed of stamina]] | |||
| [[Seed of stamina]] | |||
| x1 | |||
| | |||
|- | |||
| [[File:ICON-Fishnet stockings I & II HD.png|link=Fishnet stockings]] | |||
| [[Fishnet stockings]] | |||
| x1 | |||
|N/A | |||
|- | |||
| [[File:ICON-Garter III HD.png|link=Garter]] | |||
| [[Garter]] | |||
| x1 | |||
|N/A | |||
|- | |||
| [[File:ICON-Bamboo pole I & II HD.png|link=Bamboo pole]] | |||
| [[Bamboo pole]] | |||
| x1 | |||
|N/A | |||
|- | |||
| [[File:ICON-Iron lance III HD.png|link=Iron lance]] | |||
| [[Iron lance]] | |||
| x1 | |||
|N/A | |||
|- | |||
| [[File:ICON-Somatic staff III HD.png|link=Somatic staff]] | |||
| [[Somatic staff]] | |||
| x1 | |||
|[[Ultimate key]] | |||
|- | |||
| [[File:ICON-Silk robe III HD.png|link=Silk robe]] | |||
| [[Silk robe]] | |||
| x1 | |||
|N/A | |||
|- | |||
| [[File:ICON-Sparring suit III HD.png|link=Sparring suit]] | |||
| [[Sparring suit]] | |||
| x1 | |||
|N/A | |||
|- | |||
| [[File:ICON-Chain mail III HD.png|link=Chain mail]] | |||
| [[Chain mail]] | |||
| x1 | |||
|N/A | |||
|} | |||
====Nearby monsters==== | |||
{| class="wikitable" | |||
| [[File:Betterfly DQ III HD sprite.png|link=Betterfly]] || [[File:Hell nino DQ III HD sprite.png|link=Hell niño]] || [[File:Hocus chimaera DQ III HD sprite.png|64px|link=Hocus chimaera]] || [[File:Knight errant I & II HD sprite.png|link=Knight errant]] || [[File:Mummy DQ III HD sprite.png|link=Mummy]] || [[File:Skeleton soldier I & II HD sprite.png|link=Skeleton soldier]] || [[File:Scarewolf I & II HD sprite.png|64px|link=Scarewolf]] | |||
|} | |||
==={{DQ3}}=== | ==={{DQ3}}=== | ||
The people of | The people of Cantlin have given into despair due to [[Zoma]]'s tyranny, with the shops being left unattended and the merchants languishing in the streets. A family above the unmanaged inn despair as their child is slowly succumbing to his misery of living in such a world, and even withdraws his plea to the {{Hero 3}} to slay the archfiend out of hopelessness. The man in the next room over researches the technique to build an [[Golem|artificial guardian]] for the town, but with the people seeing the futility in even tending the fields it is a wasted effort. The only person not depressed is [[Galen]] the bard, who traveled to the town after a falling out with his parents. | ||
A [[Monster Arena]] lies beneath the town, where some citizens go to project themselves into the life and death struggles of the monsters to feel alive. It's just a distraction from the somber reality that surrounds them, and the only one to not dupe themselves into the false furor is a little girl looking for her father. | A [[Monster Arena]] lies beneath the town, where some citizens go to project themselves into the life and death struggles of the monsters to feel alive. It's just a distraction from the somber reality that surrounds them, and the only one to not dupe themselves into the false furor is a little girl looking for her father. | ||
The elder of Cantlin will instruct the player to travel to the [[Sanctum]] after acquiring the [[ | The elder of Cantlin will instruct the player to travel to the [[Sanctum]] after acquiring the [[sunstone]], [[Staff of Rain]], and [[Sacred Amulet]]. This will open the way to [[Zoma's Citadel]]. | ||
After the devil is defeated, the people of Cantlin will find new meaning in life and | After the devil is defeated, the people of Cantlin will find new meaning in life and proclaim the {{Hero 3}} as their savior, with the languishing child becoming active again and the researching tossing away his notes for future generations to pick up instead now that the town no longer needs a guardian. | ||
====Treasures==== | ====Treasures==== | ||
The following are exclusive to the | The following are exclusive to the {{SFC}} remake and its ports. | ||
*[[Dark robe]] (it will be available to search for in a grassy area in the center building after getting the second riddle in [[Cloudsgate Citadel (bonus dungeon)|Cloudsgate Citadel]]) | *[[Dark robe]] (it will be available to search for in a grassy area in the center building after getting the second riddle in [[Cloudsgate Citadel (bonus dungeon)|Cloudsgate Citadel]]) | ||
*[[Mini medal]] (search in the building in the top left corner of town) | *[[Mini medal]] (search in the building in the top left corner of town) | ||
| Line 108: | Line 428: | ||
*[[Fail is a Four-Letter Word]] | *[[Fail is a Four-Letter Word]] | ||
These tokens are unavailable in the | These tokens are unavailable in the [[Cell phone]] versions of the game: | ||
*[[T'n'T ticket]] (search by the counter in the building on the lower right corner of town) | *[[T'n'T ticket]] (search by the counter in the building on the lower right corner of town) | ||
*[[T'n'T ticket]] (left drawer upstairs in the larger shop on the left side of the town) | *[[T'n'T ticket]] (left drawer upstairs in the larger shop on the left side of the town) | ||
====Nearby | ====Nearby {{MFamilies}}s==== | ||
*[[Boss troll]] | *[[Boss troll]] | ||
*[[Chimaera]] | *[[Chimaera]] | ||
| Line 119: | Line 439: | ||
*[[Muddy hand]] | *[[Muddy hand]] | ||
*[[Skelegon]] | *[[Skelegon]] | ||
*[[Stone guardian]] ( | *[[Stone guardian]] (called by [[muddy hand]]) | ||
*[[Walking corpse]] ( | *[[Walking corpse]] (called by [[darth voodoo]]) | ||
*[[Voodoogooder]] ( | *[[Voodoogooder]] (called by [[ghoul]]) | ||
==={{ | ==={{DQ3HD}}=== | ||
Cantlin has become a walled city with an arabian theme in the jump to HD and can only be entered from the north, but the theme of dejection and despair remains; the only place where the people are remotely motivated is in the [[Monster Arena (Dragon Quest III HD-2D Remake)|Monster Arena]]. | |||
One key difference is that the town is now a mandatory visit due to the method to reforge the [[Sword of Kings]] becoming more involved than in past iterations of the game. Specifically, the player must speak to the researcher trying to create a [[Golem]] to be given the [[Broken Blade]], the ruined remains of the fabled sword after [[Zoma]] spent three years destroying it. The learned man admits that little is known of the sword save that it was created many, many years ago, and even its metal is alien to him. He had attempted to use the pieces in the construction of his Golem but failed, and freely hands it to the player. | |||
During the ending sequence the researcher is now shown to be successful in creating the [[Golem]], standing tall in his laboratory. | |||
==== | ====Treasures==== | ||
{| class="wikitable sortable" | |||
|- | |||
| | |[[File:ICON-Mini medal III HD.png|link=Mini medal]] | ||
|[[List of mini medal locations in Dragon Quest III HD-2D Remake|Mini medal]] | |||
|x1 | |||
|N/A | |||
|- | |- | ||
| [[File:ICON-Being A Better Person III HD.png|link=Being A Better Person]] | |||
| [[Being A Better Person]] | |||
| x1 | |||
| N/A | |||
|- | |- | ||
| | | [[File:ICON-Fail Is A Four-Letter Word III HD.png|link=Fail is a Four-Letter Word]] | ||
| [[Fail is a Four-Letter Word]] | |||
| x1 | |||
| N/A | |||
|- | |- | ||
| | | [[File:ICON-Primm's Primer III HD.png|link=Primm's Primer]] | ||
| [[Primm's Primer]] | |||
| x1 | |||
| N/A | |||
|- | |- | ||
| | | [[File:ICON-The Champion's Code III HD.png|link=The Champion's Code]] | ||
| [[The Champion's Code]] | |||
| x1 | |||
| N/A | |||
|- | |- | ||
| | | [[File:ICON-The Eureka Moment III HD.png|link=The Eureka Moment]] | ||
| [[The Eureka Moment]] | |||
| x1 | |||
| N/A | |||
|- | |- | ||
| | | [[File:Prayer ring III HD icon.png|link=Prayer ring]] | ||
| [[Prayer ring]] | |||
| x1 | |||
| N/A | |||
|- | |- | ||
| | | [[File:Oomph powder III HD icon.png|link=Oomph powder]] | ||
| [[Oomph powder]] | |||
| x1 | |||
| N/A | |||
|- | |||
| [[File:Unsealant III HD icon.png|link=Unsealant]] | |||
| [[Unsealant]] | |||
| x1 | |||
| N/A | |||
|- | |||
| [[File:Seed of defence III HD icon.png|link=Seed of defence]] | |||
| [[Seed of defence]] | |||
| x1 | |||
| N/A | |||
|- | |||
| [[File:Training togs III HD icon.png|link=Training togs]] | |||
| [[Training togs]] | |||
| x1 | |||
| N/A | |||
|- | |||
| [[File:Leather kilt III HD icon.png|link=Leather kilt]] | |||
| [[Leather kilt]] | |||
| x1 | |||
| N/A | |||
|- | |||
| [[File:Party dress III HD icon.png|link=Party dress]] | |||
| [[Party dress]] | |||
| x1 | |||
| N/A | |||
|- | |||
| [[File:Dark robe III HD icon.png|link=Dark robe]] | |||
| [[Dark robe]] | |||
| x1 | |||
| Speak with the bard in {{Cloudsgate Citadel 3}} to trigger | |||
|- | |||
|} | |||
====Nearby {{MFamilies}}s==== | |||
{| class="wikitable" | |||
| [[File:Chimaera DQ III HD sprite.png|link=Chimaera]] || [[File:Ghoul DQ III HD sprite.png|link=Ghoul]] || [[File:Muddy hand DQ III HD sprite.png|link=Muddy hand]] || [[File:Skelegon DQ III HD sprite.png|link=Skelegon]] || [[File:Stone guardian DQ III HD sprite.png|link=Stone guardian]] || [[File:Troobloovoodoo DQ III HD sprite.png|link=Troobloo voodoo]] | |||
|} | |} | ||
===[[ | ==={{DQM}}=== | ||
A Golem appears as the boss of the Gate of Talisman traveler's gate, with the level being based on the encounter with the [[Golem]] in Cantlin from the original game. After defeating it, it will join [[Terry]] as a companion. | |||
==={{DQB}}=== | |||
''See it's [[Challenges_(Dragon_Quest_Builders)#Chapter_1_challenges|list of challenges]].'' | |||
[[File:DQB Alefgard Map Ch1.jpeg|thumb|right|Map of Alefgard, highlighting the Cantlin region.]] | |||
Cantlin serves as the first area visited by the Builder, and it is the region less affected by the Dragonlord's influence. The Cantlin region consists of four different areas, the town region and three other areas that can be reached by using teleportals: | |||
*[[The Ravaged Realm|Cantlin Plains]], where the base will be located. | |||
*[[Hammerhood Heights]], where the builder learns how to make mallets. | |||
*[[The Damdara Desert]]. | |||
*[[Rockbomb Ravine]]. | |||
These areas collectively serve as the tutorial for the game, easing the player into the concepts of building, crafting, hunger, and the passage of time. Since the hunger meter and passage of time are activated after finishing Pippa's room request, it's adviced players explore and stock as much as possible before doing said quest. | |||
In this chapter, The Builder learns the dark truth of the time [[Alefgard]] fell, and how the survivors from Cantlin succumbed to selfishness which only made the Golem rage and destroy the citadel in order to stop humans from hurting each other. While most of the villagers believe the Builder will bring Cantlin to its former glory and defeat the [[Golem]], one of them -a villager named Larouche- isn't so certain. Larouche, despite believing the Builder's efforts will only bring chaos once again, does nothing to stop the Builder and the other villagers from rebuilding Cantlin. In the end, the [[Golem]] is defeated and Cantlin is bursting with life once more. | |||
==={{DQB2}}=== | |||
Despite Cantlin not appearing directly in the game, it is also established that the [[Builder (Dragon Quest Builders 2)|Player]] is originally from Cantlin. | Despite Cantlin not appearing directly in the game, it is also established that the [[Builder (Dragon Quest Builders 2)|Player]] is originally from Cantlin. | ||
==={{DQTact}}=== | |||
The party comes across the city in Chapter 3, Episode 5 of the game's limited ''Dragon Quest I'' event, hoping to find some way that will allow them to return to Orchesterra. They are stopped by the [[Golem]], who refuses to let any visitors into the city. [[Mindini]] becomes enraged and tries to force her way in with brute force, much to the frustration of her companions. | |||
==Etymology== | ==Etymology== | ||
The city takes its name from the [[Wikipedia:Cantlin Stone|Cantlin Stone]], which sits near the boarder between England and Wales. The name comes from William Cantlin, a peddler who died under mysterious circumstances between the English Bettws-y-Crwyn parish and the Welsh Kerry parish. An dispute arose over which parish should bury the man who had no family, with Bettws taking the task and claiming the plot of land afterwards. The grave is marked by a cross standing tall in amid the empty field, giving the location | The city takes its name from the [[Wikipedia:Cantlin Stone|Cantlin Stone]], which sits near the boarder between England and Wales. The name comes from William Cantlin, a peddler who died under mysterious circumstances between the English Bettws-y-Crwyn parish and the Welsh Kerry parish. An dispute arose over which parish should bury the man who had no family, with Bettws taking the task and claiming the plot of land afterwards. The grave is marked by a cross standing tall in amid the empty field, giving the location its distinction. | ||
==Gallery== | ==Gallery== | ||
<center><gallery> | <center><gallery> | ||
Golem Battle.png| | Golem Battle.png|{{I}} Golem battle. | ||
File:Cantlin III HD concept art.png|HD-2D Remake concept art. | |||
Cantlin | DQ NES Cantlin.png|Map for {{Dragon Warrior}}. ({{NES}}) | ||
DQ SFC Cantlin.png|Map for {{I}}. ({{SFC}}) | |||
DQ III NES Cantlin.png|Map for {{Dragon Warrior III}}. ({{NES}}) | |||
DQ III SFC Cantlin.png|Map for {{III}}. ({{SFC}}) | |||
Cantlin map III HD2D.png|HD map for ''III'' | |||
Cantlin map I HD2D.png|HD map for ''I''. | |||
Cantlin map II HD2D.png|HD map for Woods. | |||
DQ Smash Grow Cantlin Map.jpg|Map in ''[[Dragon Quest Smash/Grow]]''. ([[Cell phone]]) | |||
Image:DQ III Android Cantlin.jpg | |||
DQ III Android Cantlin 1.jpg| | |||
DQ III Android Cantlin 2.jpg| | |||
DQ III Android Cantlin 3.jpg| | |||
DQ III Android Cantlin 4.jpg| | |||
DQ III Android Cantlin 5.jpg| | |||
DQ III Android Cantlin Dark Robe.jpg|One step away from the [[Dark robe]]. ([[Cell phone]]) | |||
DQ Android Cantlin Entrance.jpg| | |||
DQ Android Cantlin Temple.jpg| | |||
DQ II Android Site Of Cantlin.jpg|Former site of Cantlin and the [[Shrine of the Spirit]] from {{II}}. ([[Cell phone]]) | |||
DQ Stars Android Soldier of Cantlin.jpg|Appearance in {{Stars}}. ([[Cell phone]]) | |||
DQ Stars Android Elderly Man of Cantlin.jpg| | |||
The ravaged realm.jpg|The Ravaged Realm. | The ravaged realm.jpg|The Ravaged Realm. | ||
Hammerhood Heights.jpg|Hammerhood Heights. | Hammerhood Heights.jpg|Hammerhood Heights. | ||
Damdara Desert.jpg|Damdara Desert. | Damdara Desert.jpg|Damdara Desert. | ||
Rockbomb ravine.jpg|Rockbomb Ravine. | Rockbomb ravine.jpg|Rockbomb Ravine. | ||
Banner of light in use.jpg|Rubiss directing the player towards the ruins of Cantlin in {{Builders}}. | |||
DQ | DQB_Cantlin_Start.jpeg|How the ruined city looks upon placing the [[Banner of Hope]]. | ||
DQT Cantlin.jpg|The [[Golem]] guarding the city in {{Tact}}. ([[Cell phone]]) | |||
DQ Smash Grow Golem Of Cantlin.jpg|[[Golem]] guardian of Cantlin in ''[[Dragon Quest Smash/Grow]]''. ([[Cell phone]]) | |||
DQ Smash Grow Golem Of Cantlin 2.jpg|The city's [[Golem]] becoming a Boon. ([[Cell phone]]) | |||
DQ Smash Grow Golem Of Cantlin 3.jpg|[[Golem]]'s punch becoming a stronger Boon. ([[Cell phone]]) | |||
DQ Smash Grow Protector Of Cantlin.jpg|Soldier protecting Cantlin. ([[Cell phone]]) | |||
DQ Smash Grow Cantlin Innkeeper.jpg|Innkeeper of Cantlin. ([[Cell phone]]) | |||
DQ Smash Grow Cantlin Item Shop Owner.jpg|[[Item shop]] owner of Cantlin. ([[Cell phone]]) | |||
DQ Smash Grow Cantlin Weapon Shop Owner.jpg|[[Weapon shop]] owner of Cantlin. ([[Cell phone]]) | |||
DQ Smash Grow Wandering Warrior Of Alefgard 1.jpg|Wandering [[warrior]]. ([[Cell phone]]) | |||
DQ Smash Grow Wandering Warrior Of Alefgard 2.jpg| | |||
DQ Smash Grow Wandering Warrior Of Alefgard 3.jpg| | |||
DQ Smash Grow Wandering Merchant In Cantlin.jpg|Wandering [[merchant]]. ([[Cell phone]]) | |||
DQ Smash Grow Fall Of Cantlin.jpg|Fall of the town if the [[party]] fails in Defend Cantlin. ([[Cell phone]]) | |||
</gallery></center> | </gallery></center> | ||
{{DQI}} | {{DQI}} | ||
{{DQIII}} | {{DQIII}} | ||
{{DQI&IIHD}} | |||
{{DQIIIHD}} | |||
{{DQBI}} | {{DQBI}} | ||
[[Category:English mythology]] | |||
[[Category:Dragon Quest I locations]] | [[Category:Dragon Quest I locations]] | ||
[[Category:Dragon Quest III locations]] | [[Category:Dragon Quest III locations]] | ||
[[Category:Dragon Quest III HD-2D Remake locations]] | |||
[[Category:Dragon Quest Builders locations]] | [[Category:Dragon Quest Builders locations]] | ||
[[Category:Dragon Quest Tact locations]] | |||
Latest revision as of 09:57, 24 June 2026
| City | |
|---|---|
| Cantlin | |

| |
| Japanese | メルキド |
| Romaji | Merukido |
| Game | Dragon Quest Dragon Quest I HD-2D Remake Dragon Quest II HD-2D Remake'Dragon Quest III Dragon Quest III HD-2D Remake Dragon Quest Builders |
| Old localization | Mercado (GBC) |
Cantlin is a walled city located in the south central region of Alefgard in Dragon Quest, Dragon Quest I & II HD-2D Remake, Dragon Quest III, and Dragon Quest Builders.
Cantlin is most famous for it's heavy fortifications and for being guarded by a Golem in the original game. It was featured in Dragon Quest Builders as the starting city, followed by Rimuldar.
Appearances[edit]
Dragon Quest[edit]
The city of Cantlin is typically the last city the player visits due to its distance from Tantegel and the strength of the surrounding monsters. When first approached, the city is guarded by a Golem whose battle is triggered when the Hero first attempts to enter the ramparts surrounding the city. This battle is a one time event, and is the only place where a Golem can be encountered. The weapons and armor shop in Cantlin sells the best equipment the character can purchase in the game.

Despite all of this, Cantlin is a not a required location to visit in order to complete the game.
Locked doors[edit]
The first game has two doors in southwestern part of town, the first of which leads to man with clues to find Erdrick's Armour, and the second to the hidden shops.
Shops & Services[edit]
 NorthwestItem Shop NorthwestItem Shop
|