Orochi's Lair: Difference between revisions
No edit summary |
Antiyonder (talk | contribs) No edit summary |
||
| Line 3: | Line 3: | ||
|title = Orochi's Lair | |title = Orochi's Lair | ||
|type= Dungeon | |type= Dungeon | ||
|image = [[ | |image = [[Image:DQ III Android Jipang.jpg|250px]] | ||
|caption = | |caption = | ||
|japanese=ジパングの洞窟 | |japanese=ジパングの洞窟 | ||
|romaji={{tt|Jipangu no dōkutsu|Jipang cave}} | |romaji={{tt|Jipangu no dōkutsu|Jipang cave}} | ||
| Line 17: | Line 17: | ||
The lair is a simple dungeon, consisting of two floors with a direct route with few branches. [[Metal slime]]s appear fairly regularly and in large groups, giving the party a chance to level up before facing the dragon. | The lair is a simple dungeon, consisting of two floors with a direct route with few branches. [[Metal slime]]s appear fairly regularly and in large groups, giving the party a chance to level up before facing the dragon. | ||
If the altar on B2F is examined, it is mentioned as the possible place where sacrifices to Orochi are left. | If the altar on B2F is examined, it is mentioned as the possible place where sacrifices to [[Orochi]] are left. | ||
====Treasures==== | ====Treasures==== | ||
| Line 23: | Line 23: | ||
*[[Orochi's sword]] (automatically obtained after battle) | *[[Orochi's sword]] (automatically obtained after battle) | ||
==== | ===={{Monster}}s==== | ||
*[[Lump shaman]] | *[[Lump shaman]] | ||
*[[Magmalice]] | *[[Magmalice]] | ||
| Line 31: | Line 31: | ||
*'''[[Orochi]]''' | *'''[[Orochi]]''' | ||
====Nearby | ====Nearby {{MFamilies}}s==== | ||
*[[Ethereal serpent]] | *[[Ethereal serpent]] | ||
*[[Garuda]] | *[[Garuda]] | ||
| Line 40: | Line 40: | ||
====Remake==== | ====Remake==== | ||
*On the second floor, Orochi's growls can be heard as the | *On the second floor, [[Orochi]]'s growls can be heard as the {{Party 3}} approaches her. | ||
====Usage of Orochi's Lair in another area==== | ====Usage of Orochi's Lair in another area==== | ||
| Line 49: | Line 49: | ||
==Map & Gallery== | ==Map & Gallery== | ||
<center><gallery> | <center><gallery> | ||
DQ III NES Cave of Jipang.png|{{NES}} | DQ III NES Cave of Jipang.png|Map. ({{NES}}) | ||
Orochi's Lair 16-bit.png|{{SFC}} | Orochi's Lair 16-bit.png|map. ({{SFC}}) | ||
DQIII Orochi and Merchant.png|Merchant running from the Orochi. | |||
DQT Orochis Lair.jpg|Orochi confronting Majellan in {{Tact}}. | DQT Orochis Lair.jpg|Orochi confronting Majellan in {{Tact}}. | ||
</gallery></center> | </gallery></center> | ||
Latest revision as of 22:12, 30 January 2023
| Dungeon | |
|---|---|
| Orochi's Lair | |

| |
| Japanese | ジパングの洞窟 |
| Rōmaji | Jipangu no dōkutsu |
| Game | Dragon Quest III |
| Old localization | Cave Northeast of Jipang Zipangu Cave (GBC version) |
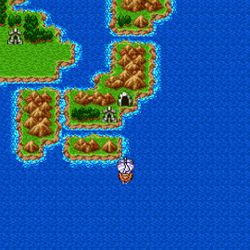
The Orochi's Lair[1] is a volcanic cave in Dragon Quest III: The Seeds of Salvation. It is nearly adjacent to Jipang, and houses the altar on which maidens from the golden land are sacrificed to the eponymous serpent.
It was once visited by The Hero's father, the great Ortega during his travels through the world.[2]
Appearances[edit]
Dragon Quest III: The Seeds of Salvation[edit]
The lair is a simple dungeon, consisting of two floors with a direct route with few branches. Metal slimes appear fairly regularly and in large groups, giving the party a chance to level up before facing the dragon.
If the altar on B2F is examined, it is mentioned as the possible place where sacrifices to Orochi are left.
Treasures[edit]
- Mask of Implacability
- Orochi's sword (automatically obtained after battle)
Monsters[edit]
Nearby monsters[edit]
Remake[edit]
Usage of Orochi's Lair in another area[edit]
- B1F is used as 3F of the Cloudsgate Citadel.
Dragon Quest Tact[edit]
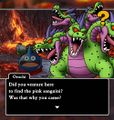
Majellan and the Master journey to Orochi's Lair during the Dragon Quest III in search of the missing Mindini. They reach the heart of the volcano and face Orochi in battle after seeing that she has gobbled up Mindini. Afterwards, Orochi spits the pink sanguini up, sending her even further into Manoza.
Map & Gallery[edit]
References[edit]
- ↑ Name given when Storeyteller is used in the Cell phone Version.
- ↑ Shown in the prologue to the Super Famicom and Game Boy Color version of the game.


