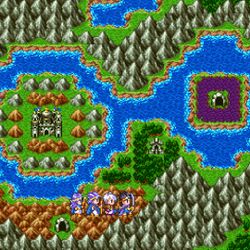
Baramos' Lair
| Location | |
|---|---|
| Baramos' Lair | |
| Japanese | バラモスの城 |
| Romaji | baramosu jō |
| Game | Dragon Quest III Dragon Quest III HD-2D Remake Dragon Quest XI |
Baramos' Lair is a castle in the overworld of Dragon Quest III.
It is the home of the Archfiend Baramos, one of the chief villains in the game. It is surrounded by impassable mountains left of Necrogond Shrine and requires Ramia in order to enter.
Appearances[edit]
Dragon Quest III: The Seeds of Salvation[edit]
The castle is the former city-state of the Necrogond, which was destroyed by Baramos and his forces to claim as their own. As such, it resembles a twisted and sinister mockery of the castles seen throughout the adventure thus far. In the remakes of the title, the final chamber in which Baramos sits is given a heat-distortion effect, alluding to how difficult the battle will be.
Treasures[edit]
Nearby monsters[edit]
Monsters[edit]
Dragon Quest III HD-2D Remake[edit]
Baramos's lair remains mostly unchanged from past iterations of the game, save for the addition of a teleportal that connects the entrance to the fiend's throne room appearing once the dungeon has been fully explored. The mysterious voice congratulates the player for slaying Baramos and now warps the party back to Aliahan to celebrate.
Treasures[edit]
| x1 | x1 | x1 | x1 | x2 | x1 | x1 | x1 |
Nearby monsters[edit]
Monsters[edit]
Dragon Quest XI: Echoes of an Elusive Age[edit]
The Luminary and his party can travel to the lair twice through the Echo Chamber. The first venture is sometime after the conclusion of the game, in which the kings of Aliahan, Portogus Rex of Portoga, Romaria, Edina, Manoza, and their guards converge on the site to honor the deaths of the King of the Necrogond and his people. To their horror, the reanimated corpses of these citizens have begun the process of reviving Baramos, and the lair is once again crawling with monsters. The king of the Necrogond himself may be spoken to as well, having resisted the mind-altering incantations of the Necrogondolier due to his immense despair of the plight of his people. By slaying the necromancer, the Luminary and his party allow the Necrogondians to rest in peace at last.
The second expedition to the lair occurs after this point, in which the aforementioned kings attempted to secure the site from monsters but were repelled due to the revival of Baramos, who used the souls of his followers to return. The Luminary must clash with the affront to Rubiss, and finally put an end to the Necrogrond's misery.
Additionally, the Galapogod was taken to here by a group of monsters who abducted the holy terrapin from his home in Tenton. These foes are chumps, and can be defeated easily at any level.


