Orgodemir: Difference between revisions
No edit summary |
m (→{{DQM3}}) |
||
| (45 intermediate revisions by 16 users not shown) | |||
| Line 1: | Line 1: | ||
{{Character | {{Character | ||
|Name=Orgodemir | |Name=Orgodemir | ||
|Game= | |Game={{DQ7}} | ||
|Image=[[Image: | |Image=[[Image:Orgodemir_Second_Forme.png|center|250px]] | ||
|Sprite= | |Sprite= | ||
|Japanese name=オルゴ・デミーラ | |Japanese name=オルゴ・デミーラ | ||
|Roumaji= | |Roumaji=Orugo・Demira | ||
|Title=Demon King | |Title=Demon King | ||
|Class= | |Class= | ||
|Race=Demon | |Race=[[Demon]] | ||
|Age=Ageless | |Age=Ageless | ||
|Family= | |Family= | ||
}} | }} | ||
'''Orgodemir''' is the final boss and main antagonist of {{Dragon Quest VII}}. | |||
Known as the Demon King, he is the force behind all the evil that the {{Hero 7}} and his {{Party 7}} encounter during the game. A villain with multiple forms, Orgodemir sought to replace [[Numen|the Almighty]], and had nearly the entire world sealed away to keep his foe from being resurrected. | |||
Orgodemir has appeared in various spinoffs in the series, including ''[[Dragon Quest Monsters: Joker]]'', {{Joker 2}} and {{Dragon Quest IX}} as a {{Legacy Boss}}. | |||
==Characteristics== | ==Characteristics== | ||
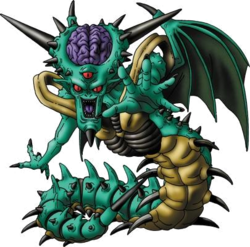
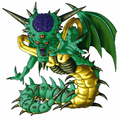
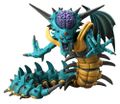
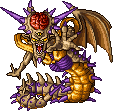
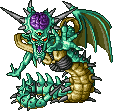
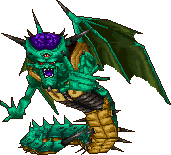
Orgodemir's true form is a monstrous demonic centipede with | Orgodemir's true form is a monstrous demonic centipede with an upper body that combines both humanoid and draconic features. His head is enlarged, has a pair of large spikes on each side of it, and exposes his brain. His brain also has smaller spikes surrounding it. Orgodemir has three eyes with vertical pupils, pointed ears, a black spike on his chin, a mouth lined with sharp fangs, and a purple tongue. He has a pair of dragon wings on his back, a yellow bone-like structure which surrounds his torso, and a section on his chest similar in appearance to a rib cage. His lower back is covered in dorsal fins and small black spines, ending in a long black spike. The underside of his lower body is yellow. Orgodemir moves about by crawling on his various legs in a fashion similar to real-world centipedes. In the past, most of Orgodemir's body is beige, he has yellow eyes, his brain is red, the webbing on his wings is orange, and his chest, legs, and various spikes are all purple. In the present, most of Orgodemir's body is dark green, his eyes are red, his brain is purple, and the spikes on his body are black. In both of his forms, Orgodemir has long, sharp nails on his hands, which are purple in the past and black in the present. | ||
Orgodemir can also disguise himself in a | Orgodemir can also disguise himself in a {{Humanoid}} form, retaining the pair of wings on his back along with his three eyes and long, pointed ears (however, the shape of wings differs rather noticeably, from ones of his real form). His skin is now pale green and his exaggerated facial features are meant to be physically attractive. He wears his silver hair in a long, slick forelock falling over his face. His eyes are white with red pupils and he wears dark blue eyeshadow on all three of his eyelids, as well as dark purple lipstick. Orgodemir wears a red-lined suit with a coattail and puffed sleeves that exposes most of his chest, a leather codpiece with a skull belt around his waist, and leather shoes with steel tips. He also wears an extensive amount of jewelry, including a single black hoop earring on his right ear and numerous earrings on his left ear, a leather choker and chain necklace around his neck, and various bones on his fingers. In the past, the suit he wears is red and the webbing on his wings is orange, while in the present he wears a purple suit and the webbing on his wings is green. | ||
== | ==Appearances== | ||
==={{DQ7}}=== | |||
Long before the game begins, Orgodemir set out to seal all lands and cast them in darkness. He was opposed by [[Numen|the Almighty]] and the Four Elemental Spirits: [[Earth Spirit|Earth]], [[Fire Spirit|Fire]], [[Water Spirit|Water]], and [[Wind Spirit|Wind]]. The Almighty was defeated and the four spirits were scattered. However, the Almighty had put a system into place that would allow the world to be reborn again within the [[Shrine of Mysteries]]. | |||
{{Spoiler|start}} | {{Spoiler|start}} | ||
Although Orgodemir himself does not make an appearance until late in the story, his presence is felt throughout the various worlds the party visits. At [[Ballymolloy]], the warrior [[Maeve]] is twisted into a | Although Orgodemir himself does not make an appearance until late in the story, his presence is felt throughout the various worlds the party visits. At [[Ballymolloy]], the warrior [[Maeve]] is twisted into a {{MFamilies}} by a mysterious evil voice. The [[Tinpot Dictator]] invades the land of [[Faraday]] with an army of [[Automaton]]s on the orders of the Demon King, aided by the [[Slaughtomaton]]. At {{Alltrades Abbey 7}}, [[Cardinal Sin]] and his {{MFamilies}}s concoct a devious plan in order to strengthen the Demon King with the stolen abilities of adventurers hoping to change their vocation there. In the land of [[Al-Balad]], a group of {{MFamilies}}s led by [[Setesh the Punisher]] forces the people to construct a [[The Likeness|monument]] in the likeness of the Demon King. | ||
The kingdom of [[Buccanham]] is the only nation to pose a serious threat against the Demon King's reign. A band of pirates, led by Captain [[Sharkeye]], braves the seas in their ship, the [[Sea Dragon]] and fights battles against the Demon King's | The kingdom of [[Buccanham]] is the only nation to pose a serious threat against the Demon King's reign. A band of pirates, led by Captain [[Sharkeye]], braves the seas in their ship, the [[Sea Dragon (sailing vessel)|Sea Dragon]] and fights battles against the Demon King's {{MFamilies}}s. However, their victories are short-lived, as Orgodemir encases the ship and its crew in ice, putting a stop to their heroics. The Demon King then places a curse on the kingdom of [[Buccanham]], causing its newborns to be transformed into {{MFamilies}}s on the first night after a full moon. | ||
The Hero and his | The {{Hero 7}} and his {{Party 7}} travel to the past through the [[Excavated Cave]] underneath the [[Dig Site]]. After placing Mysterious Fragments into the pedestal there, they are transported to the [[Malign Shrine]]. They witness the Almighty sealing away [[Sir Mervyn]] in the [[Sizzling Stone]] and His defeat at the hands of the Demon King. After traversing through the stronghold, they encounter the Demon King himself. Orgodemir taunts the {{Party 7}} by saying they are foolish to throw their lives away for the sake of [[Numen|the Almighty]]. He even allows them to walk away. However, if the player refuses, Orgodemir will fight the {{Party 7}}. | ||
When the player defeats Orgodemir, he tells them that although they were able to defeat his body, his soul will never die. With that, he disappears, ending Disc 1. | When the player defeats Orgodemir, he tells them that although they were able to defeat his body, his soul will never die. With that, he disappears, ending Disc 1. | ||
In Disc 2, the | In Disc 2, the {{Party 7}} reunites with the present day [[Roamers]] in their ceremony to revive [[Numen|the Almighty]]. With [[Aishe]] dancing in the Vestment of Virtue and [[Crispin]] playing the Torban of Truth, the Almighty is revived. However, unbeknownst to the party, this is really Orgodemir in disguise. As [[Numen|the Almighty]], Orgodemir thanks the {{Party 7}} for reviving him and tells them that he will issue peace to the entire worlds. | ||
Months later, Orgodemir, disguised as the Almighty, has the populace of the world build him a palace at the center of the world known as the [[Cathedral of Light]]. [[Sir Mervyn]] has been working with him as part of security. After its completion, he invites representatives from all nations to hear him speak. He tells them that he is the Almighty and that evil has been defeated. He instructs them to do dispose of their weapons as they will have no need for them and not to take the life of a human or a | Months later, Orgodemir, disguised as [[Numen|the Almighty]], has the populace of the world build him a palace at the center of the world known as the [[Cathedral of Light]]. [[Sir Mervyn]] has been working with him as part of security. After its completion, he invites representatives from all nations to hear him speak. He tells them that he is [[Numen|the Almighty]] and that evil has been defeated. He instructs them to do dispose of their weapons as they will have no need for them and not to take the life of a [[human]] or a {{MFamilies}}. Orgodemir, as [[Numen|the Almighty]], then asks the {{Hero 7}} to give him the Dark Ruby as it is evil. With this, the audience with [[Numen|the Almighty]] is finished and he disappears. As the {{Hero 7}}'s {{Party 7}} leaves the [[Cathedral of Light]], they see [[Sir Mervyn]] being chased by soldiers, claiming that he has committed treason against [[Numen|Him]]. | ||
As the | As the {{Party 7}} leaves to return to [[Estard]], the land is sealed once again and thrown into darkness. This is the work of Orgodemir. Mervyn communicates this to the {{Party 7}} via Mindspeak. He tells the {{Party 7}} that [[Numen|the Almighty]] went about sealing the worlds that he said were evil. When [[Sir Mervyn]] questioned this judgment, he was called a traitor. However, he learned of the four Elemental Spirits and they are the only beings able to shed light on [[Numen|the Almighty]]'s actions. When the party awakens the [[Fire Spirit]], they free the [[Sea Dragon (sailing vessel)|Sea Dragon]] and its crew from their icy prison, allowing Sharkeye and his band of pirates to assist the party's battle against the Demon King. | ||
When the | When the {{Party 7}} find all the Elemental Spirits, they go to the [[Cathedral of Light]] and reveal that [[Numen|the Almighty]] is actually the Demon King. Unfortunately, this leaves the Spirits overtaxed and unable to defeat Orgodemir. After his ruse is revealed, Orgodemir transforms the [[Cathedral of Light]] into the [[Cathedral of Blight]] and it serves as the final dungeon of the game. The party enters the [[Cathedral of Blight|Cathedral]] and reaches the Demon King at its depths. He tells them that he is the new [[Numen|the Almighty]] and that they will not be able to defeat him because they are ephemeral creatures. The {{Party 7}} challenges Orgodemir. | ||
With their victory, Orgodemir wonders why he was defeated and postulates the | With their victory, Orgodemir wonders why he was defeated and postulates the {{Party 7}} is actually [[Numen|the Almighty]]. Orgodemir's final defeat brings peace to the world. | ||
{{Spoiler|end}} | {{Spoiler|end}} | ||
The player fights Orgodemir twice at the end of each disc. In the first battle, he has two forms, and in the second battle, he has four forms. | The player fights Orgodemir twice at the end of each disc. In the first battle, he has two forms, and in the second battle, he has four forms. | ||
[[Image:DQVII_Orgodemir.png|thumb|right| | [[Image:DQVII_Orgodemir.png|thumb|right|170px|Human form]] | ||
===First Encounter | |||
====First Encounter==== | |||
{{DQ7Enemy | {{DQ7Enemy | ||
|name=First phase (past) | |name=First phase (past) | ||
|kanji= | |kanji= オルゴ・デミーラ | ||
|romanji= | |romanji=Orugo・Demira | ||
|sprite=[[Image: | |sprite=[[Image:Orgodemir DQVII PSX.gif]] | ||
|hp=3000 | |hp=3000 | ||
|mp=Infinite | |mp=Infinite | ||
| Line 62: | Line 64: | ||
|agility=107 | |agility=107 | ||
|tameRate=0 | |tameRate=0 | ||
|bestiaryNumber=314 | |bestiaryNumber=#314 | ||
|spells=[[Kaboom]]<br>[[Kafrizzle]] | |spells=[[Kaboom]]<br>[[Kafrizzle]] | ||
|skills=Acts three times<br>[[Disruptive Wave]]<br> | |skills=Acts three times.<br>[[Disruptive Wave]]<br>[[Lullab-Eye]]<br>[[Lightning]]<br>[[Magma Blast]]<br>[[Wind Sickles]]<br>[[Incantation|Energy Balls]] | ||
|locations= | |locations=[[Malign Shrine]] | ||
|items= | |items= | ||
|evasion={{fraction|1|64}} | |evasion={{fraction|1|64}} | ||
| Line 93: | Line 95: | ||
|remake-changes= | |remake-changes= | ||
}} | }} | ||
{{Clear}} | {{Clear}} | ||
{{DQ7Enemy | {{DQ7Enemy | ||
|name=Second phase (past) | |name=Second phase (past) | ||
|kanji= | |kanji= オルゴ・デミーラ | ||
|romanji= | |romanji=Orugo・Demira | ||
|sprite= | |sprite=[[Image:Orgodemir2 DQVII PS.gif]] | ||
|hp=4200 | |hp=4200 | ||
|mp=0 | |mp=0 | ||
| Line 109: | Line 110: | ||
|agility=82 | |agility=82 | ||
|tameRate=0 | |tameRate=0 | ||
|bestiaryNumber=314 | |bestiaryNumber=#314 | ||
|spells= | |spells= | ||
|skills=Acts twice per turn<br>[[Disruptive Wave]][[Freezing Blizzard]]<br>[[Inferno]]<br>Spike Charge<br>[[Thin Air]] | |skills=Acts twice per turn.<br>[[Disruptive Wave]]<br>[[Freezing Blizzard]]<br>[[Inferno]]<br>Spike Charge<br>[[Thin Air]] | ||
|locations= | |locations=[[Malign Shrine]] | ||
|items= | |items= | ||
|evasion={{fraction|1|32}} | |evasion={{fraction|1|32}} | ||
| Line 141: | Line 142: | ||
}} | }} | ||
====Second Encounter==== | |||
===Second Encounter | |||
{{DQ7Enemy | {{DQ7Enemy | ||
|name=First phase | |name=First phase | ||
|kanji= | |kanji= オルゴ・デミーラ | ||
|romanji= | |romanji=Orugo・Demira | ||
|sprite=[[Image: | |sprite=[[Image:Orgodemir3 DQVII PS.gif]] | ||
|hp=3500 | |hp=3500 | ||
|mp=Infinite | |mp=Infinite | ||
| Line 156: | Line 156: | ||
|agility=80 | |agility=80 | ||
|tameRate=0 | |tameRate=0 | ||
|bestiaryNumber=316 | |bestiaryNumber=#316 | ||
|spells= | |spells= | ||
|skills=[[Disruptive Wave]]<br>[[Freezing Blizzard]]<br>[[Scorch]]<br>Tail whip | |skills=[[Disruptive Wave]]<br>[[Freezing Blizzard]]<br>[[Scorch]]<br>Tail whip | ||
| Line 192: | Line 192: | ||
{{DQ7Enemy | {{DQ7Enemy | ||
|name=Second phase | |name=Second phase | ||
|kanji= | |kanji= オルゴ・デミーラ | ||
|romanji= | |romanji=Orugo・Demira | ||
|sprite=[[Image: | |sprite=[[Image:Orgodemir4 DQVII PS.gif]] | ||
|hp=3300 | |hp=3300 | ||
|mp=Infinite | |mp=Infinite | ||
| Line 203: | Line 203: | ||
|agility=135 | |agility=135 | ||
|tameRate=0 | |tameRate=0 | ||
|bestiaryNumber=316 | |bestiaryNumber=#316 | ||
|spells=[[Kaboom]]<br>[[Kafrizzle]] | |spells=[[Kaboom]]<br>[[Kafrizzle]] | ||
|skills=Acts Twice<br>[[Disruptive Wave]]<br>Energy Balls(Attack/2+67)<br> | |skills=Acts Twice<br>[[Disruptive Wave]]<br>[[Incantation|Energy Balls]] (Attack/2+67)<br>[[Scorch]] (168~188)<br>[[Knuckle Sandwich]]<br>[[Lullab-Eye]]<br>[[Wind Sickles]] | ||
|locations=[[Cathedral of Blight]] | |locations=[[Cathedral of Blight]] | ||
|items= | |items= | ||
| Line 238: | Line 238: | ||
{{DQ7Enemy | {{DQ7Enemy | ||
|name=Third phase | |name=Third phase | ||
|kanji= | |kanji= オルゴ・デミーラ | ||
|romanji= | |romanji=Orugo・Demira | ||
|sprite=[[Image: | |sprite=[[Image:Orgodemir5 DQVII PS.gif]] | ||
|hp=3000 | |hp=3000 | ||
|mp=Infinite | |mp=Infinite | ||
| Line 249: | Line 249: | ||
|agility=116 | |agility=116 | ||
|tameRate=0 | |tameRate=0 | ||
|bestiaryNumber=316 | |bestiaryNumber=#316 | ||
|spells= | |spells=[[Kaboom]]<br>[[Kafrizzle]] | ||
|skills=Acts twice per turn<br>[[Disruptive Wave]]<br>Ferocious Roar<br>[[Magma Blast]]<br>[[Venom Mist]]<br>[[Weird Whacker]] | |skills=Acts twice per turn<br>[[Disruptive Wave]]<br>[[Ferocious Roar]]<br>[[Magma Blast]]<br>[[Venom Mist]]<br>[[Weird Whacker]] | ||
|locations=[[Cathedral of Blight]] | |locations=[[Cathedral of Blight]] | ||
|items= | |items= | ||
| Line 280: | Line 280: | ||
|remake-changes= | |remake-changes= | ||
}} | }} | ||
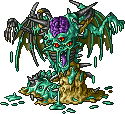
*''As infered from his rotting appearance, Orgodemir is now vulnerable to [[Undead Undoer]] and [[Zombiesbane]].'' | *''As infered from his rotting appearance, Orgodemir is now vulnerable to [[Undead Undoer]] and [[Zombiesbane (Weapon)|Zombiesbane]].'' | ||
{{Clear}} | {{Clear}} | ||
{{DQ7Enemy | {{DQ7Enemy | ||
|name=Fourth phase | |name=Fourth phase | ||
|kanji= | |kanji= オルゴ・デミーラ | ||
|romanji= | |romanji=Orugo・Demira | ||
|sprite=[[Image: | |sprite=[[Image:Orgodemir6 DQVII PS.gif]] | ||
|hp=4500 | |hp=4500 | ||
|mp=Infinite | |mp=Infinite | ||
| Line 296: | Line 296: | ||
|agility=85 | |agility=85 | ||
|tameRate=0 | |tameRate=0 | ||
|bestiaryNumber=316 | |bestiaryNumber=#316 | ||
|spells=[[Magic Barrier]]<br>[[Magic Burst]]<br>[[Snooze]] | |spells=[[Magic Barrier]]<br>[[Magic Burst]]<br>[[Snooze]] | ||
|skills=Acts Twice<br>Charges Party (50% damage to all)<br>Evil Prayer<br> | |skills=Acts Twice per turn<br>Charges {{Party 7}}. (50% damage to all.)<br>[[Disruptive Wave]]<br>[[Evil Prayer]]<br>[[C-c-cold Breath]]<br>[[Meditation]]<br>[[Paralysis Attack]]<br>[[Scorch]]<br>Summons minions ([[Orglob]] and [[Orgon]]) | ||
|locations= | |locations=[[Cathedral of Blight]] | ||
|items= | |items= | ||
|evasion={{fraction|1|64}} | |evasion={{fraction|1|64}} | ||
| Line 327: | Line 327: | ||
|remake-changes= | |remake-changes= | ||
}} | }} | ||
*''Orgodemir is still vulnerable to [[Undead Undoer]] and [[Zombiesbane]].'' | *''Orgodemir is still vulnerable to [[Undead Undoer]] and [[Zombiesbane (Weapon)|Zombiesbane]].'' | ||
== | ==={{DQ9}}=== | ||
{{DQ9Enemy | {{DQ9Enemy | ||
|image= | |image=[[Image:Orgodemir DQIX DS.png]] | ||
|name=Orgodemir | |name=Orgodemir | ||
|game= | |game={{Dragon Quest IX}} | ||
|console=DS | |console={{DS}} | ||
|romanji= | |kanji=オルゴ・デミーラ | ||
|hp= | |romanji=Orugo・Demīra | ||
|hp=8,000<br>16,070 (99) | |||
|mp=255 | |mp=255 | ||
|attack=690<br> | |attack=690<br>1,366 (99) | ||
|defense=540<br>810 (99) | |defense=540<br>810 (99) | ||
|agility=260<br>380 (99) | |agility=260<br>380 (99) | ||
|experience= | |experience=68,600 | ||
|gold= | |gold=2,490 | ||
|droppedItem= | |droppedItem= | ||
|skills= | |skills= | ||
|spells= | |spells= | ||
|family= | |family={{Q family}} | ||
|bestiaryNumber=304 | |bestiaryNumber=#304 | ||
|description= | |description=Screams enemies into submission with a blood-curdling cry, then hits hard with [[Hellfire]]. Always attacks twice.<br><br>Doesn't like people to know he's really a dumpy dragon, so disguises himself as a dashing young dandy. | ||
Doesn't like people to know he's really a dumpy dragon, so disguises himself as a dashing young dandy. | |||
|locations= | |locations= | ||
| fire = 150 | |fire=150 | ||
| ice = 100 | |ice=100 | ||
| wind = 100 | |wind=100 | ||
| earth = 50 | |earth=50 | ||
| light = 100 | |light=100 | ||
| dark = 100 | |dark=100 | ||
| blast = 100 | |blast=100 | ||
| drnmp = 100 | |drnmp=100 | ||
| mrdown = 50 | |mrdown=50 | ||
|dazzle = 25 | |dazzle=25 | ||
|sleep = 0 | |sleep=0 | ||
|fizzle = 0 | |fizzle=0 | ||
|charm = 10 | |charm=10 | ||
|blunt = 5 | |blunt=5 | ||
|sap = 25 | |sap=25 | ||
|decelerate = 75 | |decelerate=75 | ||
}} | }} | ||
Orgodemir appears as a | Orgodemir appears as a {{Legacy Boss}}, obtained after completing [[List of quests in Dragon Quest IX#Quest #171 - #180|Quest #176]] (or received at special events). He will become [[enraged]] once his health drops to orange range. | ||
{| border="0" cellpadding="5" cellspacing="0" width="100%" | {| border="0" cellpadding="5" cellspacing="0" width="100%" | ||
| Line 383: | Line 381: | ||
!style="background:#4682B4; color: white;"| | !style="background:#4682B4; color: white;"| | ||
|- | |- | ||
|1-3||[[Estard shoes]]||15%||[[Blue Orb]]|| | |1-3||[[Estard shoes]]||15%||[[Blue Orb]]||10% | ||
|- | |- | ||
|4-8||Estard shoes||20%||Blue Orb|| | |4-8||Estard shoes||20%||Blue Orb||10% | ||
|- | |- | ||
|9-15||Estard shoes||25%||Blue Orb|| | |9-15||Estard shoes||25%||Blue Orb||11% | ||
|- | |- | ||
|16-25||[[Estard trousers]]||15%||Blue Orb|| | |16-25||[[Estard trousers]]||15%||Blue Orb||11% | ||
|- | |- | ||
|26-40||Estard trousers||20%||Blue Orb|| | |26-40||Estard trousers||20%||Blue Orb||12% | ||
|- | |- | ||
|41-56||Estard trousers||25%||Blue Orb|| | |41-56||Estard trousers||25%||Blue Orb||12% | ||
|- | |- | ||
|57-68||[[Estard hood]]||20%||Blue Orb|| | |57-68||[[Estard hood]]||20%||Blue Orb||13% | ||
|- | |- | ||
|69-80||Estard hood||25%||Blue Orb|| | |69-80||Estard hood||25%||Blue Orb||13% | ||
|- | |- | ||
|81-90||[[Estard clothes]]||20%||Blue Orb|| | |81-90||[[Estard clothes]]||20%||Blue Orb||14% | ||
|- | |- | ||
|91-99||Estard clothes||25%||Blue Orb|| | |91-99||Estard clothes||25%||Blue Orb||15% | ||
|} | |} | ||
*''In addition, he will always drop a [[ | *''In addition, he will always drop a [[Mini medal]].'' | ||
| valign="top" width="50%" | | | valign="top" width="50%" | | ||
| Line 411: | Line 409: | ||
!style="background:#4682B4; color: white;"|New abilities | !style="background:#4682B4; color: white;"|New abilities | ||
|- | |- | ||
|''Initial''||[[Hellfire]], [[ | |''Initial''||[[Hellfire]], [[Freezing Blizzard]], [[Eagle Grip|Swats character like a fly]], [[Confusion Attack]], [[War Cry]], attacks twice per round. | ||
|- | |- | ||
|5||[[Disruptive Wave]] | |5||[[Disruptive Wave]] | ||
| Line 417: | Line 415: | ||
|10||[[Venom Mist]] | |10||[[Venom Mist]] | ||
|- | |- | ||
|16||[[Raging Roar]], stops using War Cry | |16||[[Raging Roar]], stops using [[War Cry]]. | ||
|- | |- | ||
|24||[[Burning Breath]] | |24||[[Burning Breath]] | ||
| Line 423: | Line 421: | ||
|33||[[C-c-cold Breath]] | |33||[[C-c-cold Breath]] | ||
|- | |- | ||
|41||Begins attacking 3 times per turn, stops using | |41||Begins attacking 3 times per turn, stops using [[Freezing Blizzard]]. | ||
|- | |- | ||
|57||[[Eerie Light]] | |57||[[Eerie Light]] | ||
| Line 429: | Line 427: | ||
|} | |} | ||
=== | ==={{DQM2}}=== | ||
=== | {{DQM2Enemy | ||
=== | |name=Orgodemir | ||
Orgodemir | |kanji= オルゴ・デミーラ | ||
|romanji=Orugo・Demira | |||
|sprite=[[File:Orgodemir.png]] | |||
|level=65 | |||
|hp=7/10 | |||
|mp=8/10 | |||
|attack=8/10 | |||
|defense=7/10 | |||
|wisdom=10/10 | |||
|agility=6/10 | |||
|family= {{Q family}} | |||
|in-game-description= | |||
|abilities=[[Bang]], [[Hatchet Man|EvilSlash]], [[Focus Pocus|Focus]] | |||
|habitat= | |||
|breeding=[[Psycho Psaro|PsychoPiz]] x [[Fright knight|Niterich]] | |||
|frizz-resist=Strong | |||
|sizz-resist=Strong | |||
|fire-breath-resist=Strong | |||
|bang-resist=Strong | |||
|crack-resist=Strong | |||
|ice-breath-resist=Strong | |||
|woosh-resist=Strong | |||
|rock-resist=Strong | |||
|zap-resist=Strong | |||
|water-resist=Strong | |||
|gigaslash-resist=Strong | |||
|magic-burst-resist=Weak | |||
|drain-resist=Strong | |||
|whack-resist=Immune | |||
|kamikazee-resist=Immune | |||
|poison-resist=Strong | |||
|paralysis-resist=Immune | |||
|fuddle-resist=Immune | |||
|snooze-resist=Immune | |||
|dazzle-resist=Immune | |||
|sap-resist=Strong | |||
|decelerate-resist=Strong | |||
|fizzle-resist=Immune | |||
|stun-resist=Weak | |||
|ban-dance-resist=Strong | |||
|gobstopper-resist=Strong | |||
|curse-resist=Strong | |||
}} | |||
{{DQM2Enemy | |||
|name=Orgodemir (Transformed) | |||
|kanji= オルゴ・デミーラ | |||
|romanji=Orugo・Demira | |||
|sprite=[[File:Orgodemir2.png]] | |||
|level=70 | |||
|hp=8/10 | |||
|mp=10/10 | |||
|attack=9/10 | |||
|defense=7/10 | |||
|wisdom=10/10 | |||
|agility=7/10 | |||
|family= {{Q family}} | |||
|in-game-description= | |||
|abilities=[[Disruptive Wave|DeMagic]], [[Song of Salvation|LifeSong]], [[Magic Burst|MegaMagic]] | |||
|habitat= | |||
|breeding=Orgodemir x [[Drakulard|GigaDraco]], [[Neo Dragonlord|LordDraco]] | |||
|frizz-resist=Immune | |||
|sizz-resist=Immune | |||
|fire-breath-resist=Strong | |||
|bang-resist=Immune | |||
|crack-resist=Immune | |||
|ice-breath-resist=Immune | |||
|woosh-resist=Immune | |||
|rock-resist=Weak | |||
|zap-resist=Strong | |||
|water-resist=Strong | |||
|gigaslash-resist=Weak | |||
|magic-burst-resist=Strong | |||
|drain-resist=Strong | |||
|whack-resist=Immune | |||
|kamikazee-resist=Immune | |||
|poison-resist=Immune | |||
|paralysis-resist=Immune | |||
|fuddle-resist=Immune | |||
|snooze-resist=Immune | |||
|dazzle-resist=Immune | |||
|sap-resist=Strong | |||
|decelerate-resist=Immune | |||
|fizzle-resist=Immune | |||
|stun-resist=Strong | |||
|ban-dance-resist=Weak | |||
|gobstopper-resist=Weak | |||
|curse-resist=Immune | |||
}} | |||
==={{DQMJ}}=== | |||
{{DQMJmonster | |||
|name = Orgodemir | |||
|image = | |||
|family = {{Undead}} | |||
|rank = X | |||
|description = ''In ages past, he sought to become a god.'' | |||
|weapons = {{Sword}}s, {{Spear}}s, {{Claw}}s, {{Staves}} | |||
|traits = [[List of Traits in Dragon Quest Monsters: Joker|Double Trouble]] | |||
|resistances = [[Whack]]proof, Vulnerable to Confuse, [[Paralysis]]proof | |||
|skill = [[Muspell]] | |||
|location = - | |||
|breeding chart = [[Dragovian lord]] or [[Alabast dragon]] x [[Mortamor]] | |||
}} | |||
{{clear}} | |||
=== | ==={{DQMJ2}}=== | ||
{{DQMJ2monster | |||
|name = Orgodemir | |||
|image = | |||
|family = {{Q family}} | |||
|rank = X | |||
|size = M | |||
|weapons = {{Sword}}s, {{Spear}}s, {{Claw}}s, {{Staves}} | |||
|traits = [[List of Traits in Dragon Quest Monsters: Joker|Hit Squad]], [[List of Traits in Dragon Quest Monsters: Joker|Big Hitter]], [[List of Traits in Dragon Quest Monsters: Joker|Crafty Fire Breather]], [[List of Traits in Dragon Quest Monsters: Joker|Crafty Ice Breather]] | |||
|resistances = Vulnerable to [[Ban Dance]], Resists [[Confusion]], Immune to [[Whack]], {{Poison}}, Inaction, [[Paralysis]], and {{Sleep}}, Reflects [[Fire Breath]] and [[Cool Breath|Cold Breath]] | |||
|skill = [[Muspell]] | |||
|location = - | |||
|breeding chart = [[Mortamor]] x [[Alabast dragon]] | |||
}} | |||
{{clear}} | |||
==={{DQM3D}}=== | |||
{{stub}} | {{stub}} | ||
==={{DQM23D}}=== | |||
{{Stub}} | |||
==={{DQMJ3}}=== | |||
{{Stub}} | |||
==={{DQM3}}=== | |||
{{DQM3Enemy | |||
|name=Orgodemir | |||
|kanji= オルゴ・デミーラ | |||
|romanji=Orugo・Demira | |||
|icon=[[File:Orgodemir DQM3 portrait.png|100px]] | |||
|family=[[File:DQM3 ??? family icon.png|link=??? family]] | |||
|hp=<big><big>1,240</big></big> | |||
|mp=<big><big>470</big></big> | |||
|attack=<big><big>560</big></big> | |||
|defense=<big><big>540</big></big> | |||
|wisdom=<big><big>830</big></big> | |||
|agility=<big><big>490</big></big> | |||
|bestiary=#501 | |||
|rank=<big><big>'''S'''</big></big> | |||
|in-game-description=The triumphal transformation of the demon king who once fought the Almighty and won, sealing away the continents of the world. Possessed of a particularly malevolent mind | |||
|talents=[[Orgodemir (Talent)|Orgodemir]] (lv. 1) | |||
|traits=[[Rando-Disrupt]] (lv. 1)<br>[[Wizardly Waft]] (lv. 20)<br>[[Ultra Crafty Banger]] (lv. 40) | |||
|ltraits=[[Tactical Commander]] (lv. 1)<br>[[Ultra Crafty Frizzer]] (lv. 1)<br>[[Ultra Crafty Zapper]] (lv. 60) | |||
|habitat=This monster has no natural habitat | |||
|items=N/A | |||
|synthesis=[[File:Macho picchu DQM3 portrait.png|64px|link=Macho picchu]] X [[File:Pandora's box DQM3 portrait.png|64px|link=Pandora's box]] X [[File:The time being DQM3 portrait.png|64px|link=The Time Being]] X [[File:Night knight DQM3 portrait.png|64px|link=Night knight]] | |||
|fusions=[[File:Orgodemir DQM3 portrait.png|64px]] X [[File:Emperor slime DQM3 portrait.jpeg|64px|link=Emperor slime]] = [[File:The almighty DQM3 portrait.png|64px|link=Numen]] | |||
|fire-resist=25% | |||
|water-resist=0% | |||
|wind-resist=0% | |||
|earth-resist=0% | |||
|explosion-resist=50% | |||
|ice-resist=25% | |||
|electricity-resist=0% | |||
|light-resist=0% | |||
|dark-resist=50% | |||
|debilitation-resist=0% | |||
|bedazzlement-resist=0% | |||
|antimagic-resist=0% | |||
|mp-absorption-resist=0% | |||
|confusion-resist=25% | |||
|sleep-resist=25% | |||
|paralysis-resist=25% | |||
|stun-resist=0% | |||
|poison-resist=25% | |||
|instant-death-resist=50% | |||
}} | |||
==={{DQMP}}=== | |||
{{Stub}} | |||
==={{DQMSL}}=== | |||
{{Stub}} | |||
==={{DQStars}}=== | |||
{{Stub}} | |||
==={{DQRivals}}=== | |||
Orgodemir was introduced in the fourth card pack as a legendary rare card. Each time he was defeated in battle, he would transform into his next form and return to the player's hand, each form having its own special effects. When the game's name was changed to {{Rivals Ace}}, Orgodemir's final form appeared again in the last expansion pack on a card entitled "Heavenly King Orgodemir". | |||
==={{DQWalk}}=== | |||
Orgodemir first appeared in the game as a boss in Chapter 5, Episode 4 of the {{Dragon Quest VII}} event held in the game starting on April 9th, 2021. After he takes enough damage, he will change into his second form. His second form also appears as a boss in Chapter 6, Episode 4. On April 12th, 2021, Orgodemir's second form began appearing as a special mega {{MFamilies}} that can be challenged by multiple players. | |||
==={{DQTact}}=== | |||
Both of Orgodemir's {{Humanoid}} and Demon King forms appear as S-rank members of the [[??? family]] as part of the {{Dragon Quest VII}} event. Demon King Orgodemir appears on his own banner alongside [[Terrorhawk]]. His humanoid form appears on its own separate banner alongside [[Missing lynx]]. Both could eventually be scouted from any limited banner, as well. His Demon King form is faced as a boss in Chapter 5, Episode 3 of the event quests, entitled The Demon King Orgodemir 1, while his humanoid form is faced in Chapter 5, Episode 4: The Demon King Orgodemir 2. His demonic form could also faced as a Mega Boss Battle, as well, but only during the event's original run. | |||
{{DQTactEnemy | |||
|name=Demon King Orgodemir | |||
|kanji=魔王オルゴ・デミーラ | |||
|romanji=Maō Orugo・Demīra | |||
|sprite=[[Image:DQT Demon King Orgodemir.png|325px]] | |||
|family=[[Image:Tact Icon SpecialFamily.png|48px]]<br>{{Q family}} | |||
|rank=[[Image:DQTact Rank Icon S.png|48px]] | |||
|role=[[Image:DQTact AttackType.png|48px]]<br>{{Attack}} | |||
|lvl=130 | |||
|hp=1,216 | |||
|mp=401 | |||
|move=2-3 | |||
|attack=555 | |||
|defense=460 | |||
|agility=387 | |||
|wisdom=242 | |||
|weight=65 | |||
|bskill1=[[Blazing Claw]] | |||
|bskill2=[[Beautiful Blast]]{{tt|*|Level 34}} | |||
|bskill3=[[Ominous Impact]]{{tt|*|Level 58}} | |||
|askill1=Move +1/Stats Up | |||
|askill2=[[Zam]] Res +25/Stats Up | |||
|askill3=Physical Potency +5%/Stats Up | |||
|askill4=[[Zap]] Res +25/Stats Up | |||
|askill5=Physical Potency +5%/Stats Up | |||
|lperk1=Lowers enemy {{ATK}} by 20% in a 5x5 square around him. | |||
|bperk1='''Heavenly King''': Greatly raises {{DEF}} and Spell Res for 3 turns at the start of battle. | |||
|bperk2={{ATK}} +15<br>Max {{HP}} +30 | |||
|bperk3=Physical Potency +2% | |||
|aperk1='''Move +1''': Raises Move by 1. | |||
|frizz-resist=Normal | |||
|sizz-resist=Very Weak | |||
|crack-resist=Normal | |||
|woosh-resist=Normal | |||
|bang-resist=Very Weak | |||
|zam-resist=Half Res | |||
|zap-resist=Half Res | |||
|snooze-resist=Normal | |||
|poison-resist=Normal | |||
|physical-seal-resist=Half Res | |||
|spell-seal-resist=Normal | |||
|martial-seal-resist=Normal | |||
|breath-seal-resist=Normal | |||
|hobble-resist=Super Weak | |||
|stun-resist=Half Res | |||
|blind-resist=Super Weak | |||
|curse-resist=Normal | |||
|paralysis-resist=Immune | |||
|confusion-resist=Normal | |||
|charm-resist=Normal | |||
}} | |||
{{DQTactEnemy | |||
|name=Orgodemir | |||
|kanji=オルゴ・デミーラ | |||
|romanji=Orugo・Demīra | |||
|sprite=[[Image:DQT Orgodemir.png|300px]] | |||
|family=[[Image:Tact Icon SpecialFamily.png|48px]]<br>{{Q family}} | |||
|rank=[[Image:DQTact Rank Icon S.png|48px]] | |||
|role=[[Image:DQTact MagicType.png|48px]]<br>Magic | |||
|lvl=130 | |||
|hp=938 | |||
|mp=536 | |||
|move=3 | |||
|attack=285 | |||
|defense=290 | |||
|agility=420 | |||
|wisdom=468 | |||
|weight=65 | |||
|bskill1=[[Devil's Heart]] | |||
|bskill2=[[Nadirian Flames]]{{tt|*|Level 40}} | |||
|bskill3=[[Psyspark]]{{tt|*|Level 52}}<br>'''Talent Blossoming''': [[Devil's Suction]] | |||
|askill1=[[Demonic Meditation]]/Stats Up | |||
|askill2=[[Woosh]] Res +25/Stats Up | |||
|askill3=[[Psyspark]] Potency +5%/Stats Up<br>[[Devil's Suction]] Potency +5% | |||
|askill4=[[Zam]] Res +25/Stats Up | |||
|askill5=[[Psyspark]] Potency +5%/Stats Up<br>[[Devil's Suction]] Potency +5% | |||
|lperk1=Lowers spell {{MP}} cost of allies, including himself, by 15% in a 5x5 square around him. | |||
|bperk1='''[[Beauty Eternal]]''': Grants +20% damage dealt if HP is at 100% at action start. | |||
|bperk2={{WIS}} +15<br>Max {{MP}} +15 | |||
|bperk3=[[Psyspark]] Potency +2% | |||
|aperk1='''[[Demonic Meditation]]''': Heals the user to full {{HP}} when {{HP}} drops under 20%, 1 time per battle. | |||
|frizz-resist=Normal | |||
|sizz-resist=Normal | |||
|crack-resist=Very Weak | |||
|woosh-resist=Half Res | |||
|bang-resist=Very Weak | |||
|zap-resist=Normal | |||
|zam-resist=Half Res | |||
|snooze-resist=Normal | |||
|poison-resist=Normal | |||
|physical-seal-resist=Normal | |||
|spell-seal-resist=Super Weak | |||
|martial-seal-resist=Half Res | |||
|breath-seal-resist=Super Weak | |||
|hobble-resist=Normal | |||
|stun-resist=Normal | |||
|blind-resist=Normal | |||
|curse-resist=Normal | |||
|paralysis-resist=Normal | |||
|confusion-resist=Immune | |||
|charm-resist=Half Res | |||
}} | |||
==={{DQKK}}=== | |||
{{Stub}} | |||
==Similar species== | |||
*[[Orgodelotl]] | |||
==Gallery== | ==Gallery== | ||
<center><gallery> | <center><gallery> | ||
The Demon King.png|Vintage art circa 2000. | |||
Orgodemir_disguised_as_The_Almighty.jpg|Orgodemir disguised as The Almight. Note the vicious red colour of his eyes | |||
Orgodemir.gif|{{1·2}} sprite. | |||
Orgodemir21.gif| | |||
Orgodemir3 DQMJ DS.png|{{Joker}} model. | |||
DQMBRV Orgodemir.png|Orgodemir in ''Battle Road Victory''. | |||
DQotS Demon King Orgodemir.png|Orgodemir's second form in {{Stars}}. | |||
DQR Orgodemir.png|{{Rivals}} card. | |||
DQR Orgodemir 2.png|Second form in {{Rivals}}. | |||
DQR Tenmaou Orgodemir.jpg|Heavenly Demon King Orgodemir in {{Rivals}}. | |||
DQW Demon King Orgodemir.jpg|Chapter 6 of {{Walk}}'s {{VII}} event. | |||
DQW Orgodemir.jpg|Orgodemir in {{Walk}}. | |||
DQT Orgodemir Rewards.jpg|Orgodemir in {{Tact}}. | |||
Orgodemirsofubi.jpg|As seen in the {{Sofubi Monster}} merchandise series. | |||
</gallery></center> | </gallery></center> | ||
| Line 450: | Line 752: | ||
{{DQVII}} | {{DQVII}} | ||
{{DQIXBossNav}} | {{DQIXBossNav}} | ||
[[Category:Final bosses]] | [[Category:Final bosses]] | ||
[[Category:Dragon Quest VII characters]] | [[Category:Dragon Quest VII characters]] | ||
| Line 459: | Line 762: | ||
[[Category:Dragon Quest Monsters: Joker enemies]] | [[Category:Dragon Quest Monsters: Joker enemies]] | ||
[[Category:Dragon Quest Monsters: Joker 2 enemies]] | [[Category:Dragon Quest Monsters: Joker 2 enemies]] | ||
[[Category:Dragon Quest Monsters: | [[Category:Dragon Quest Monsters: Terry's Wonderland 3D enemies]] | ||
[[Category:Dragon Quest Monsters 2: Iru and Luca's Marvelous Mysterious Key enemies]] | |||
[[Category:Dragon Quest Monsters: Joker 3 enemies]] | [[Category:Dragon Quest Monsters: Joker 3 enemies]] | ||
[[Category:Dragon Quest Monsters: The Dark Prince enemies]] | |||
[[Category:Dragon Quest: Monster Parade enemies]] | |||
[[Category:Dragon Quest Monsters: Super Light enemies]] | [[Category:Dragon Quest Monsters: Super Light enemies]] | ||
[[Category:Dragon Quest Monster Battle Road Victory enemies]] | |||
[[Category:Dragon Quest of the Stars enemies]] | |||
[[Category:Dragon Quest Rivals characters]] | |||
[[Category:Dragon Quest Rivals enemies]] | |||
[[Category:Dragon Quest Walk bosses]] | |||
[[Category:Dragon Quest Walk enemies]] | |||
[[Category:Dragon Quest Tact characters]] | |||
[[Category:Dragon Quest Tact monsters]] | |||
[[fr:Orgodémir]] | |||
Latest revision as of 21:58, 14 August 2024
| Orgodemir | |
| Dragon Quest VII: Fragments of the Forgotten Past | |
| Japanese name | オルゴ・デミーラ |
| Romaji | Orugo・Demira |
| Title | Demon King |
| Race | Demon |
| Age | Ageless |
Orgodemir is the final boss and main antagonist of Dragon Quest VII.
Known as the Demon King, he is the force behind all the evil that the Hero and his party encounter during the game. A villain with multiple forms, Orgodemir sought to replace the Almighty, and had nearly the entire world sealed away to keep his foe from being resurrected.
Orgodemir has appeared in various spinoffs in the series, including Dragon Quest Monsters: Joker, Joker 2 and Dragon Quest IX as a Legacy Boss.
Characteristics[edit]
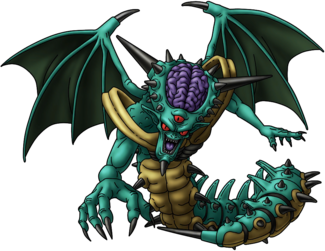
Orgodemir's true form is a monstrous demonic centipede with an upper body that combines both humanoid and draconic features. His head is enlarged, has a pair of large spikes on each side of it, and exposes his brain. His brain also has smaller spikes surrounding it. Orgodemir has three eyes with vertical pupils, pointed ears, a black spike on his chin, a mouth lined with sharp fangs, and a purple tongue. He has a pair of dragon wings on his back, a yellow bone-like structure which surrounds his torso, and a section on his chest similar in appearance to a rib cage. His lower back is covered in dorsal fins and small black spines, ending in a long black spike. The underside of his lower body is yellow. Orgodemir moves about by crawling on his various legs in a fashion similar to real-world centipedes. In the past, most of Orgodemir's body is beige, he has yellow eyes, his brain is red, the webbing on his wings is orange, and his chest, legs, and various spikes are all purple. In the present, most of Orgodemir's body is dark green, his eyes are red, his brain is purple, and the spikes on his body are black. In both of his forms, Orgodemir has long, sharp nails on his hands, which are purple in the past and black in the present.
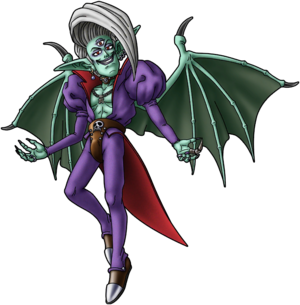
Orgodemir can also disguise himself in a Humanoid form, retaining the pair of wings on his back along with his three eyes and long, pointed ears (however, the shape of wings differs rather noticeably, from ones of his real form). His skin is now pale green and his exaggerated facial features are meant to be physically attractive. He wears his silver hair in a long, slick forelock falling over his face. His eyes are white with red pupils and he wears dark blue eyeshadow on all three of his eyelids, as well as dark purple lipstick. Orgodemir wears a red-lined suit with a coattail and puffed sleeves that exposes most of his chest, a leather codpiece with a skull belt around his waist, and leather shoes with steel tips. He also wears an extensive amount of jewelry, including a single black hoop earring on his right ear and numerous earrings on his left ear, a leather choker and chain necklace around his neck, and various bones on his fingers. In the past, the suit he wears is red and the webbing on his wings is orange, while in the present he wears a purple suit and the webbing on his wings is green.
Appearances[edit]
Dragon Quest VII: Fragments of the Forgotten Past[edit]
Long before the game begins, Orgodemir set out to seal all lands and cast them in darkness. He was opposed by the Almighty and the Four Elemental Spirits: Earth, Fire, Water, and Wind. The Almighty was defeated and the four spirits were scattered. However, the Almighty had put a system into place that would allow the world to be reborn again within the Shrine of Mysteries.
The player fights Orgodemir twice at the end of each disc. In the first battle, he has two forms, and in the second battle, he has four forms.
First Encounter[edit]
| Sprite | HP | MP | Attack | Defense |
 |
3000 | Infinite | 182 | 127 |
| Agility | Experience | Gold | Tame Rate | |
| 107 | 0 | 0 | 0 | |
| Bestiary No. | #314 |
| Spell(s) | Kaboom Kafrizzle |
| Skill(s) | Acts three times. Disruptive Wave Lullab-Eye Lightning Magma Blast Wind Sickles Energy Balls |
| Location(s) | Malign Shrine |
| Item(s) Dropped |
| Evasion | Frizz Resistance * | Sizz Resistance * | Fire Breath Resistance * |
| 1⁄64 | 30% | 30% | 30% |
| Bang Resistance * | Crack Resistance * | Ice Breath Resistance * | Woosh Resistance * |
| 30% | 30% | 0% | 0% |
| Strike/Rock Resistance * | Zap Resistance * | Drain Magic Resistance * | Whack Resistance * |
| 0% | 0% | 100% | 100% |
| Poof Resistance * | Poison Resistance * | Burning Breath Resistance | Fuddle Resistance * |
| 100% | 100% | 100% | 100% |
| Snooze Resistance * | Dazzle Resistance * | Fizzle Resistance * | Ban Dance Resistance |
| 100% | 100% | 100% | 100% |
| Stun Resistance * | Sap Resistance * | Army Resistance * | |
| 100% | 100% | 30% | |
| 3DS version changes |
| None |
| Sprite | HP | MP | Attack | Defense |
 |
4200 | 0 | 230 | 90 |
| Agility | Experience | Gold | Tame Rate | |
| 82 | 0 | 0 | 0 | |
| Bestiary No. | #314 |
| Spell(s) | |
| Skill(s) | Acts twice per turn. Disruptive Wave Freezing Blizzard Inferno Spike Charge Thin Air |
| Location(s) | Malign Shrine |
| Item(s) Dropped |
| Evasion | Frizz Resistance * | Sizz Resistance * | Fire Breath Resistance * |
| 1⁄32 | 0% | 0% | 0% |
| Bang Resistance * | Crack Resistance * | Ice Breath Resistance * | Woosh Resistance * |
| 0% | 0% | 0% | 0% |
| Strike/Rock Resistance * | Zap Resistance * | Drain Magic Resistance * | Whack Resistance * |
| 0% | 0% | 100% | 100% |
| Poof Resistance * | Poison Resistance * | Burning Breath Resistance | Fuddle Resistance * |
| 100% | 100% | 100% | 100% |
| Snooze Resistance * | Dazzle Resistance * | Fizzle Resistance * | Ban Dance Resistance |
| 100% | 100% | 100% | 100% |
| Stun Resistance * | Sap Resistance * | Army Resistance * | |
| 100% | 100% | 0% | |
| 3DS version changes |
| None |
Second Encounter[edit]
| Sprite | HP | MP | Attack | Defense |
 |
3500 | Infinite | 330 | 200 |
| Agility | Experience | Gold | Tame Rate | |
| 80 | 0 | 0 | 0 | |
| Bestiary No. | #316 |
| Spell(s) | |
| Skill(s) | Disruptive Wave Freezing Blizzard Scorch Tail whip |
| Location(s) | Cathedral of Blight |
| Item(s) Dropped |
| Evasion | Frizz Resistance * | Sizz Resistance * | Fire Breath Resistance * |
| 1⁄64 | 0% | 0% | 0% |
| Bang Resistance * | Crack Resistance * | Ice Breath Resistance * | Woosh Resistance * |
| 0% | 0% | 0% | 0% |
| Strike/Rock Resistance * | Zap Resistance * | Drain Magic Resistance * | Whack Resistance * |
| 70% | 0% | 100% | 100% |
| Poof Resistance * | Poison Resistance * | Burning Breath Resistance | Fuddle Resistance * |
| 100% | 100% | 100% | 100% |
| Snooze Resistance * | Dazzle Resistance * | Fizzle Resistance * | Ban Dance Resistance |
| 100% | 100% | 100% | 100% |
| Stun Resistance * | Sap Resistance * | Army Resistance * | |
| 100% | 100% | 0% | |
| 3DS version changes |
| None |
- Orgodemir is considered a dragon in this encounter, leaving him vulnerable to the associated skills and weapons.
| Sprite | HP | MP | Attack | Defense |
 |
3300 | Infinite | 330 | 200 |
| Agility | Experience | Gold | Tame Rate | |
| 135 | 0 | 0 | 0 | |
| Bestiary No. | #316 |
| Spell(s) | Kaboom Kafrizzle |
| Skill(s) | Acts Twice Disruptive Wave Energy Balls (Attack/2+67) Scorch (168~188) Knuckle Sandwich Lullab-Eye Wind Sickles |
| Location(s) | Cathedral of Blight |
| Item(s) Dropped |
| Evasion | Frizz Resistance * | Sizz Resistance * | Fire Breath Resistance * |
| 1⁄32 | 0% | 0% | 0% |
| Bang Resistance * | Crack Resistance * | Ice Breath Resistance * | Woosh Resistance * |
| 0% | 0% | 0% | 0% |
| Strike/Rock Resistance * | Zap Resistance * | Drain Magic Resistance * | Whack Resistance * |
| 70% | 0% | 100% | 100% |
| Poof Resistance * | Poison Resistance * | Burning Breath Resistance | Fuddle Resistance * |
| 100% | 100% | 100% | 100% |
| Snooze Resistance * | Dazzle Resistance * | Fizzle Resistance * | Ban Dance Resistance |
| 100% | 100% | 100% | 100% |
| Stun Resistance * | Sap Resistance * | Army Resistance * | |
| 100% | 100% | 0% | |
| 3DS version changes |
| None |
| Sprite | HP | MP | Attack | Defense |
 |
3000 | Infinite | 350 | 170 |
| Agility | Experience | Gold | Tame Rate | |
| 116 | 0 | 0 | 0 | |
| Bestiary No. | #316 |
| Spell(s) | Kaboom Kafrizzle |
| Skill(s) | Acts twice per turn Disruptive Wave Ferocious Roar Magma Blast Venom Mist Weird Whacker |
| Location(s) | Cathedral of Blight |
| Item(s) Dropped |
| Evasion | Frizz Resistance * | Sizz Resistance * | Fire Breath Resistance * |
| 1⁄64 | 0% | 0% | 0% |
| Bang Resistance * | Crack Resistance * | Ice Breath Resistance * | Woosh Resistance * |
| 0% | 0% | 0% | 0% |
| Strike/Rock Resistance * | Zap Resistance * | Drain Magic Resistance * | Whack Resistance * |
| 30% | 0% | 100% | 100% |
| Poof Resistance * | Poison Resistance * | Burning Breath Resistance | Fuddle Resistance * |
| 100% | 100% | 100% | 100% |
| Snooze Resistance * | Dazzle Resistance * | Fizzle Resistance * | Ban Dance Resistance |
| 100% | 100% | 100% | 100% |
| Stun Resistance * | Sap Resistance * | Army Resistance * | |
| 100% | 100% | 0% | |
| 3DS version changes |
| None |
- As infered from his rotting appearance, Orgodemir is now vulnerable to Undead Undoer and Zombiesbane.
| Sprite | HP | MP | Attack | Defense |
 |
4500 | Infinite | 300 | 140 |
| Agility | Experience | Gold | Tame Rate | |
| 85 | 0 | 0 | 0 | |
| Bestiary No. | #316 |
| Spell(s) | Magic Barrier Magic Burst Snooze |
| Skill(s) | Acts Twice per turn Charges party. (50% damage to all.) Disruptive Wave Evil Prayer C-c-cold Breath Meditation Paralysis Attack Scorch Summons minions (Orglob and Orgon) |
| Location(s) | Cathedral of Blight |
| Item(s) Dropped |
| Evasion | Frizz Resistance * | Sizz Resistance * | Fire Breath Resistance * |
| 1⁄64 | 0% | 0% | 0% |
| Bang Resistance * | Crack Resistance * | Ice Breath Resistance * | Woosh Resistance * |
| 0% | 0% | 0% | 0% |
| Strike/Rock Resistance * | Zap Resistance * | Drain Magic Resistance * | Whack Resistance * |
| 0% | 0% | 100% | 100% |
| Poof Resistance * | Poison Resistance * | Burning Breath Resistance | Fuddle Resistance * |
| 100% | 100% | 100% | 100% |
| Snooze Resistance * | Dazzle Resistance * | Fizzle Resistance * | Ban Dance Resistance |
| 100% | 100% | 100% | 100% |
| Stun Resistance * | Sap Resistance * | Army Resistance * | |
| 100% | 100% | 0% | |
| 3DS version changes |
| None |
- Orgodemir is still vulnerable to Undead Undoer and Zombiesbane.
Dragon Quest IX: Sentinels of the Starry Skies[edit]
| ##304 - Orgodemir | |||||||||||||||||||||||||||||||||||||||||||
|---|---|---|---|---|---|---|---|---|---|---|---|---|---|---|---|---|---|---|---|---|---|---|---|---|---|---|---|---|---|---|---|---|---|---|---|---|---|---|---|---|---|---|---|
| |||||||||||||||||||||||||||||||||||||||||||
| |||||||||||||||||||||||||||||||||||||||||||
| Family | ??? | ||||||||||||||||||||||||||||||||||||||||||
| Bestiary # | #304 | ||||||||||||||||||||||||||||||||||||||||||
| Game | Dragon Quest IX | ||||||||||||||||||||||||||||||||||||||||||
| Console | DS | ||||||||||||||||||||||||||||||||||||||||||
| Japanese Name | オルゴ・デミーラ | ||||||||||||||||||||||||||||||||||||||||||
| Romanized Jap. | Orugo・Demīra | ||||||||||||||||||||||||||||||||||||||||||
| Description | Screams enemies into submission with a blood-curdling cry, then hits hard with Hellfire. Always attacks twice. Doesn't like people to know he's really a dumpy dragon, so disguises himself as a dashing young dandy. | ||||||||||||||||||||||||||||||||||||||||||
| Additional Attributes | ||||||
|---|---|---|---|---|---|---|
| Fire | Ice | Wind | Earth | Light | Dark | |
| 150 | 100 | 100 | 50 | 100 | 100 | |
| Blast | Dazzle | Sleep | Death | Drain MP | Confusion | |
| 100 | 25 | 0 | 0 | 100 | 0 | |
| Fizzle | Inaction | Paralyze | Poison | Charm | Magic Res | |
| 0 | 0 | 0 | 0 | 10 | 50 | |
| Blunt | Sap | Decelerate | ||||
| 5 | 25 | 75 | ||||
Orgodemir appears as a Legacy Boss, obtained after completing Quest #176 (or received at special events). He will become enraged once his health drops to orange range.
Treasure[edit]
|
Skills[edit]
|
Dragon Quest Monsters 2[edit]
| Sprite | Level cap * | HP growth | MP growth |
| 65 | 7/10 | 8/10 | |
| Strength growth | Resilience growth | Wisdom growth | Agility growth |
| 8/10 | 7/10 | 10/10 | 6/10 |
| Family | ??? |
| In-game description | |
| Abilities | Bang, EvilSlash, Focus |
| Habitat | |
| Breeding chart | PsychoPiz x Niterich |
| Frizz Resistance * | Sizz Resistance * | Fire Breath Resistance * | Bang Resistance * |
| Strong | Strong | Strong | Strong |
| Crack Resistance * | Ice Breath Resistance * | Woosh Resistance * | Rock/Army Resistance * |
| Strong | Strong | Strong | Strong |
| Water Resistance * | Zap Resistance * | Gigaslash Resistance | Magic Burst Resistance |
| Strong | Strong | Strong | Weak |
| Drain Magic Resistance * | Whack Resistance * | Kamikazee Resistance * | Poison Resistance * |
| Strong | Immune | Immune | Strong |
| Paralysis Resistance * | Fuddle Resistance * | Snooze Resistance * | Dazzle Resistance * |
| Immune | Immune | Immune | Immune |
| Fizzle Resistance | Ban Dance Resistance | Gobstopper Resistance | Stun Resistance * |
| Immune | Strong | Strong | Weak |
| Sap Resistance * | Decelerate Resistance * | Curse Resistance | |
| Strong | Strong | Strong | |
| Sprite | Level cap * | HP growth | MP growth |
| 70 | 8/10 | 10/10 | |
| Strength growth | Resilience growth | Wisdom growth | Agility growth |
| 9/10 | 7/10 | 10/10 | 7/10 |
| Family | ??? |
| In-game description | |
| Abilities | DeMagic, LifeSong, MegaMagic |
| Habitat | |
| Breeding chart | Orgodemir x GigaDraco, LordDraco |
| Frizz Resistance * | Sizz Resistance * | Fire Breath Resistance * | Bang Resistance * |
| Immune | Immune | Strong | Immune |
| Crack Resistance * | Ice Breath Resistance * | Woosh Resistance * | Rock/Army Resistance * |
| Immune | Immune | Immune | Weak |
| Water Resistance * | Zap Resistance * | Gigaslash Resistance | Magic Burst Resistance |
| Strong | Strong | Weak | Strong |
| Drain Magic Resistance * | Whack Resistance * | Kamikazee Resistance * | Poison Resistance * |
| Strong | Immune | Immune | Immune |
| Paralysis Resistance * | Fuddle Resistance * | Snooze Resistance * | Dazzle Resistance * |
| Immune | Immune | Immune | Immune |
| Fizzle Resistance | Ban Dance Resistance | Gobstopper Resistance | Stun Resistance * |
| Immune | Weak | Weak | Strong |
| Sap Resistance * | Decelerate Resistance * | Curse Resistance | |
| Strong | Immune | Immune | |
Dragon Quest Monsters: Joker[edit]
| Orgodemir | |
|---|---|
| Family | Undead |
| Rank | X |
| Description | In ages past, he sought to become a god. |
| Weapons | Swords, Spears, Claws, Staves |
| Traits | Double Trouble |
| Resistances | Whackproof, Vulnerable to Confuse, Paralysisproof |
| Skill | Muspell |
| Location | - |
| Breeding chart | Dragovian lord or Alabast dragon x Mortamor |
Dragon Quest Monsters: Joker 2[edit]
| Orgodemir | |
|---|---|
| Family | ??? |
| Rank | X |
| Size | M |
| Weapons | Swords, Spears, Claws, Staves |
| Traits | Hit Squad, Big Hitter, Crafty Fire Breather, Crafty Ice Breather |
| Resistances | Vulnerable to Ban Dance, Resists Confusion, Immune to Whack, Poison, Inaction, Paralysis, and Sleep, Reflects Fire Breath and Cold Breath |
| Skill | Muspell |
| Location | - |
| Breeding chart | Mortamor x Alabast dragon |
Dragon Quest Monsters: Terry's Wonderland 3D[edit]
|
|
This article is a stub. You can help by expanding it. |
Dragon Quest Monsters 2: Iru and Luca's Marvelous Mysterious Key[edit]
|
|
This article is a stub. You can help by expanding it. |
Dragon Quest Monsters: Joker 3[edit]
|
|
This article is a stub. You can help by expanding it. |
Dragon Quest Monsters: The Dark Prince[edit]
| Icon | Family | Max HP* | Max MP* |
 |
1,240 | 470 | |
| Max Attack | Max Defence | Max Agility | Max Wisdom |
| 560 | 540 | 490 | 830 |
| Bestiary No. | #501 |
| Rank | S |
| In-game description | The triumphal transformation of the demon king who once fought the Almighty and won, sealing away the continents of the world. Possessed of a particularly malevolent mind |
| Talents | Orgodemir (lv. 1) |
| Guaranteed traits | Rando-Disrupt (lv. 1) Wizardly Waft (lv. 20) Ultra Crafty Banger (lv. 40) |
| Large-size exclusive traits | Tactical Commander (lv. 1) Ultra Crafty Frizzer (lv. 1) Ultra Crafty Zapper (lv. 60) |
| Habitat | This monster has no natural habitat |
| Items | N/A |
| Synthesis chart |  X X  X X  X X  |
| Notable synthesis |  X X  = =  |
| Fire Resistance * | Water Resistance * | Wind Resistance * | Earth Resistance * |
| 25% | 0% | 0% | 0% |
| Explosion Resistance * | Ice Resistance * | Electricity Resistance * | Light Resistance * |
| 50% | 25% | 0% | 0% |
| Dark Resistance * | Debilitation Resistance* | Bedazzlement Resistance * | Antimagic Resistance * |
| 50% | 0% | 0% | 0% |
| MP Absorption Resistance * | Confusion Resistance * | Sleep Resistance * | Paralysis Resistance * |
| 0% | 25% | 25% | 25% |
| Stun Resistance * | Poison Resistance * | ||
| 0% | 25% | ||
| Instant Death Resistance * | |||
| 50% | |||
Dragon Quest: Monster Parade[edit]
|
|
This article is a stub. You can help by expanding it. |
Dragon Quest Monsters: Super Light[edit]
|
|
This article is a stub. You can help by expanding it. |
Dragon Quest of the Stars[edit]
|
|
This article is a stub. You can help by expanding it. |
Dragon Quest Rivals[edit]
Orgodemir was introduced in the fourth card pack as a legendary rare card. Each time he was defeated in battle, he would transform into his next form and return to the player's hand, each form having its own special effects. When the game's name was changed to Rivals Ace, Orgodemir's final form appeared again in the last expansion pack on a card entitled "Heavenly King Orgodemir".
Dragon Quest Walk[edit]
Orgodemir first appeared in the game as a boss in Chapter 5, Episode 4 of the Dragon Quest VII event held in the game starting on April 9th, 2021. After he takes enough damage, he will change into his second form. His second form also appears as a boss in Chapter 6, Episode 4. On April 12th, 2021, Orgodemir's second form began appearing as a special mega monster that can be challenged by multiple players.
Dragon Quest Tact[edit]
Both of Orgodemir's Humanoid and Demon King forms appear as S-rank members of the ??? family as part of the Dragon Quest VII event. Demon King Orgodemir appears on his own banner alongside Terrorhawk. His humanoid form appears on its own separate banner alongside Missing lynx. Both could eventually be scouted from any limited banner, as well. His Demon King form is faced as a boss in Chapter 5, Episode 3 of the event quests, entitled The Demon King Orgodemir 1, while his humanoid form is faced in Chapter 5, Episode 4: The Demon King Orgodemir 2. His demonic form could also faced as a Mega Boss Battle, as well, but only during the event's original run.
 |
||||
| Family | Rank | Role | ||
??? |
Attack |
|||
| Max Level | HP | MP | Move | |
| 130 | 1,216 | 401 | 2-3 | |
| Attack | Defense | Agility | Wisdom | Weight |
| 555 | 460 | 387 | 242 | 65 |
| First | Second | Third | ||
| Blazing Claw | Beautiful Blast* | Ominous Impact* | ||
| First | Second | Third |
| Move +1/Stats Up | Zam Res +25/Stats Up | Physical Potency +5%/Stats Up |
| Fourth | Fifth | |
| Zap Res +25/Stats Up | Physical Potency +5%/Stats Up | |
| First | |
| Lowers enemy ATK by 20% in a 5x5 square around him. | |
| First | Second | Third |
| Heavenly King: Greatly raises DEF and Spell Res for 3 turns at the start of battle. | ATK +15 Max HP +30 |
Physical Potency +2% |
| First | |
| Move +1: Raises Move by 1. | |
| Frizz Resistance * | Sizz Resistance * | Crack Resistance * | Woosh Resistance * | |
| Normal | Very Weak | Normal | Normal | |
| Bang Resistance * | Zap Resistance * | Zam Resistance * | Snooze Resistance | |
| Very Weak | Half Res | Half Res | Normal | |
| Poison Resistance | Physical Lock Resistance | Spell Lock Resistance | Martial Lock Resistance | |
| Normal | Half Res | Normal | Normal | |
| Breath Lock Resistance | Hobble Resistance * | Stun Resistance * | Dazzle Resistance | |
| Normal | Super Weak | Half Res | Super Weak | |
| Curse Resistance | Paralysis Resistance | Confusion Resistance | Charm Resistance | |
| Normal | Immune | Normal | Normal |
 |
||||
| Family | Rank | Role | ||
??? |
Magic |
|||
| Max Level | HP | MP | Move | |
| 130 | 938 | 536 | 3 | |
| Attack | Defense | Agility | Wisdom | Weight |
| 285 | 290 | 420 | 468 | 65 |
| First | Second | Third | ||
| Devil's Heart | Nadirian Flames* | Psyspark* Talent Blossoming: Devil's Suction |
||
| First | Second | Third |
| Demonic Meditation/Stats Up | Woosh Res +25/Stats Up | Psyspark Potency +5%/Stats Up Devil's Suction Potency +5% |
| Fourth | Fifth | |
| Zam Res +25/Stats Up | Psyspark Potency +5%/Stats Up Devil's Suction Potency +5% |
|
| First | |
| Lowers spell MP cost of allies, including himself, by 15% in a 5x5 square around him. | |
| First | Second | Third |
| Beauty Eternal: Grants +20% damage dealt if HP is at 100% at action start. | WIS +15 Max MP +15 |
Psyspark Potency +2% |
| First | |
| Demonic Meditation: Heals the user to full HP when HP drops under 20%, 1 time per battle. | |
| Frizz Resistance * | Sizz Resistance * | Crack Resistance * | Woosh Resistance * | |
| Normal | Normal | Very Weak | Half Res | |
| Bang Resistance * | Zap Resistance * | Zam Resistance * | Snooze Resistance | |
| Very Weak | Normal | Half Res | Normal | |
| Poison Resistance | Physical Lock Resistance | Spell Lock Resistance | Martial Lock Resistance | |
| Normal | Normal | Super Weak | Half Res | |
| Breath Lock Resistance | Hobble Resistance * | Stun Resistance * | Dazzle Resistance | |
| Super Weak | Normal | Normal | Normal | |
| Curse Resistance | Paralysis Resistance | Confusion Resistance | Charm Resistance | |
| Normal | Normal | Immune | Half Res |
Dragon Quest Keshi Keshi[edit]
|
|
This article is a stub. You can help by expanding it. |
