Baramos: Difference between revisions
Antiyonder (talk | contribs) No edit summary |
|||
| (47 intermediate revisions by 16 users not shown) | |||
| Line 1: | Line 1: | ||
{{quote|style=1|quote=''''' | {{quote|style=1|quote='''''That is a decision you will soon come to regret. But you shall not do so for long...For I shall rend you asunder and devour your innards before you realise you are dead!'''''|source=|console=|align=center|bgcolor=e1a5f6}} | ||
{{Character | {{Character | ||
|Name=Baramos | |Name=Baramos | ||
|Game= | |Game={{DQ3}} | ||
|Image=[[ | |Image=[[File:DQIX Baramos.png|center|300px]] | ||
|Sprite= | |Sprite= | ||
|Japanese name=バラモス | |Japanese name=バラモス | ||
|Roumaji=Baramosu | |Roumaji=Baramosu | ||
|Title=Archfiend | |Title=Archfiend<br>Maou (魔王) | ||
|Class= | |Class= | ||
|Race=Demon | |Race={{Demon}} | ||
|Age=Unknown | |Age=Unknown | ||
|Family= | |Family= | ||
|Voice Actor=[[Masaharu Satō]] (Japanese, ''[[Dragon Quest III CD Theater|CD Theater]]'')<br>[[Takeshi Watabe]] (Original Japanese audio for {{Abel Yuusha}})<br>[[Garry Chalk]] (English Dub of {{Abel Yuusha}})<br>[[Takaya Hashi]] (Japanese, {{Rivals}}) | |||
}} | }} | ||
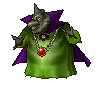
'''Baramos''', | '''Baramos''' (バラモス, ''Baramosu'') is one of the main villains of {{Dragon Quest III}}, and a recurring {{MFamilies}} in the [[Dragon Quest (series)|series]]. | ||
He can be found in [[Baramos' Lair|his lair south of Isis]], ruling over a barren, impregnable land that can only be accessed from the air. | |||
==Characteristics== | ==Characteristics== | ||
Baramos and his forces menaced the world for an unknown number of years prior, which necessitated The Hero [[Ortega]] departing from [[Aliahan]] to slay him in the game's opening prologue Though the [[King of Aliahan]] states that the world at large is unaware of the fiend's activities, his very presence emboldens monsters the world over to assault human settlements. | |||
Throughout the first half of {{III}} Baramos is believed to be the final boss, but this is a malicious facade; when [[Erdrick|The Hero]] defeats Baramos and returns to [[Aliahan]] triumphant, [[Zoma]] interrupts the celebrations to reveal Baramos was just an underling of his--an advance force to clear the way for his master. Having failed, [[Zoma]] announces that he will personally plunge the world into eternal darkness, causing The {{Hero 3}} to continue his quest. | |||
Baramos will attack the party twice more in [[Zoma's Citadel]], both as a [[Soul of Baramos|ghost]] and a [[Bones of Baramos|shambling corpse]]. There is no dialogue prior or during these encounters, implying that Baramos is not truly "revived" and is forced into further servitude by [[Zoma]]'s magic. In the {{III}} remakes, a common enemy in {{Cloudsgate Citadel 3}} is a pallete-swap known as a [[Baramonster]]. Whether the [[Baramonster]]s were in [[Zoma]]'s employ is not certain. | |||
==Appearences== | ==Appearences== | ||
=== | ==={{DQ3}}=== | ||
{{ | {{DQ3Enemy | ||
|name = Baramos | |name=Baramos | ||
| | |kanji= バラモス | ||
| | |romanji=Baramosu | ||
| | |bestiaryNumber=#133 | ||
| | |sprite=[[Image:Baramos DQIII NES.gif]] | ||
| | |lvl=63 | ||
| | |hp=900 ({{NES}})<br>2,500 (Remakes) | ||
| | |mp=255 | ||
| | |exp=0 ({{NES}})<br>6,535 (Remakes) | ||
| | |gold=90 ({{NES}})<br> 0 (Remakes) | ||
| | |attack=220 | ||
| | |defense=100 | ||
| | |agility=85 | ||
|spells=[[Bazoom]]<br>[[Fuddle]]<br>[[Kaboom]]<br>[[Kafrizzle]] | |spells=[[Bazoom]]<br>[[Fuddle]]<br>[[Kaboom]]<br>[[Kafrizzle]] | ||
| | |skills=Can attack twice per turn.<br>[[Inferno]]<br>Recovers 90~110 {{HP}} per turn. | ||
|locations= | |item=None | ||
| | |locations=[[Baramos' Lair]] | ||
|evasion={{fraction|0|64}} | |||
|fire-resist=70% | |||
|crack-resist=25% | |||
|woosh-resist=25% | |||
|zap-resist=0% | |||
|whack-resist=100% | |||
|kamikazee-resist=100% | |||
|poof-resist=100% | |||
|dazzle-resist=25% | |||
|snooze-resist=70% | |||
|drain-magic-resist=100% | |||
|fizzle-resist=70% | |||
|fuddle-resist=100% | |||
|sap-resist=70% | |||
|deceleratle-resist=100% | |||
|snes-sprites=[[File:Baramos III snes.png]] | |||
|gbc-sprites=[[File:Baramos III gbc.png]] | |||
|switch-sprites=[[File:Baramos III switch.png|150px]] | |||
}} | }} | ||
{{ | Baramos uses a fixed attack pattern in every version of the game, with slight differences between the {{NES}} version's pattern and the that of the {{SFC}} remake that would be the basis for all other versions: | ||
{| cellpadding="0" cellspacing="0" class="listTable" | |||
|- style="text-align:center; background:#B1ED00;" | |||
! Version | |||
! Pattern | |||
|- | |||
| {{NES}} || [[Kaboom]] → normal attack → [[Inferno]] → [[Kafrizzle]] → [[Bazoom]] → normal attack → [[Kaboom]] → [[Fuddle]] → repeat | |||
|- | |||
|All<br>others || [[Kaboom]] → normal attack → [[Inferno]] → normal attack → [[Kafrizzle]] → [[Fuddle]] → [[Kaboom]] → [[Bazoom]] → repeat | |||
|- | |||
|Fizzled || Normal attack → [[Bazoom]] (fails) → [[Inferno]] → normal attack → repeat | |||
|} | |||
Furthermore, Baramos has an excellent AI that halts him from casting [[Kaboom]] if a character has [[Bounce]] applied to them, skipping that phase of his pattern, and avoiding using magic altogether if he's been afflicted with [[Fizzle]], starting a briefer pattern of using physical blows and [[Inferno]] instead. The one exception to this is [[Bazoom]], which will fail to activate when cast and thus waste his turn. | |||
In the {{Game Boy Color}} version Baramos will not cast [[Bazoom]] when [[Fizzle]]d, gaining an additional physical attack in the spells place for a loop of normal attack → normal attack → [[Inferno]] → normal attack. | |||
=== | ==={{DQ9}}=== | ||
{{DQ9Enemy | {{DQ9Enemy | ||
|image= | |image=[[File:DQIX NDS Baramos.png|center|150px]] | ||
|name=Baramos | |name=Baramos | ||
|game= | |game={{Dragon Quest IX}} | ||
|console=DS | |console={{DS}} | ||
|romanji= | |romanji=Baramosu | ||
|hp=6500<br>13057 (99) | |hp=6500<br>13057 (99) | ||
|mp=255 | |mp=255 | ||
| Line 63: | Line 100: | ||
|skills= | |skills= | ||
|spells= | |spells= | ||
|family= | |family={{Q family}} | ||
|bestiaryNumber= | |bestiaryNumber= | ||
|description="Windproof king and wizard who wastes no time in whipping out Kaboom, Kafrizz, and all kinds of calamity-inducing conjury. | |description="Windproof king and wizard who wastes no time in whipping out [[Kaboom]], [[Kafrizz]], and all kinds of calamity-inducing conjury. | ||
Takes great pleasure in obliterating people while they're busy poking fun at his bizarre appearance." | Takes great pleasure in obliterating people while they're busy poking fun at his bizarre appearance." | ||
|locations= | |locations= | ||
| Line 86: | Line 123: | ||
}} | }} | ||
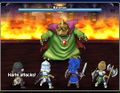
Baramos appears as a {{Legacy Boss}}, obtained after completing [[List of quests in Dragon Quest IX#Quest #061 - #062|Quest #062]]. He is the weakest of the {{Legacy Boss}}es, but he is still very powerful and capable of casting [[Kafrizz]] and [[Kaboom]] and can also use [[Fire Breath]] and regular attacks (which are prone to inflicting critical hits). Ice attacks are his weakness, but he resists wind attacks. | |||
Baramos appears as a | |||
{| border="0" cellpadding="5" cellspacing="0" width="100%" | {| border="0" cellpadding="5" cellspacing="0" width="100%" | ||
| Line 99: | Line 135: | ||
!style="background:#4682B4; color: white;"| | !style="background:#4682B4; color: white;"| | ||
|- | |- | ||
|1-3||[[Aliahan boots]]||20%||[[Silver Orb]]||5% | |1-3||[[Aliahan costume#Aliahan boots|Aliahan boots]]||20%||[[Silver Orb]]||5% | ||
|- | |- | ||
|4-8||Aliahan boots||25%||Silver Orb||5% | |4-8||Aliahan boots||25%||[[Silver Orb]]||5% | ||
|- | |- | ||
|9-15||[[Aliahan clothes]]||20%||Silver Orb||6% | |9-15||[[Aliahan costume#Aliahan clothes|Aliahan clothes]]||20%||[[Silver Orb]]||6% | ||
|- | |- | ||
|16-25||[[Murdaw]]'s Map||10%||Silver Orb||6% | |16-25||[[Murdaw]]'s Map||10%||[[Silver Orb]]||6% | ||
|- | |- | ||
|26-40||Murdaw's Map||15%||Silver Orb||7% | |26-40||[[Murdaw]]'s Map||15%||[[Silver Orb]]||7% | ||
|- | |- | ||
|41-56||Murdaw's Map||20%||Silver Orb||7% | |41-56||[[Murdaw]]'s Map||20%||[[Silver Orb]]||7% | ||
|- | |- | ||
|57-68||Murdaw's Map||25%||Silver Orb||8% | |57-68||[[Murdaw]]'s Map||25%||[[Silver Orb]]||8% | ||
|- | |- | ||
|69-80||Murdaw's Map||30%||Silver Orb||8% | |69-80||[[Murdaw]]'s Map||30%||[[Silver Orb]]||8% | ||
|- | |- | ||
|81-90||Murdaw's Map||35%||Silver Orb||9% | |81-90||[[Murdaw]]'s Map||35%||[[Silver Orb]]||9% | ||
|- | |- | ||
|91-99||Murdaw's Map||40%||Silver Orb||10% | |91-99||[[Murdaw]]'s Map||40%||Silver Orb||10% | ||
|} | |} | ||
*''In addition, he will always drop a [[ | *''In addition, he will always drop a [[Mini medal]].'' | ||
| valign="top" width="50%" | | | valign="top" width="50%" | | ||
| Line 127: | Line 163: | ||
!style="background:#4682B4; color: white;"|New abilities | !style="background:#4682B4; color: white;"|New abilities | ||
|- | |- | ||
|''Initial''||[[Kafrizz]], [[Kaboom]], [[Scorch]], critical attack, sometimes attacks twice per round | |''Initial''||[[Kafrizz]], [[Kaboom]], [[Scorch]], [[Critical Hit|critical attack]], sometimes attacks twice per round | ||
|- | |- | ||
|8||[[Disruptive Wave]] | |8||[[Disruptive Wave]] | ||
|- | |- | ||
|16||Always attacks twice per round | |16||Always attacks twice per round. | ||
|- | |- | ||
|24||[[Hellfire]] | |24||[[Hellfire]] | ||
| Line 137: | Line 173: | ||
|33||[[Kafrizzle]] | |33||[[Kafrizzle]] | ||
|- | |- | ||
|41||Begins attacking 3 times per turn, stops using Scorch & Kafrizz | |41||Begins attacking 3 times per turn, stops using [[Scorch]] & [[Kafrizz]]. | ||
|- | |- | ||
|57||[[Kaboomle]] | |57||[[Kaboomle]] | ||
| Line 143: | Line 179: | ||
|} | |} | ||
== | ==={{DQ10}}=== | ||
===' | {{stub}} | ||
==={{DQ11}}=== | |||
Baramos returns as a boss battle in his castle, accessible from the last {{III}} chapter in the [[Echo Chamber]]. Due to the death of the [[Necrogondolier]] before the minion's revival ceremony could be completed, the fiend pulled himself back from the void by consuming souls and anguish. | |||
==={{DQM}}=== | |||
{{DQMEnemy | |||
|name=Baramos | |||
|kanji= バラモス | |||
|romanji=Baramosu | |||
|sprite=[[File:Baramos DQM GBC.png]] | |||
|level=60 | |||
|hp=2/5 | |||
|mp=5/5 | |||
|attack=2/5 | |||
|defense=2/5 | |||
|wisdom=4/5 | |||
|agility=4/5 | |||
|family= {{Q family}} | |||
|in-game-description= | |||
|abilities=[[Bang]], [[Boulder Toss|RockThrow]], [[Lightning Storm|HellBlast]] | |||
|habitat=[[List of teleportals in Dragon Quest Monsters|Gate of Mastermind]] | |||
|breeding=[[Hargon]] x [[Orochi]] | |||
|frizz-resist=Weak | |||
|sizz-resist=Weak | |||
|fire-breath-resist=Weak | |||
|bang-resist=Weak | |||
|crack-resist=Strong | |||
|ice-breath-resist=Weak | |||
|woosh-resist=Strong | |||
|rock-resist=None | |||
|zap-resist=None | |||
|water-resist=Weak | |||
|gigaslash-resist=None | |||
|magic-burst-resist=Weak | |||
|drain-resist=Strong | |||
|whack-resist=Immune | |||
|kamikazee-resist=Immune | |||
|poison-resist=Immune | |||
|paralysis-resist=Immune | |||
|fuddle-resist=Immune | |||
|snooze-resist=Immune | |||
|dazzle-resist=Immune | |||
|sap-resist=Strong | |||
|decelerate-resist=Strong | |||
|fizzle-resist=Immune | |||
|stun-resist=Immune | |||
|ban-dance-resist=Immune | |||
|gobstopper-resist=Immune | |||
|curse-resist=Immune | |||
}} | |||
Baramos appears as the boss of the [[List of teleportals in Dragon Quest Monsters|Gate of Mastermind]]. He then talks to you and makes a odd threat of eating your guts so you will never be brought back to life. | |||
==={{DQM2}}=== | |||
{{DQM2Enemy | |||
|name=Baramos | |||
|kanji= バラモス | |||
|romanji=Baramosu | |||
|sprite=[[File:Baramos DQM2 GBC.png]] | |||
|level=60 | |||
|hp=5/10 | |||
|mp=9/10 | |||
|attack=5/10 | |||
|defense=5/10 | |||
|wisdom=6/10 | |||
|agility=6/10 | |||
|family= {{Q family}} | |||
|in-game-description= | |||
|abilities=[[Bang]], [[Lightning Storm|HellBlast]], [[Boulder Toss|RockThrow]] | |||
|habitat= | |||
|breeding=[[Hargon]] x [[Orochi]] | |||
|frizz-resist=Weak | |||
|sizz-resist=Weak | |||
|fire-breath-resist=Weak | |||
|bang-resist=Weak | |||
|crack-resist=Strong | |||
|ice-breath-resist=Weak | |||
|woosh-resist=Strong | |||
|rock-resist=None | |||
|zap-resist=None | |||
|water-resist=Weak | |||
|gigaslash-resist=None | |||
|magic-burst-resist=Weak | |||
|drain-resist=Strong | |||
|whack-resist=Immune | |||
|kamikazee-resist=Immune | |||
|poison-resist=Immune | |||
|paralysis-resist=Immune | |||
|fuddle-resist=Immune | |||
|snooze-resist=Immune | |||
|dazzle-resist=Immune | |||
|sap-resist=Strong | |||
|decelerate-resist=Strong | |||
|fizzle-resist=Immune | |||
|stun-resist=Immune | |||
|ban-dance-resist=Immune | |||
|gobstopper-resist=Immune | |||
|curse-resist=Immune | |||
}} | |||
==={{DQMJ2}}=== | |||
{{DQMJ2monster | |||
|name = Baramos | |||
|image = | |||
|family = {{Demon}} | |||
|rank = S | |||
|size = S | |||
|weapons = {{Whip}}s, {{Spear}}s, {{Hammer}}s, {{Staves}} | |||
|traits = [[List of Traits in Dragon Quest Monsters: Joker|Hit Squad]], [[List of Traits in Dragon Quest Monsters: Joker|Frizzmeister]], [[List of Traits in Dragon Quest Monsters: Joker|Sizzmeister]], [[List of Traits in Dragon Quest Monsters: Joker|Tactical Trooper]] | |||
|resistances = Vulnerable to [[Dazzle]], Immune to [[Frizz]], [[Bang]], and [[Whack]] | |||
|skill = [[Frizz & Sizz]] | |||
|location = - | |||
|breeding chart = [[Hargon]] x [[Gemon]] | |||
}} | |||
{{clear}} | |||
==={{DQM3D}}=== | |||
{{Stub}} | |||
==={{DQM2R}}=== | |||
{{Stub}} | |||
===''[[Dragon Quest Monsters: Joker 3]] Professional''=== | |||
{{Stub}} | |||
==={{DQM3}}=== | |||
{{DQM3Enemy | |||
|name=Baramos | |||
|kanji=バラモス | |||
|romanji=Baramosu | |||
|icon=[[File:Baramos DQM3 portrait.png|100px]] | |||
|family=[[File:DQM3 ??? family icon.png|link=??? family]] | |||
|hp=<big><big>1,360</big></big> | |||
|mp=<big><big>570</big></big> | |||
|attack=<big><big>410</big></big> | |||
|defense=<big><big>370</big></big> | |||
|wisdom=<big><big>780</big></big> | |||
|agility=<big><big>460</big></big> | |||
|bestiary=#498 | |||
|rank=<big><big>'''A'''</big></big> | |||
|in-game-description=The Archfiend who tried to conquer the world under the orders of his master, Zoma. He keeps his magical talents mostly under wraps, but is a terrifyingly capable caster of spells when it comes to the crunch | |||
|talents=[[Baramos (talent)|Baramos]] (lv. 1) | |||
|traits=[[Frizzmeister]] (lv. 1)<br>[[Bossesbane]] (lv. 20)<br>[[Ultra Crafty Frizzer]] (lv. 40) | |||
|ltraits=[[Tactical Trooper]] (lv. 1)<br>[[Attacking Impulse]] (lv. 1)<br>[[Late Bloomer]] (lv. 60) | |||
|habitat=This monster has no natural habitat | |||
|items=N/A | |||
|synthesis=[[File:Umbra DQM3 portrait.png|64px|link=Umbra]] X [[File:Boss troll DQM3 portrait.png|64px|link=Boss troll]] | |||
|fusions=[[File:Baramos DQM3 portrait.png|64px]] X [[File:Skelegon DQM3 portrait.png|64px|link=Skelegon]] = [[File:Bones of baramos DQM3 portrait.png|64px|link=Bones of Baramos]] | |||
|fire-resist=25% | |||
|water-resist=0% | |||
|wind-resist=25% | |||
|earth-resist=0% | |||
|explosion-resist=50% | |||
|ice-resist=25% | |||
|electricity-resist=-25% | |||
|light-resist=25% | |||
|dark-resist=25% | |||
|debilitation-resist=50% | |||
|bedazzlement-resist=0% | |||
|antimagic-resist=0% | |||
|mp-absorption-resist=0% | |||
|confusion-resist=25% | |||
|sleep-resist=0% | |||
|paralysis-resist=25% | |||
|stun-resist=25% | |||
|poison-resist=-25% | |||
|instant-death-resist=50% | |||
}} | |||
===''[[Dragon Quest: Monster Parade]]''=== | |||
{{Stub}} | |||
==={{DQTreasures}}=== | |||
Baramos' likeness appears as [[List_of_treasures_in_Dragon_Quest_Treasures|treasure No. 475]], with a base value of 1,110,000. | |||
==={{DQMSL}}=== | |||
{{Stub}} | |||
==={{DQMBRV}}=== | |||
{{Stub}} | |||
=== | ==={{DQStars}}=== | ||
Baramos appears in his normal role in the {{III}} scenario, as well as his posthumous boss forms. | |||
=== | ==={{DQRivals}}=== | ||
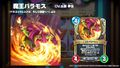
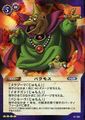
Baramos is | Baramos is featured on several cards in the game. | ||
=== | ==={{DQWalk}}=== | ||
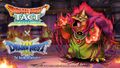
Baramos first appeared in the game as a boss in Chapter 3 of the {{Dragon Quest III}} event held in the game from March to May 2020, as well as a special mega version that can be challenged by multiple players. However, due to the outside world being affected by the COVID-19 pandemic, Baramos also appeared as a "Dokodemo Mega Monster" that can be fought at anytime and anyplace up to 3 times a day. | |||
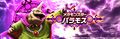
=== | ==={{DQTact}}=== | ||
Baramos appears as a S-rank monster of the [[??? family]] as part of the limited {{Dragon Quest III}} event, appearing on his own banner alongside [[Boreal serpent]]. He can be faced in the event quest Chapter 4, Episode 4: Archfiend Baramos, as well as his own boss battle. Baramos can also take part in [[Armful]]'s Battle Road as a party member. | |||
{{DQTactEnemy | |||
|name=Baramos | |||
|kanji=バラモス | |||
|romanji=Baramosu | |||
|sprite=[[Image:DQT Baramos.png|300px]] | |||
|family=[[Image:Tact Icon SpecialFamily.png|48px]]<br>{{Q family}} | |||
|rank=[[Image:DQTact Rank Icon S.png|48px]] | |||
|role=[[Image:DQTact MagicType.png|48px]]<br>Magic | |||
|lvl=130 | |||
|hp=1,005 | |||
|mp=527 | |||
|move=2-3 | |||
|attack=418 | |||
|defense=295 | |||
|agility=292 | |||
|wisdom=440 | |||
|weight=65 | |||
|bskill1=[[Necrogond Wave]] | |||
|bskill2=[[Necroboom]]{{tt|*|Level 38}} | |||
|bskill3=[[Compressed Kaboom]]{{tt|*|Level 51}}<br>'''Talent Blossoming''': [[Necrogond Miasma]] | |||
|askill1=Bangmeister / Stats Up | |||
|askill2=[[Zam]] Res +25 / Stats Up | |||
|askill3=[[Compressed Kaboom]] Potency +5% / Stats Up<br>[[Necrogond Miasma]] Potency +5%<br>Ability {{MP}} Cost -5% | |||
|askill4=[[Woosh]] Res +25 / Stats Up | |||
|askill5=[[Compressed Kaboom]] Potency +5% / Stats Up<br>[[Necrogond Miasma]] Potency +5%<br>Ability {{MP}} Cost -5% | |||
|lperk1=Raises [[Bang]]-type brilliant potency of allies, including himself, by 15% in a 5x5 square around him. | |||
|bperk1=WIS +15<br>Max {{HP}} +30 | |||
|bperk2='''Wicked Veil''': Raises spell resistance for 3 turns at battle start. | |||
|bperk3=[[Compressed Kaboom]] Potency +2% | |||
|aperk1='''Bangmeister''': Lowers Bang-type ability {{MP}} cost, raises potency | |||
|frizz-resist=Very Weak | |||
|sizz-resist=Normal | |||
|crack-resist=Very Weak | |||
|woosh-resist=Half Res | |||
|bang-resist=Normal | |||
|zap-resist=Normal | |||
|zam-resist=Half Res | |||
|snooze-resist=Normal | |||
|poison-resist=Super Weak | |||
|physical-seal-resist=Normal | |||
|spell-seal-resist=Half Res | |||
|martial-seal-resist=Normal | |||
|breath-seal-resist=Normal | |||
|hobble-resist=Normal | |||
|stun-resist=Normal | |||
|blind-resist=Half Res | |||
|curse-resist=Super Weak | |||
|paralysis-resist=Normal | |||
|confusion-resist=Normal | |||
|charm-resist=Immune | |||
}} | |||
===''[[Dragon | ==Trivia== | ||
*Baramos' design bears a slight similarity to the ''[[Dragon Ball]]'' character Piano, one of Demon King Piccolo's henchmen. | |||
*Oddly, Baramos comes after his own ghost and corpse in the numerical list of monsters in {{III}}. | |||
==Similar species== | |||
*[[Baramonster]] | |||
*[[Bones of Baramos]] | |||
*[[Soul of Baramos]] | |||
==Gallery== | ==Gallery== | ||
<center><gallery> | <center><gallery> | ||
BaramosArt.png|Original artwork of {{III}}. ({{NES}}) | |||
DQIII Baramos artwork.png|Modern artwork. (older color scheme) | |||
Baramos DQM PSX.gif|{{1·2}} sprite. | |||
Baramos joker 2.png|{{Joker 2}} model. | |||
DQM2-3D Baramos Icon.jpg|Icon in {{Monsters 2: 3D}}. | |||
DQMBRV Baramos model.png|Model in ''Monster Road Victory''. | |||
Baramos statue treasures icon.jpg|''Treasures'' statue | |||
DQ Stars Android Baramos 2.jpg|Appearance in {{Stars}}. | |||
DQ Stars Android Baramos 1.jpg| | |||
DQR Maou Baramos.jpg|Archfiend Baramos in {{Rivals}}. | |||
DQW Baramos VS Erdrick.jpg|Chapter 3 of {{Walk}}'s {{Dragon Quest III}} event. | |||
DQW Baramos.jpg|Baramos in {{Walk}}. | |||
DQT Baramos Event.jpg|Baramos as he appears in {{Tact}}. | |||
Baramos sofubi.jpg|{{Sofubi Monster}}. | |||
DQTCG Baramos.jpg|''DQ'' Trading Card. | |||
</gallery></center> | </gallery></center> | ||
{{DQIII}} | {{DQIII}} | ||
{{Bosses}} | {{Bosses}} | ||
{{DQIXBossNav}} | {{DQIXBossNav}} | ||
[[Category:Dragon Quest III characters]] | [[Category:Dragon Quest III characters]] | ||
[[Category:Dragon Quest III enemies]] | [[Category:Dragon Quest III enemies]] | ||
| Line 180: | Line 461: | ||
[[Category:Dragon Quest IX enemies]] | [[Category:Dragon Quest IX enemies]] | ||
[[Category:Dragon Quest IX bosses]] | [[Category:Dragon Quest IX bosses]] | ||
[[Category:Dragon Quest X bosses]] | |||
[[Category:Dragon Quest XI bosses]] | |||
[[Category:Dragon Quest Monsters enemies]] | [[Category:Dragon Quest Monsters enemies]] | ||
[[Category:Dragon Quest Monsters 2 enemies]] | [[Category:Dragon Quest Monsters 2 enemies]] | ||
[[Category:Dragon Quest Monsters: Joker 2 enemies]] | [[Category:Dragon Quest Monsters: Joker 2 enemies]] | ||
[[Category:Dragon Quest Monsters: Terry's Wonderland 3D enemies]] | [[Category:Dragon Quest Monsters: Terry's Wonderland 3D enemies]] | ||
[[Category:Dragon Quest Monsters 2: Iru and | [[Category:Dragon Quest Monsters 2: Iru and Luca's Marvelous Mysterious Key enemies]] | ||
[[Category:Dragon Quest Monsters: Joker 3 Pro enemies]] | |||
[[Category:Dragon Quest Monsters: The Dark Prince enemies]] | |||
[[Category:Dragon Quest Monster Battle Road Victory enemies]] | [[Category:Dragon Quest Monster Battle Road Victory enemies]] | ||
[[Category:Dragon Quest: Monster Parade enemies]] | |||
[[Category:Dragon Quest Monsters: Super Light enemies]] | |||
[[Category:Dragon Quest of the Stars characters]] | |||
[[Category:Dragon Quest of the Stars enemies]] | |||
[[Category:Dragon Quest Rivals characters]] | |||
[[Category:Dragon Quest Rivals enemies]] | |||
[[Category:Dragon Quest Tact bosses]] | |||
[[Category:Dragon Quest Tact characters]] | |||
[[Category:Dragon Quest Tact monsters]] | |||
[[Category:Dragon Quest Walk bosses]] | |||
[[Category:Dragon Quest Walk enemies]] | |||
[[Category:Dragon Quest Keshi Keshi enemies]] | |||
[[fr:Baramos]] | |||
Latest revision as of 22:02, 22 February 2024
"That is a decision you will soon come to regret. But you shall not do so for long...For I shall rend you asunder and devour your innards before you realise you are dead!"
| Baramos | |
| Dragon Quest III: The Seeds of Salvation | |
 | |
| Japanese name | バラモス |
| Romaji | Baramosu |
| Title | Archfiend Maou (魔王) |
| Race | Demon |
| Age | Unknown |
| Voice actor | Masaharu Satō (Japanese, CD Theater) Takeshi Watabe (Original Japanese audio for Dragon Quest: Abel Yuusha) Garry Chalk (English Dub of Dragon Quest: Abel Yuusha) Takaya Hashi (Japanese, Rivals) |
Baramos (バラモス, Baramosu) is one of the main villains of Dragon Quest III, and a recurring monster in the series.
He can be found in his lair south of Isis, ruling over a barren, impregnable land that can only be accessed from the air.
Characteristics[edit]
Baramos and his forces menaced the world for an unknown number of years prior, which necessitated The Hero Ortega departing from Aliahan to slay him in the game's opening prologue Though the King of Aliahan states that the world at large is unaware of the fiend's activities, his very presence emboldens monsters the world over to assault human settlements.
Throughout the first half of III Baramos is believed to be the final boss, but this is a malicious facade; when The Hero defeats Baramos and returns to Aliahan triumphant, Zoma interrupts the celebrations to reveal Baramos was just an underling of his--an advance force to clear the way for his master. Having failed, Zoma announces that he will personally plunge the world into eternal darkness, causing The Hero to continue his quest.
Baramos will attack the party twice more in Zoma's Citadel, both as a ghost and a shambling corpse. There is no dialogue prior or during these encounters, implying that Baramos is not truly "revived" and is forced into further servitude by Zoma's magic. In the III remakes, a common enemy in Cloudsgate Citadel is a pallete-swap known as a Baramonster. Whether the Baramonsters were in Zoma's employ is not certain.
Appearences[edit]
Dragon Quest III: The Seeds of Salvation[edit]
| Baramos (バラモス Baramosu) |
| Sprite | Level | HP | MP | |
 |
63 | 900 (NES) 2,500 (Remakes) |
255 | |
| Attack | Defense | Agility | Experience | Gold |
| 220 | 100 | 85 | 0 (NES) 6,535 (Remakes) |
90 (NES) 0 (Remakes) |
| Bestiary No. | #133 |
| Spell(s) | Bazoom Fuddle Kaboom Kafrizzle |
| Skill(s) | Can attack twice per turn. Inferno Recovers 90~110 HP per turn. |
| Location(s) | Baramos' Lair |
| Item Dropped | None |
| Evasion | Fire Resistance * | Crack Resistance * | Woosh Resistance * | ||
| 0⁄64 | 70% | 25% | 25% | ||
| Zap Resistance * | Drain Magic Resistance | Whack Resistance * | Kamikazee Resistance | ||
| 0% | 100% | 100% | 100% | ||
| Poof Resistance | Fuddle Resistance | Snooze Resistance | Dazzle Resistance | ||
| 100% | 100% | 70% | 25% | ||
| Fizzle Resistance | Sap Resistance * | Deceleratle Resistance * | |||
| 70% | 70% | 100% | |||


Baramos uses a fixed attack pattern in every version of the game, with slight differences between the NES version's pattern and the that of the SFC remake that would be the basis for all other versions:
| Version | Pattern |
|---|---|
| NES | Kaboom → normal attack → Inferno → Kafrizzle → Bazoom → normal attack → Kaboom → Fuddle → repeat |
| All others |
Kaboom → normal attack → Inferno → normal attack → Kafrizzle → Fuddle → Kaboom → Bazoom → repeat |
| Fizzled | Normal attack → Bazoom (fails) → Inferno → normal attack → repeat |
Furthermore, Baramos has an excellent AI that halts him from casting Kaboom if a character has Bounce applied to them, skipping that phase of his pattern, and avoiding using magic altogether if he's been afflicted with Fizzle, starting a briefer pattern of using physical blows and Inferno instead. The one exception to this is Bazoom, which will fail to activate when cast and thus waste his turn.
In the Game Boy Color version Baramos will not cast Bazoom when Fizzled, gaining an additional physical attack in the spells place for a loop of normal attack → normal attack → Inferno → normal attack.
Dragon Quest IX: Sentinels of the Starry Skies[edit]
| Baramos | |||||||||||||||||||||||||||||||||||||||||||
|---|---|---|---|---|---|---|---|---|---|---|---|---|---|---|---|---|---|---|---|---|---|---|---|---|---|---|---|---|---|---|---|---|---|---|---|---|---|---|---|---|---|---|---|
 | |||||||||||||||||||||||||||||||||||||||||||
| Family | ??? | ||||||||||||||||||||||||||||||||||||||||||
| Game | Dragon Quest IX | ||||||||||||||||||||||||||||||||||||||||||
| Console | DS | ||||||||||||||||||||||||||||||||||||||||||
| Romanized Jap. | Baramosu | ||||||||||||||||||||||||||||||||||||||||||
| Description | "Windproof king and wizard who wastes no time in whipping out Kaboom, Kafrizz, and all kinds of calamity-inducing conjury.
Takes great pleasure in obliterating people while they're busy poking fun at his bizarre appearance." | ||||||||||||||||||||||||||||||||||||||||||
| Additional Attributes | ||||||
|---|---|---|---|---|---|---|
| Fire | Ice | Wind | Earth | Light | Dark | |
| 100 | 150 | 50 | 100 | 100 | 100 | |
| Blast | Dazzle | Sleep | Death | Drain MP | Confusion | |
| 100 | 0 | 0 | 0 | 100 | 0 | |
| Fizzle | Inaction | Paralyze | Poison | Charm | Magic Res | |
| 0 | 25 | 0 | 0 | 5 | 50 | |
| Blunt | Sap | Decelerate | ||||
| 5 | 25 | 75 | ||||
Baramos appears as a Legacy Boss, obtained after completing Quest #062. He is the weakest of the Legacy Bosses, but he is still very powerful and capable of casting Kafrizz and Kaboom and can also use Fire Breath and regular attacks (which are prone to inflicting critical hits). Ice attacks are his weakness, but he resists wind attacks.
Treasure[edit]
|
Skills[edit]
|
Dragon Quest X[edit]
|
|
This article is a stub. You can help by expanding it. |
Dragon Quest XI: Echoes of an Elusive Age[edit]
Baramos returns as a boss battle in his castle, accessible from the last III chapter in the Echo Chamber. Due to the death of the Necrogondolier before the minion's revival ceremony could be completed, the fiend pulled himself back from the void by consuming souls and anguish.
Dragon Quest Monsters[edit]
| Baramos (バラモス Baramosu) |
| Sprite | Level cap * | HP growth | MP growth |
 |
60 | 2/5 | 5/5 |
| Strength growth | Resilience growth | Wisdom growth | Agility growth |
| 2/5 | 2/5 | 4/5 | 4/5 |
| Family | ??? |
| In-game description | |
| Abilities | Bang, RockThrow, HellBlast |
| Habitat | Gate of Mastermind |
| Breeding chart | Hargon x Orochi |
| Frizz Resistance * | Sizz Resistance * | Fire Breath Resistance * | Bang Resistance * |
| Weak | Weak | Weak | Weak |
| Crack Resistance * | Ice Breath Resistance * | Woosh Resistance * | Rock/Army Resistance * |
| Strong | Weak | Strong | None |
| Zap Resistance * | Gigaslash Resistance | Magic Burst Resistance | Drain Magic Resistance * |
| None | None | Weak | Strong |
| Whack Resistance * | Kamikazee Resistance * | Poison Resistance * | Paralysis Resistance * |
| Immune | Immune | Immune | Immune |
| Fuddle Resistance * | Snooze Resistance * | Dazzle Resistance * | Fizzle Resistance |
| Immune | Immune | Immune | Immune |
| Ban Dance Resistance | Gobstopper Resistance | Stun Resistance * | Sap Resistance * |
| Immune | Immune | Immune | Strong |
| Decelerate Resistance * | Curse Resistance | ||
| Strong | Immune | ||
Baramos appears as the boss of the Gate of Mastermind. He then talks to you and makes a odd threat of eating your guts so you will never be brought back to life.
Dragon Quest Monsters 2[edit]
| Baramos (バラモス Baramosu) |
| Sprite | Level cap * | HP growth | MP growth |
 |
60 | 5/10 | 9/10 |
| Strength growth | Resilience growth | Wisdom growth | Agility growth |
| 5/10 | 5/10 | 6/10 | 6/10 |
| Family | ??? |
| In-game description | |
| Abilities | Bang, HellBlast, RockThrow |
| Habitat | |
| Breeding chart | Hargon x Orochi |
| Frizz Resistance * | Sizz Resistance * | Fire Breath Resistance * | Bang Resistance * |
| Weak | Weak | Weak | Weak |
| Crack Resistance * | Ice Breath Resistance * | Woosh Resistance * | Rock/Army Resistance * |
| Strong | Weak | Strong | None |
| Water Resistance * | Zap Resistance * | Gigaslash Resistance | Magic Burst Resistance |
| Weak | None | None | Weak |
| Drain Magic Resistance * | Whack Resistance * | Kamikazee Resistance * | Poison Resistance * |
| Strong | Immune | Immune | Immune |
| Paralysis Resistance * | Fuddle Resistance * | Snooze Resistance * | Dazzle Resistance * |
| Immune | Immune | Immune | Immune |
| Fizzle Resistance | Ban Dance Resistance | Gobstopper Resistance | Stun Resistance * |
| Immune | Immune | Immune | Immune |
| Sap Resistance * | Decelerate Resistance * | Curse Resistance | |
| Strong | Strong | Immune | |
Dragon Quest Monsters: Joker 2[edit]
| Baramos | |
|---|---|
| Family | Demon |
| Rank | S |
| Size | S |
| Weapons | Whips, Spears, Hammers, Staves |
| Traits | Hit Squad, Frizzmeister, Sizzmeister, Tactical Trooper |
| Resistances | Vulnerable to Dazzle, Immune to Frizz, Bang, and Whack |
| Skill | Frizz & Sizz |
| Location | - |
| Breeding chart | Hargon x Gemon |
Dragon Quest Monsters: Terry's Wonderland 3D[edit]
|
|
This article is a stub. You can help by expanding it. |
Dragon Quest Monsters 2: Iru and Luca's Marvelous Mysterious Key[edit]
|
|
This article is a stub. You can help by expanding it. |
Dragon Quest Monsters: Joker 3 Professional[edit]
|
|
This article is a stub. You can help by expanding it. |
Dragon Quest Monsters: The Dark Prince[edit]
| Baramos (バラモス Baramosu) |
| Icon | Family | Max HP* | Max MP* |
 |
1,360 | 570 | |
| Max Attack | Max Defence | Max Agility | Max Wisdom |
| 410 | 370 | 460 | 780 |
| Bestiary No. | #498 |
| Rank | A Rank |
| In-game description | The Archfiend who tried to conquer the world under the orders of his master, Zoma. He keeps his magical talents mostly under wraps, but is a terrifyingly capable caster of spells when it comes to the crunch |
| Talents | Baramos (lv. 1) |
| Guaranteed traits | Frizzmeister (lv. 1) Bossesbane (lv. 20) Ultra Crafty Frizzer (lv. 40) |
| Large-size exclusive traits | Tactical Trooper (lv. 1) Attacking Impulse (lv. 1) Late Bloomer (lv. 60) |
| Habitat | This monster has no natural habitat |
| Items | N/A |
| Synthesis chart |  X X  |
| Notable synthesis | X  = =  |
| Fire Resistance * | Water Resistance * | Wind Resistance * | Earth Resistance * |
| 25% | 0% | 25% | 0% |
| Explosion Resistance * | Ice Resistance * | Electricity Resistance * | Light Resistance * |
| 50% | 25% | -25% | 25% |
| Dark Resistance * | Debilitation Resistance* | Bedazzlement Resistance * | Antimagic Resistance * |
| 25% | 50% | 0% | 0% |
| MP Absorption Resistance * | Confusion Resistance * | Sleep Resistance * | Paralysis Resistance * |
| 0% | 25% | 0% | 25% |
| Stun Resistance * | Poison Resistance * | ||
| 25% | -25% | ||
| Instant Death Resistance * | |||
| 50% | |||
Dragon Quest: Monster Parade[edit]
|
|
This article is a stub. You can help by expanding it. |
Dragon Quest Treasures[edit]
Baramos' likeness appears as treasure No. 475, with a base value of 1,110,000.
Dragon Quest Monsters: Super Light[edit]
|
|
This article is a stub. You can help by expanding it. |
Dragon Quest: Monster Battle Road Victory[edit]
|
|
This article is a stub. You can help by expanding it. |
Dragon Quest of the Stars[edit]
Baramos appears in his normal role in the III scenario, as well as his posthumous boss forms.
Dragon Quest Rivals[edit]
Baramos is featured on several cards in the game.
Dragon Quest Walk[edit]
Baramos first appeared in the game as a boss in Chapter 3 of the Dragon Quest III event held in the game from March to May 2020, as well as a special mega version that can be challenged by multiple players. However, due to the outside world being affected by the COVID-19 pandemic, Baramos also appeared as a "Dokodemo Mega Monster" that can be fought at anytime and anyplace up to 3 times a day.
Dragon Quest Tact[edit]
Baramos appears as a S-rank monster of the ??? family as part of the limited Dragon Quest III event, appearing on his own banner alongside Boreal serpent. He can be faced in the event quest Chapter 4, Episode 4: Archfiend Baramos, as well as his own boss battle. Baramos can also take part in Armful's Battle Road as a party member.
| Baramos (バラモス Baramosu) |  |
 |
||||
| Family | Rank | Role | ||
??? |
Magic |
|||
| Max Level | HP | MP | Move | |
| 130 | 1,005 | 527 | 2-3 | |
| Attack | Defense | Agility | Wisdom | Weight |
| 418 | 295 | 292 | 440 | 65 |
| First | Second | Third | ||
| Necrogond Wave | Necroboom* | Compressed Kaboom* Talent Blossoming: Necrogond Miasma |
||
| First | Second | Third |
| Bangmeister / Stats Up | Zam Res +25 / Stats Up | Compressed Kaboom Potency +5% / Stats Up Necrogond Miasma Potency +5% Ability MP Cost -5% |
| Fourth | Fifth | |
| Woosh Res +25 / Stats Up | Compressed Kaboom Potency +5% / Stats Up Necrogond Miasma Potency +5% Ability MP Cost -5% |
|
| First | |
| Raises Bang-type brilliant potency of allies, including himself, by 15% in a 5x5 square around him. | |
| First | Second | Third |
| WIS +15 Max HP +30 |
Wicked Veil: Raises spell resistance for 3 turns at battle start. | Compressed Kaboom Potency +2% |
| First | |
| Bangmeister: Lowers Bang-type ability MP cost, raises potency | |
| Frizz Resistance * | Sizz Resistance * | Crack Resistance * | Woosh Resistance * | |
| Very Weak | Normal | Very Weak | Half Res | |
| Bang Resistance * | Zap Resistance * | Zam Resistance * | Snooze Resistance | |
| Normal | Normal | Half Res | Normal | |
| Poison Resistance | Physical Lock Resistance | Spell Lock Resistance | Martial Lock Resistance | |
| Super Weak | Normal | Half Res | Normal | |
| Breath Lock Resistance | Hobble Resistance * | Stun Resistance * | Dazzle Resistance | |
| Normal | Normal | Normal | Half Res | |
| Curse Resistance | Paralysis Resistance | Confusion Resistance | Charm Resistance | |
| Super Weak | Normal | Normal | Immune |
Trivia[edit]
- Baramos' design bears a slight similarity to the Dragon Ball character Piano, one of Demon King Piccolo's henchmen.
- Oddly, Baramos comes after his own ghost and corpse in the numerical list of monsters in III.
Similar species[edit]
Gallery[edit]

Modern artwork. (older color scheme)
DQM1·2 sprite.
Joker 2 model.

Icon in Monsters 2: 3D.

Model in Monster Road Victory.

Treasures statue
Appearance in Stars.

Archfiend Baramos in Rivals.

Chapter 3 of Walk's Dragon Quest III event.
Baramos in Walk.
Baramos as he appears in Tact.
DQ Trading Card.


