Zoma: Difference between revisions
m (→Stats) |
No edit summary |
||
| (80 intermediate revisions by 22 users not shown) | |||
| Line 1: | Line 1: | ||
{{quote|style3|quote='''''All shall know despair! All shall kneel! All shall gives their lives in sacrifice to my glory! For I am Zoma, bringer of oblivion!''''' |source=|console=|bgcolor=FF8C00}} | |||
{{Character | {{Character | ||
|Name=Zoma | |Name=Zoma | ||
|Game= | |Game={{DQ3}} | ||
|Image=[[ | |Image=[[File:DQM Zoma artwork.png|300px]] | ||
|Sprite= | |Sprite= | ||
|Japanese name=ゾーマ | |Japanese name=ゾーマ | ||
|Roumaji=Zōma | |Roumaji=Zōma | ||
|Title=Master Archfiend | |Title=Master Archfiend<br>{{tt|Great Demon Lord|大魔王, Daimaō}} (Japanese)<br>{{tt|King of Destruction|滅びの王, Horobi no ō}} (Japanese, {{Super Light}}/{{Rivals}}) | ||
|Class= | |Class= | ||
|Race=Demon | |Race=Demon | ||
|Age=Ageless | |Age=Ageless | ||
|Family= | |Family= | ||
|Voice Actor=[[Hidekatsu Shibata]] (Japanese, ''[[Dragon Quest III CD Theater|CD Theater]]'')<br>[[Akio Otsuka]] (Japanese, {{Rivals}}, ''[[Dragon Quest X]]'', and ''[[Dragon Quest III HD-2D Remake]]'') | |||
}} | }} | ||
'''Zoma''', the Master Archfiend of the [[Alefgard|Dark World]], is the final villain and chief antagonist of | {{translation|'''Zoma'''|ゾーマ, ''Zoma''}}, the Master Archfiend of the [[Alefgard|Dark World]], is the final villain and chief antagonist of {{Dragon Quest III}}. | ||
== | ==Appearance and personality== | ||
Zoma is a blue demon dressed in the golden robes of an emperor and wearing a purple cape that attaches to his shoulders in large horizontal pads. A red, white, and black banner covers his torso as well as his knees, and wraps around his neck as a large collar. His face is skeletal with tight skin and an open nasal cavity. His helmet is huge compared to his head, featuring a massive eye in the center and two large, upwards curving horns on both sides. | |||
Zoma is a demon of unfathomable power, whose [[Magic and Abilities|sorcery]] is so great that he was able to imprison the kingdom of [[Alefgard]] in a shroud of eternal night. Due to this, he was able to sustain himself on the despair of the people trapped within, bolstering his physical might to the point that he was able to shatter a sword made of [[Orichalcum]], albeit after a prolonged effort of three years. His incredible strength is supported by a mastery of [[Kacrackle|ice magic]] and [[C-c-cold Breath|freezing breath]], and it is said that the very air becomes chilled by his mere presence. Zoma is also the first boss in the series to make use of the infamous [[Disruptive Wave]] technique, stripping his enemies of any support spells. | |||
Zoma | The Archfiend resides in [[Zoma's Citadel|his Citadel]] south-east of [[Tantegel]], where he gorges himself on the fear and despair of the land’s inhabitants, cloaking himself in an nigh upon impenetrable shroud of darkness that no spell can pierce. However, Zoma is weakened by the [[Sphere of Light]] and the shroud is destroyed when the ball is used in battle. Upon being defeated by the {{Hero 3}} (as well as [[Terry]] in {{Monsters}}), Zoma mockingly congratulates [[Hero (Dragon Quest III)|his vanquisher]], but warns that his death will not bring an end to the world's suffering, and that a new evil shall arise to take his place long after the {{Hero 3}} has died. He is proven correct that the [[Dragonlord|darkness yet to come]] will throw [[Alefgard]] into despair, but failed to realize that the lineage of [[hero]]es will resurface to restore light to the world once more. | ||
==Appearances== | ==Appearances== | ||
=== | ==={{DQ3}}=== | ||
Zoma is | Near the end of the game, Zoma is revealed to be the master of the archfiend [[Baramos]], whom had been previously alluded to as the final boss to the game. Upon the death of his main and chief servant, Zoma's voice roars throughout the throne room of [[Aliahan]] castle, stating his intent to plunge the "[[Overworld (Dragon Quest III)|world of light]]" into darkness and that the {{Hero 3}} is a fool for assuming that he had won peace. This proclamation sends the [[King of Aliahan]] into a deep despair, forbidding the {{Hero 3}} and company from speaking of Zoma. | ||
==== | Zoma is on the basement floor of his castle along with three sub-bosses--the [[King Hydra]] along with the [[Soul of Baramos|soul]] and [[Bones of Baramos|skeleton]] of [[Baramos]]. He approaches and berates the {{Hero 3}} prior to allowing his three subordinates to fight the {{Hero 3}}'s {{Party 3}} before him. | ||
{{DQ3Enemy | |||
| | |name=Zoma | ||
| | |kanji= ゾーマ | ||
| | |romanji=Zoma | ||
| | |bestiaryNumber=#134 | ||
| | |sprite=[[Image:Zoma2 DQIII NES.gif]] | ||
|lvl=63 | |||
| | |hp=1,023<br>4,700({{SFC}}) | ||
| | |mp=255 | ||
| | |exp=0 | ||
| | |gold=0 | ||
| | |attack=360 | ||
| | |defense=200 | ||
| | |agility=80 | ||
|gold= | |spells=[[Kacrackle]] | ||
| | |skills=Acts twice per turn.<br>[[Freezing Blizzard|C-c-cold Breath]]<br>[[Disruptive Wave]]<br>Recovers 90~110 {{HP}} per turn. | ||
|skills=[[C-c-cold Breath]]<br>[[Disruptive Wave]]<br> | |locations=[[Zoma's Citadel]] | ||
| | |item=None | ||
| | |evasion={{fraction|0|64}} | ||
| | |fire-resist=0% | ||
| | |crack-resist=100% | ||
| | |woosh-resist=70% | ||
|}} | |zap-resist=0% | ||
Remove his | |whack-resist=100% | ||
|kamikazee-resist=100% | |||
|poof-resist=100% | |||
|dazzle-resist=100% | |||
|snooze-resist=100% | |||
|drain-magic-resist=100% | |||
|fizzle-resist=100% | |||
|fuddle-resist=100% | |||
|sap-resist=0% | |||
|deceleratle-resist=100% | |||
|snes-sprites=[[File:Zoma DQIII SNES.png]] | |||
|gbc-sprites=[[File:Zoma III gbc.png]] | |||
|switch-sprites=[[File:Zoma Erdrick Trilogy Switch.png|150px]] | |||
}} | |||
{{DQ3Enemy | |||
|name=Zoma (shrouded) | |||
|kanji= ゾーマ | |||
|romanji=Zoma | |||
|bestiaryNumber=#134 | |||
|sprite=[[File:Zoma DQIII NES.gif]] | |||
|lvl=63 | |||
|hp=1,023<br>4,500({{SFC}}) | |||
|mp=255 | |||
|exp=0 | |||
|gold=0 | |||
|attack=500 | |||
|defense=350 | |||
|agility=255 | |||
|spells=[[Kacrackle]]<br>[[Bounce]] | |||
|skills=Acts twice per turn.<br>[[C-c-cold Breath]]<br>[[Disruptive Wave]]<br>Recovers 90~110 {{HP}} per turn. | |||
|item=None | |||
|locations=[[Zoma's Citadel]] | |||
|evasion={{fraction|0|64}} | |||
|fire-resist=100% | |||
|crack-resist=100% | |||
|woosh-resist=100% | |||
|zap-resist=100% | |||
|whack-resist=100% | |||
|kamikazee-resist=100% | |||
|poof-resist=100% | |||
|dazzle-resist=100% | |||
|snooze-resist=100% | |||
|drain-magic-resist=100% | |||
|fizzle-resist=100% | |||
|fuddle-resist=100% | |||
|sap-resist=100% | |||
|deceleratle-resist=100% | |||
|snes-sprites=[[File:Zoma2 DQIII SNES.png]] | |||
|gbc-sprites=[[File:Shroud zoma gbc.png]] | |||
|switch-sprites=[[File:Zoma shroud of shadows erdrick trilogy switch.png|150px]] | |||
}} | |||
====Strategy==== | |||
Remove his [[Shroud of Shadows]] immediately with the [[Sphere of Light]]; without it, Zoma is immune to nigh upon everything you can throw at him. His [[C-c-cold Breath|breath]] and [[Kacrackle|ice magic]] is more powerful, and his physical ability is also quite powerful . On top of this, he will regenerate 90~110 {{HP}} per round, minimizing any damage players can inflict between healing sessions. This form is so powerful that it has become a challenge among {{III}}'s players to slay the fiendish overlord '''without''' the [[Sphere of Light]]. | |||
Once the | Once the shield is removed, Zoma's defensive capabilities will plummet considerably: [[Sap]], [[Zap]], and all forms of fire will hit 100% of the time, and his regeneration will be nixed. [[Woosh]] spells also have a 30% chance to connect. The {{Hero 3}}/[[Warrior]] should be [[Oomph]]ed at all times. If the {{Hero 3}} isn’t physically attacking, he should be casting [[Kazap]] for extra damage. This is slightly risky though, for if the battle goes south, [[Omniheal]] may be necessary, and the {{Hero 3}} needs to have enough {{MP}} to cast it. The [[Warrior]] should also have a [[Staff of resurrection]] as a Hail Mary. The [[Sage]]/[[Priest]] should continually cast [[Multiheal]], and, as extra insurance, have a [[Sage's staff]] as backup for when they run out of {{MP}}. The [[Mage]]/[[Sage]] (although a [[Sage]] is recommended), should use the [[Sage's stone]] when the [[Priest]]’s [[Multiheal]] isn’t enough to fully heal the {{Party 3}}, and otherwise spam [[Kafrizzle]]. Keep this strategy up, and taking a few turns to heal every now and then, and one should be able to best the hellish demon. '''NOTE: The preceding strategy''' | ||
'''may not work if the player’s {{Party 3}} is under level 45.''' | |||
=== | ==={{DQ9}}=== | ||
{{DQ9Enemy | |||
|float=left | |||
|name=Zoma | |||
|image=[[File:Zoma IX DS.png]] | |||
|game={{Dragon Quest IX}} | |||
|console={{DS}} | |||
|hp=8000<br>16070 (99) | |||
|mp=255 | |||
|attack=675<br>1346 (99) | |||
|defense=570<br>855 (99) | |||
|agility=350<br>560 (99) | |||
|experience=63600 | |||
|gold=2490 | |||
|droppedItem=[[Mini medal]] (common, 100%)<br/>[[Silver Orb]] (rare, 10%-15%) | |||
|family={{Q family}} | |||
|bestiaryNumber= | |||
|description="A truly intimidating opponent who can attack twice and use seriously strong spells. Lay into him with the power of light. | |||
His unparalleled evil made him very popular with {{MFamilies}}s, but he left the lands above to escape his screaming fans." | |||
|locations = {{Grotto}} | |||
|fire=100 | |||
|ice=50 | |||
|wind=100 | |||
|earth=100 | |||
|light=150 | |||
|dark=100 | |||
|blast=100 | |||
|drnmp=100 | |||
|mrdown=25 | |||
|sleep=25 | |||
|charm=5 | |||
|blunt=5 | |||
|sap=15 | |||
|decelerate=75 | |||
}} | |||
Zoma appears as a | Zoma appears as a {{Legacy Boss}}, obtained after completing [[List of quests in Dragon Quest IX#Quest #161 - #169|Quest #167]] (or received at special events). He is [[enraged]] anytime a character is revived. | ||
{| border="0" cellpadding="5" cellspacing="0" width="100%" | {| border="0" cellpadding="5" cellspacing="0" width="100%" | ||
| Line 69: | Line 157: | ||
!style="background:#4682B4; color: white;"| | !style="background:#4682B4; color: white;"| | ||
|- | |- | ||
|1-3||Aliahan gloves||15%||[[Silver Orb]]|| | |1-3||Aliahan gloves||15%||[[Silver Orb]]||10% | ||
|- | |- | ||
|4-8||Aliahan gloves||20%||Silver Orb|| | |4-8||Aliahan gloves||20%||[[Silver Orb]]||10% | ||
|- | |- | ||
|9-15||Aliahan gloves||25%||Silver Orb|| | |9-15||Aliahan gloves||25%||[[Silver Orb]]||11% | ||
|- | |- | ||
|16-25||Aliahan trousers||15%||Silver Orb|| | |16-25||Aliahan trousers||15%||[[Silver Orb]]||11% | ||
|- | |- | ||
|26-40||Aliahan trousers||20%||Silver Orb|| | |26-40||Aliahan trousers||20%||[[Silver Orb]]||12% | ||
|- | |- | ||
|41-56||Aliahan trousers||25%||Silver Orb|| | |41-56||Aliahan trousers||25%||[[Silver Orb]]||12% | ||
|- | |- | ||
|57-68||Aliahan clothes||25%||Silver Orb|| | |57-68||Aliahan clothes||25%||[[Silver Orb]]||13% | ||
|- | |- | ||
|69-80||Aliahan headpiece||15%||Silver Orb|| | |69-80||Aliahan headpiece||15%||[[Silver Orb]]||13% | ||
|- | |- | ||
|81-90||Aliahan headpiece||20%||Silver Orb|| | |81-90||Aliahan headpiece||20%||[[Silver Orb]]||14% | ||
|- | |- | ||
|91-99||Aliahan headpiece||25%||Silver Orb|| | |91-99||Aliahan headpiece||25%||[[Silver Orb]]||15% | ||
|} | |} | ||
*''In addition, he will always drop a [[ | *''In addition, he will always drop a [[Mini medal]].'' | ||
| valign="top" width="50%" | | | valign="top" width="50%" | | ||
| Line 97: | Line 185: | ||
!style="background:#4682B4; color: white;"|New abilities | !style="background:#4682B4; color: white;"|New abilities | ||
|- | |- | ||
|''Initial''||[[Disruptive Wave]], [[Kacrack]], critical attack, attacks twice per round | |''Initial''||[[Disruptive Wave]], [[Kacrack]], [[Critical Hit|critical attack]], attacks twice per round. | ||
|- | |- | ||
|8||[[C-c-cold Breath]] | |8||[[C-c-cold Breath]] | ||
| Line 105: | Line 193: | ||
|33||[[Air Pollution]] | |33||[[Air Pollution]] | ||
|- | |- | ||
|41||Begins attacking 3 times per turn | |41||Begins attacking 3 times per turn. | ||
|- | |- | ||
|49||[[Kacrackle]] | |49||[[Kacrackle]] | ||
| Line 113: | Line 201: | ||
|} | |} | ||
== | ==={{DQM}}=== | ||
=== | {{DQMEnemy | ||
In this game, he resides deep inside the Room of Control, threatening Terry the same way he threatened the people in | |name=Zoma | ||
|kanji= ゾーマ | |||
|romanji=Zoma | |||
|sprite=[[File:Zoma DQM GBC.png]] | |||
|level=70 | |||
|hp=3/5 | |||
|mp=5/5 | |||
|attack=5/5 | |||
|defense=2/5 | |||
|wisdom=5/5 | |||
|agility=5/5 | |||
|family={{Q family}} | |||
|in-game-description=The source of all evil | |||
|abilities=[[Cool Breath|FrigidAir]], [[Disruptive Wave|DeMagic]], [[Big Banga|BigBang]] | |||
|habitat=[[List of teleportals in Dragon Quest Monsters|Gate of Control]] | |||
|breeding=[[Dragonlord|DracoLord]] (either form) x [[Malroth|Sidoh]] | |||
|frizz-resist=Weak | |||
|sizz-resist=Strong | |||
|fire-breath-resist=Strong | |||
|bang-resist=Immune | |||
|crack-resist=Immune | |||
|ice-breath-resist=Strong | |||
|woosh-resist=Immune | |||
|rock-resist=Strong | |||
|zap-resist=Weak | |||
|water-resist=Strong | |||
|gigaslash-resist=Weak | |||
|magic-burst-resist=Strong | |||
|drain-resist=Immune | |||
|whack-resist=Immune | |||
|kamikazee-resist=Immune | |||
|poison-resist=Immune | |||
|paralysis-resist=Immune | |||
|fuddle-resist=Immune | |||
|snooze-resist=Immune | |||
|dazzle-resist=Immune | |||
|sap-resist=Immune | |||
|decelerate-resist=Immune | |||
|fizzle-resist=Immune | |||
|stun-resist=Immune | |||
|ban-dance-resist=Immune | |||
|gobstopper-resist=Immune | |||
|curse-resist=Immune | |||
}} | |||
In this game, he resides deep inside the Room of Control, threatening [[Terry]] the same way he threatened the people in {{Dragon Quest III}}. | |||
==={{DQM2}}=== | |||
{{DQM2Enemy | |||
|name=Zoma | |||
|kanji= ゾーマ | |||
|romanji=Zoma | |||
|sprite=[[File:Zoma DQM2 GBC.png]] | |||
|level=70 | |||
|hp=7/10 | |||
|mp=9/10 | |||
|attack=8/10 | |||
|defense=6/10 | |||
|wisdom=7/10 | |||
|agility=7/10 | |||
|family={{Q family}} | |||
|in-game-description= | |||
|abilities=[[Big Banga|BigBang]], [[Disruptive Wave|DeMagic]], [[Cool Breath|FrigidAir]] | |||
|habitat= | |||
|breeding=[[Dragonlord|DracoLord]], [[Dragonlord|DracoLord]] (Dragon) x [[Malroth|Sidoh]] | |||
|frizz-resist=Weak | |||
|sizz-resist=Strong | |||
|fire-breath-resist=Strong | |||
|bang-resist=Immune | |||
|crack-resist=Immune | |||
|ice-breath-resist=Strong | |||
|woosh-resist=Immune | |||
|rock-resist=Strong | |||
|zap-resist=Weak | |||
|water-resist=Strong | |||
|gigaslash-resist=Weak | |||
|magic-burst-resist=Strong | |||
|drain-resist=Immune | |||
|whack-resist=Immune | |||
|kamikazee-resist=Immune | |||
|poison-resist=Immune | |||
|paralysis-resist=Immune | |||
|fuddle-resist=Immune | |||
|snooze-resist=Immune | |||
|dazzle-resist=Immune | |||
|sap-resist=Immune | |||
|decelerate-resist=Immune | |||
|fizzle-resist=Immune | |||
|stun-resist=Immune | |||
|ban-dance-resist=Immune | |||
|gobstopper-resist=Immune | |||
|curse-resist=Immune | |||
}} | |||
==={{DQMJ}}=== | |||
{{DQMJmonster | |||
|name = Zoma | |||
|image = | |||
|family = {{Demon}} | |||
|rank = X | |||
|description = ''The vast powers wielded by this dark lord strike fear into even spirits of darkness.'' | |||
|weapons = {{Sword}}s, {{Spear}}s, {{Hammer}}s, {{Staves}} | |||
|traits = [[List of Traits in Dragon Quest Monsters: Joker|Double Trouble]] | |||
|resistances = Vulnerable to [[Zap]], [[Whack]]proof, [[Fizzle]]proof | |||
|skill = [[Ice (skillset)|Ice II]] | |||
|location = - | |||
|breeding chart = [[Malroth]] x [[Wight king]], [[Dullahan]], or [[Bone baron]] | |||
}} | |||
{{clear}} | |||
==={{DQMJ2}}=== | |||
{{DQMJ2monster | |||
|name = Zoma | |||
|image = | |||
|family = {{Q family}} | |||
|rank = ??? | |||
|size = S | |||
|weapons = {{Sword}}s, {{Spear}}s, {{Hammer}}s, {{Staves}} | |||
|traits = [[List of Traits in Dragon Quest Monsters: Joker|Bouncer]], [[List of Traits in Dragon Quest Monsters: Joker|Tactical Trooper]] | |||
|resistances = Vulnerable to [[Zap]] and Inaction, Immune to [[Whack]] and [[Fizzle]] | |||
|skill = [[Zoma (skill)|Zoma]] | |||
|location = - | |||
|breeding chart = [[Malroth]] x [[Captain Crow]], [[Dullahan]], or [[Wight king]] | |||
}} | |||
{{clear}} | |||
=== | ==={{DQM3D}}=== | ||
In this game, Zoma's role is the same as it was supposed in the first {{Monsters}}. | |||
=== | ==={{DQM2R}}=== | ||
Zoma is bred from [[Dragonlord|Dracolord]] (Either Form) and [[Malroth|Sidoh]]. It can be bred with [[Nimzo]] (Either Form) to make [[Mortamor]] or bred with [[Psycho Psaro]] to upgrade it to [[Asura Zoma]]. | |||
=== | ==={{DQMJ3}}=== | ||
{{Stub}} | |||
===''[[ | ==={{DQM3}}=== | ||
{{DQM3Enemy | |||
|name=Zoma | |||
|kanji= | |||
|romanji= | |||
|icon=[[File:Zoma DQM3 portrait.png|100px]] | |||
|family=[[File:DQM3 ??? family icon.png|link=??? family]] | |||
|hp=<big><big>1,270</big></big> | |||
|mp=<big><big>520</big></big> | |||
|attack=<big><big>500</big></big> | |||
|defense=<big><big>600</big></big> | |||
|wisdom=<big><big>760</big></big> | |||
|agility=<big><big>470</big></big> | |||
|bestiary=#521 | |||
|rank=<big><big>'''X'''</big></big> | |||
|in-game-description=A demonic despot who wishes to turn the world to dust with his own hands. He devours despair and feasts on fear, stopping only to wash it down with the saltiest tears of sadness | |||
|talents=[[Zoma (Talent)|Zoma]] (lv. 1) | |||
|traits=[[Rando-Disrupt]] (lv. 1)<br>[[Ultra Crafty Cracker]] (lv. 20)<br>[[Wizardly Waft]] (lv. 40) | |||
|ltraits=[[Tactical Commander]] (lv. 1)<br>[[Late Bloomer]] (lv. 1)<br>[[Crackmeister]] (lv. 60) | |||
|habitat=This {{MFamilies}} has no natural habitat | |||
|items=N/A | |||
|synthesis=[[File:King hydra DQM3 portrait.png|64px|link=King hydra]] X [[File:Bones of baramos DQM3 portrait.png|64px|link=Bones of Baramos]] X [[File:Malroth DQM3 portrait.png|64px|link=Malroth]] X [[File:Calasmos DQM3 portrait.png|64px|link=Calasmos]] | |||
|fusions=N/A | |||
|fire-resist=% | |||
|water-resist=% | |||
|wind-resist=% | |||
|earth-resist=% | |||
|explosion-resist=% | |||
|ice-resist=% | |||
|electricity-resist=% | |||
|light-resist=% | |||
|dark-resist=% | |||
|debilitation-resist=% | |||
|bedazzlement-resist=% | |||
|antimagic-resist=% | |||
|mp-absorption-resist=% | |||
|confusion-resist=% | |||
|sleep-resist=% | |||
|paralysis-resist=% | |||
|stun-resist=% | |||
|poison-resist=% | |||
|instant-death-resist=% | |||
}} | |||
=== | ==={{DQMSL}}=== | ||
{{Stub}} | |||
=== | ==={{DQMBRV}}=== | ||
=== | {{Stub}} | ||
==={{DQH}}=== | |||
Beating Zoma will unlock the costumes from {{Dragon Quest III}} for both [[Luceus]] and [[Aurora]]. | |||
{{DQHEnemy | |||
|name=Zoma | |||
|kanji=ゾーマ | |||
|romanji={{tt||}} | |||
|listNumber=#107 | |||
|fieldNotes=A self-appointed doyen among demons, whose enchanted apparel protects him from all attacks.<br/>Legends tell of how he [[Dragon Quest III: The Seeds of Salvation|plotted to rob the world of light, and plunge it into everlasting darkness]]. | |||
|image=[[File:DQ_Heroes_Zoma.png|200px]] | |||
|exp=1999 | |||
|gold=777<span style="font-variant: small-caps;">g</span> | |||
|item=None | |||
|locations=City of Sorrows - Lair of the Lord of Darkness (awarded Erdrick’s orb) | |||
}} | |||
=== | ==={{DQStars}}=== | ||
Zoma appeared once more as the final boss of the {{III}} scenario section. He could also be challenged with Zoma keys at Legendary, Giga-Legendary, and Fiend difficulties. | |||
=== | ==={{DQRivals}}=== | ||
Zoma was introduced in the first card pack as a legendary rare card and he appears on the artwork of several cards, as well. As a reference to his original appearance in {{Dragon Quest III}}, Zoma has his Dark Robes when he is summoned on the field and a [[Sphere of Light]] is placed on top of the opponent's deck. This made him immune to all attacks and card effects until the enemy leader used the Sphere, which would cost 4 {{MP}} to use. Zoma appeared on another card in the 7th card pack, "Strange Tale of Light and Darkness" under the name "Great Demon Lord Zoma". He appeared as a boss in the Solo Battle Adventure in the Zoma's Castle level and on another card in the 2nd card pack after the game's name changed to {{Rivals Ace}} as "King of Destruction Zoma". | |||
== | ==={{DQWalk}}=== | ||
Zoma first appeared in the game as the boss of Chapter 5 of the {{Dragon Quest III}} event held from March to May 2020, as well as a special mega version that can be challenged by multiple players. | |||
==={{DQTact}}=== | |||
Image: | Zoma appears as a S-rank {{MFamilies}} of the [[??? family]] as part of the {{Dragon Quest III}} event, appearing on his own banner alongside [[Boss troll]]. He can be faced in the event quest Chapter 5, Episode 4: Archfiend Zoma, as well as his own boss battle. Zoma can also participate in [[Skelegon]]'s Battle Road as a party member. He also appears in the limited ''True Dragon Quest III'' event and there he can be faced in a Score Challenge in The Battle of [[Zoma's Citadel|Zoma's Castle]] and he's as a boss during the Fiendish Onslaught at the game's half-year anniversary. | ||
Image: | {{DQTactEnemy | ||
Image: | |name=Zoma | ||
Image: | |kanji=ゾーマ | ||
|romanji=Zōma | |||
|sprite=[[Image:DQT Zoma.png|275px]] | |||
|family=[[Image:Tact Icon SpecialFamily.png|48px]]<br>{{Q family}} | |||
|rank=[[Image:DQTact Rank Icon S.png|48px]] | |||
|role=[[Image:DQTact MagicType.png|48px]]<br>Magic | |||
|lvl=130 | |||
|hp=896 | |||
|mp=522 | |||
|move=2 | |||
|attack=335 | |||
|defense=316 | |||
|agility=441 | |||
|wisdom=473 | |||
|weight=65 | |||
|bskill1=[[Frigid Breath]] | |||
|bskill2=[[Psycannon]]{{tt|*|Level 40}} | |||
|bskill3=[[Glacial Doom]]{{tt|*|Level 52}}<br>'''Talent Blossoming''': [[Psycho Requiem]], [[Frigid Wave]] | |||
|askill1=Spell Tricks/Stats Up | |||
|askill2=[[Frizz]] Res +25/Stats Up | |||
|askill3=Spell Potency +5%/Stats Up | |||
|askill4=[[Bang]] Res +25/Stats Up | |||
|askill5=Spell Potency +5%/Stats Up | |||
|lperk1=Raises [[Crack]]-type spell potency of allies, including himself, by 20% in a 5x5 square around him. | |||
|bperk1={{WIS}} +15<br>Max {{MP}} +15 | |||
|bperk2='''Dark Robes''': Reduces damage by 20% for 3 turns at battle start. | |||
|bperk3=Spell Potency +2% | |||
|aperk1='''Spell Tricks''': Lowers spell ability {{MP}} cost, raises potency and effect. | |||
|frizz-resist=Half Res | |||
|sizz-resist=Normal | |||
|crack-resist=Normal | |||
|woosh-resist=Very Weak | |||
|bang-resist=Half Res | |||
|zap-resist=Very Weak | |||
|zam-resist=Normal | |||
|snooze-resist=Half Res | |||
|poison-resist=Normal | |||
|physical-seal-resist=Normal | |||
|spell-seal-resist=Half Res | |||
|martial-seal-resist=Normal | |||
|breath-seal-resist=Normal | |||
|hobble-resist=Super Weak | |||
|stun-resist=Immune | |||
|blind-resist=Normal | |||
|curse-resist=Normal | |||
|paralysis-resist=Super Weak | |||
|confusion-resist=Normal | |||
|charm-resist=Normal | |||
}} | |||
==={{DQKK}}=== | |||
{{Stub}} | |||
==Trivia== | ==Trivia== | ||
* | *Zoma is depicted with an inconsistent number of fingers. He was originally depicted having four fingers in his hands, but newer games (including remakes) instead show five fingers instead. ''Dragon Quest Tact'' still depicts him having four fingers though. | ||
*In the original version of {{III}}, Zoma's Shroud of Shadows uses his normal colour pallet and his weakened state uses the bleaker colours due to a glitch. This error was corrected in the {{Super Famicom}} remake. | |||
:*It is speculated that this was not an error, and that Zoma was meant to take a different form once the Sphere of Light is used. This is supported by concept art found in ''[[Dragon Quest Illustrations]]'' that depicts a monster reminiscent of the [[hellspawn]] next to Zoma, and Yuji Horii's remarks that the ROM for ''III'' was completely full by the end of development. If this speculation is true, then it is possible that the duller colour scheme was chosen to signify that the fiend was weakened due to there not being enough room for a new sprite on the cartridge. | |||
==See also== | ==See also== | ||
* [[Asura Zoma]] | *[[Asura Zoma]] | ||
* [[Zoma's devil]] | *[[Zoma's devil]] | ||
*[[Zoma's Citadel]] | |||
*[[Xenlon]] | |||
==Gallery== | |||
<center><gallery> | |||
Prototype_Zoma_transformation.jpg|Unused concept art for Zoma, possibly after the Sphere of Light is used on him. | |||
ZomaArt.png|Artwork from {{III}}. | |||
Zoma DQM PSX.gif|Sprite in {{1·2}}. | |||
Zoma DQMJ DS.png|{{Joker}}. | |||
Zoma joker 2.png|{{Joker 2}}. | |||
DQM2-3D Zoma Icon.jpeg|Icon in {{Monsters 2: 3D}}. | |||
DQMBRV Zoma artwork.png|Model in ''Monster Road Victory''. | |||
DQX Zoma.jpg|Zoma in {{X}}. | |||
DQ35th Zoma.jpg|35th Anniversary boss challenge. | |||
DQ Stars Android Zoma 1.jpg|Appearance in {{Stars}}. | |||
DQ Stars Android Zoma 2.jpg| | |||
DQ Stars Android Zoma 3.jpg| | |||
Kenshin DQ Dragonlord 1st forme.png|Official art for ''[[Kenshin Dragon Quest]]''. | |||
DQR Zoma.png|Zoma in {{Rivals}}. | |||
DQR Daimaou Zoma.png | |||
DQR King of Destruction Zoma.png | |||
DQR_Loyalty_to_Demon_Lord.png|Cameo apperance in the ''Loyalty to Demon Lord'' card along with a [[Lesionnaire]] and a [[Dark dullahan]] in {{Rivals}}. | |||
DQT Zoma Event.jpg|Zoma as he appears in {{Tact}}. | |||
DQW Zoma VS Erdrick.jpg|Chapter 5 of {{Walk}}'s {{Dragon Quest III}} event. | |||
DQW Zoma.png|Zoma in {{Walk}}. | |||
Zoma.jpg|Zoma, from the {{Sofubi Monster}} merchandise line by Square Enix. | |||
Metalzomasofubi.jpg|Metal figurine. | |||
Maou no Densetsu Zoma.jpg|''Densetsu no Maō'' plush toy. | |||
</gallery></center> | |||
{{Bosses}} | {{Bosses}} | ||
{{DQIII}} | {{DQIII}} | ||
{{DQIXBossNav}} | {{DQIXBossNav}} | ||
{{DQHI}} | |||
[[Category:Final bosses]] | [[Category:Final bosses]] | ||
[[Category:Dragon Quest III characters]] | [[Category:Dragon Quest III characters]] | ||
| Line 172: | Line 517: | ||
[[Category:Dragon Quest IX enemies]] | [[Category:Dragon Quest IX enemies]] | ||
[[Category:Dragon Quest IX bosses]] | [[Category:Dragon Quest IX bosses]] | ||
[[Category:Dragon Quest X enemies]] | |||
[[Category:Dragon Quest X bosses]] | |||
[[Category:Dragon Quest Monsters enemies]] | [[Category:Dragon Quest Monsters enemies]] | ||
[[Category:Dragon Quest Monsters 2 enemies]] | [[Category:Dragon Quest Monsters 2 enemies]] | ||
[[Category:Dragon Quest Monsters: Joker enemies]] | [[Category:Dragon Quest Monsters: Joker enemies]] | ||
[[Category:Dragon Quest Monsters: Joker 2 enemies]] | [[Category:Dragon Quest Monsters: Joker 2 enemies]] | ||
[[Category:Dragon Quest Monsters: Terry's Wonderland 3D enemies]] | [[Category:Dragon Quest Monsters: Terry's Wonderland 3D enemies]] | ||
[[Category:Dragon Quest Monsters 2: Iru and | [[Category:Dragon Quest Monsters 2: Iru and Luca's Marvelous Mysterious Key enemies]] | ||
[[Category:Dragon Quest Monsters: Joker 3 enemies]] | |||
[[Category:Dragon Quest Monsters: The Dark Prince enemies]] | |||
[[Category:Dragon Quest Monsters: Super Light enemies]] | [[Category:Dragon Quest Monsters: Super Light enemies]] | ||
[[Category:Dragon Quest Monster Battle Road Victory enemies]] | [[Category:Dragon Quest Monster Battle Road Victory enemies]] | ||
[[Category:Dragon Quest Heroes: The World Tree's Woe and the Blight Below bosses]] | [[Category:Dragon Quest Heroes: The World Tree's Woe and the Blight Below bosses]] | ||
[[Category:Dragon Quest of the Stars enemies]] | |||
[[Category:Dragon Quest Rivals characters]] | |||
[[Category:Dragon Quest Rivals enemies]] | |||
[[Category:Dragon Quest Walk bosses]] | |||
[[Category:Dragon Quest Walk enemies]] | |||
[[Category:Dragon Quest Tact bosses]] | |||
[[Category:Dragon Quest Tact monsters]] | |||
[[Category:Dragon Quest Keshi Keshi enemies]] | |||
[[fr:Zoma]] | |||
Revision as of 17:44, 30 November 2024
"All shall know despair! All shall kneel! All shall gives their lives in sacrifice to my glory! For I am Zoma, bringer of oblivion!"
| Zoma | |
| Dragon Quest III: The Seeds of Salvation | |
| |
| Japanese name | ゾーマ |
| Romaji | Zōma |
| Title | Master Archfiend Great Demon Lord (Japanese) King of Destruction (Japanese, Super Light/Rivals) |
| Race | Demon |
| Age | Ageless |
| Voice actor | Hidekatsu Shibata (Japanese, CD Theater) Akio Otsuka (Japanese, Rivals, Dragon Quest X, and Dragon Quest III HD-2D Remake) |
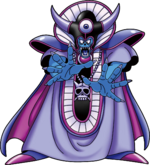
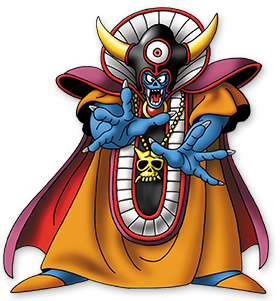
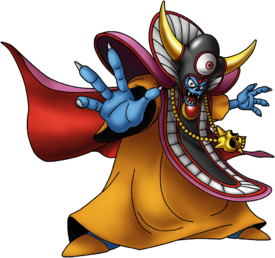
Zoma (ゾーマ, Zoma), the Master Archfiend of the Dark World, is the final villain and chief antagonist of Dragon Quest III.
Appearance and personality
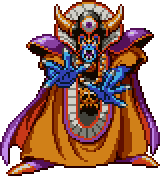
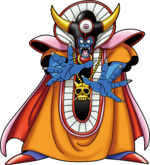
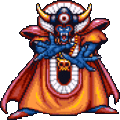
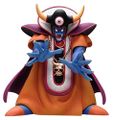
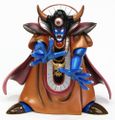
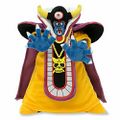
Zoma is a blue demon dressed in the golden robes of an emperor and wearing a purple cape that attaches to his shoulders in large horizontal pads. A red, white, and black banner covers his torso as well as his knees, and wraps around his neck as a large collar. His face is skeletal with tight skin and an open nasal cavity. His helmet is huge compared to his head, featuring a massive eye in the center and two large, upwards curving horns on both sides.
Zoma is a demon of unfathomable power, whose sorcery is so great that he was able to imprison the kingdom of Alefgard in a shroud of eternal night. Due to this, he was able to sustain himself on the despair of the people trapped within, bolstering his physical might to the point that he was able to shatter a sword made of Orichalcum, albeit after a prolonged effort of three years. His incredible strength is supported by a mastery of ice magic and freezing breath, and it is said that the very air becomes chilled by his mere presence. Zoma is also the first boss in the series to make use of the infamous Disruptive Wave technique, stripping his enemies of any support spells.
The Archfiend resides in his Citadel south-east of Tantegel, where he gorges himself on the fear and despair of the land’s inhabitants, cloaking himself in an nigh upon impenetrable shroud of darkness that no spell can pierce. However, Zoma is weakened by the Sphere of Light and the shroud is destroyed when the ball is used in battle. Upon being defeated by the Hero (as well as Terry in Monsters), Zoma mockingly congratulates his vanquisher, but warns that his death will not bring an end to the world's suffering, and that a new evil shall arise to take his place long after the Hero has died. He is proven correct that the darkness yet to come will throw Alefgard into despair, but failed to realize that the lineage of heroes will resurface to restore light to the world once more.
Appearances
Dragon Quest III: The Seeds of Salvation
Near the end of the game, Zoma is revealed to be the master of the archfiend Baramos, whom had been previously alluded to as the final boss to the game. Upon the death of his main and chief servant, Zoma's voice roars throughout the throne room of Aliahan castle, stating his intent to plunge the "world of light" into darkness and that the Hero is a fool for assuming that he had won peace. This proclamation sends the King of Aliahan into a deep despair, forbidding the Hero and company from speaking of Zoma.
Zoma is on the basement floor of his castle along with three sub-bosses--the King Hydra along with the soul and skeleton of Baramos. He approaches and berates the Hero prior to allowing his three subordinates to fight the Hero's party before him.
| Sprite | Level | HP | MP | |
 |
63 | 1,023 4,700(SFC) |
255 | |
| Attack | Defense | Agility | Experience | Gold |
| 360 | 200 | 80 | 0 | 0 |
| Bestiary No. | #134 |
| Spell(s) | Kacrackle |
| Skill(s) | Acts twice per turn. C-c-cold Breath Disruptive Wave Recovers 90~110 HP per turn. |
| Location(s) | Zoma's Citadel |
| Item Dropped | None |
| Evasion | Fire Resistance * | Crack Resistance * | Woosh Resistance * | ||
| 0⁄64 | 0% | 100% | 70% | ||
| Zap Resistance * | Drain Magic Resistance | Whack Resistance * | Kamikazee Resistance | ||
| 0% | 100% | 100% | 100% | ||
| Poof Resistance | Fuddle Resistance | Snooze Resistance | Dazzle Resistance | ||
| 100% | 100% | 100% | 100% | ||
| Fizzle Resistance | Sap Resistance * | Deceleratle Resistance * | |||
| 100% | 0% | 100% | |||
| Sprite | Level | HP | MP | |
 |
63 | 1,023 4,500(SFC) |
255 | |
| Attack | Defense | Agility | Experience | Gold |
| 500 | 350 | 255 | 0 | 0 |
| Bestiary No. | #134 |
| Spell(s) | Kacrackle Bounce |
| Skill(s) | Acts twice per turn. C-c-cold Breath Disruptive Wave Recovers 90~110 HP per turn. |
| Location(s) | Zoma's Citadel |
| Item Dropped | None |
| Evasion | Fire Resistance * | Crack Resistance * | Woosh Resistance * | ||
| 0⁄64 | 100% | 100% | 100% | ||
| Zap Resistance * | Drain Magic Resistance | Whack Resistance * | Kamikazee Resistance | ||
| 100% | 100% | 100% | 100% | ||
| Poof Resistance | Fuddle Resistance | Snooze Resistance | Dazzle Resistance | ||
| 100% | 100% | 100% | 100% | ||
| Fizzle Resistance | Sap Resistance * | Deceleratle Resistance * | |||
| 100% | 100% | 100% | |||
Strategy
Remove his Shroud of Shadows immediately with the Sphere of Light; without it, Zoma is immune to nigh upon everything you can throw at him. His breath and ice magic is more powerful, and his physical ability is also quite powerful . On top of this, he will regenerate 90~110 HP per round, minimizing any damage players can inflict between healing sessions. This form is so powerful that it has become a challenge among III's players to slay the fiendish overlord without the Sphere of Light.
Once the shield is removed, Zoma's defensive capabilities will plummet considerably: Sap, Zap, and all forms of fire will hit 100% of the time, and his regeneration will be nixed. Woosh spells also have a 30% chance to connect. The Hero/Warrior should be Oomphed at all times. If the Hero isn’t physically attacking, he should be casting Kazap for extra damage. This is slightly risky though, for if the battle goes south, Omniheal may be necessary, and the Hero needs to have enough MP to cast it. The Warrior should also have a Staff of resurrection as a Hail Mary. The Sage/Priest should continually cast Multiheal, and, as extra insurance, have a Sage's staff as backup for when they run out of MP. The Mage/Sage (although a Sage is recommended), should use the Sage's stone when the Priest’s Multiheal isn’t enough to fully heal the party, and otherwise spam Kafrizzle. Keep this strategy up, and taking a few turns to heal every now and then, and one should be able to best the hellish demon. NOTE: The preceding strategy may not work if the player’s party is under level 45.
Dragon Quest IX: Sentinels of the Starry Skies
| Zoma | |||||||||||||||||||||||||||||||||||||||||||
|---|---|---|---|---|---|---|---|---|---|---|---|---|---|---|---|---|---|---|---|---|---|---|---|---|---|---|---|---|---|---|---|---|---|---|---|---|---|---|---|---|---|---|---|

| |||||||||||||||||||||||||||||||||||||||||||
| |||||||||||||||||||||||||||||||||||||||||||
| Dropped Item | Mini medal (common, 100%) Silver Orb (rare, 10%-15%) | ||||||||||||||||||||||||||||||||||||||||||
| Locations | Grotto | ||||||||||||||||||||||||||||||||||||||||||
| Family | ??? | ||||||||||||||||||||||||||||||||||||||||||
| Game | Dragon Quest IX | ||||||||||||||||||||||||||||||||||||||||||
| Console | DS | ||||||||||||||||||||||||||||||||||||||||||
| Description | "A truly intimidating opponent who can attack twice and use seriously strong spells. Lay into him with the power of light.
His unparalleled evil made him very popular with monsters, but he left the lands above to escape his screaming fans." | ||||||||||||||||||||||||||||||||||||||||||
| Additional Attributes | ||||||
|---|---|---|---|---|---|---|
| Fire | Ice | Wind | Earth | Light | Dark | |
| 100 | 50 | 100 | 100 | 150 | 100 | |
| Blast | Dazzle | Sleep | Death | Drain MP | Confusion | |
| 100 | 0 | 25 | 0 | 100 | 0 | |
| Fizzle | Inaction | Paralyze | Poison | Charm | Magic Res | |
| 0 | 0 | 0 | 0 | 5 | 25 | |
| Blunt | Sap | Decelerate | ||||
| 5 | 15 | 75 | ||||
Zoma appears as a Legacy Boss, obtained after completing Quest #167 (or received at special events). He is enraged anytime a character is revived.
Treasure
|
Skills
|
Dragon Quest Monsters
| Sprite | Level cap * | HP growth | MP growth |
 |
70 | 3/5 | 5/5 |
| Strength growth | Resilience growth | Wisdom growth | Agility growth |
| 5/5 | 2/5 | 5/5 | 5/5 |
| Family | ??? |
| In-game description | The source of all evil |
| Abilities | FrigidAir, DeMagic, BigBang |
| Habitat | Gate of Control |
| Breeding chart | DracoLord (either form) x Sidoh |
| Frizz Resistance * | Sizz Resistance * | Fire Breath Resistance * | Bang Resistance * |
| Weak | Strong | Strong | Immune |
| Crack Resistance * | Ice Breath Resistance * | Woosh Resistance * | Rock/Army Resistance * |
| Immune | Strong | Immune | Strong |
| Zap Resistance * | Gigaslash Resistance | Magic Burst Resistance | Drain Magic Resistance * |
| Weak | Weak | Strong | Immune |
| Whack Resistance * | Kamikazee Resistance * | Poison Resistance * | Paralysis Resistance * |
| Immune | Immune | Immune | Immune |
| Fuddle Resistance * | Snooze Resistance * | Dazzle Resistance * | Fizzle Resistance |
| Immune | Immune | Immune | Immune |
| Ban Dance Resistance | Gobstopper Resistance | Stun Resistance * | Sap Resistance * |
| Immune | Immune | Immune | Immune |
| Decelerate Resistance * | Curse Resistance | ||
| Immune | Immune | ||
In this game, he resides deep inside the Room of Control, threatening Terry the same way he threatened the people in Dragon Quest III.
Dragon Quest Monsters 2
| Sprite | Level cap * | HP growth | MP growth |
 |
70 | 7/10 | 9/10 |
| Strength growth | Resilience growth | Wisdom growth | Agility growth |
| 8/10 | 6/10 | 7/10 | 7/10 |
| Family | ??? |
| In-game description | |
| Abilities | BigBang, DeMagic, FrigidAir |
| Habitat | |
| Breeding chart | DracoLord, DracoLord (Dragon) x Sidoh |
| Frizz Resistance * | Sizz Resistance * | Fire Breath Resistance * | Bang Resistance * |
| Weak | Strong | Strong | Immune |
| Crack Resistance * | Ice Breath Resistance * | Woosh Resistance * | Rock/Army Resistance * |
| Immune | Strong | Immune | Strong |
| Water Resistance * | Zap Resistance * | Gigaslash Resistance | Magic Burst Resistance |
| Strong | Weak | Weak | Strong |
| Drain Magic Resistance * | Whack Resistance * | Kamikazee Resistance * | Poison Resistance * |
| Immune | Immune | Immune | Immune |
| Paralysis Resistance * | Fuddle Resistance * | Snooze Resistance * | Dazzle Resistance * |
| Immune | Immune | Immune | Immune |
| Fizzle Resistance | Ban Dance Resistance | Gobstopper Resistance | Stun Resistance * |
| Immune | Immune | Immune | Immune |
| Sap Resistance * | Decelerate Resistance * | Curse Resistance | |
| Immune | Immune | Immune | |
Dragon Quest Monsters: Joker
| Zoma | |
|---|---|
| Family | Demon |
| Rank | X |
| Description | The vast powers wielded by this dark lord strike fear into even spirits of darkness. |
| Weapons | Swords, Spears, Hammers, Staves |
| Traits | Double Trouble |
| Resistances | Vulnerable to Zap, Whackproof, Fizzleproof |
| Skill | Ice II |
| Location | - |
| Breeding chart | Malroth x Wight king, Dullahan, or Bone baron |
Dragon Quest Monsters: Joker 2
| Zoma | |
|---|---|
| Family | ??? |
| Rank | ??? |
| Size | S |
| Weapons | Swords, Spears, Hammers, Staves |
| Traits | Bouncer, Tactical Trooper |
| Resistances | Vulnerable to Zap and Inaction, Immune to Whack and Fizzle |
| Skill | Zoma |
| Location | - |
| Breeding chart | Malroth x Captain Crow, Dullahan, or Wight king |
Dragon Quest Monsters: Terry's Wonderland 3D
In this game, Zoma's role is the same as it was supposed in the first Monsters.
Dragon Quest Monsters 2: Iru and Luca's Marvelous Mysterious Key
Zoma is bred from Dracolord (Either Form) and Sidoh. It can be bred with Nimzo (Either Form) to make Mortamor or bred with Psycho Psaro to upgrade it to Asura Zoma.
Dragon Quest Monsters: Joker 3
|
|
This article is a stub. You can help by expanding it. |
Dragon Quest Monsters: The Dark Prince
| Icon | Family | Max HP* | Max MP* |
 |
1,270 | 520 | |
| Max Attack | Max Defence | Max Agility | Max Wisdom |
| 500 | 600 | 470 | 760 |
| Bestiary No. | #521 |
| Rank | X |
| In-game description | A demonic despot who wishes to turn the world to dust with his own hands. He devours despair and feasts on fear, stopping only to wash it down with the saltiest tears of sadness |
| Talents | Zoma (lv. 1) |
| Guaranteed traits | Rando-Disrupt (lv. 1) Ultra Crafty Cracker (lv. 20) Wizardly Waft (lv. 40) |
| Large-size exclusive traits | Tactical Commander (lv. 1) Late Bloomer (lv. 1) Crackmeister (lv. 60) |
| Habitat | This monster has no natural habitat |
| Items | N/A |
| Synthesis chart |  X X  X X  X X  |
| Notable synthesis | N/A |
| Fire Resistance * | Water Resistance * | Wind Resistance * | Earth Resistance * |
| % | % | % | % |
| Explosion Resistance * | Ice Resistance * | Electricity Resistance * | Light Resistance * |
| % | % | % | % |
| Dark Resistance * | Debilitation Resistance* | Bedazzlement Resistance * | Antimagic Resistance * |
| % | % | % | % |
| MP Absorption Resistance * | Confusion Resistance * | Sleep Resistance * | Paralysis Resistance * |
| % | % | % | % |
| Stun Resistance * | Poison Resistance * | ||
| % | % | ||
| Instant Death Resistance * | |||
| % | |||
Dragon Quest Monsters: Super Light
|
|
This article is a stub. You can help by expanding it. |
Dragon Quest: Monster Battle Road Victory
|
|
This article is a stub. You can help by expanding it. |
Dragon Quest Heroes: The World Tree's Woe and the Blight Below
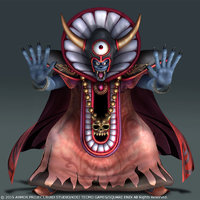
Beating Zoma will unlock the costumes from Dragon Quest III for both Luceus and Aurora.
| Model | Experience | Gold |
 |
1999 | 777g |
| List No. | #107 |
| Field Notes | A self-appointed doyen among demons, whose enchanted apparel protects him from all attacks. Legends tell of how he plotted to rob the world of light, and plunge it into everlasting darkness. |
| Location(s) | City of Sorrows - Lair of the Lord of Darkness (awarded Erdrick’s orb) |
| Item(s) Dropped | None |
Dragon Quest of the Stars
Zoma appeared once more as the final boss of the III scenario section. He could also be challenged with Zoma keys at Legendary, Giga-Legendary, and Fiend difficulties.
Dragon Quest Rivals
Zoma was introduced in the first card pack as a legendary rare card and he appears on the artwork of several cards, as well. As a reference to his original appearance in Dragon Quest III, Zoma has his Dark Robes when he is summoned on the field and a Sphere of Light is placed on top of the opponent's deck. This made him immune to all attacks and card effects until the enemy leader used the Sphere, which would cost 4 MP to use. Zoma appeared on another card in the 7th card pack, "Strange Tale of Light and Darkness" under the name "Great Demon Lord Zoma". He appeared as a boss in the Solo Battle Adventure in the Zoma's Castle level and on another card in the 2nd card pack after the game's name changed to Rivals Ace as "King of Destruction Zoma".
Dragon Quest Walk
Zoma first appeared in the game as the boss of Chapter 5 of the Dragon Quest III event held from March to May 2020, as well as a special mega version that can be challenged by multiple players.
Dragon Quest Tact
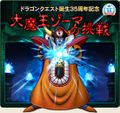
Zoma appears as a S-rank monster of the ??? family as part of the Dragon Quest III event, appearing on his own banner alongside Boss troll. He can be faced in the event quest Chapter 5, Episode 4: Archfiend Zoma, as well as his own boss battle. Zoma can also participate in Skelegon's Battle Road as a party member. He also appears in the limited True Dragon Quest III event and there he can be faced in a Score Challenge in The Battle of Zoma's Castle and he's as a boss during the Fiendish Onslaught at the game's half-year anniversary.
 |
||||
| Family | Rank | Role | ||
??? |
Magic |
|||
| Max Level | HP | MP | Move | |
| 130 | 896 | 522 | 2 | |
| Attack | Defense | Agility | Wisdom | Weight |
| 335 | 316 | 441 | 473 | 65 |
| First | Second | Third | ||
| Frigid Breath | Psycannon* | Glacial Doom* Talent Blossoming: Psycho Requiem, Frigid Wave |
||
| First | Second | Third |
| Spell Tricks/Stats Up | Frizz Res +25/Stats Up | Spell Potency +5%/Stats Up |
| Fourth | Fifth | |
| Bang Res +25/Stats Up | Spell Potency +5%/Stats Up | |
| First | |
| Raises Crack-type spell potency of allies, including himself, by 20% in a 5x5 square around him. | |
| First | Second | Third |
| WIS +15 Max MP +15 |
Dark Robes: Reduces damage by 20% for 3 turns at battle start. | Spell Potency +2% |
| First | |
| Spell Tricks: Lowers spell ability MP cost, raises potency and effect. | |
| Frizz Resistance * | Sizz Resistance * | Crack Resistance * | Woosh Resistance * | |
| Half Res | Normal | Normal | Very Weak | |
| Bang Resistance * | Zap Resistance * | Zam Resistance * | Snooze Resistance | |
| Half Res | Very Weak | Normal | Half Res | |
| Poison Resistance | Physical Lock Resistance | Spell Lock Resistance | Martial Lock Resistance | |
| Normal | Normal | Half Res | Normal | |
| Breath Lock Resistance | Hobble Resistance * | Stun Resistance * | Dazzle Resistance | |
| Normal | Super Weak | Immune | Normal | |
| Curse Resistance | Paralysis Resistance | Confusion Resistance | Charm Resistance | |
| Normal | Super Weak | Normal | Normal |
Dragon Quest Keshi Keshi
|
|
This article is a stub. You can help by expanding it. |
Trivia
- Zoma is depicted with an inconsistent number of fingers. He was originally depicted having four fingers in his hands, but newer games (including remakes) instead show five fingers instead. Dragon Quest Tact still depicts him having four fingers though.
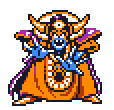
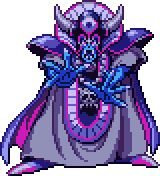
- In the original version of III, Zoma's Shroud of Shadows uses his normal colour pallet and his weakened state uses the bleaker colours due to a glitch. This error was corrected in the Super Famicom remake.
- It is speculated that this was not an error, and that Zoma was meant to take a different form once the Sphere of Light is used. This is supported by concept art found in Dragon Quest Illustrations that depicts a monster reminiscent of the hellspawn next to Zoma, and Yuji Horii's remarks that the ROM for III was completely full by the end of development. If this speculation is true, then it is possible that the duller colour scheme was chosen to signify that the fiend was weakened due to there not being enough room for a new sprite on the cartridge.
See also
Gallery
Artwork from III.
Sprite in DQM1·2.
Icon in Monsters 2: 3D.
Zoma in X.
Appearance in Stars.
Official art for Kenshin Dragon Quest.
Zoma in Rivals.
Cameo apperance in the Loyalty to Demon Lord card along with a Lesionnaire and a Dark dullahan in Rivals.
Zoma as he appears in Tact.
Chapter 5 of Walk's Dragon Quest III event.
Zoma in Walk.
Zoma, from the Sofubi Monster merchandise line by Square Enix.
